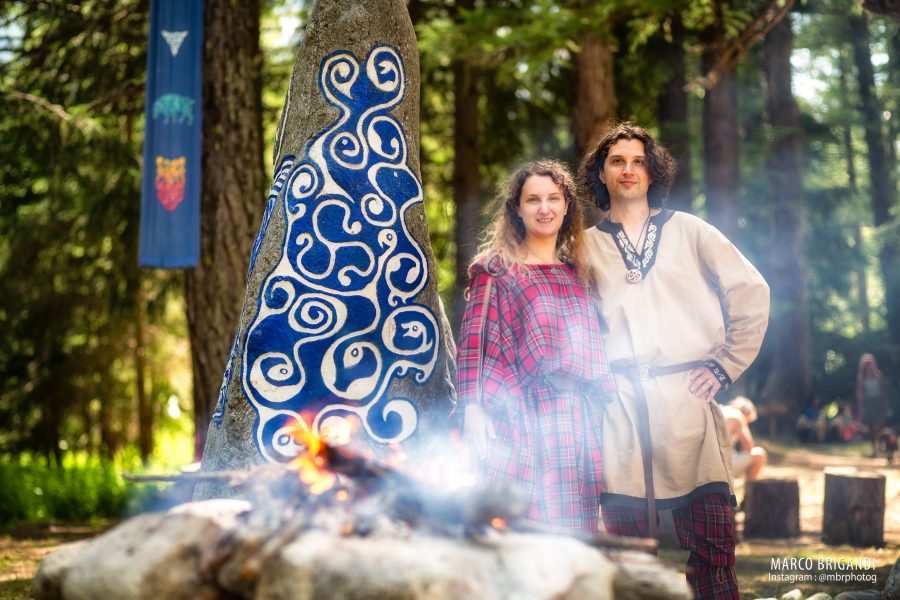
My first approach to embroidery and sewing, as I said several times, was related to the making of historical garments for my husband and I.
The occasion arose in 2016 when we decided to attend our first Celtica Festival. I wrote at lenght about this wonderful event, that gave us the inspiration for several crafts, including our very first epoxy resin diorama. And, well, before that, it gave us our first opportunity to get involved into embroidery and sewing.
Since a part of the festival is about reenactment, we decided we wanted to go there prepared and in the proper attire. But how to do that with no clothes-making skills? We decided to go for ready-made clothes to be customised.
Looking at what we did now, years and projects after, makes me want to come back and start anew making everything from scratch! Well, since that is not possible, I’ll show you what we did as first try and how we are still trying to get the best out of our Celtic gowns.
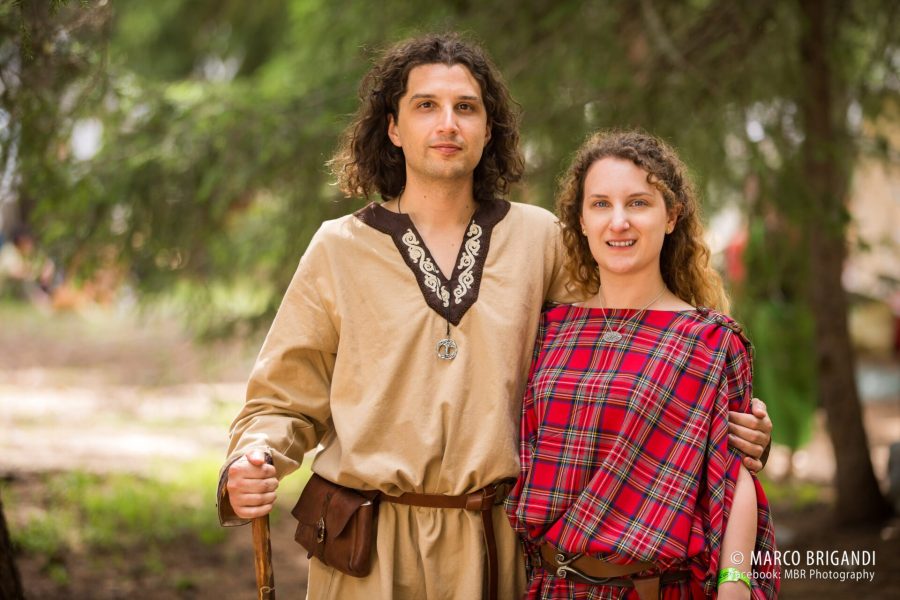
Beginning in the Spring of 2016, we started with a tunic for Locutus and a simple dress for me. The next year, having learnt a few things, we added trousers for him and an under-tunic for me. The decorations and accessories? We made a few, others are planned.

Click for the finished projects detailed photos
Table of contents
The tunic for Locutus

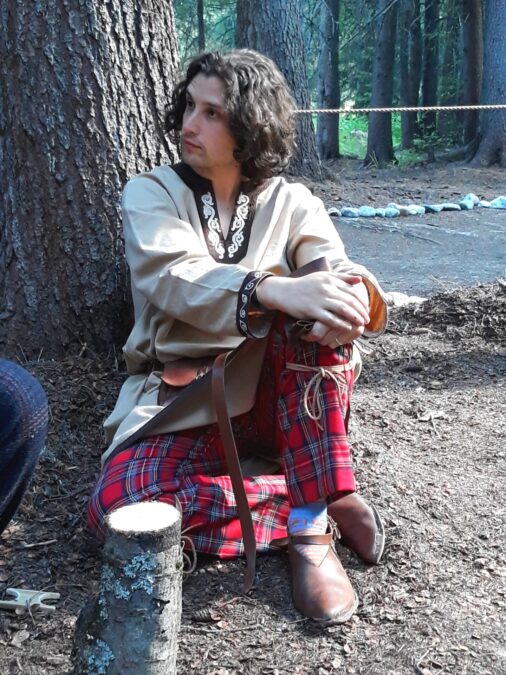
First of all, during a fair my husband bought a simple machine-made tunic. It was really plain: perfect to adapt to become his first Celtic tunic.
In 2016, he was better than me with sewing machines, thanks to his seamstress grandmother, while I had more patience to work by hand with needle and thread. So I got my hands on the tunic to give it a more hand-made appearance.
First step: the neckline. To cover the machine seams around the different colored borders, my husband’s granny attached a trimming. We bought it at the same fair where we found the tunic: machine-made and not so historically accurate, we knew it later on…
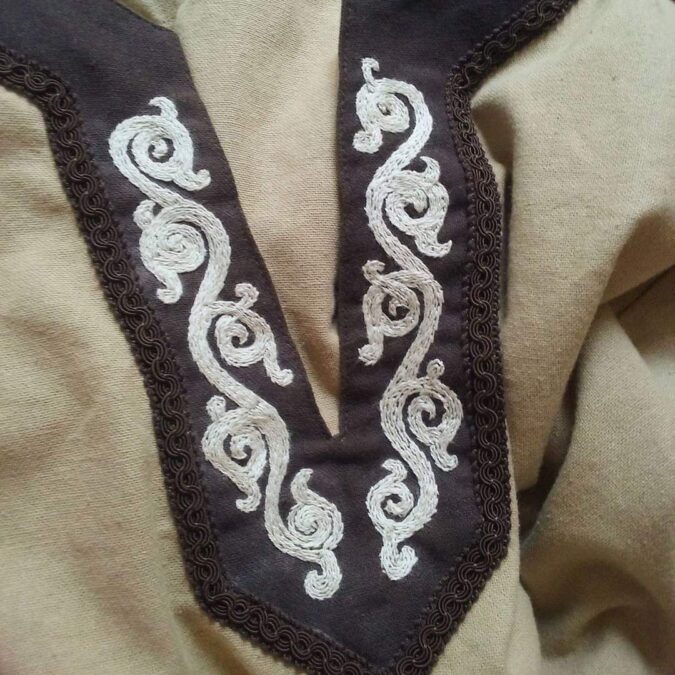
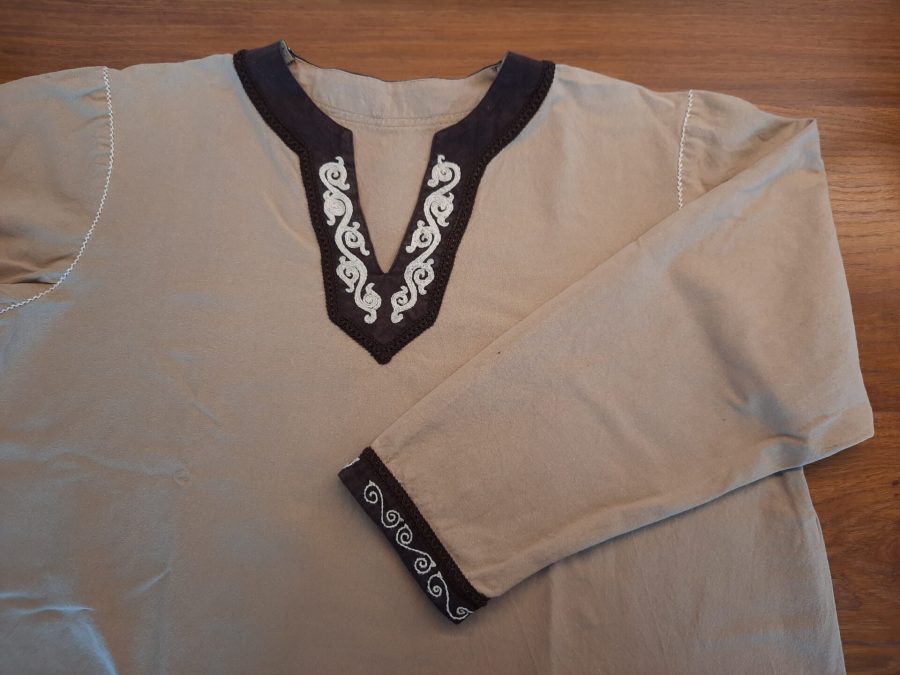
The first thing I did was the planning of a Celtic-inspired embroidery to enrich the neckline. Since it was my first embroidery attempt, I made various samples before trying with the proper tunic.
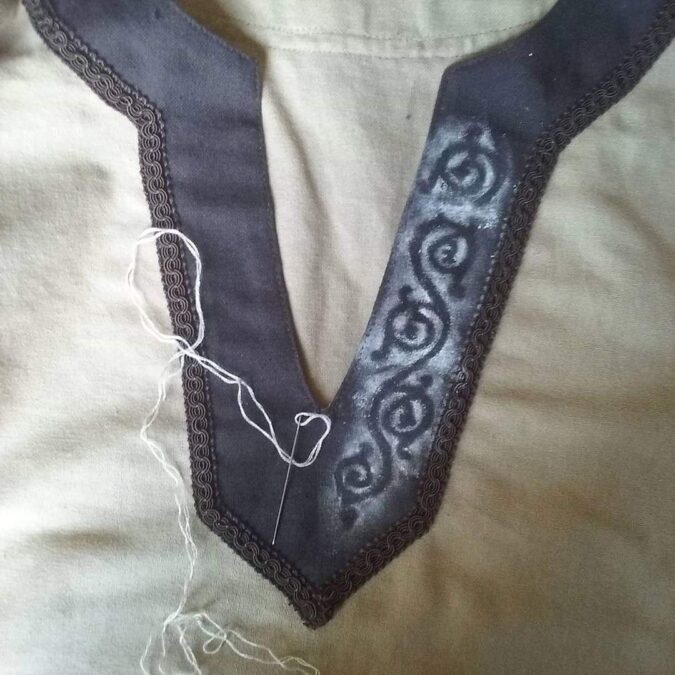
I didn’t have all the useful tools, back then, so I had to figure out a workaround to draw on the tunic. I designed the embroidery on cardboard, cut it out, then used school chalk powder to leave a non-permanent mark on the dark fabric I wanted to embroider on.
This took me ages to complete! I knew almost nothing about embroidery, in 2016, not even which stitch I was using! Not to mention historical accuracy. How different, now…
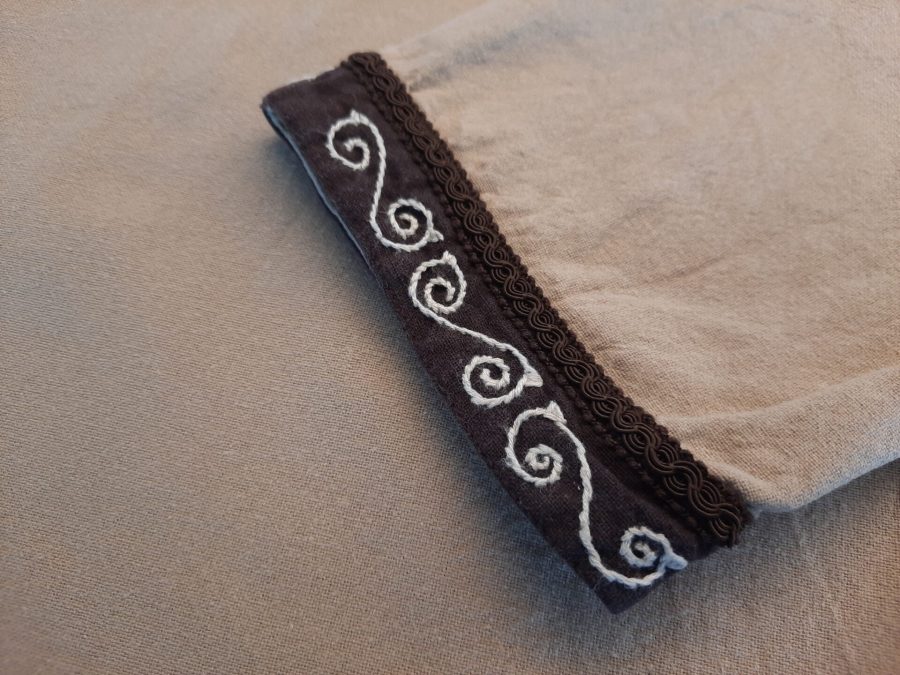
After the neckline, I embroidered the cuffs.
I chose a matching Celtic-like design. Both this and the one on the neck remind me of the lost Celtic artifacts known as “Placche di Comacchio“. They are a group of 31 decorated appliques in bronze that were lost after the Second World War in Berlin, disappeared from the Staatlichen Museen. Found in Comacchio (Ferrara, Italy) at the beginning of the 20th century, they came from the 5th century b.C. and their incisions are in La Tène style. I knew about them in an article on n.32 “Celtica” magazine by the archaeologist Daniele Vitali with the wonderful 3D illustrations by Luca Tarlazzi. One day I’ll make more crafts inspired by those artifacts…
The embroidery I made on the cuffs were simpler and thinner: just a hint of decoration to match the bigger one without attracting too much attention from it.
We know this tunic is not historically perfect, but as a first attempt it was a good introduction into the making and embroidering of reenactment garments.

Well, the tunic was not complete yet after those embroideries.
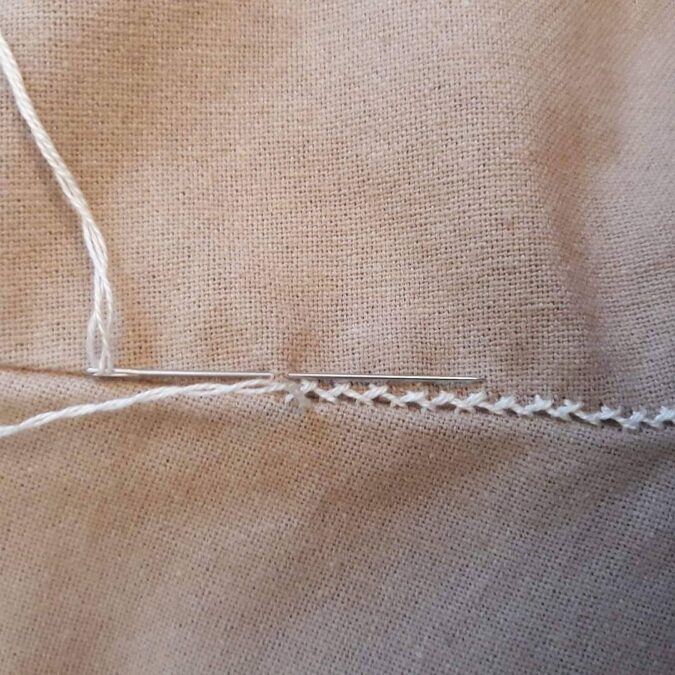
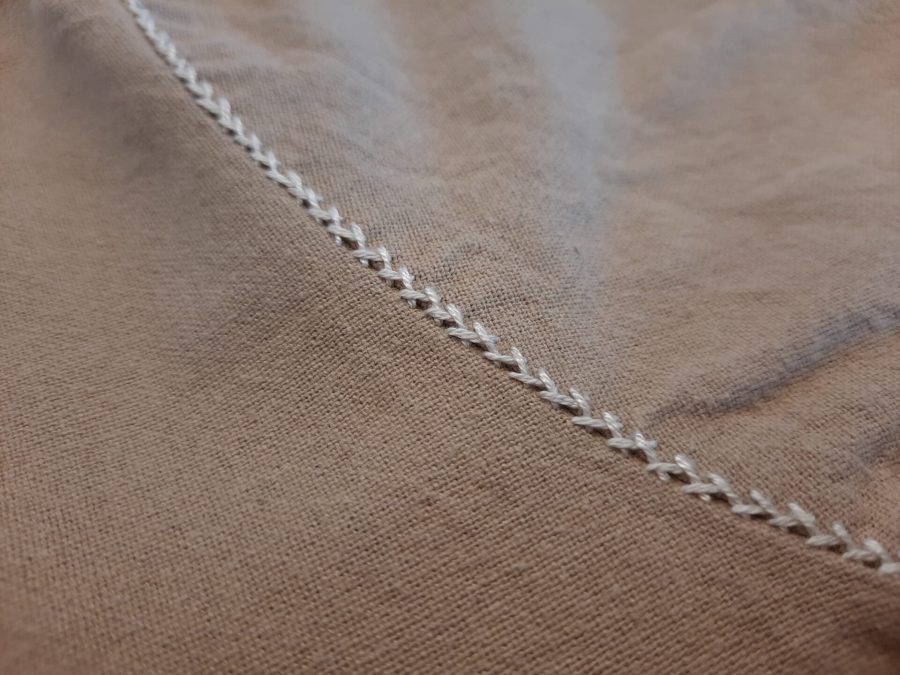
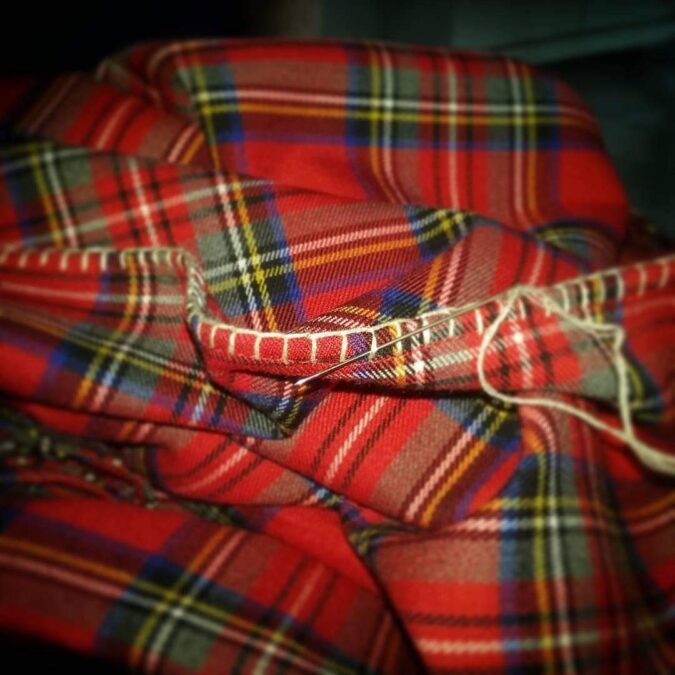
The following year, I wanted to mask all the machine-made stitches, even the ones that were not covered by granny’s trimming. So after our first festival I decided to cover all of them with herringbone stitches.
After my first projects, I spent a lot of time practicing embroidery, loving it more the longer I stitched. I learnt a lot, also the names of the stitches I decided to use.
I started again with a lot of practice to master the stitch. Now, it’s one of the stitches I love most!
In the meantime, I wanted to gain more historical accuracy, so expert reenactors suggested me a few books to study. Among them, the “Medieval Tailor’s Assistant” by Sarah Thursfield became my handbook for historical garments making. Well, not so much for my Celtic projects, as for the making of a proper Medieval gown.
With those herringbone stitches, I decided the tunic was complete. For the kind of events we wanted to attend, such a gown was appropriate, even though not historically perfect. One day I’ll start a new tunic from scratch, be sure of it!
The female dress for Rici
While embroiderying my husband’s tunic, I was also thinking about me. I didn’t have a basis to start from, I’d and never made a dress before in my life, so I decided to ask for help.
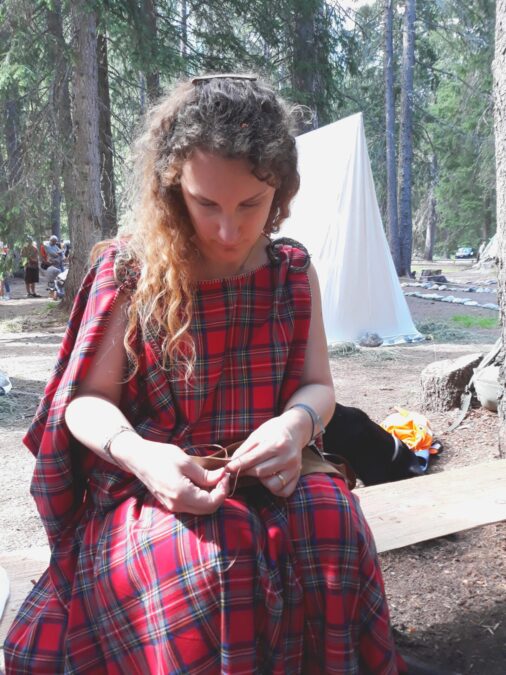
In my favourite fabric shop I found a red viscose tartan, quite modern in design and material, but so comfortable to wear. First of all I studied the Early Iron Age Hallstatt period clothing, the easiest historical dresses I saw around. I liked the peplos and thought it easy to ask to my town’s tailor. Now I know we could have done it ourselves quite easily, but I was scared I would ruin the wonderful tartan fabric I chose.
I was not able to fully explain what I wanted to the tailor, so the cut of the dress is quite modern: a lenght of fabric with a hole for the head, not the historical tubular dress fixed with fibulae on the shoulders.
Well, no matter how, in the end I had my Celtic gown for the festival ready on time, and I had to wear it with the only quite suitable belt I had at home. I bought a proper one during the festival itself, planning to embellish the dress myself for the following year.


Even though my Celtic dress seemed ok, I saw at first glance that it lacked a few accessories. I just had a belt bought at the festival, nothing more.
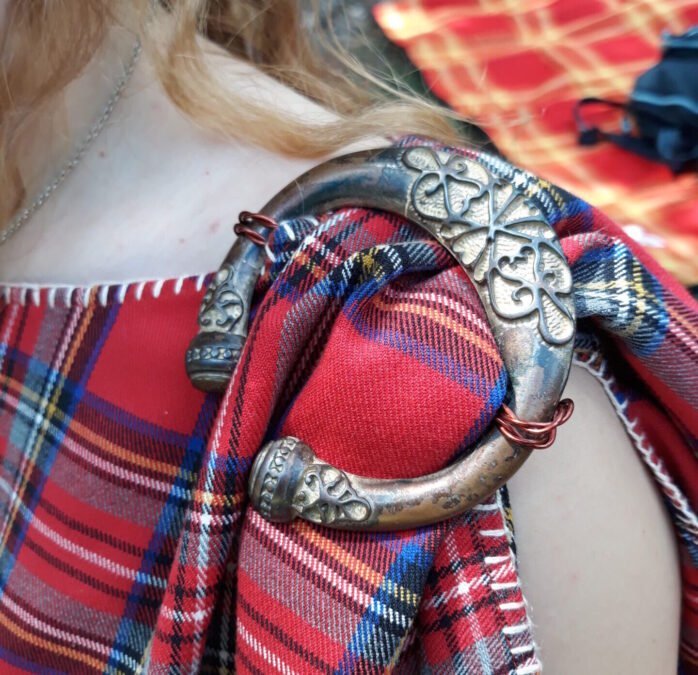
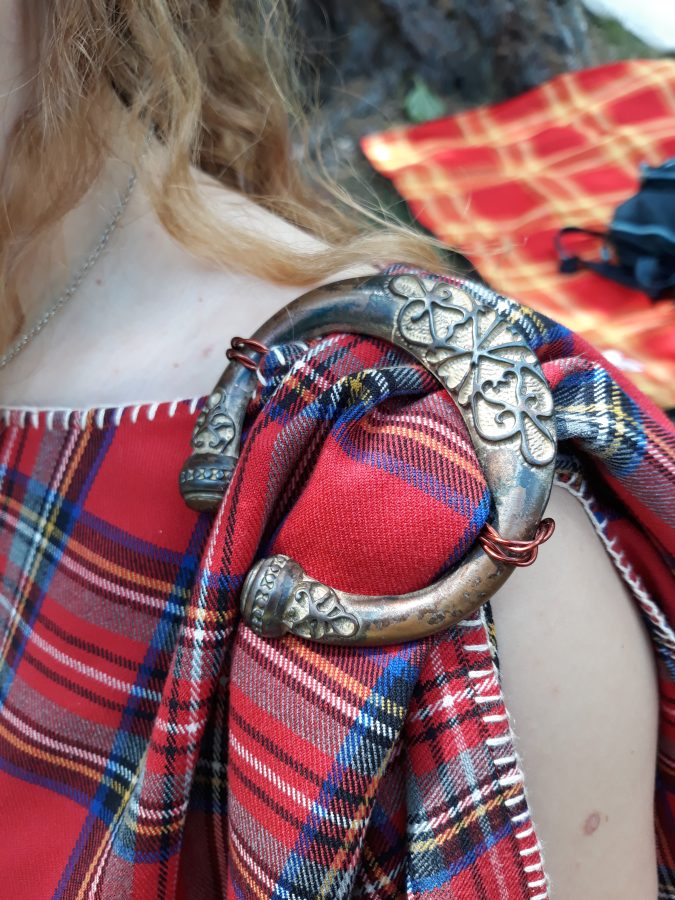
At my parents’, I happened to stumble into a few pieces of my teenage years, in particular a couple of belts whose fabric had become too worn out to be used again. I really loved those twin belts, the black one and the white one, so I decided they were perfect to have a new life: I removed the fabric and made their buckles into a couple of brooches for the fastening of my Celtic dress.
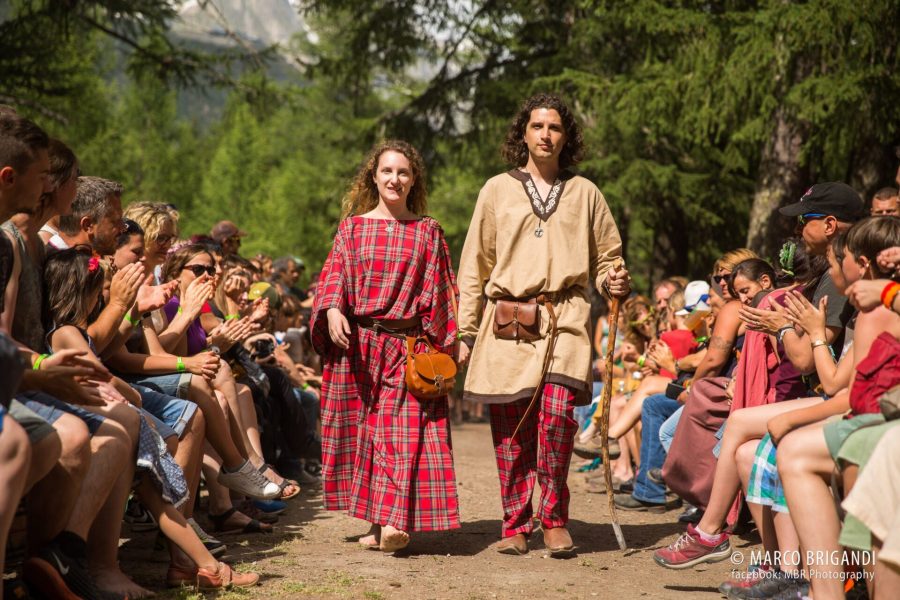
There’s still work to do, I need to study a more suitable fastening system to attach them properly to the dress, nonetheless, I have to say they’ve been appreciated during Celtica festival next year. On the 2017 edition, my husband and I even attended the historical parade!
I wore my two brooches and I’m glad they’ve been appreciated also by expert reenactors. We were not perfect among others with more experience and who dedicated more time to historical reenactment, I know, but for the first time we did not feel inadequate.
After the 2017 festival, I decided I wanted to improve my dress: I got my hands on it to hide all the machine seams, as I did for my husband’s tunic. This time I decided use blanket stitch, and I discovered I love it as much as herringbone stitch.
I decided to go with embroidery because in the previous months, mainly because of how my first project on Locutus’s tunic came out, my passion for this craft had grown and grown.
The stitiching this time was fastest than with my husband’s tunic, but it wasn’t easier. It was my first try with the blanket stitch, after all, and I was careful to make all the stitches appear good both from the outside and the inside.
I embroidered all the upper part of the dress: the neckline and the loose parts of fabric that fell on my arm. I decided not to do the same at the bottom: I thought I could simply remove the machine stitch for the edge and re-make it myself. Well, in the end I never did that… the reversed fabric is quite long, so I have no idea how to handle it… I’ll figure it out one day!
Watching the dress at the end of the process made me feel quite proud of the result: I really knew that a new craft passion was born.

Other additions
The trousers for Locutus

About the outfit for Locutus, our improvements didn’t stop with the tunic.
The first time, during Celtica 2016, he wore it with the same trousers and shirt used for Medieval reenactments (even those far from perfect!). We wanted to make something more appropriate.
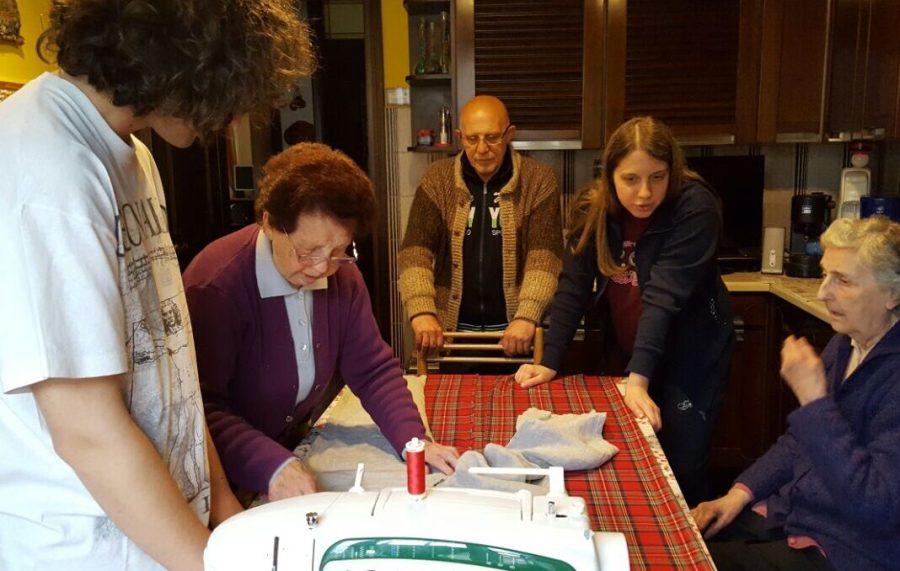
Since we had fabric enough left from my Celtic tunic, in 2017 we embarked on a task that was far more complicated than the previous ones: making trousers. And for this, our sewing skills were not enough: we called my husband’s grannies at rescue. They were both seamstresses, so the perfect helpers. And not just one, but two!
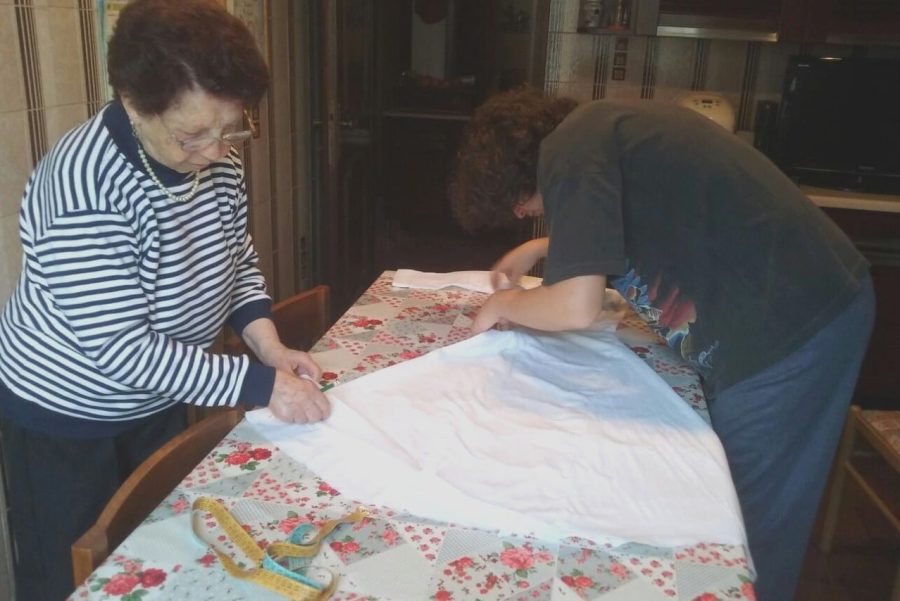
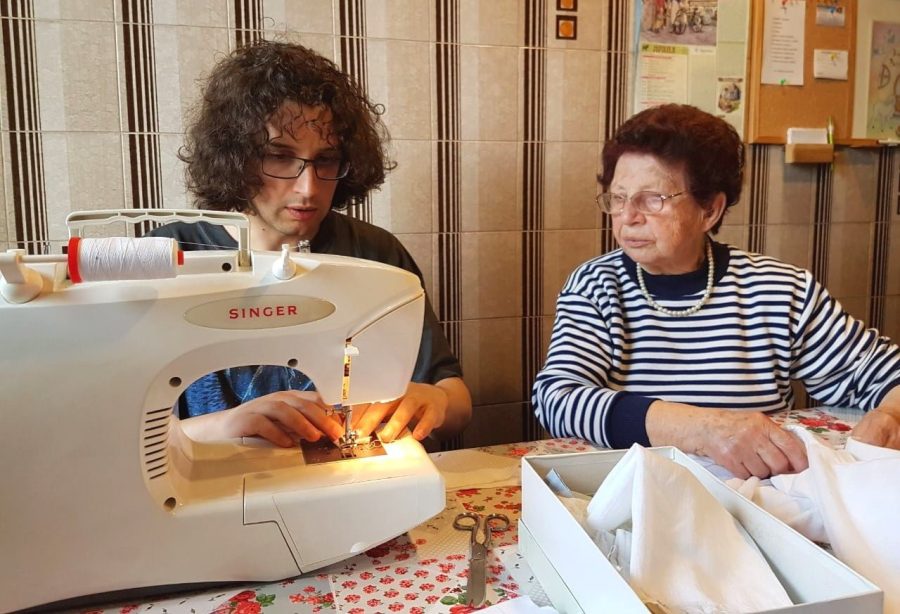
With the supervision of granny Nene, granny Emilia traced a pattern from other trousers, cut the fabric to match the tartan design and helped my husband sew it all together. Without the grannies, we’d never thought about matching the fabric design! So the trousers came out particularly well, maybe not perfectly accurate, but a great fit for Locutus.
Worn under the tunic, they seemed quite good while compared to the others we saw on the reenactors around. They simply close with a knotted lace: not historical, I know, but handy. Moreover, you don’t see the lacing when Locutus wears the tunic. I offered to make him a new lace with my lucet: not the perfect tool for the job because it’s supposedly Medieval and not Celtic, maybe the fingerlooping technique would be better, but at least the cord would be handmade and not machine-made.
A chemise for Rici
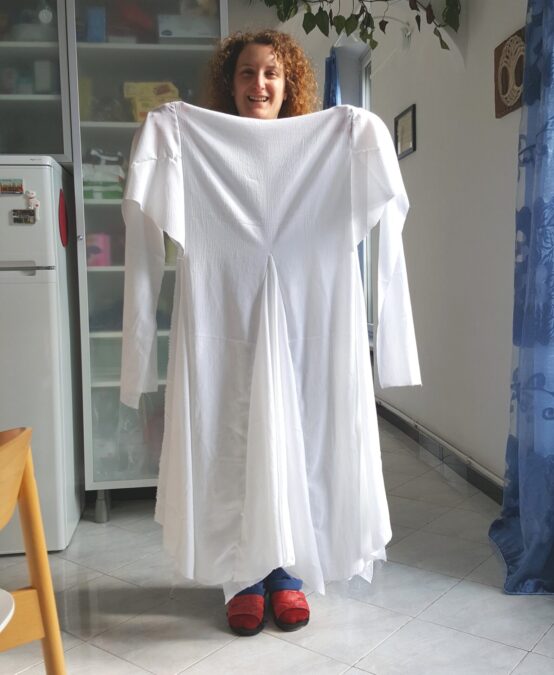
What about cold days in the mountains? My outfit needed something to be warmer, besides the tartan dress and a woolen mantle. I decided to make a sort of under-tunic, a chemise.
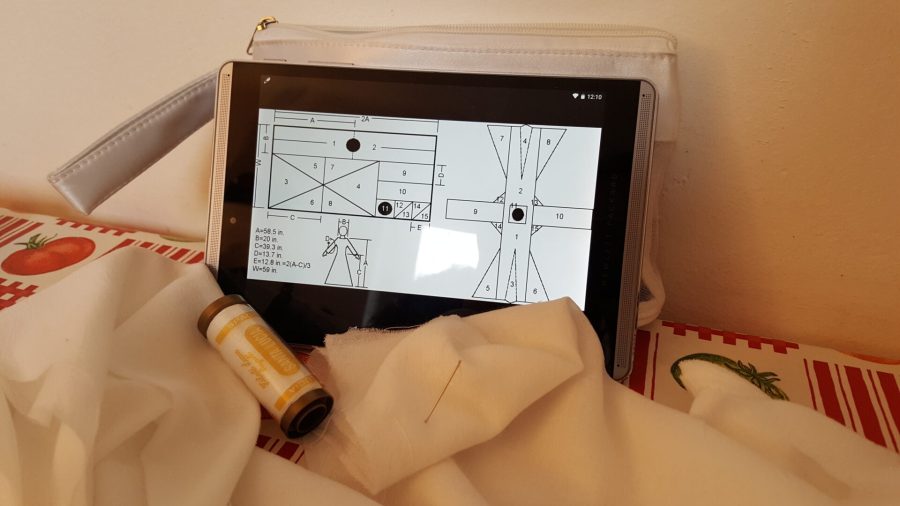
At the time, I didn’t know yet “The Medieval tailor’s assistant”, an awesome book to make Medieval garments that is my perfect go-to for any historical proect now. Back to 2017 when I wanted to make the chemise, I chose to use an easy Medieval pattern found online among many others: I selected it because it seemed the easiest one, and I decided to go Medieval to be able to use the garment in multiple occasions. I wanted to add it to the Celtic dress just in case of cold weather on the mountains, seeing that other reenactors sometimes wore a similar garment. I thought its pattern and construction could be quite unnoticed under the tartan dress and maybe with a mantle on top of everything.

Next step: more improvements

Now you know our long journey with the making and improvement of our Celtic garb.
Well, the journey is not finished yet. Actually, there would be a lot of work to do. This year during Celtica festival I talked at lenght with more expert reenactors to ask advices on how to improve our outfit. The fact is, with all the time spent on it, the shortage of time for crafts we have now, all the family links bonded in each single garment, we don’t want to start from scratch to make something more accurate.
We are aware of the limits of the clothes we wear during Celtic events, but we also got reassured about a few things, so we decided to go on with that and use our new sewing skills and historical studies for something totally new. We’ll see what our next historical crafts will be!
What are your opinions? Please tell us in the comments. Would you re-make or adapt our Celtic outfits? What would you change or add?