I love watching my husband at work.
When we need something, the first question is “can we make it?“
In most cases the answer is “yes”! He can handle all kind of tools, he knows what to use for each specific purpose, he’s able to find a way to accomplish almost everything. The mindset of the engineer comes out in every situation!
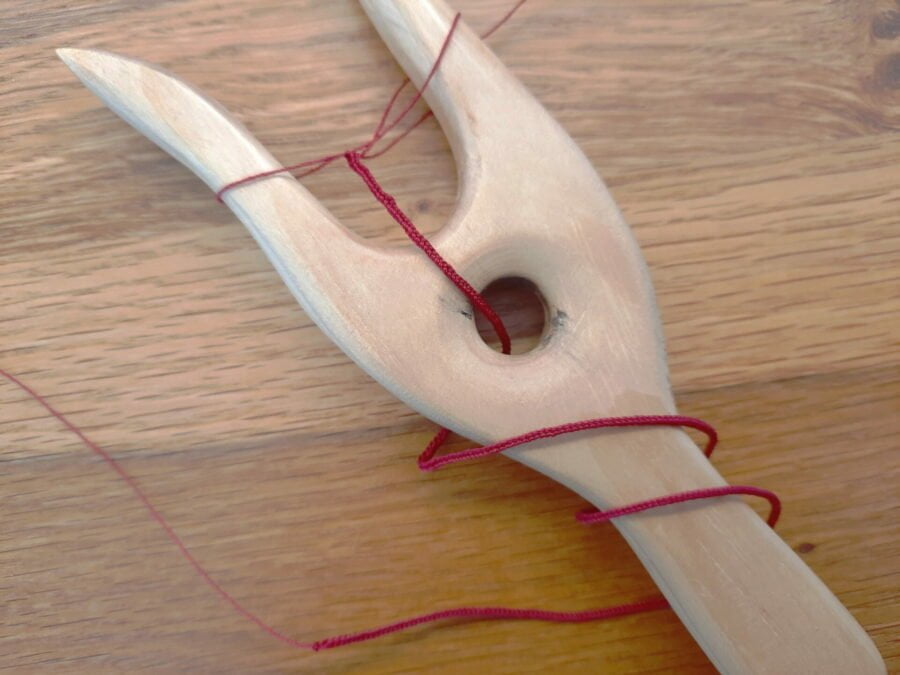
One day I said I wanted to make a cord for the Medieval pouch I was sewing. How could I do it? With a small tool tried during a reenactment event: a lucet.
What is a lucet?
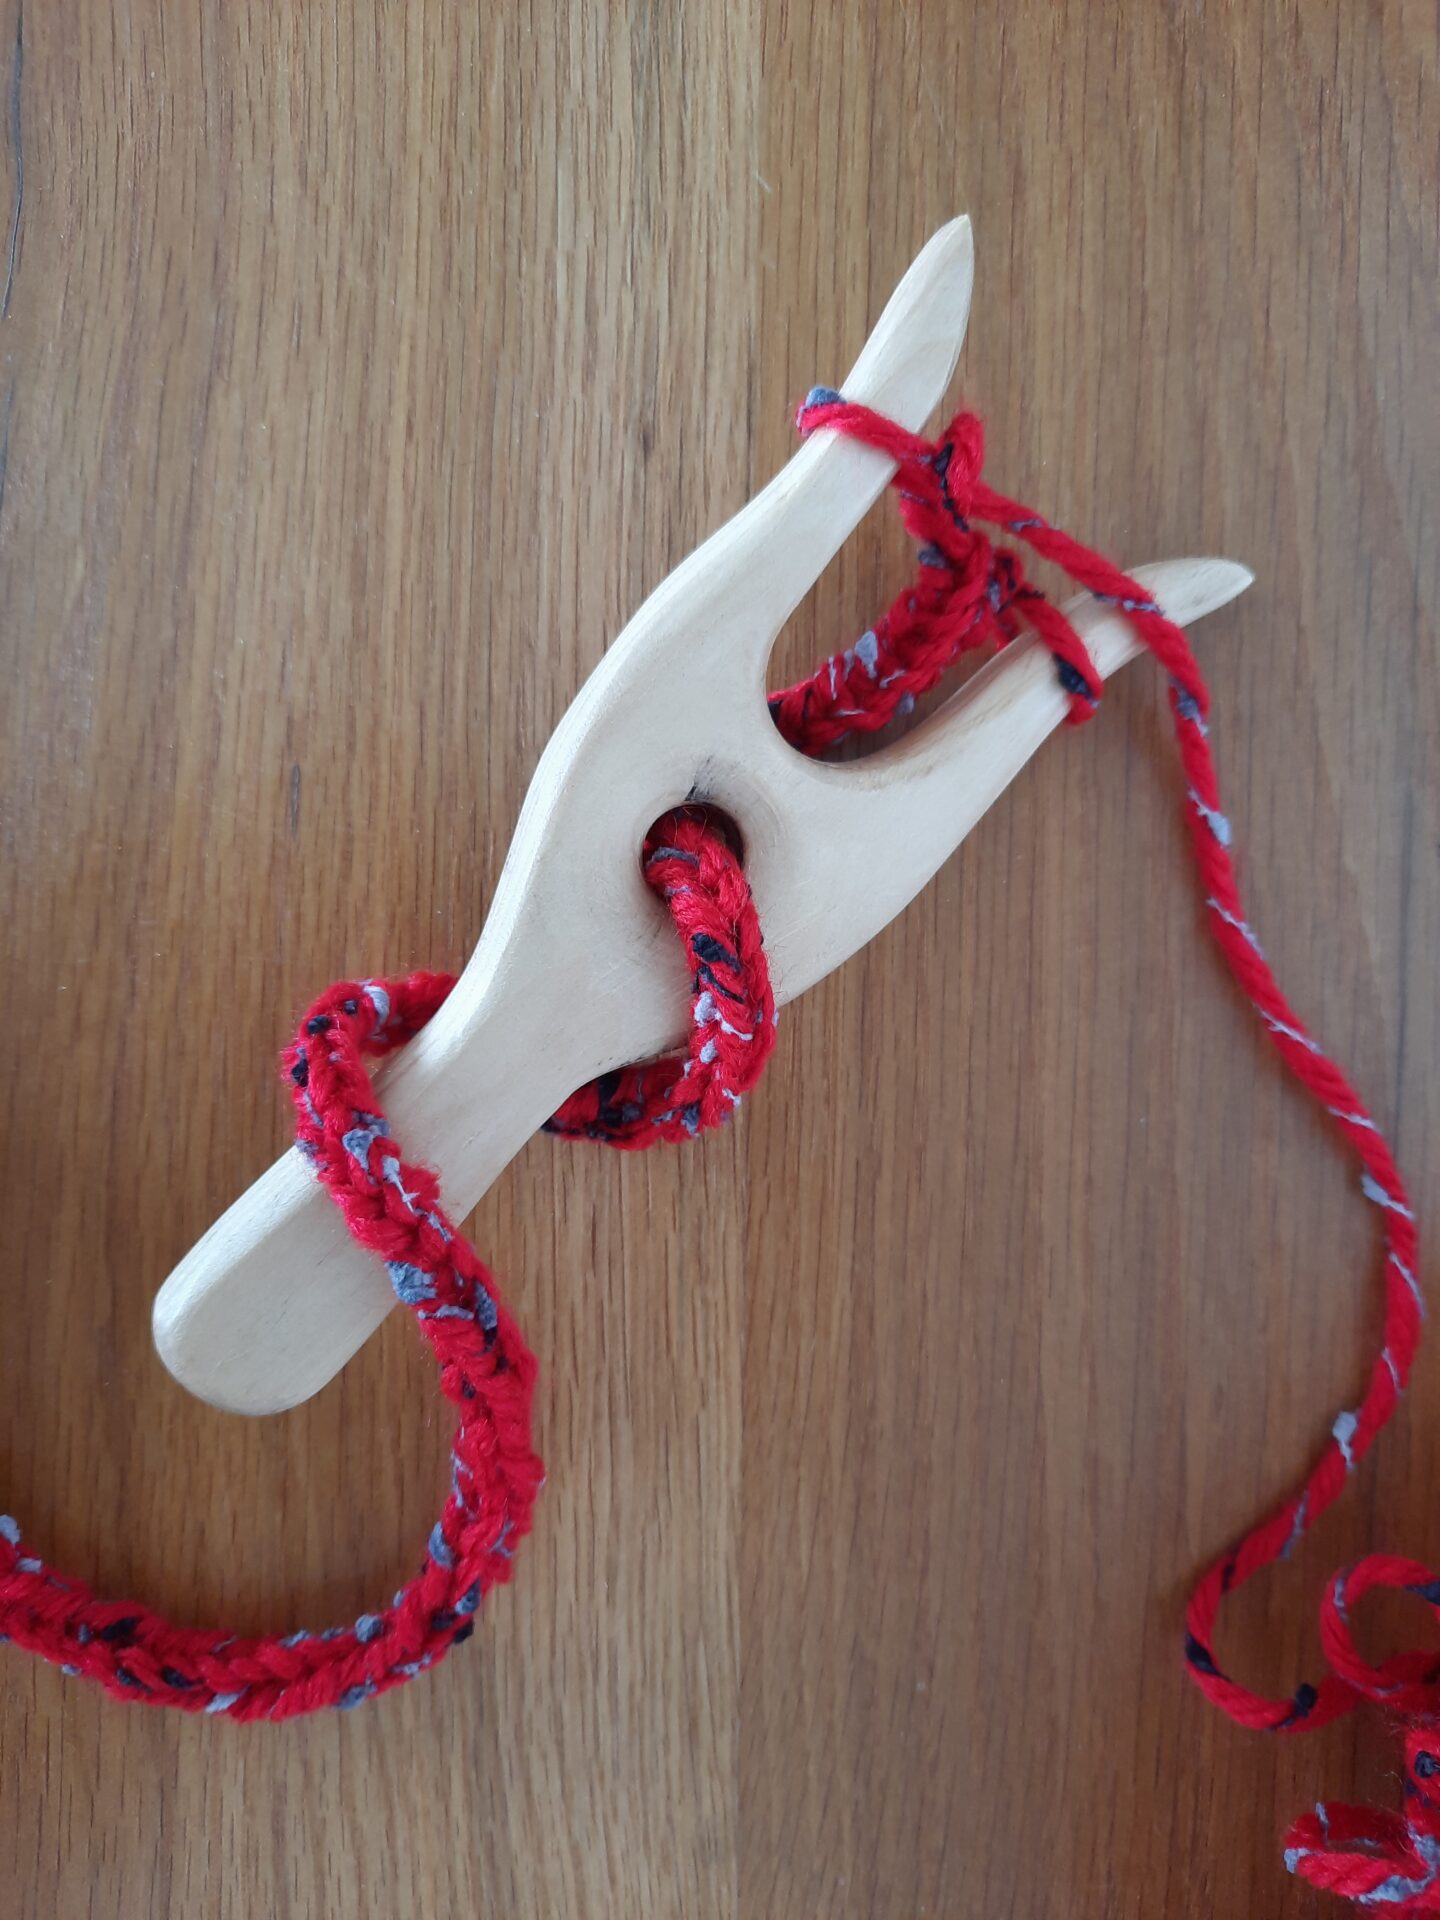
It’s a tool used for cordmaking or braiding. It’s said to be Medieval, and it’s common during Medieval reenactments, but its real history is controversial. I am making an archaeological research about this, for anyone interested. The cords made with a lucet are square, strong and slightly springy, useful for hanging tools from a belt or as clothes accessories and decorations.
I tried it for the first time during a Medieval fair in 2015 and, when I began working on my Medieval pouch, I thought it could be the perfect tool to make the pull strings, as well as decoration and hanging cords.
Click for the finished project detailed photos
Table of contents
Making our first lucet out of scrap wood


My husband was with me during that fair when I discovered the lucet, and he tried it as well, so it was not hard for him to say he could make one. All I needed to provide him was a drawing of its shape in the size I wanted. Half an hour was enough for my husband to make a beautiful, handmade, functioning lucet, just from a picture.
Not to mention the satisfaction of seeing him working to make it just for me.
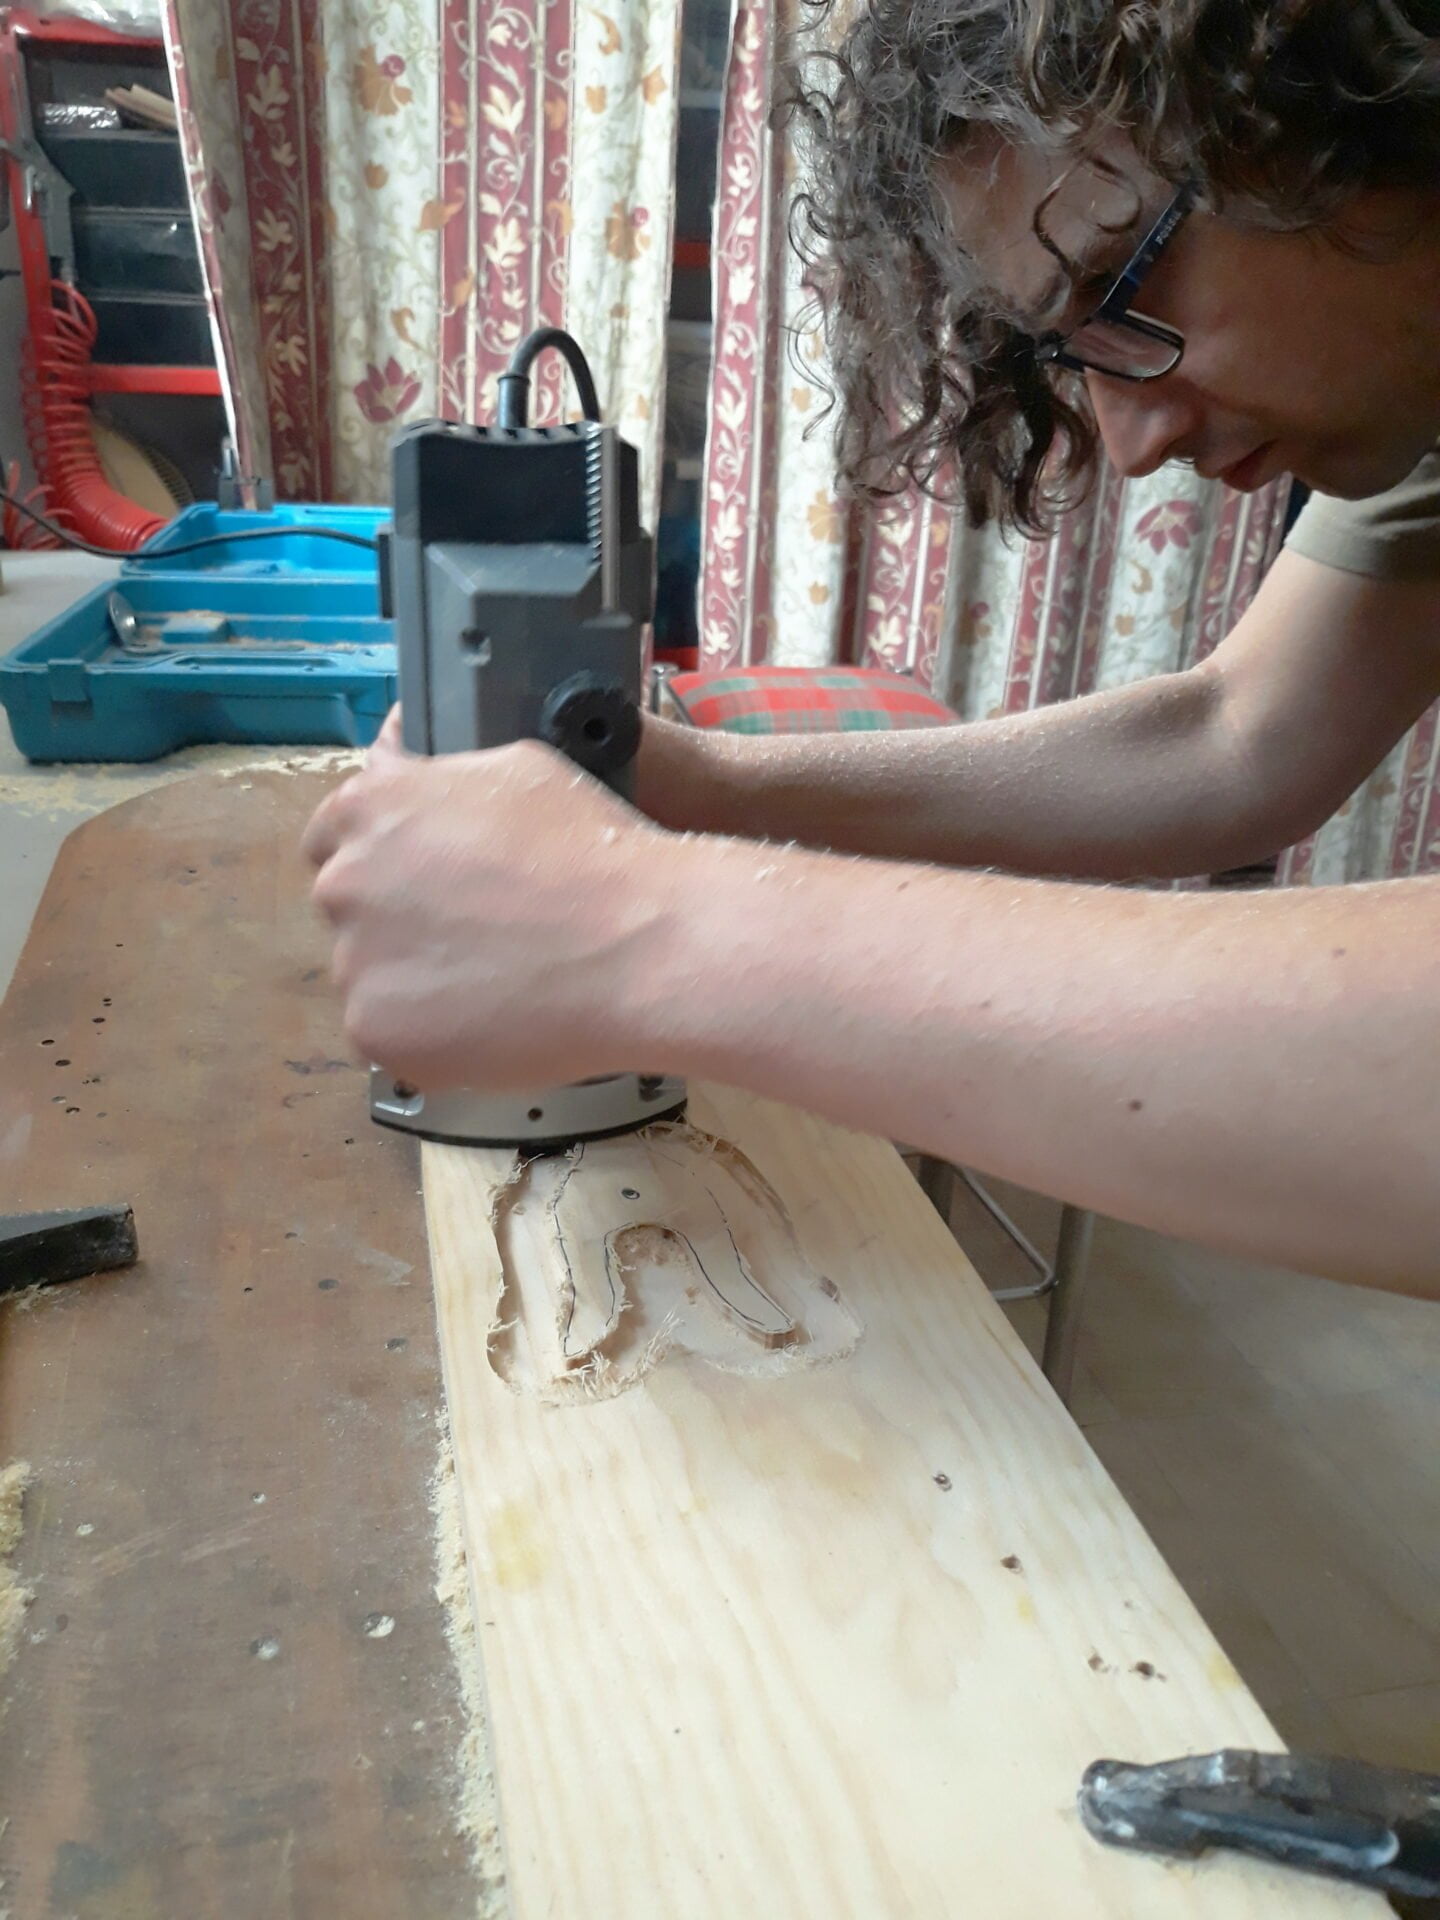
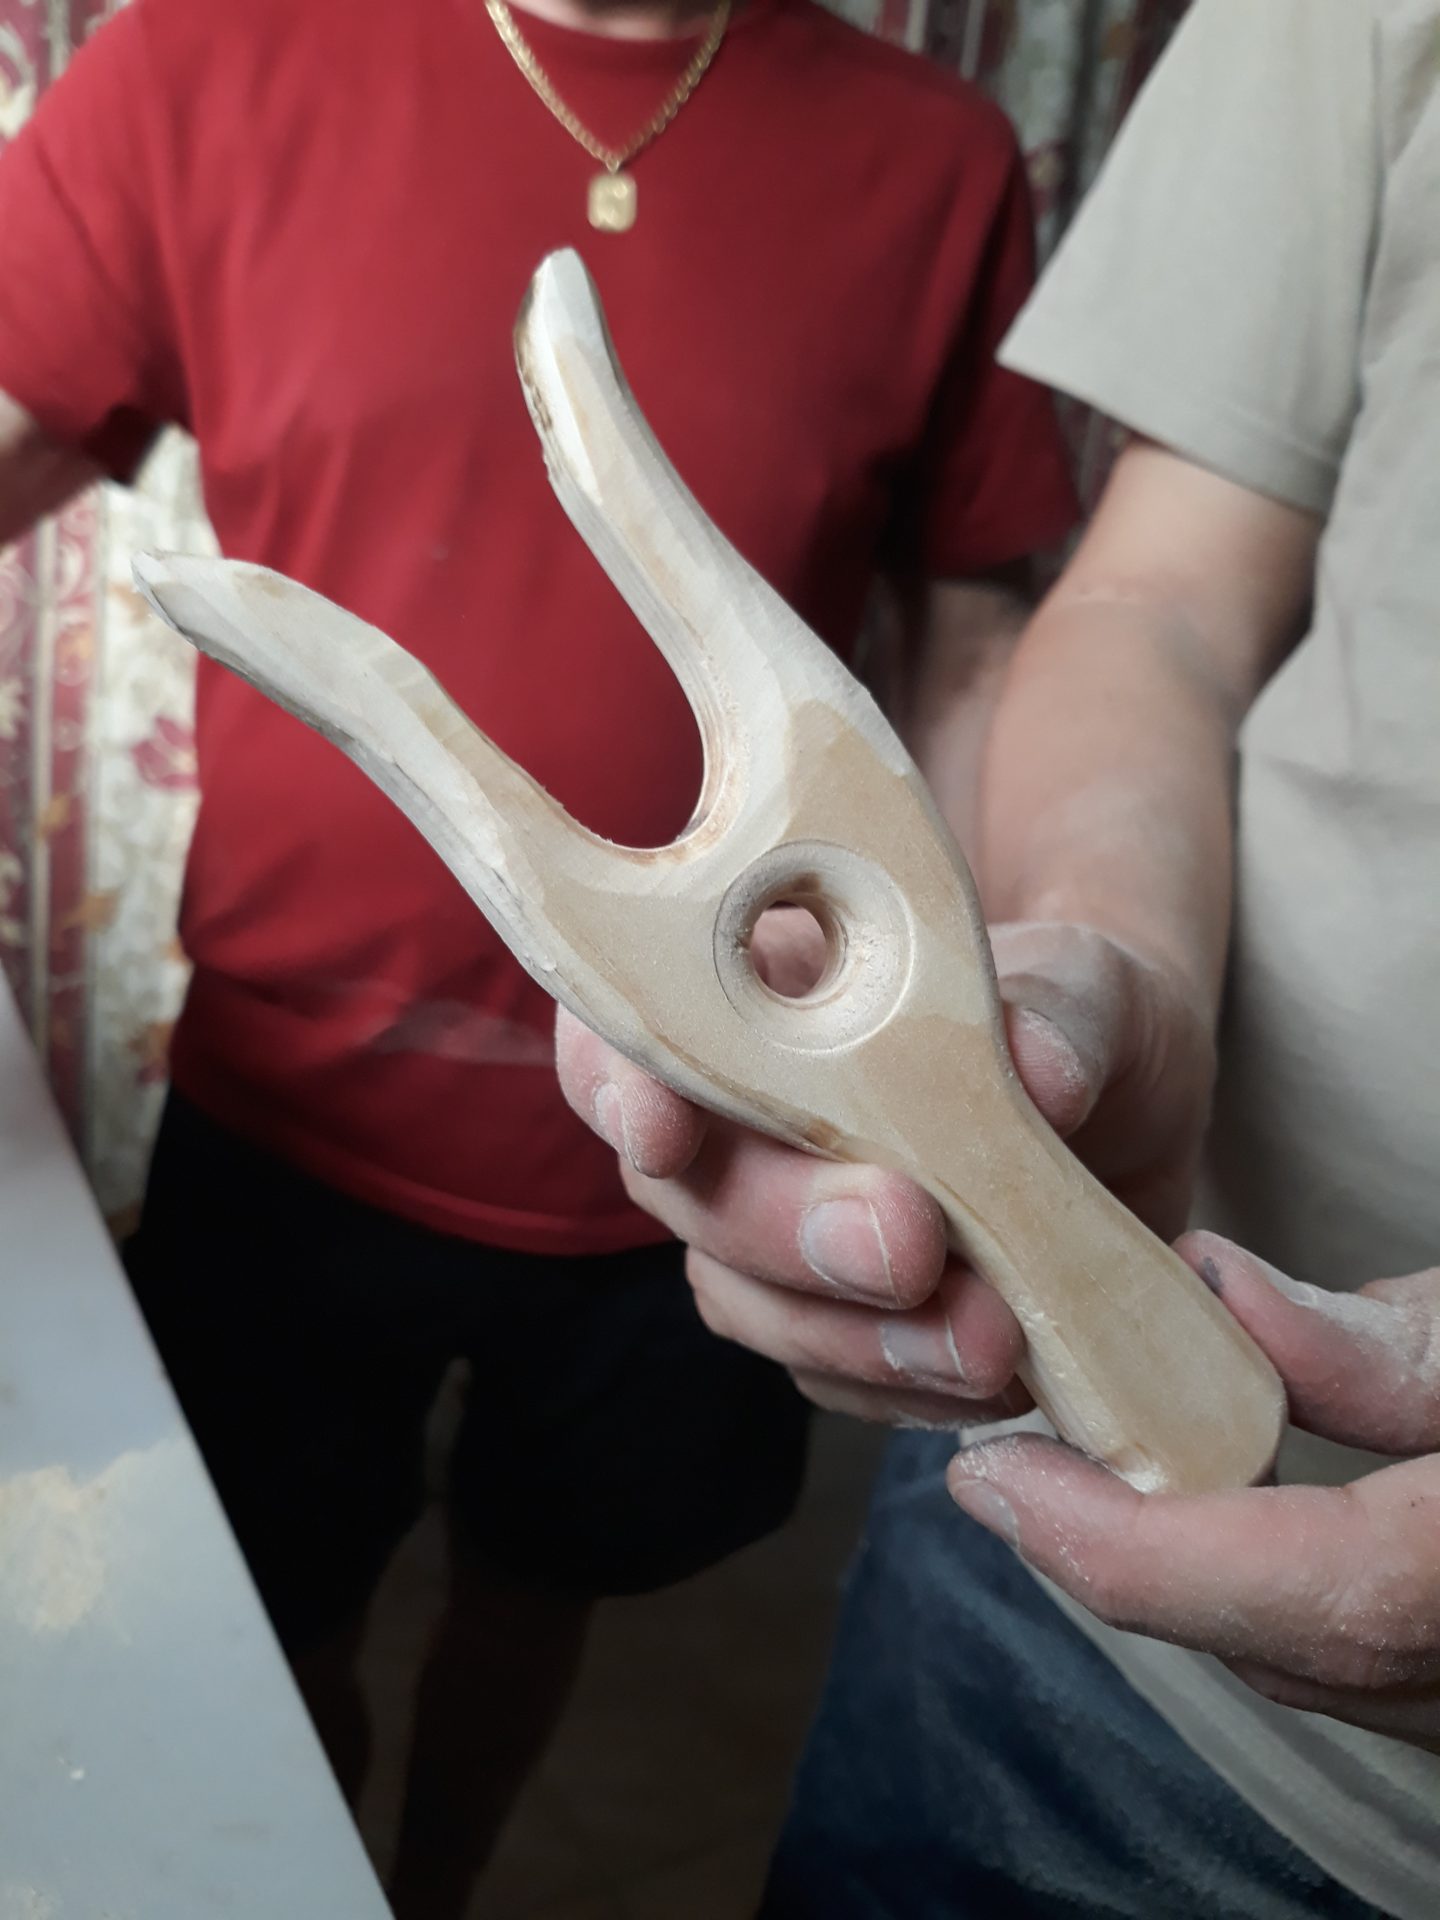
He went to the basement where his father keeps scraps of wood and any kind of material that “one day we may need“, where he found a board that suited him. He chose solid pine wood, easy enough to work with but also strong.
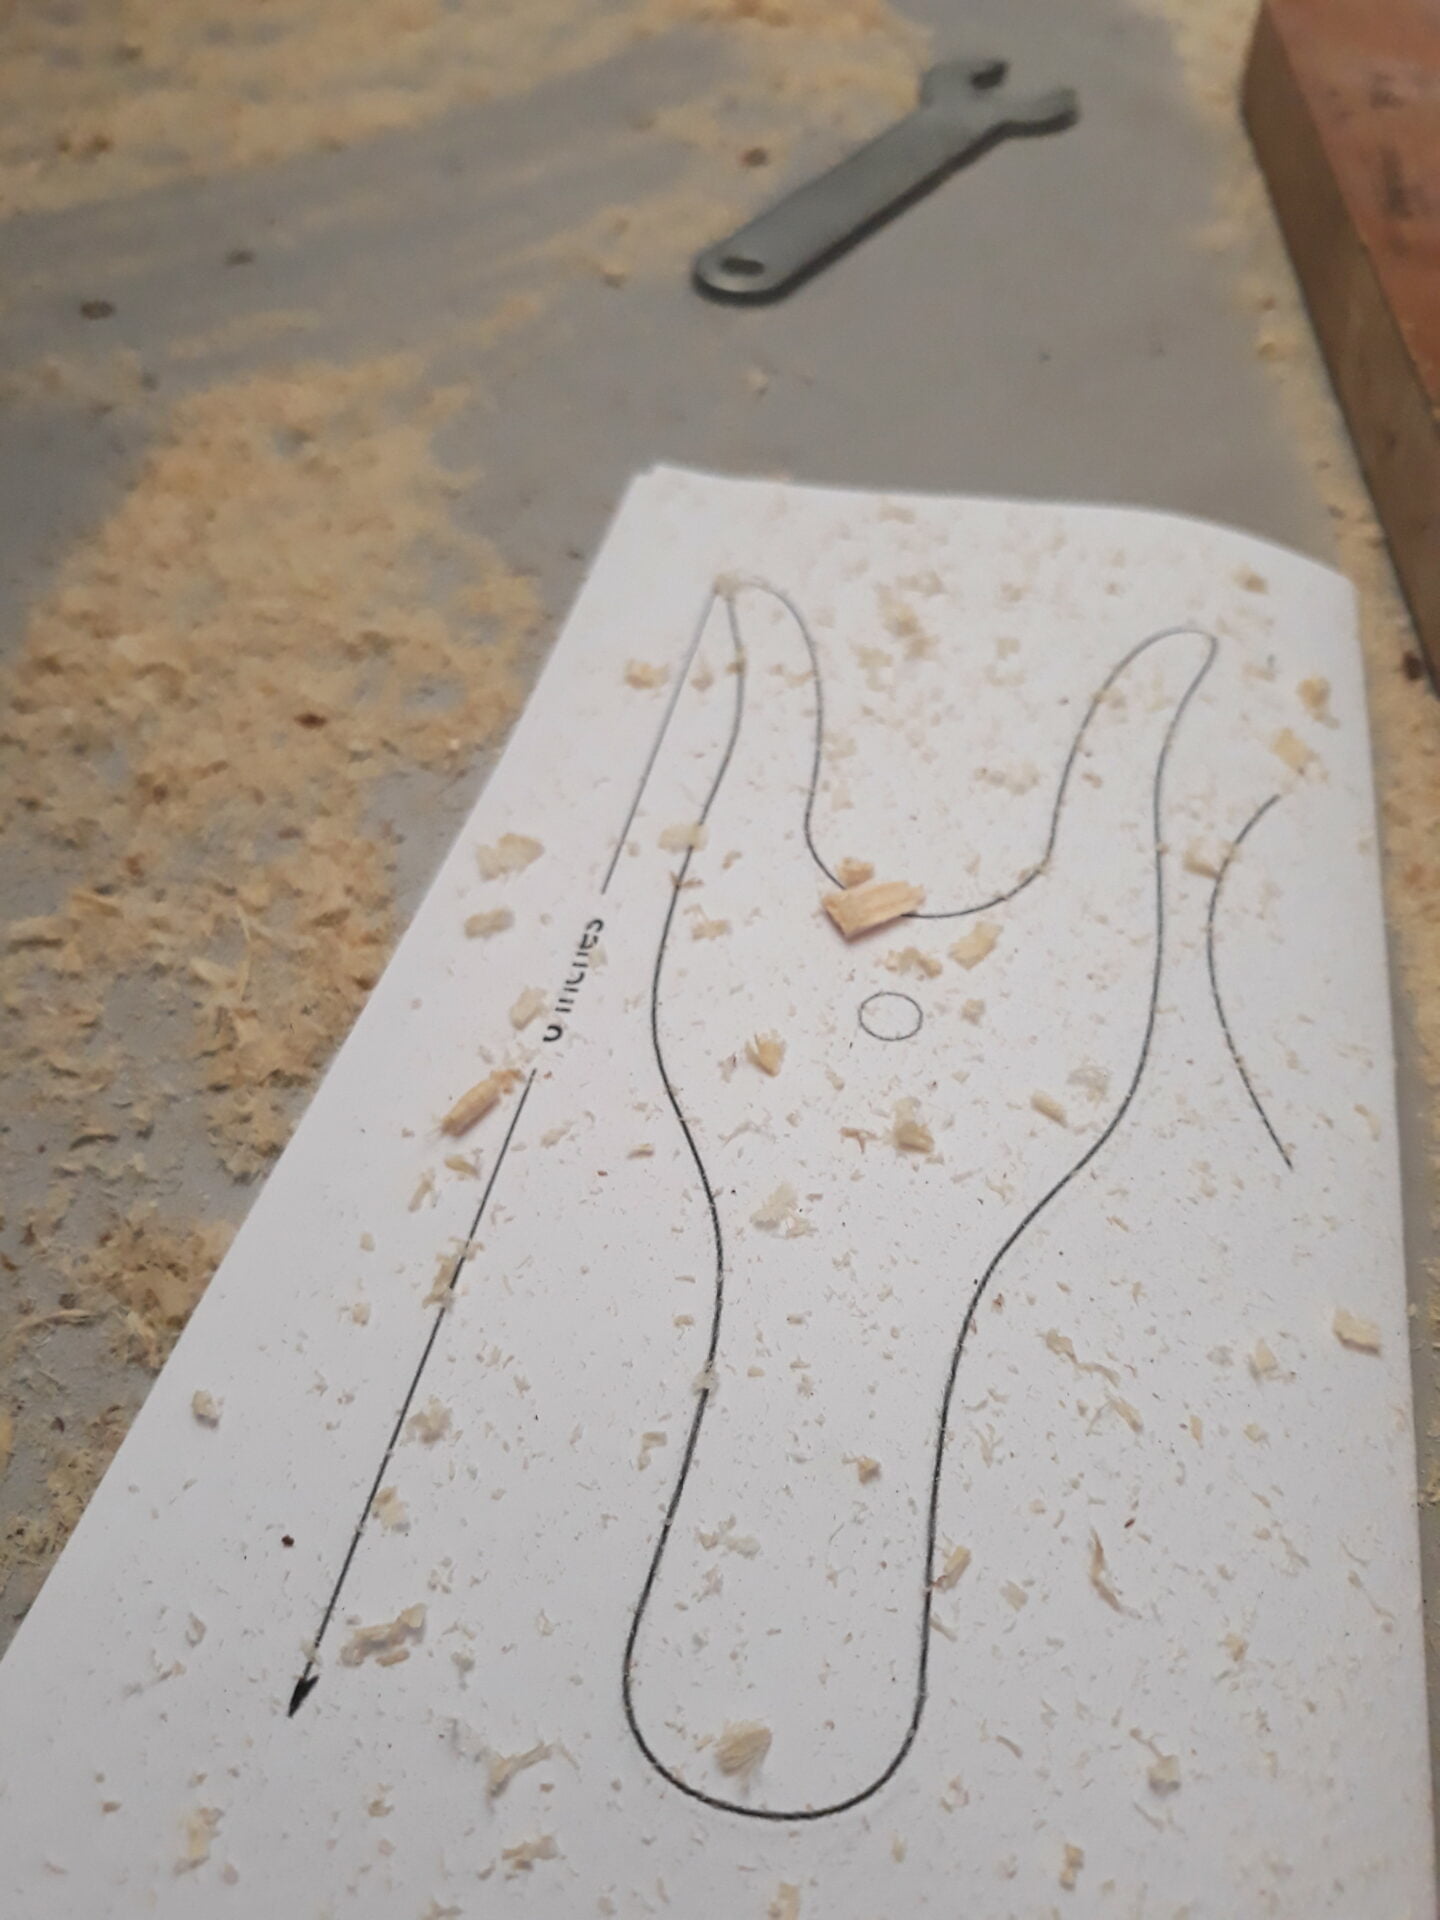
Meanwhile, I found a lucet shape I liked, the one that resembled best the tool I tried at the Medieval fair. I printed out the shape in a few different sizes to decide which one was best, then cut out the chosen one and drew its outline onto the wood.
With his wood milling machine, my husband cut out the shape of the lucet, then drilled the central hole. To complete the shape, he countersunk the hole with the drilling machine. Careful sanding completed the tool.
At first, we thought it advisable to paint it, but then retraced our steps: the yarn slides better on raw wood. Also, it has a more Medieval appeal.
Download our free pattern
Want to make a lucet yourself? I prepared a PDF collection of quick patterns to print, ready to cut out your own lucet in wood. It comes with photos, plus the QR code and URL of this post you are reading just now.
It requires a basic woodworking skill and basic tools to work with. You can choose to use a wooden milling machine or hand-carve your lucet out of solid wood by hand.

This is the pattern we used to make our first lucet.
I’m sorry I don’t have a source for this. If you know the author, please let me know to give proper credit!
Support our work!
Enjoy this website?
Please consider a small tip to say thanks.
(No account required!)
A new shape for our hand-made lucets

After using my handmade lucet for a while, time came to make more tools. It all began with a lucet workshop I had to host for a living history event. Since I needed more lucets to let any participant try working on them, the obvious answer to that was making them!
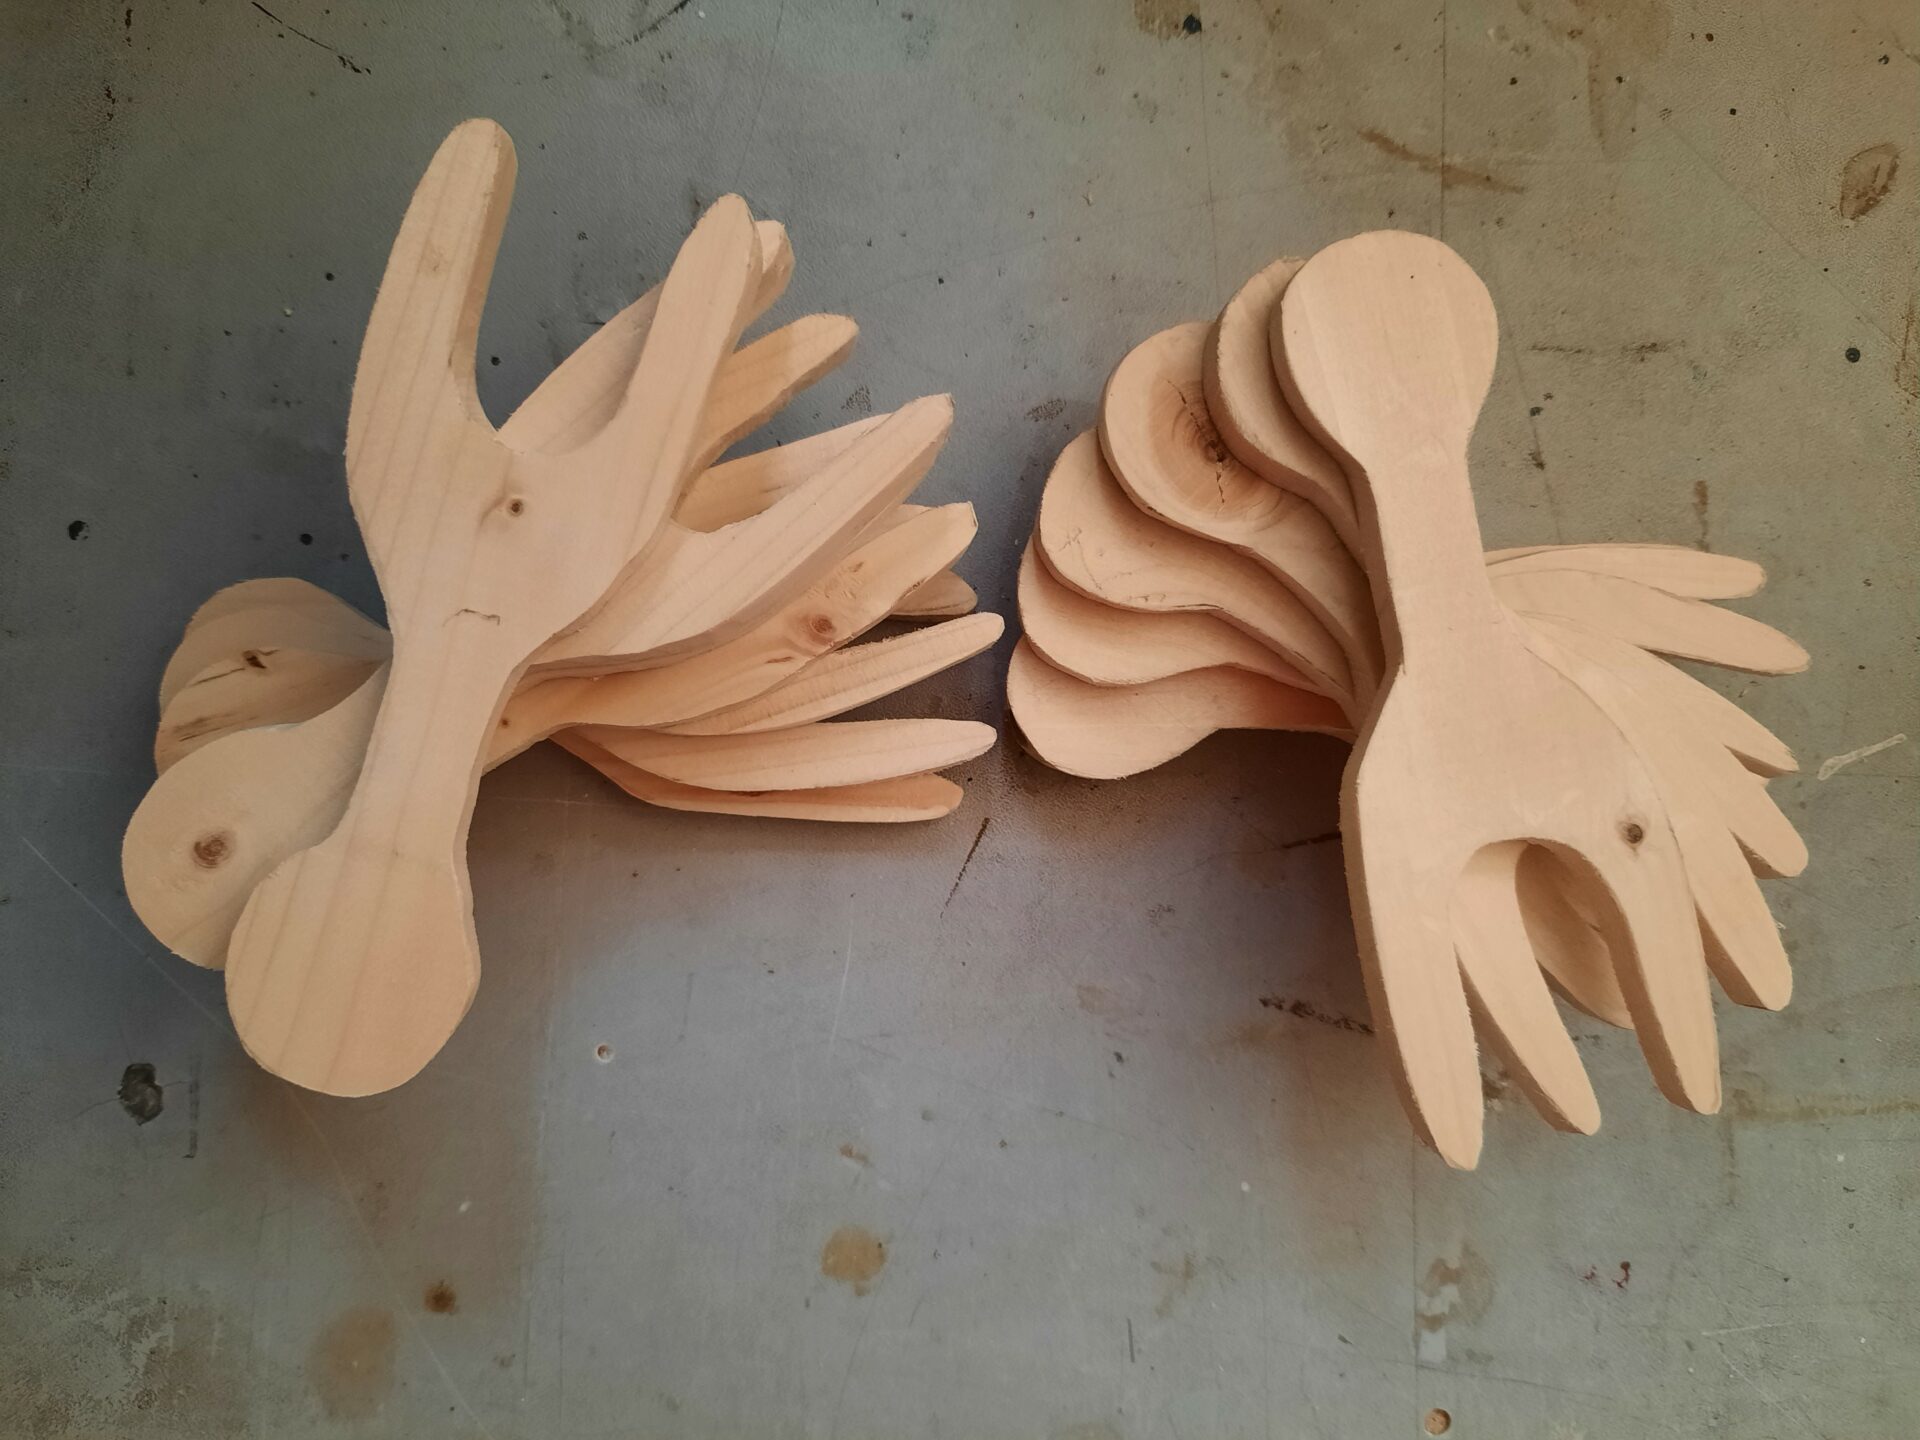
We had a few pine wood boards to use, so I started designing shapes on them. After using my lucet for a few years, I had a few edits to its shape and size I wanted to test. All my considerations on the matter, later on. I drew two designs, one with straight prongs and one with slightly curved ones, and asked my family to test them.
In the end, thanks to their feedbacks, I decided to go middle way: I kept the prongs straight, but I made them thinner in the middle and thinned the pointed ends towards the sides. This way I could have both the advantages of straight horns, that help speed, and also of the outward curved prongs, that prevent thread from slipping away. Spoiler: all the participants to my workshop, adults and children alike, used those lucets without problems!
I chose to add a handle for additional support: I also enlarged the end of the handle for ease of grip and movement. I did not add a central hole, instead. First, because I made small lucets and I feared a hole would be too small to be of use or that it would weaken the whole tool.
I made the lucets compact enough to fit in a hand, to be easy to turn singlehandedly and to fit in small Medieval pouches. In the end they came out 12cm long, the prongs about 4cm long and 4cm apart from each other.
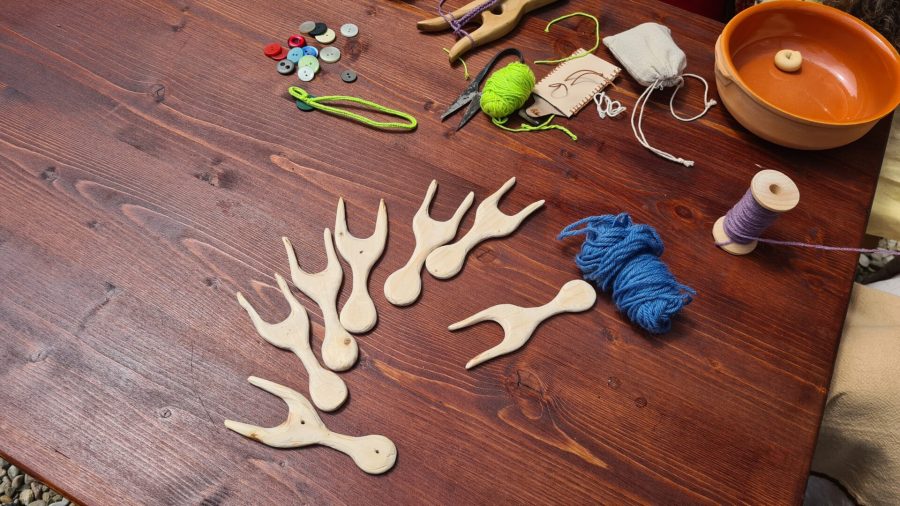
The lucets we made, ready for their first workshop.
Notice that the first one on the left has the first straight prongs design.


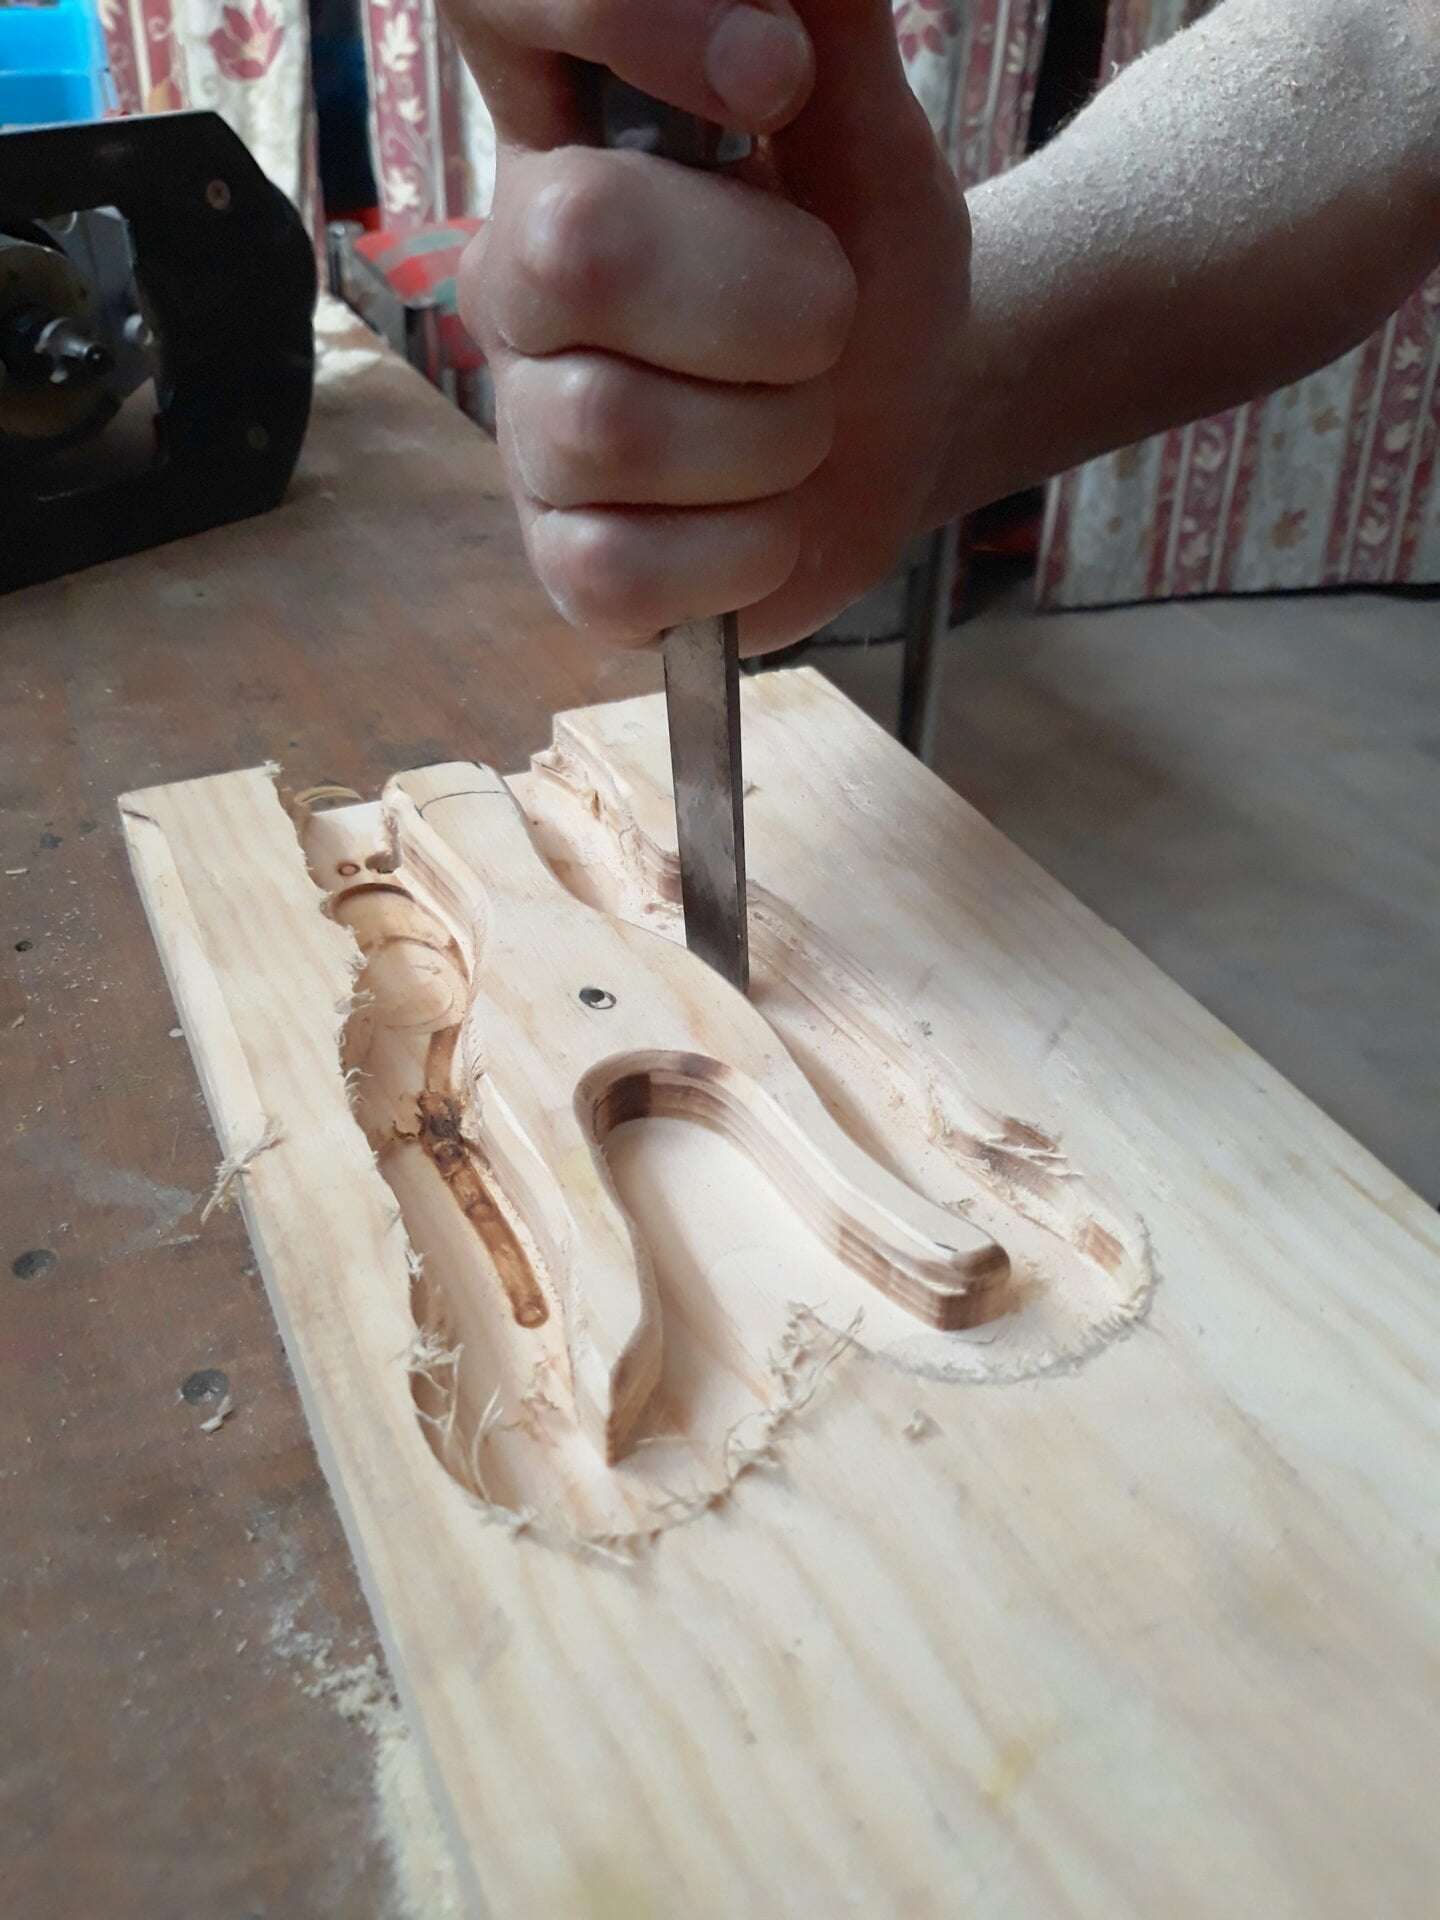
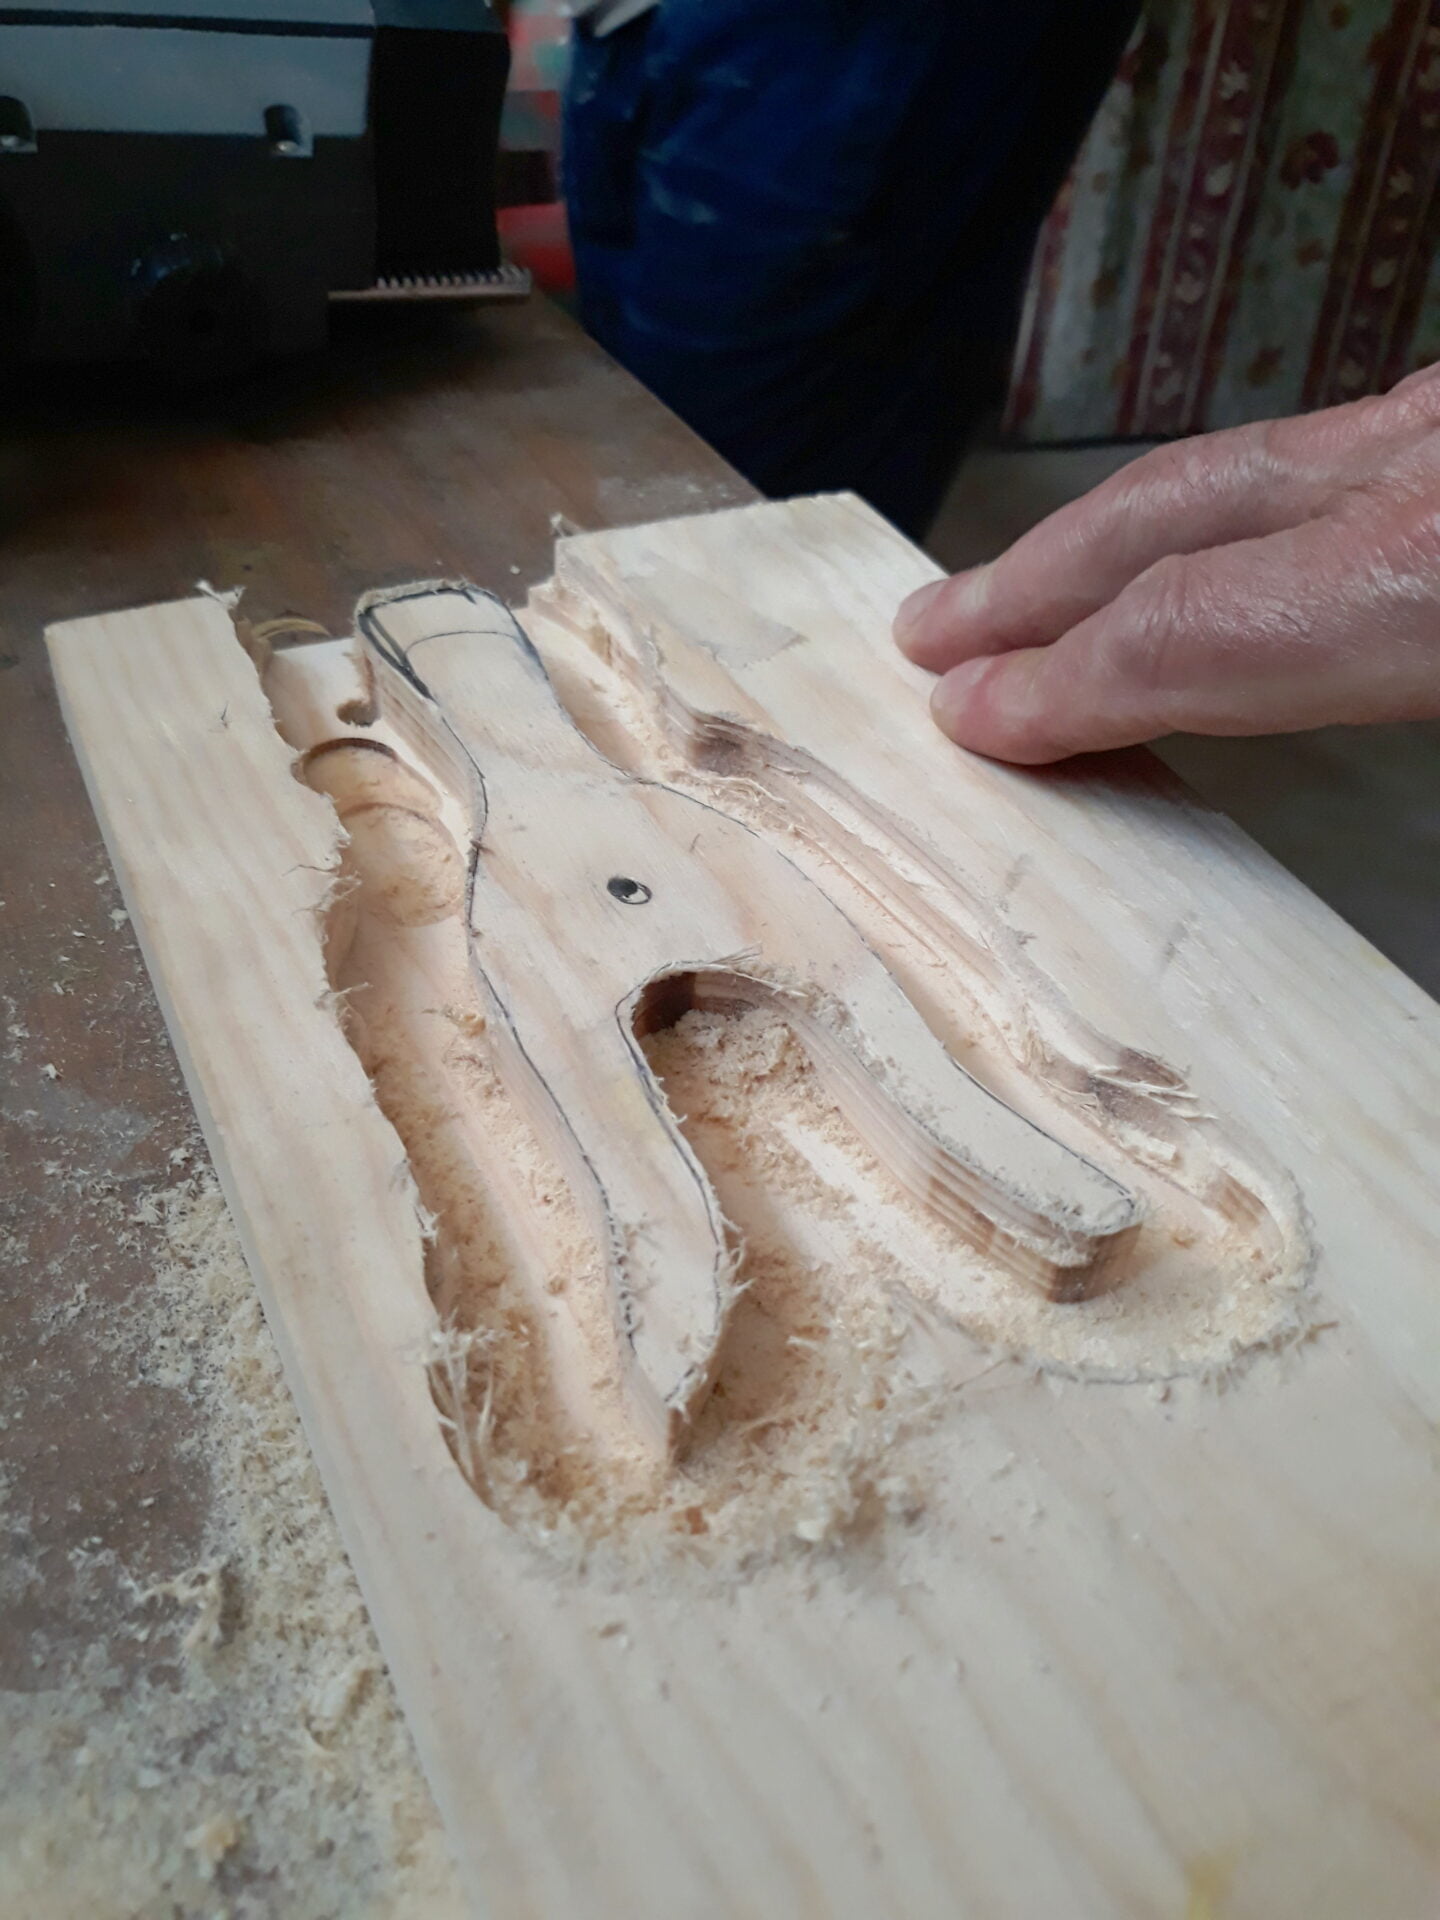
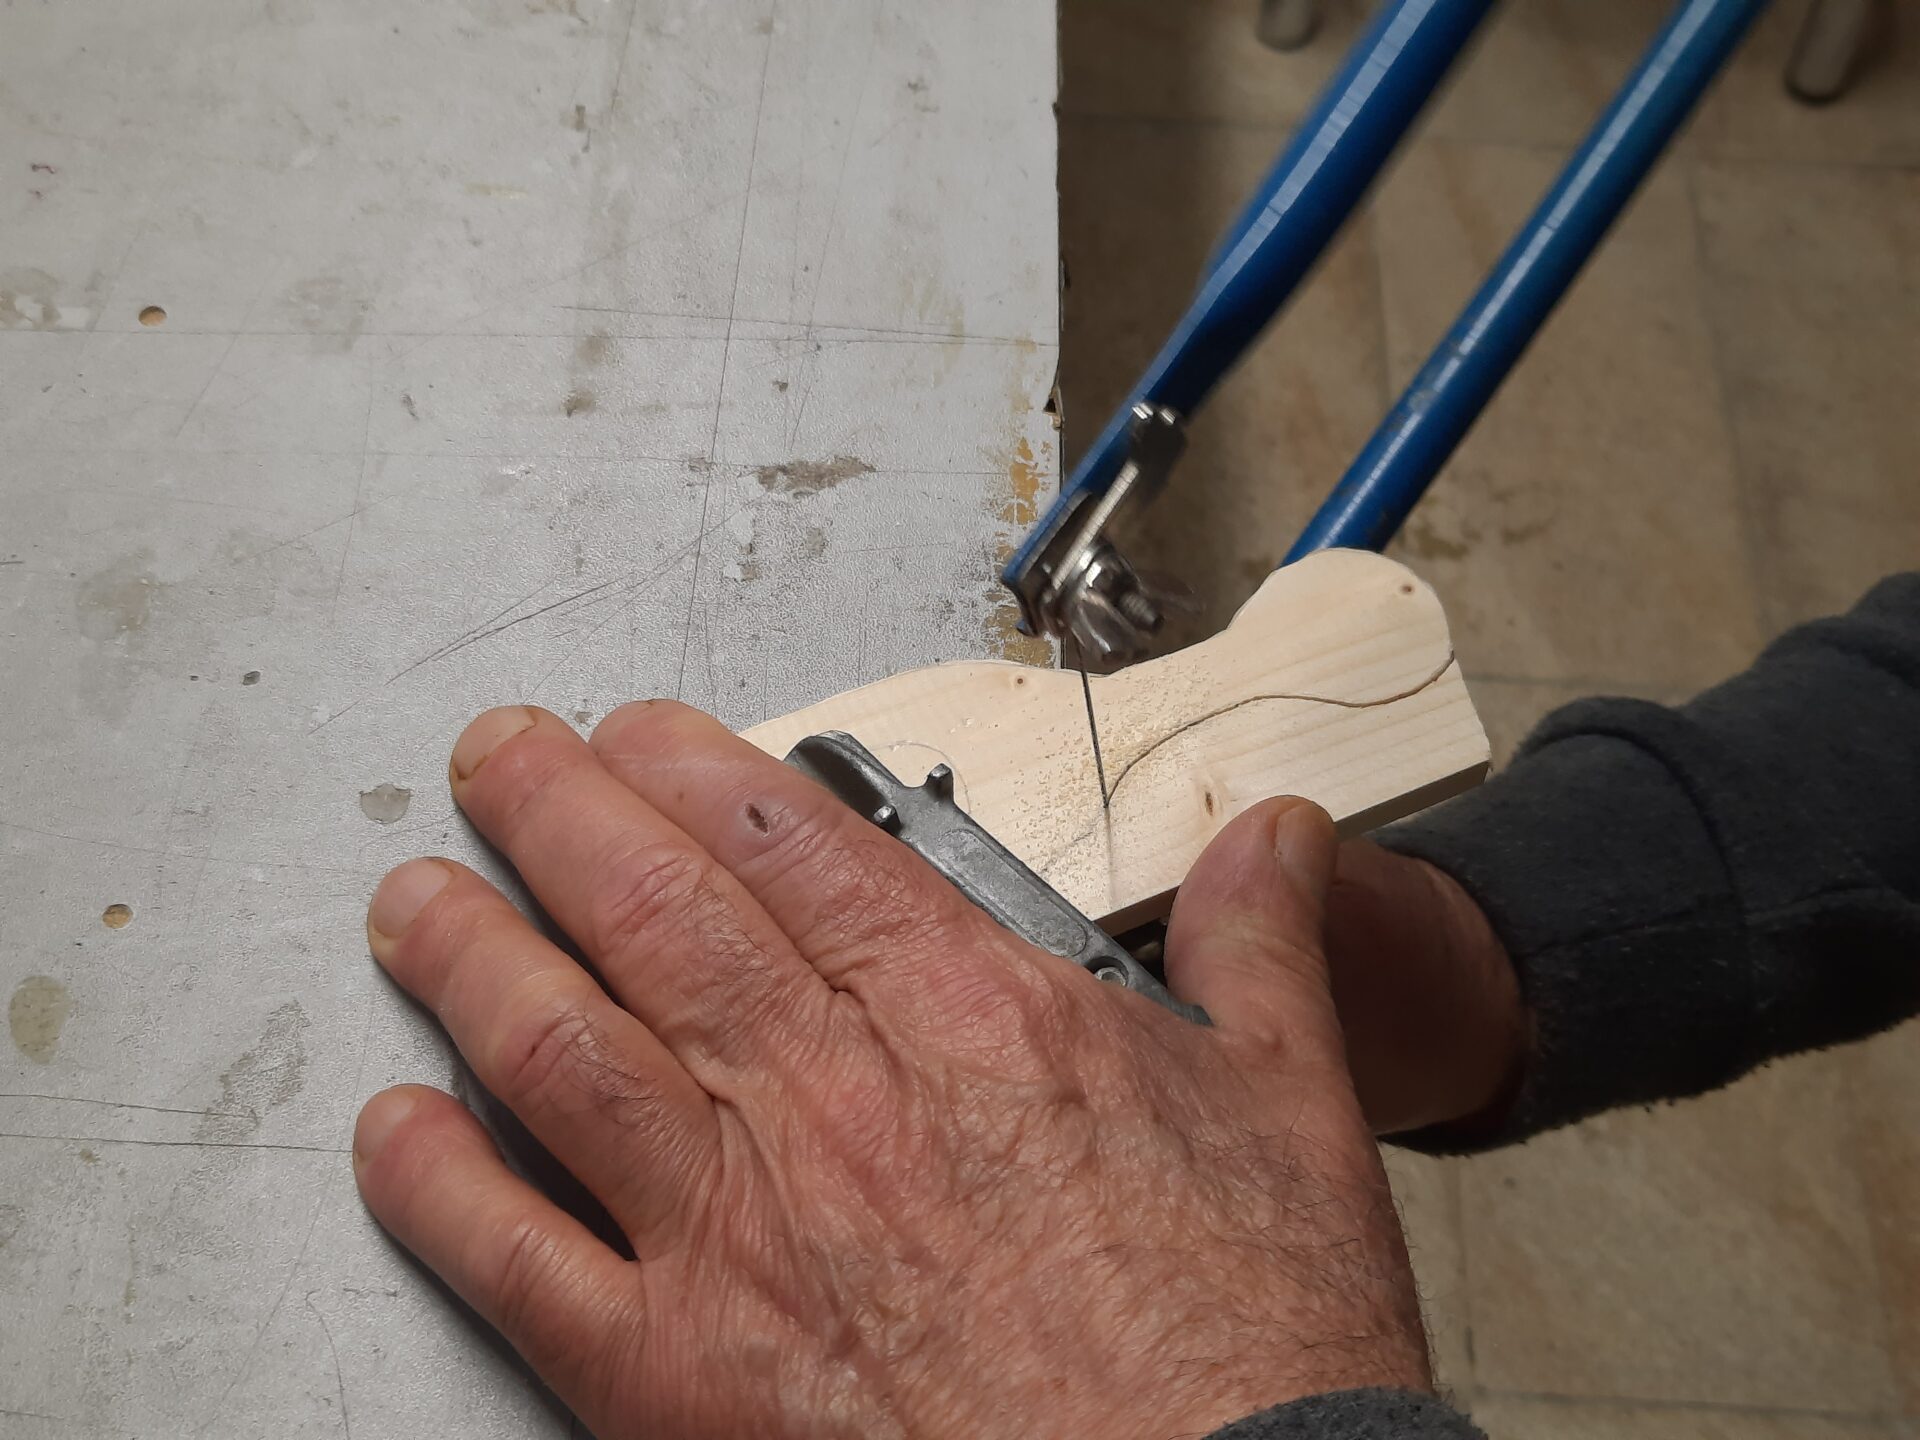
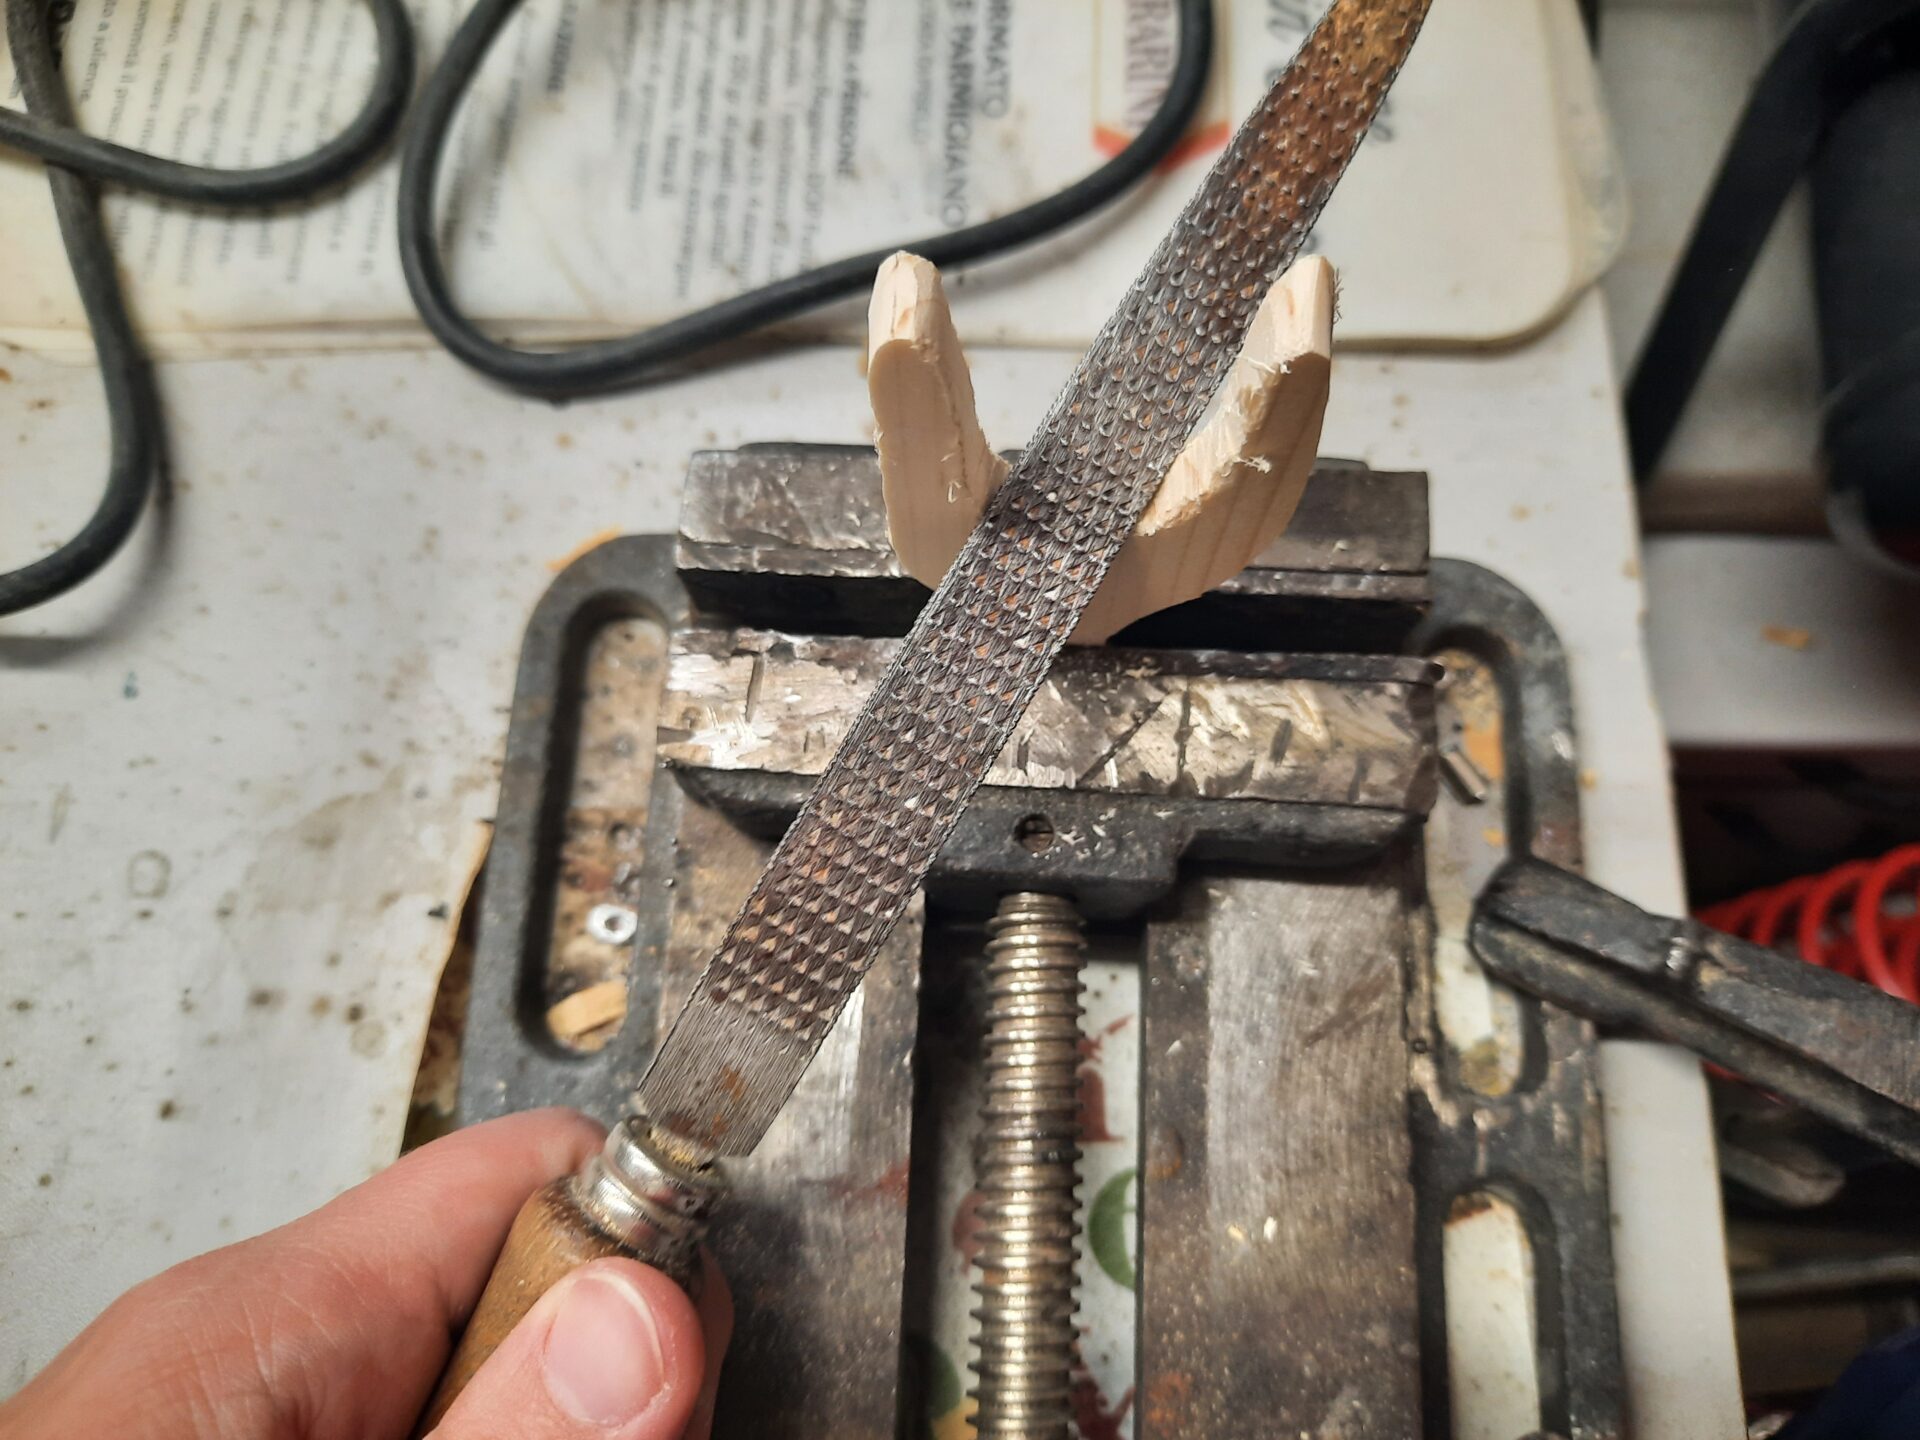
This time, making the lucets was more difficult. The wood boards were thin, almost the same width as the finished tools, so we had to set aside our milling machine and switch to a more manual approach. Since that required more patience and time, this time I gave a bigger contribution to the project.
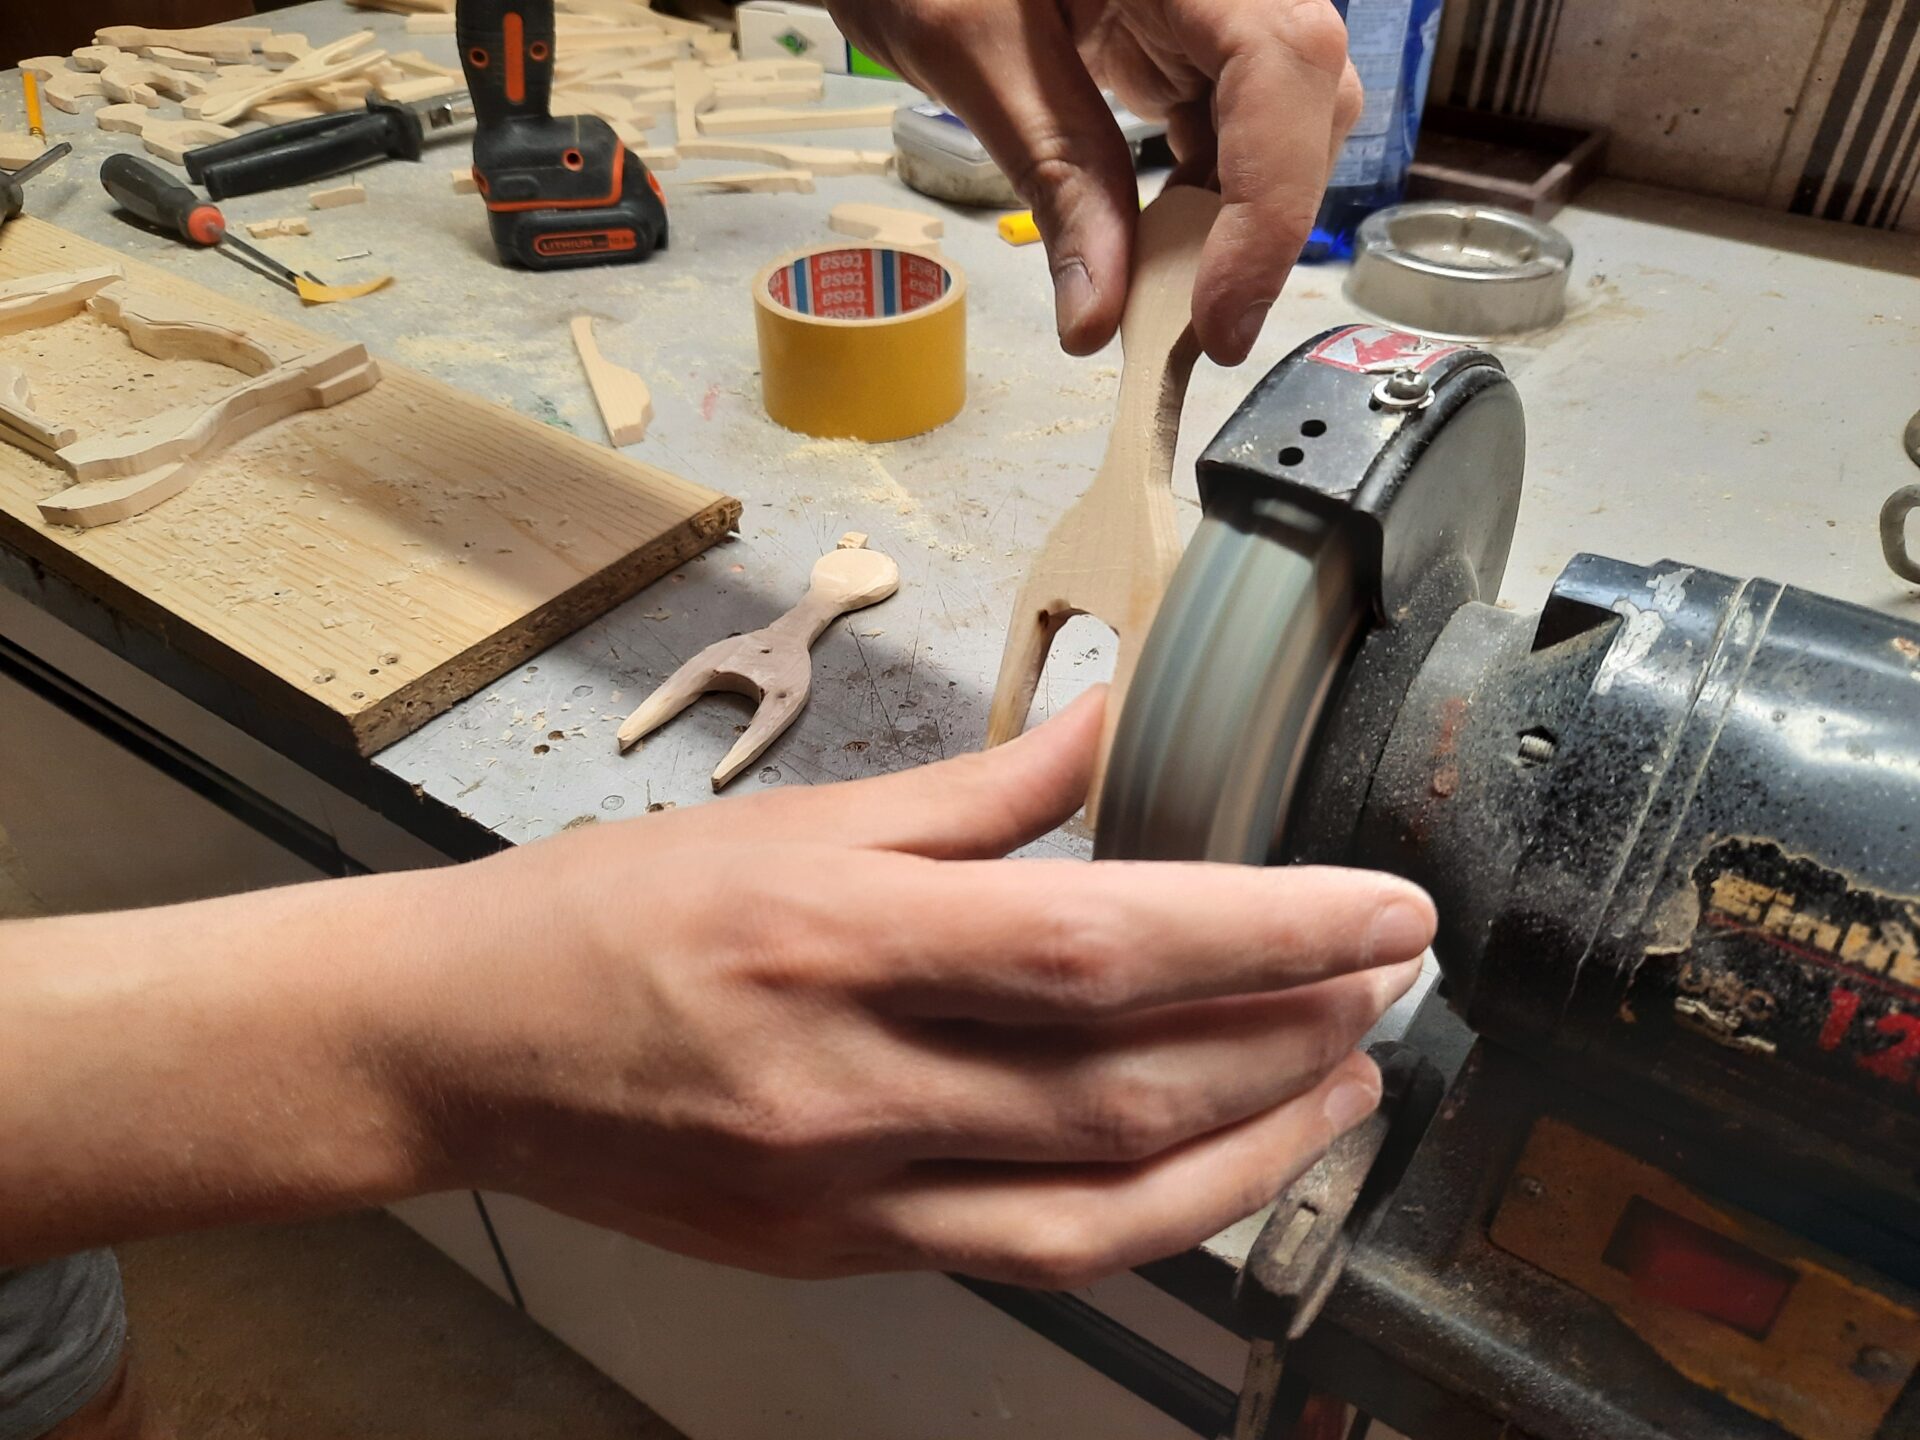
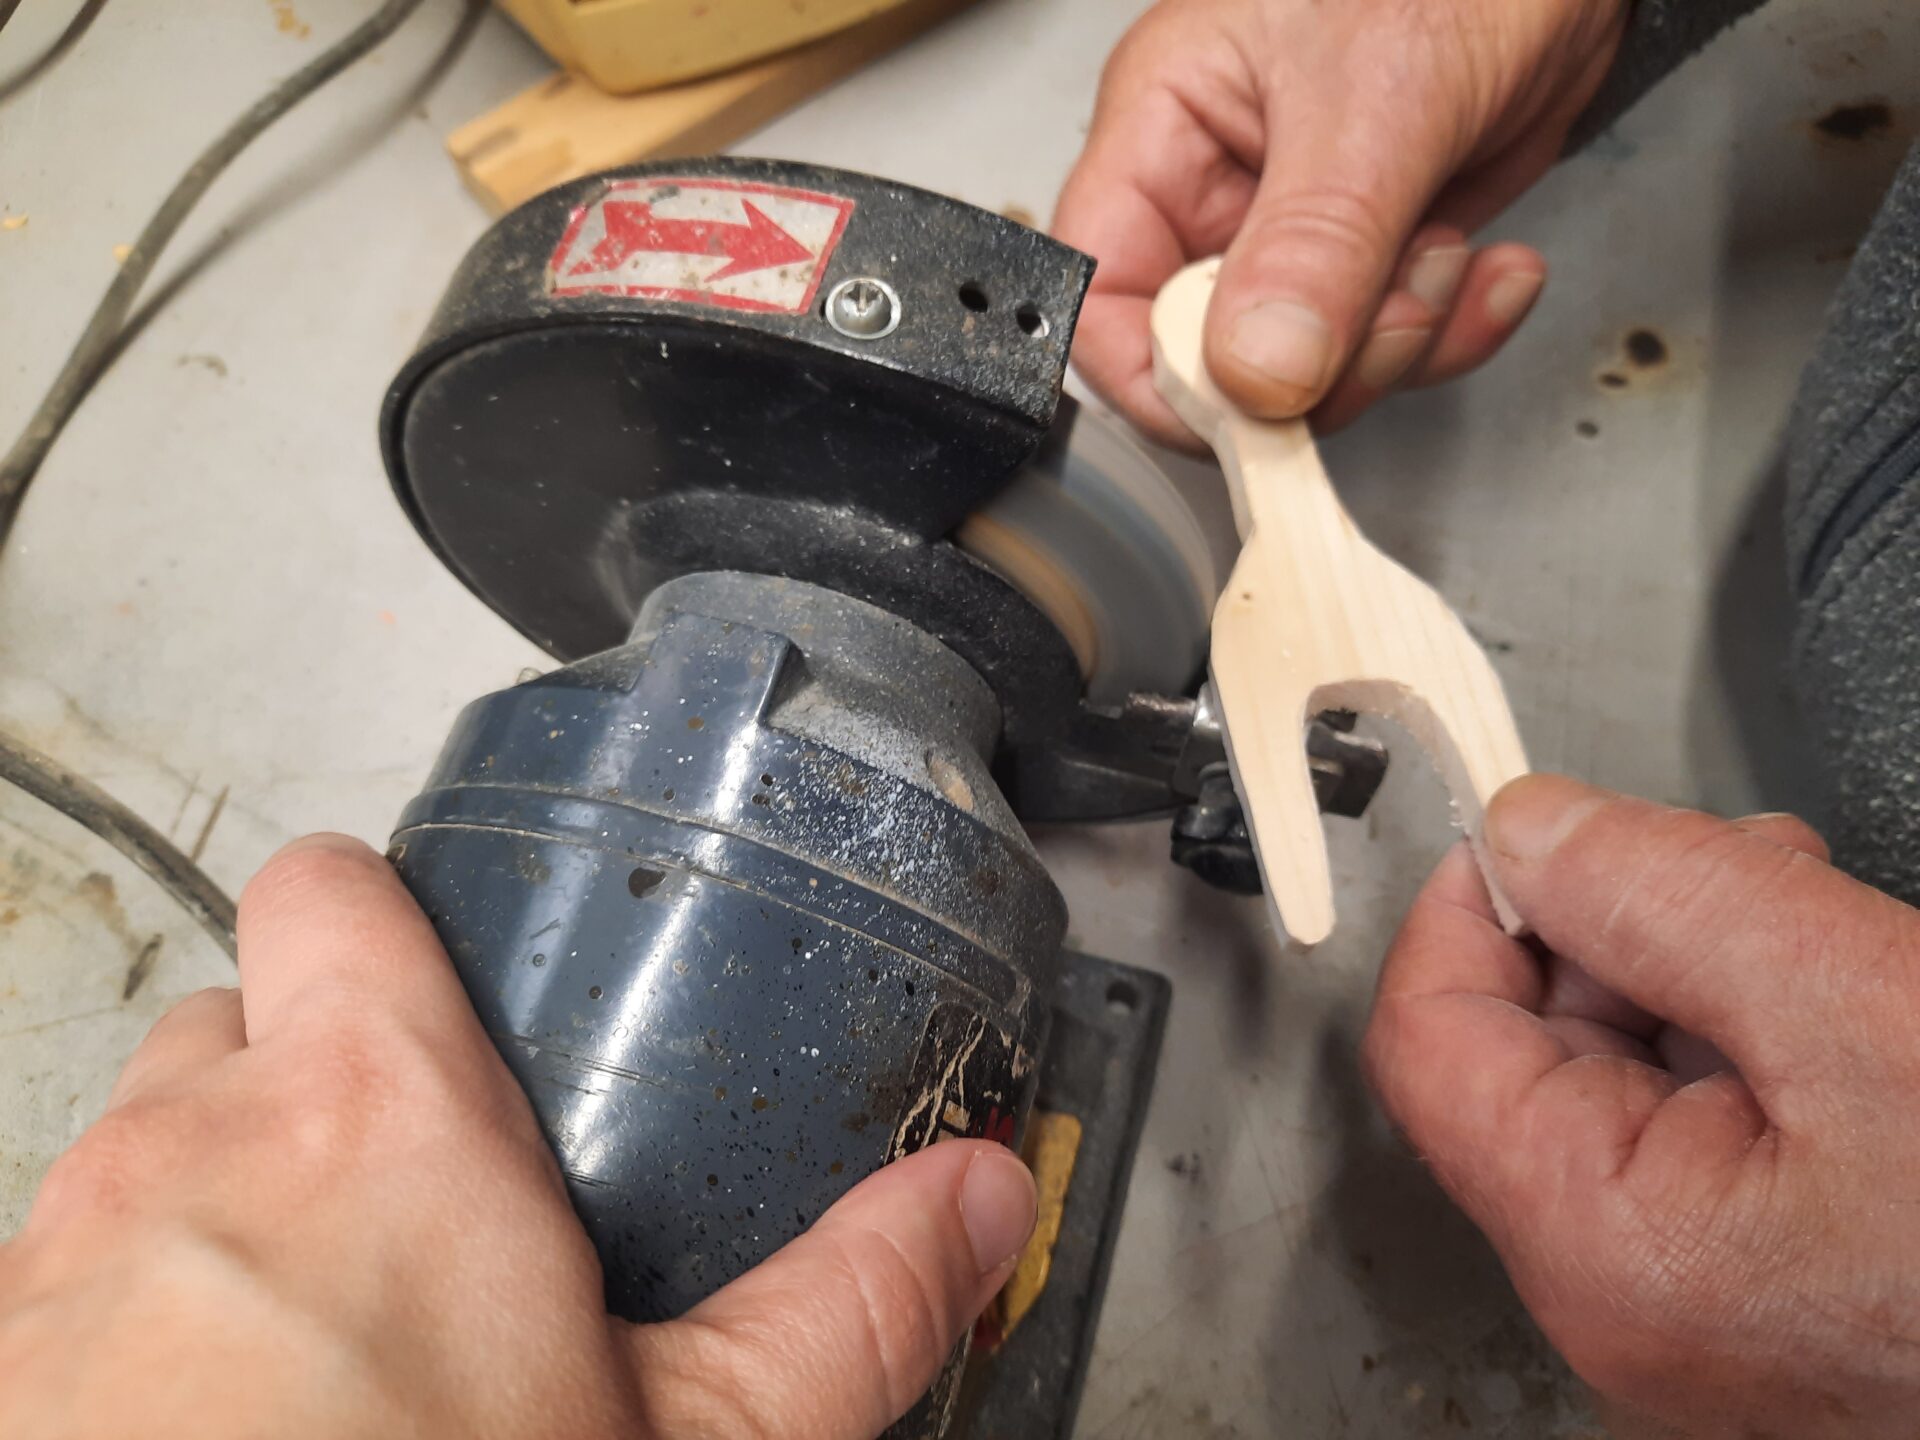
First, we cut out all the lucets with a hand saw, then tried using a file to rifinish the shape, but the task was tedious and didn’t give the expected results. My father-in-law’s laboratory had a grindstone, though: using that, we smoothed all the sides and gave shape to our lucets.
The grindstone, not easy to use for me at the beginning, was indeed the right tool, in the end. It gave me the control I needed to refinish the prongs carefully, thinning the places I wanted with precision. I took m time and, after my husband did the first rough cutting and shaping, I set myself to the refinishing task.
Our tips to make your own wooden lucet
After making and using our lucets, we have a few personal tips for anyone who wants to make his first wooden lucet.
- Choose a hard wood you can work comfortably with your tools
- Align the lucet design with the grain for strength
- If you have to make multiple lucets, make a sample or two and test the tool before making all the lucets, to test shape and size according to your needs and preferences
- Don’t paint your lucet! It was our first beginner mistake, and we had to sand all off: paint makes the sliding of your yarn difficult and could leave marks on the finished cord, if you can even work one on a painted tool. As SueC pointed out in a comment below, there are other ways to enhance the wood’s finish and smooth the surface. Her suggestion is to regularly make lengths of cord with greasy wool, to encourage a good patina on a new lucet. The lanolin in the wool conditions the wood beautifully, smoothing and enriching its surface over time. This is especially useful for woods that might initially feel a bit rough or dry. Whether or not additional smoothing is needed depends on the type of wood you’ve chosen for your lucet and how you feel it while working with yarn.
- Sand carefully! You want to avoid splinters in your hands. After sanding, use a sturdy cloth to smooth all the parts of your lucet

Support our work!
Enjoy this website?
Please consider a small tip to say thanks.
(No account required!)
About the shape and size of a handy lucet
I have to say I am very fond of my first lucet. I carry it with me almost everywhere, it’s a faithful companion even during the commute to work!
But going on with lucetting, learning new techniques and gaining speed, I started wondering about the shape of the lucet. Do the outward curved prongs help me keeping the stitches on, or do they slow me down? Is the hole in the handle useful or unnecessary? Is the handle itself really helpful while turning the tool?
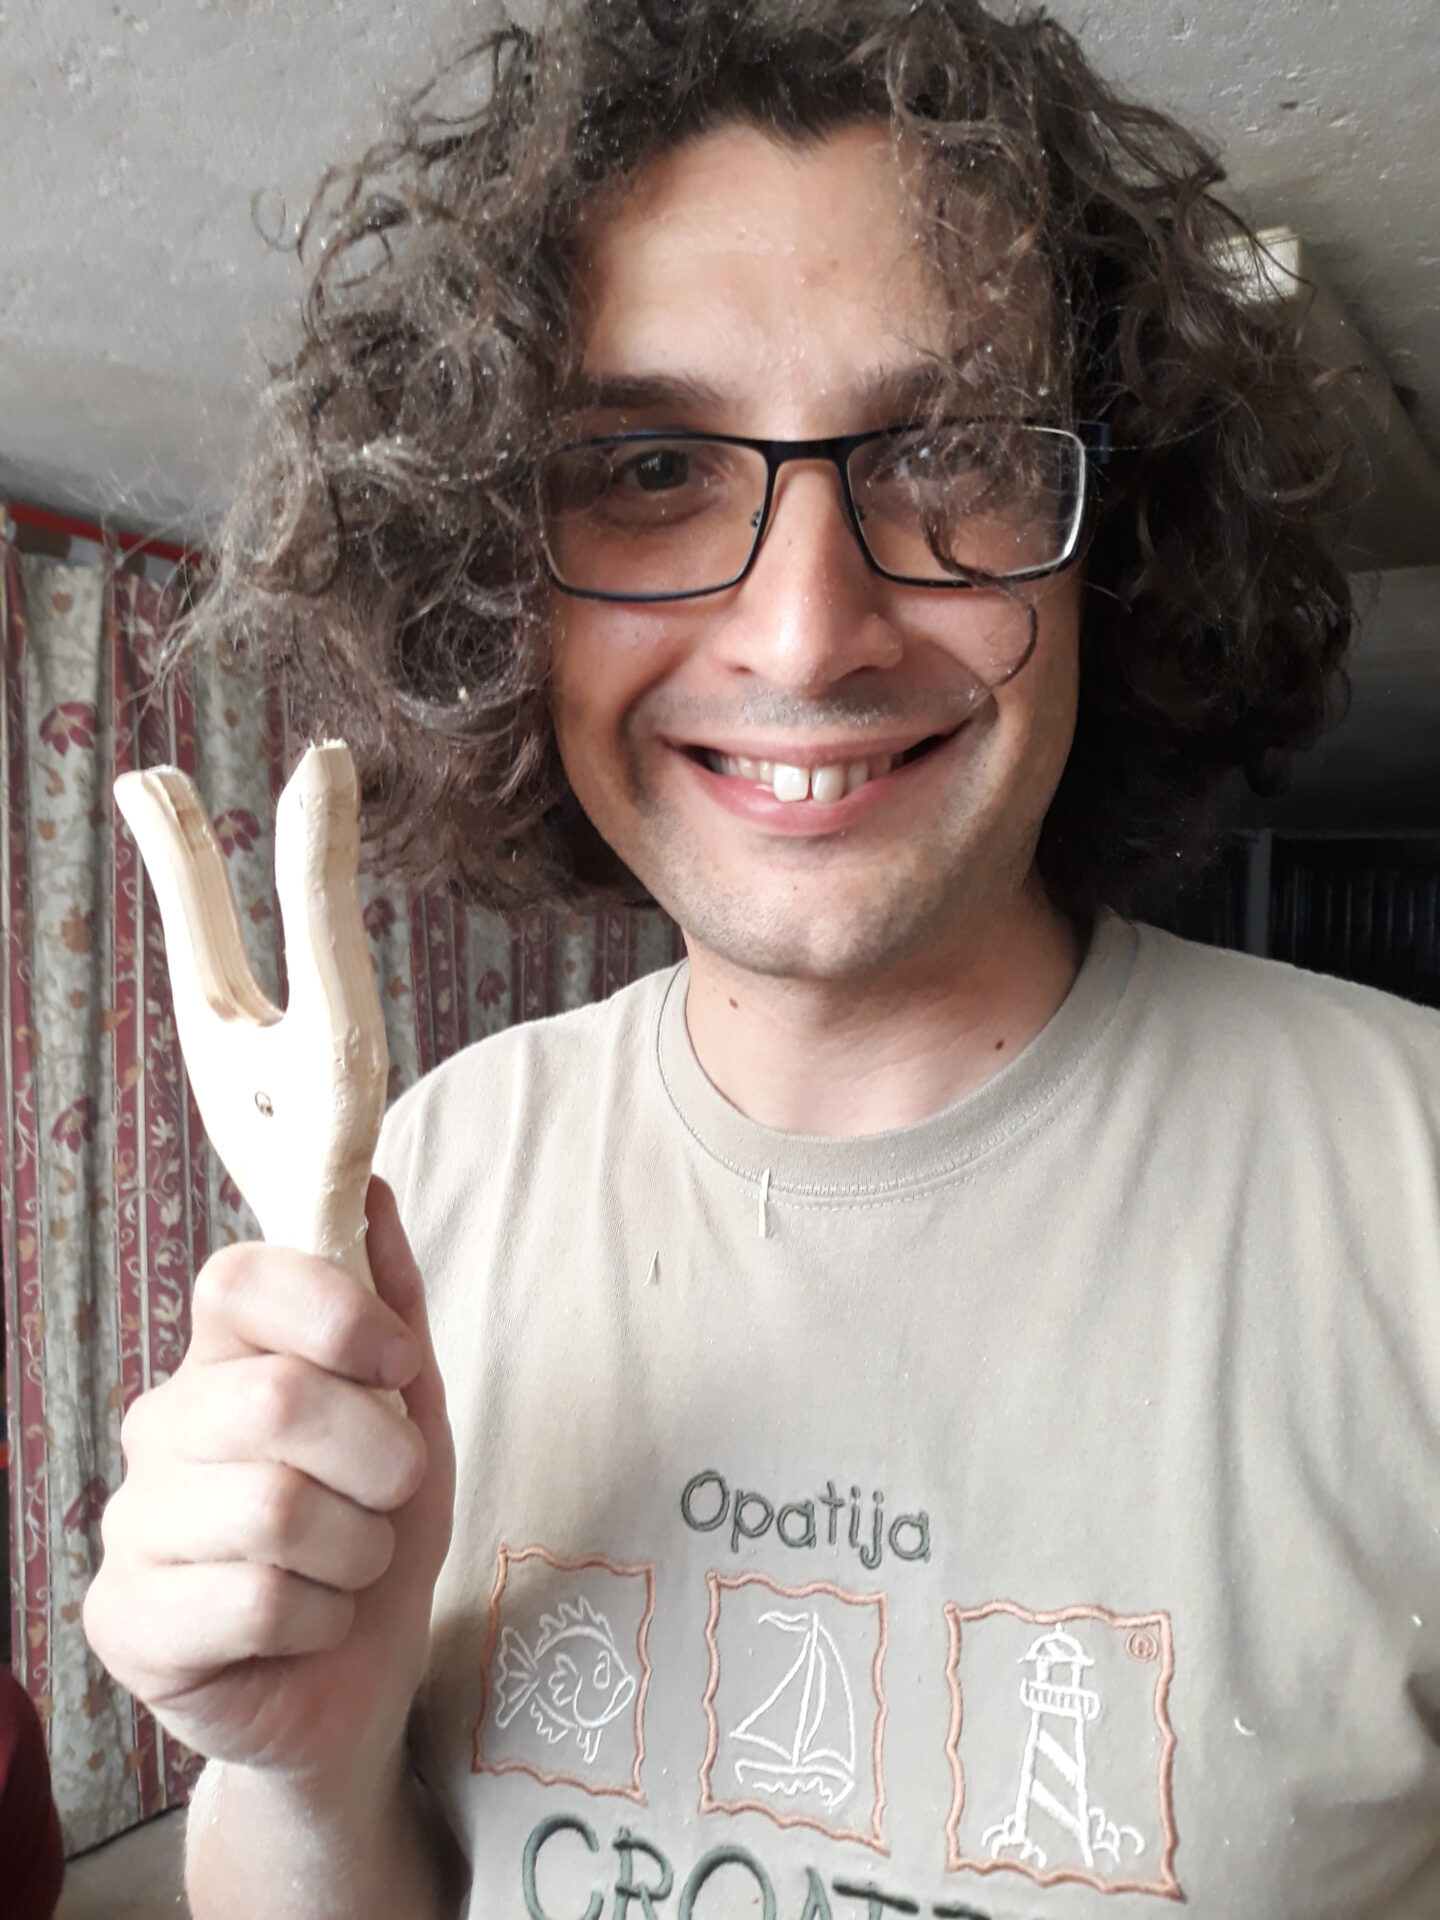
Also, what’s the most comfortable size? One day, while researching on ancient lucet and noting how small they were, I tried with a tiny lucet, carved out of a wooden fork. Well, it was surprisingly good to work with! As a reference, my favourite lucet is 17cm long, each prong is 7cm long and they are 6cm apart at the top. The tiny one is 13cm long, each prong just 3cm long, and they are 1.5cm apart.
I’d not recommend going with such a tiny lucet for everyday use, though. Going fast with one of these could be hard and your fingers could get sore.
I found that a lucet whose prongs are more than 5-6cm apart would be hard to hold and turn comfortably. On the other hand, I think a lucet should also be largher than 4cm to have a firm grip and avoid cramps, and also to have enough space to work the stitches. The width is the greatest complain I have about my favourite lucet, but I have to say I got so used to it that now I feel clumsy when I switch to a different tool.
Also the lenght of the prongs matters. I noticed I usually work using the final tips of my prongs, pushing the stitches further down just when I need to pause the work, so I’d not need really long tines to work on.
My favourite lucet has 7cm long prongs, and that’s quite comfortable. I’d recommend having prongs at least 3-4cm long: shorter ones would mean easier yarn slipping. That always depends on the thickness of your yarn: if you use sewing or crochet thread, the prongs’ lenght is less important than if you use super thick yarn.
Having your prongs straight or outward-pointed is a question of personal preference, I think. Many professional luceteers I spoke with said they prefer straight prongs. I agree, sometimes working with protruding tines makes it hard to speed up. On the other hand, straight prongs could let your thread slip off more easily, so I don’t recommend them to a novice.
It’s also important to consider the section of your prongs: a square section or sharp corners would make lucetting practically impossible. Having round and smooth prongs is essential for working the yarn efficiently.


The first time I tried lucetting back in 2015, the tool I used had square-section prongs.
Workable, but not my ideal.
The first time I tried lucetting back in 2015, the tool I used had square-section prongs. It was workable, but not ideal. The edges slowed my progress, making the process less enjoyable, while rounded prongs allow the yarn to glide effortlessly. Since then, I’ve always paid close attention to the prongs when choosing or making lucets.
The ideal section of your prongs impacts the thickness of the wood you choose to make your lucet from. It’s ideal for both prongs to have the same thickness. That’s why I shaped my prongs to be almost circular in section: they’re smooth, symmetrical, and easy to work with from any angle.
If you make your lucet yourself, I suggest you to go for a wood board slightly thicker than the intended width of your prongs. For example, if your final pattern shows each prong being 1.5 cm wide, opt for a wood board at least 2 cm thick. This way, you’ll have enough material to refine the prongs into a rounded, smooth shape, thinning them evenly to 1.5 cm thickness.
The goal is to create prongs that are comfortable to use and that facilitate the smooth passing of yarn. Sharp edges or corners are bad for your handmade lucet: they’ll snag your yarn and slow your work. Sanding is your best friend here: take your time to round out the prongs and make them buttery smooth. Trust me, your hands and your lucetted cord will thank you!
Another question to consider is the presence or absence of a handle. I have seen both versions, in contemporary lucets or in extant finds from the 18th or 19th century.
Lucets without a handle are more portable, maybe, they can easily fit inside one’s pocket. Thinking about practicality, if you lucet with a no-turn method, having a handle or not is really a matter of aesthetics, more than functionality. If you use the turn-method, my preferred one, having a handle is… handy! It provides support and could help your hand turn the lucet at each stitch. Also, you could wrap your cord around it as if it was a bobbin.
This guides me to the central hole: having one or not depends on your favourite knitting method and personal feelings. You can feed your work inside the hole or you can use the handle as a bobbin, your choice. I don’t have in mind a handleless lucet that is also lacking the central hole, but I did see and used tools with handle and without hole. Most of the time, even when I have a hole in the lucet I’m using I don’t feed the cord inside it.


To sum up the features of a handy lucet:
- Size: space between the prongs between 4cm and 6cm, with prongs at least 3-4cm long.
- Prongs: slightly outward-pointed for beginners, straight if you aim for speed.
- Section: prongs and handle (when present) must be smooth and round to ease the passing of thread and turn.
- Handle: if you use the turn-method, it’s better having a handle for support, otherwise it’s up to each one’s personal preference or aesthetics
- Hole: if you don’t have a handle, it helps you keep your finished cord away from the working thread; if you have a handle, it depends on your own knitting style.
How to use a lucet fork?
I often use the lucet to make braids and cords for reenactment projects, but it could be super useful even in everyday life. The basic tecnnique is super easy! Follow a step-by-step tutorial, with photos and video.


4 Comments. Leave new
Great summary of your experiments with lucets. Thankyou for making your patterns available.
One question.. how thick was the wood in relation to the width of the prongs. Are they more equal or more flat?
A great way to encourage a good patina quickly on a new lucet is to regularly make lengths of cord with greasy wool. The lanolin conditions the wood a treat.
Hello, thanks a million to you!
You are right, I should clarify the thickness! I made the prongs equal: since I usually work with the turn method, I like the prongs to be the same thickness, no matter how you turn them. Almost a circle in section.
And thank you for the suggestion about the patina. We also tested applying linseed oil, but I fear it could remain on the fibers as you knit.
Wonderful pattern, y’all are so nice to provide it. I do have a question. How thick should the wood be? Can’t wait for me or hubby to try this. Thank you.
Thanks a million, I’m glad you appreciated! As for the thickness of the wood (and of the prongs in general), that’s something I should clarify better. Ideally, you want your prongs to be round in section and smooth to work with. Depending on the chosen size of your final lucet, choose a wood board thickness just a little more than the width of each prong. Let’s say, your final pattern has each prong 1.5cm wide: in this case, choose a 2cm board, so you have thickness enough to smooth your prongs to 1.5cm thickness all around. Hope it helps! If not, come back and ask more questions, I’d love to be of help!