We’ve been experimenting with epoxy resin for a while. We tried casting small objects in resin, making ornaments. Just small things to keep learning.
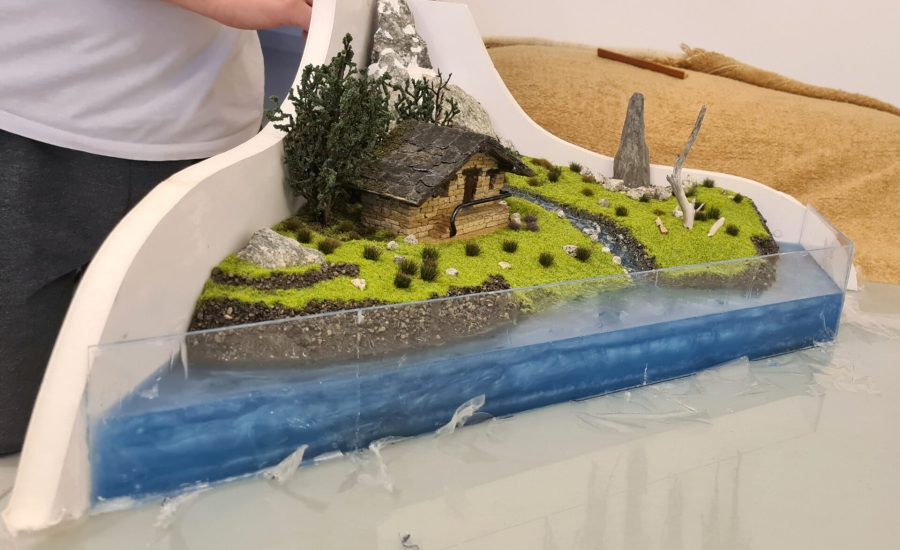
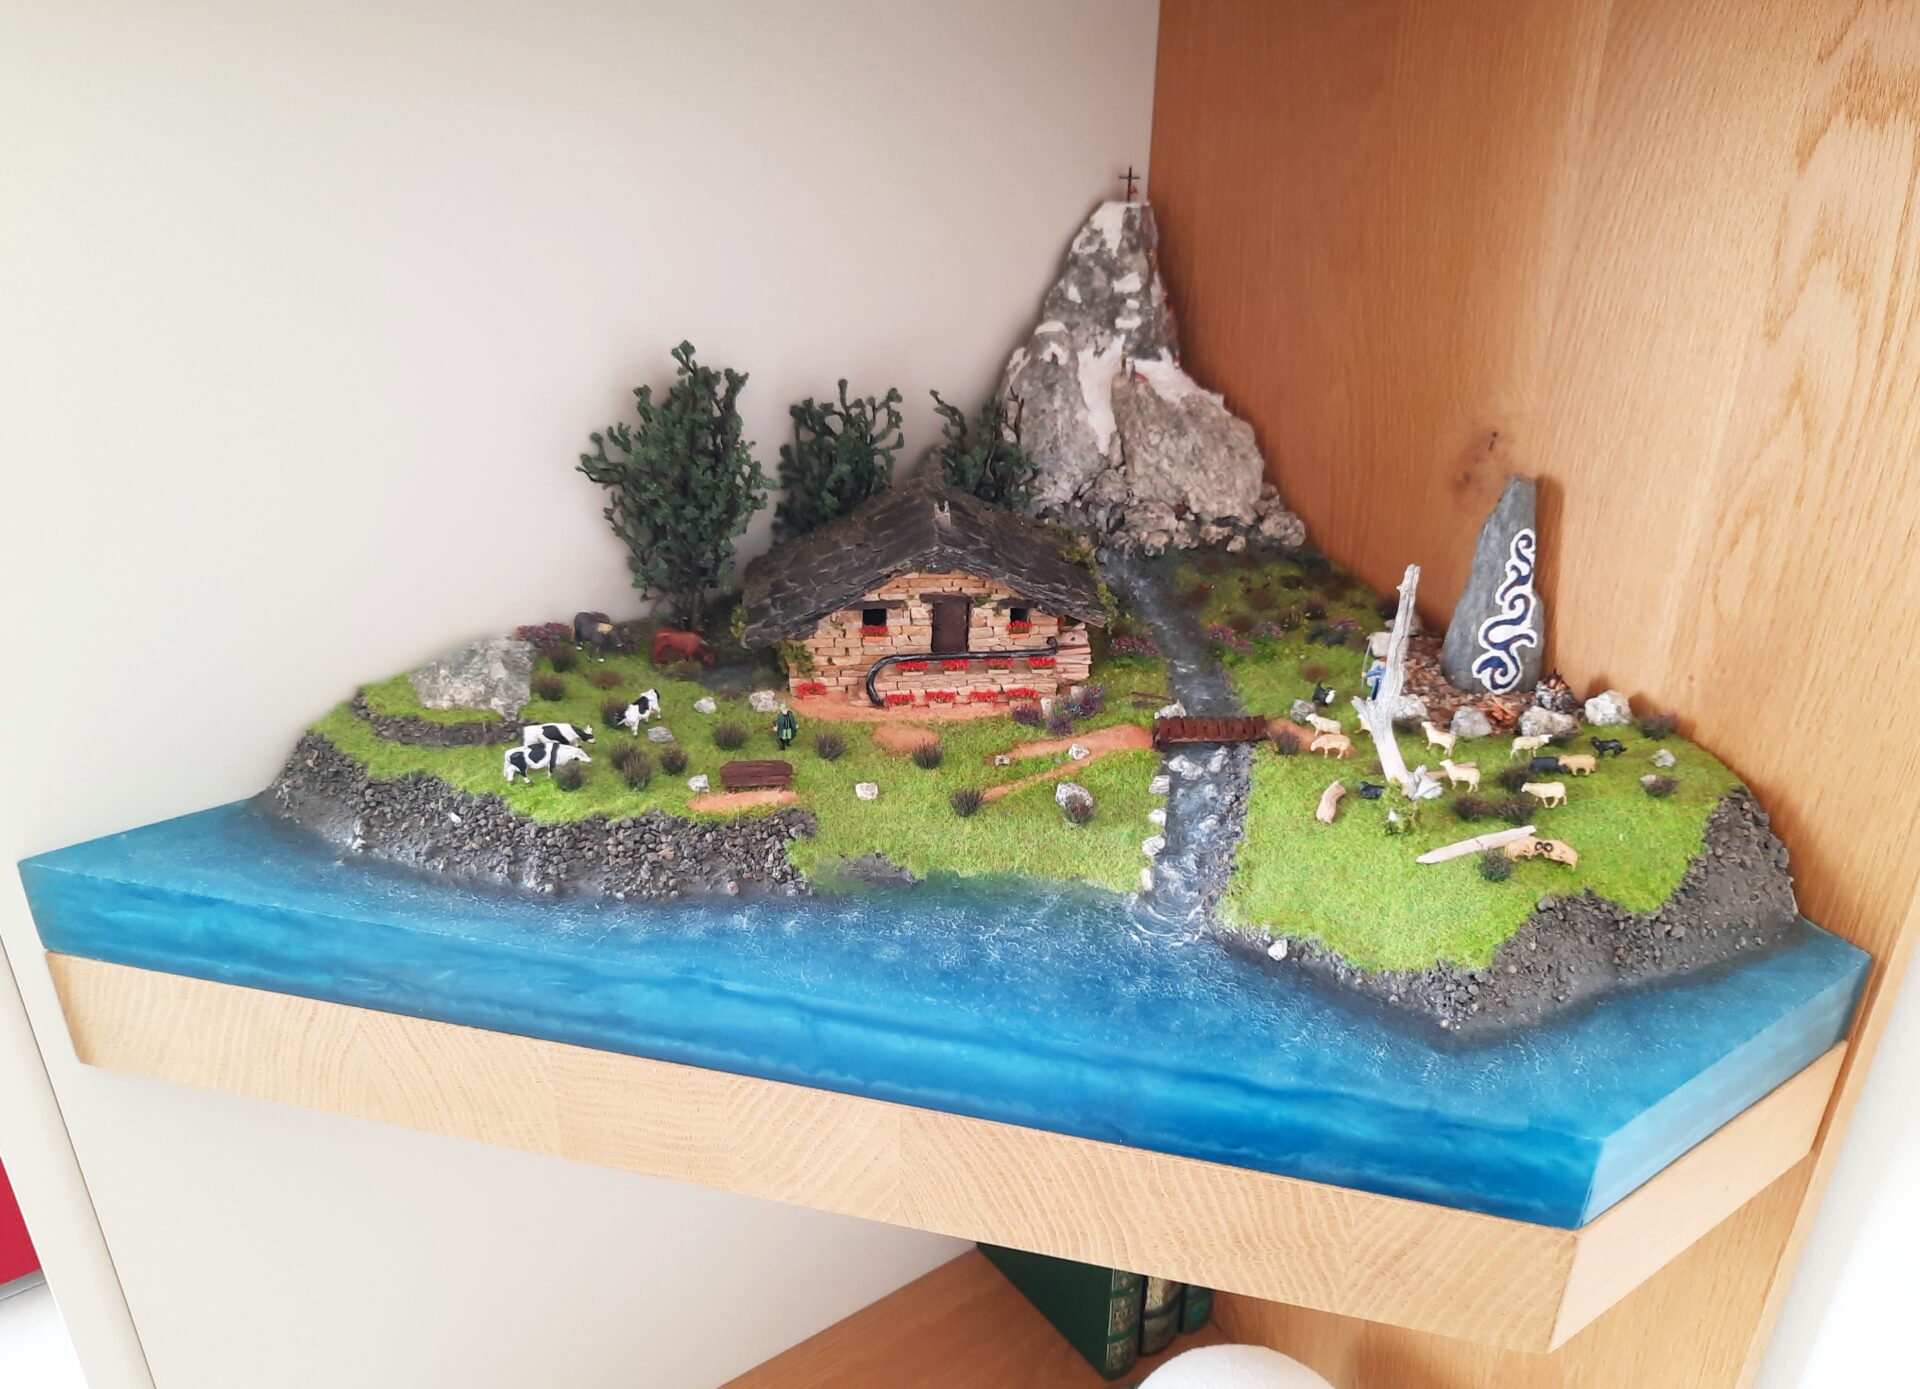
In Summer 2020, though, we started our first really big projects: a resin basement for a decorative tree and a mountain lake diorama.
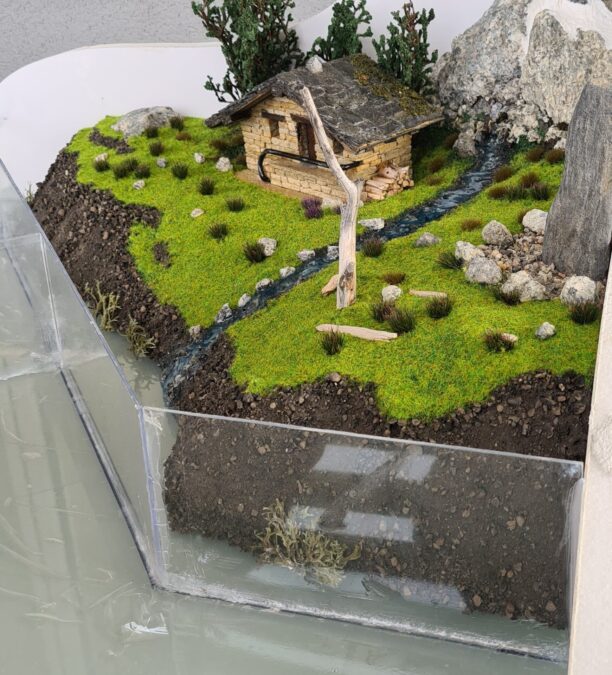
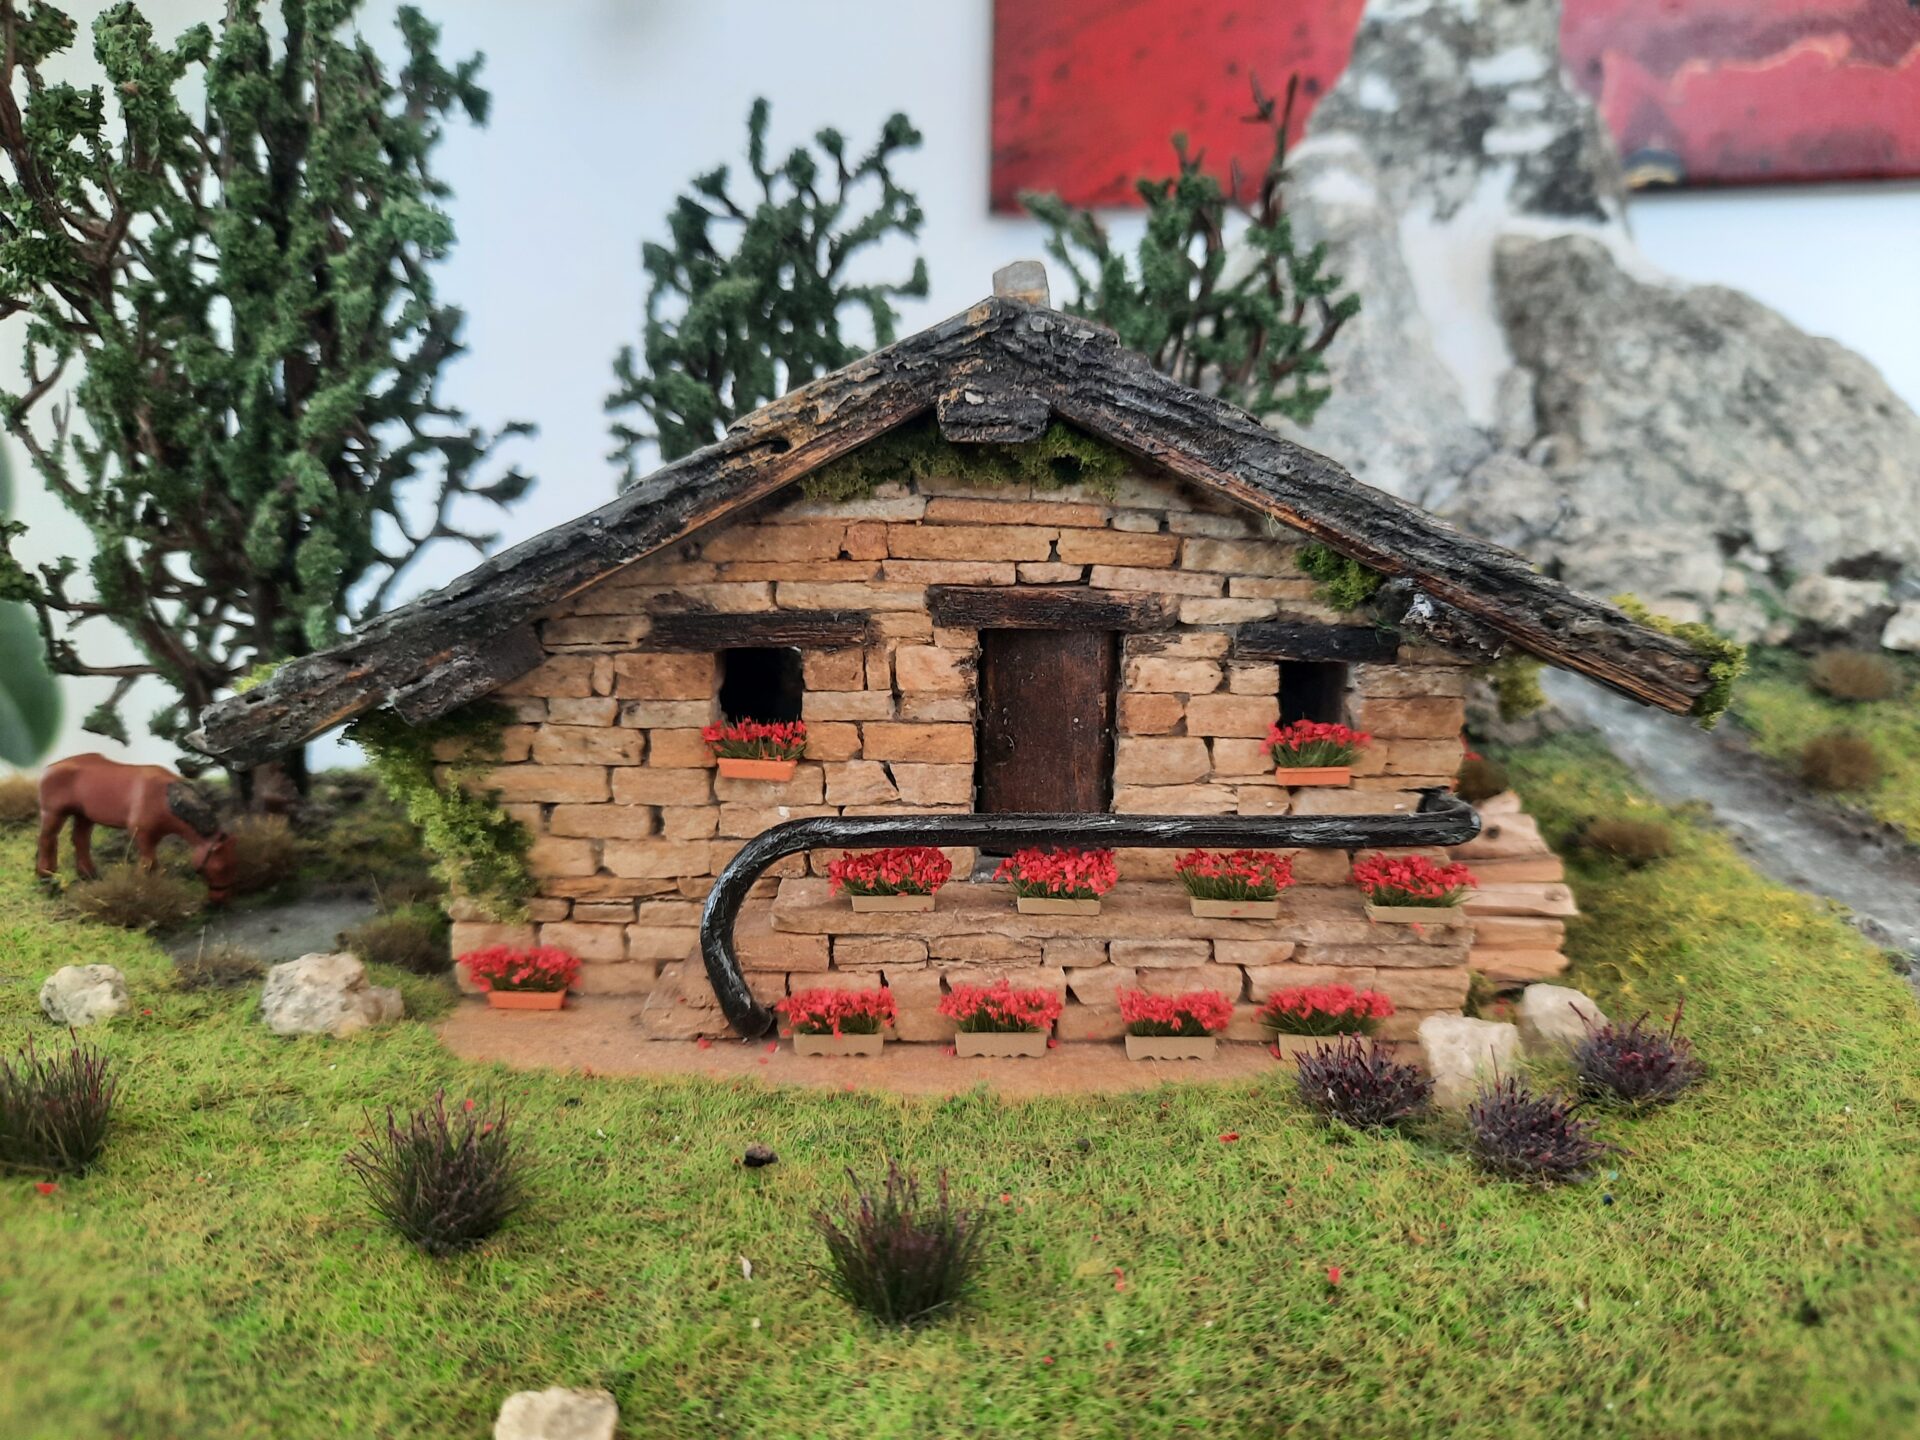
About the mountain lake landscape, its beginning was a fortuitous finding: at our favourite flea market we found the model of a stone cottage perfect in every detail. As soon as we saw it, it was clear it was calling us to become the main feature of the diorama that has been lingering in our minds for a while.
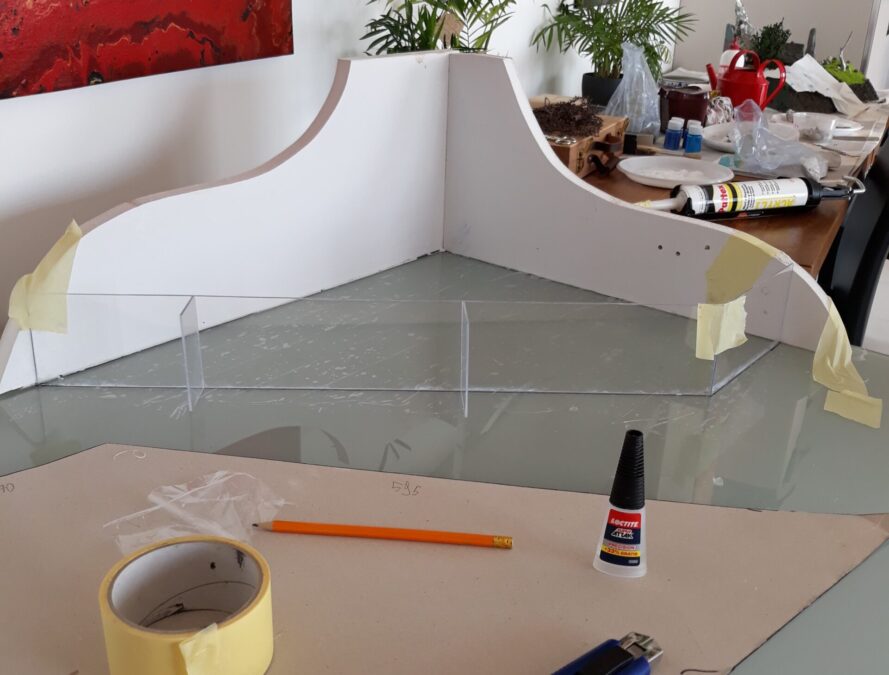
The project needed loads of different materials, all our skills and months to complete. We had a trapezoid shelf at home that we decided was the perfect spot for such a big project, so after cutting its shape and size on a cardboard, our greatest challenge so far began.

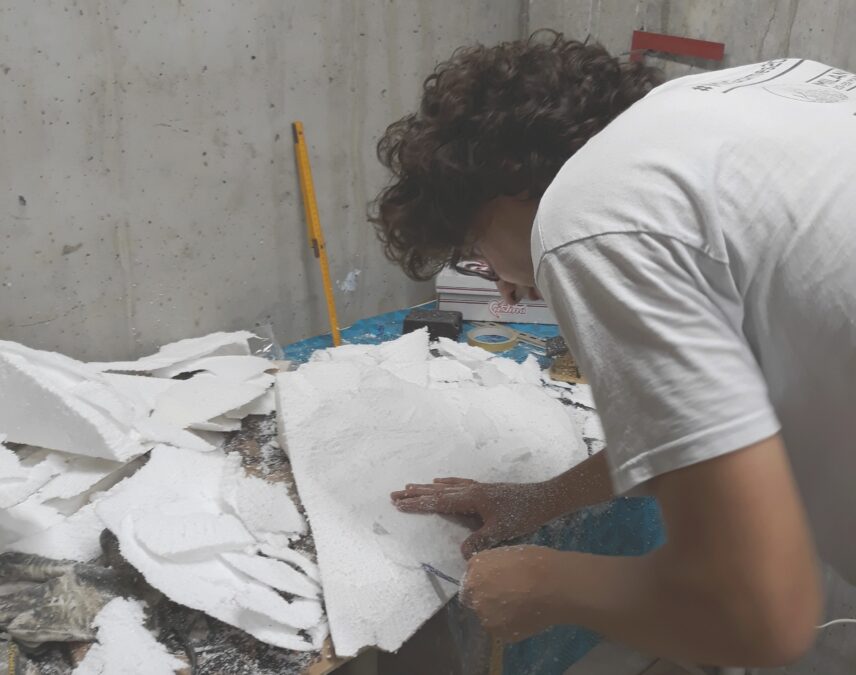
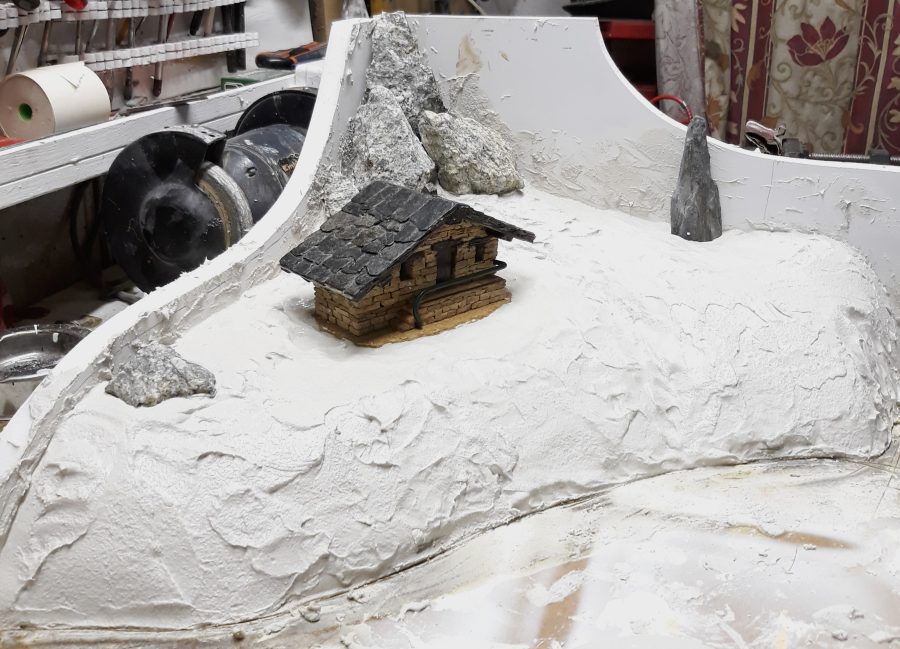
The first step was the making of the base. We had some polystyrene at home just the right size, so we decided to give it the shape of the lakeside. On top, we wanted to place the house with trees, grass, a stream bed and, on the highest corner, real rocks to suggest high snowy peaks in the distance.
Yes, this was not conceived as a scale model. First, as our first big diorama we thought it was too much. Second, we had a 16×8 cm house, so our project would have been far too big for our home!
Shaping the base was long but quite easy, but then we had to reinforce the polystyrene. We chose to use cement, with the same technique used for our cement vase or cement pumpkins. After soaking a towel in cement, we placed it on top of the base, then added more cement and sculpted to host the house and other features. A final sanding prepared the terrain for painting.
My husband painted a first layer of green as a foundation, then added the main features: the house, the high peaks, the menhir, a few rocks here and there.
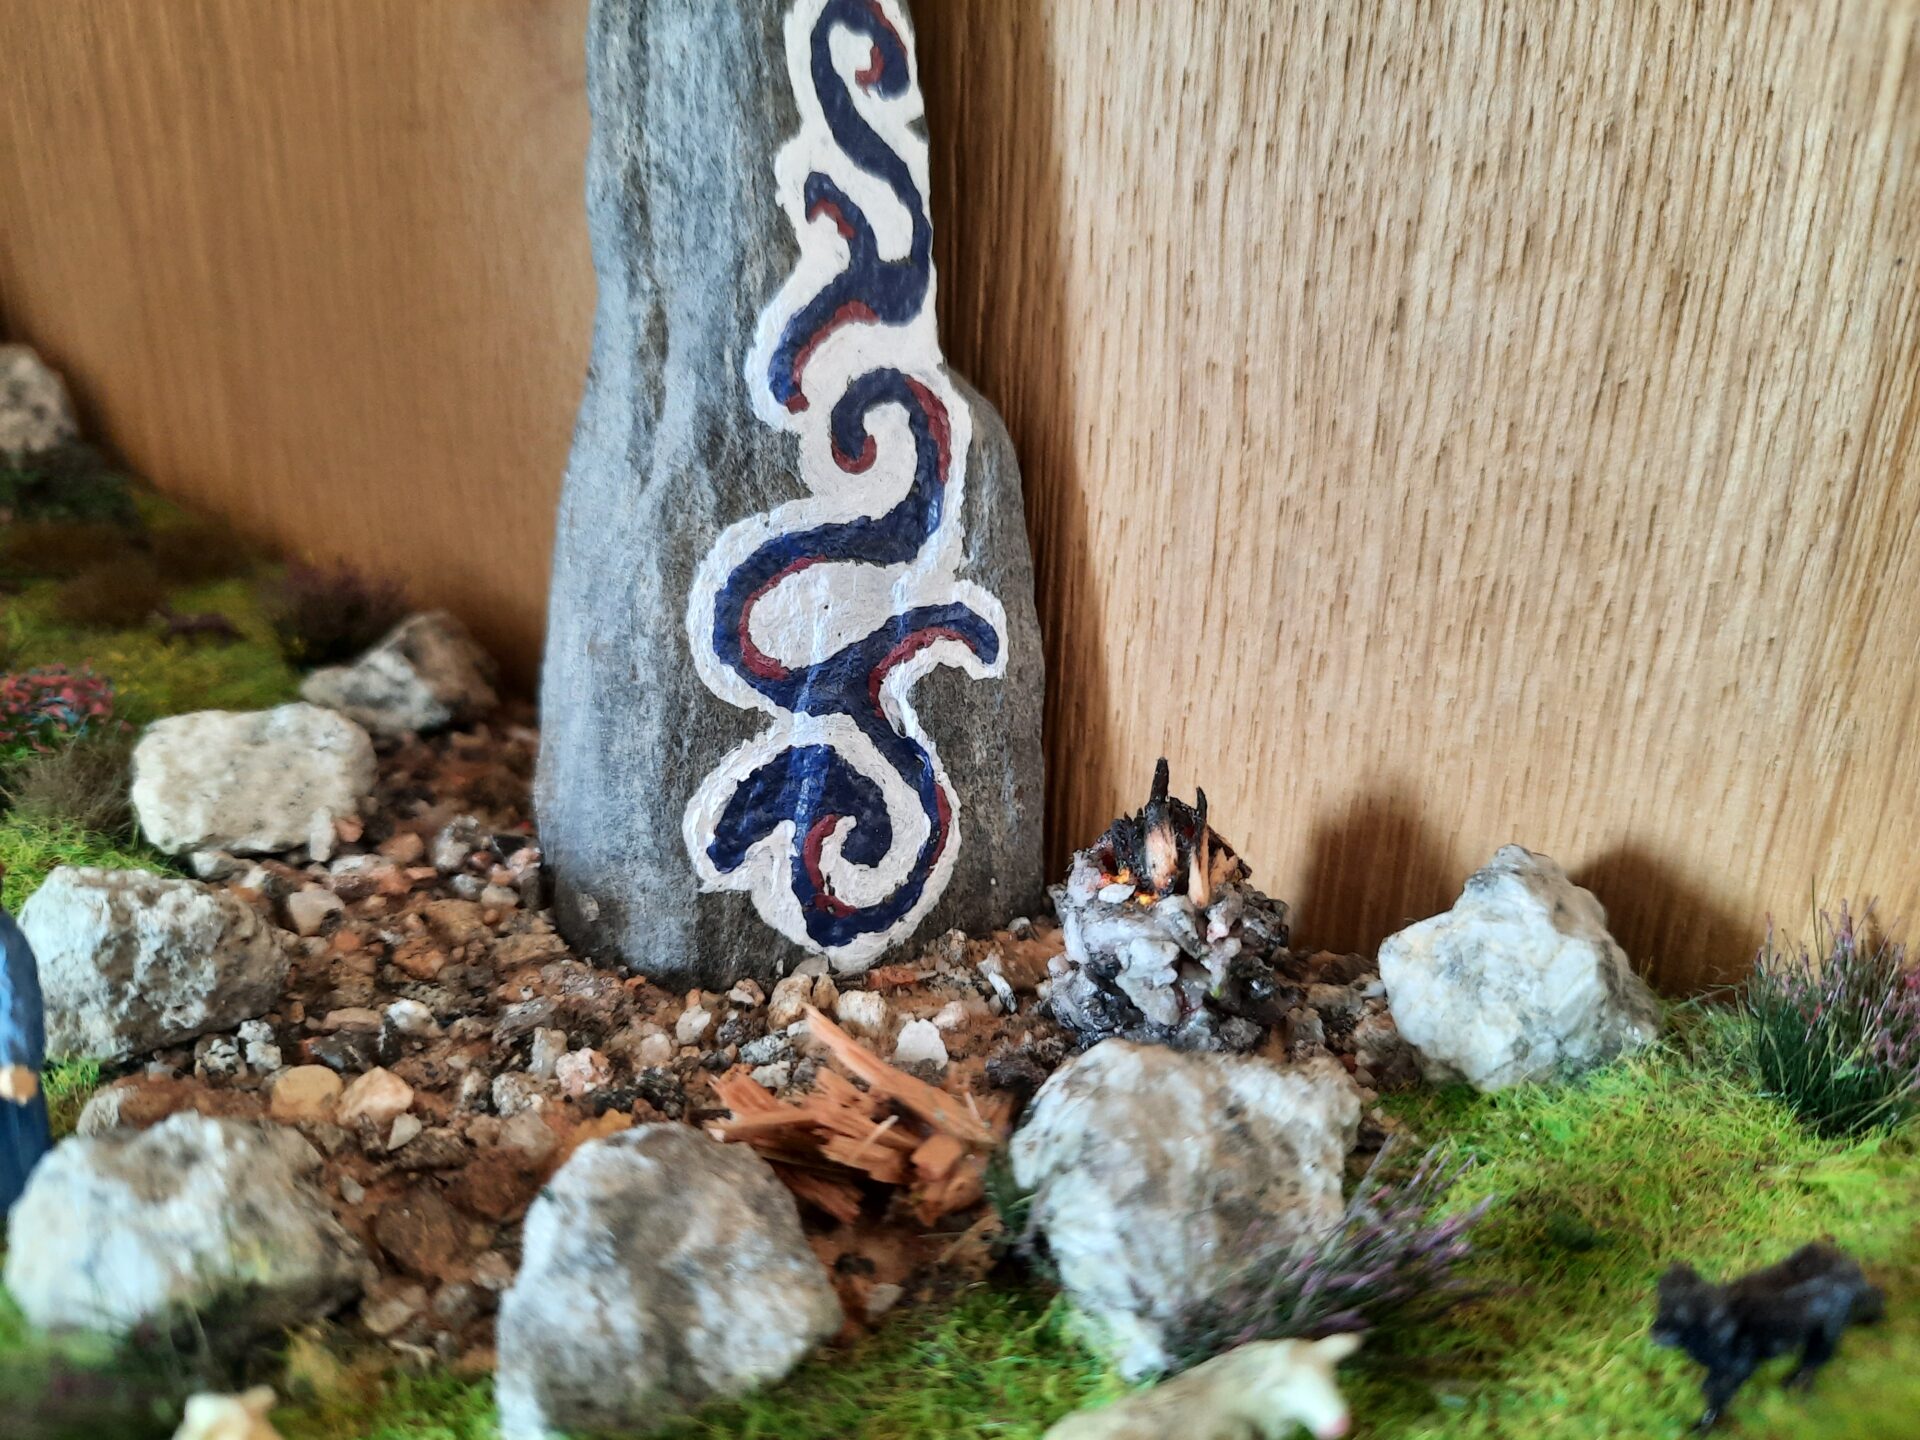
A menhir? Yes, and a special one. The idea of this diorama came to us during a vacation in Valle d’Aosta (Italy) in Summer 2020. We went there with a few friends, in the valley that usually hosted the Celtica Festival. It’s a very important event for us, and even though it was cancelled due to the Covid-19 pandemic, we nonetheless wanted to enjoy the Peuterey Wood in Val Veny with its unique athmosphere. Well, if you walk inside that wood, you’ll find a painted menhir with a hearth. That is the core of the Celtica Festival, that we wanted to recreate in our diorama to remind us of that special event. Just a suggestion, the diorama is not intended as a mere reproduction of the Peuterey wood or its surroundings, but a sum of the mountain features of Val Veny.

In this photo, Locutus and Rici are standing in front of the Peuterey Wood menhir during Celtica 2018.
Photo by MBR Photography
Celtica Festival, where no one is a stranger
“There are no strangers here; Only friends you haven’t yet met.”
This quote by William Butler Yeats sums up the soul of Celtica Festival better than anything else.
What is Celtica Festival? If you ask someone who knows it, they will probably answer: “to know it, you have to live it”.
It would require more than a small box to tell what it is. Celtica is an experience. When you try it for the first time, youl’ll never be the same.

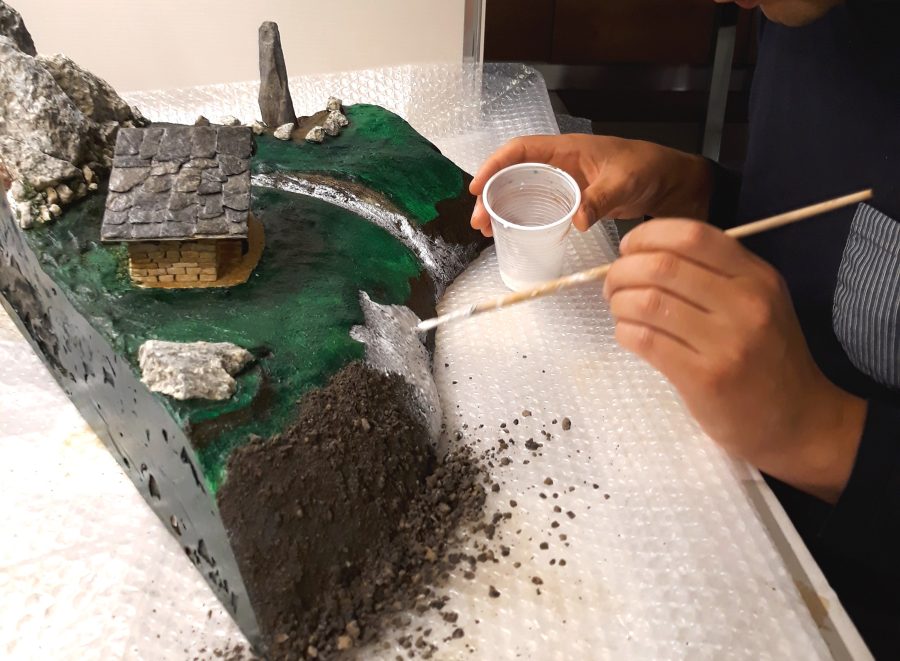
After a basic green painting on the diorama base, plus a rough definition of earth colored parts on the lakeshore, the riverbed and the area of the menhir, we began adding texture to the surface.
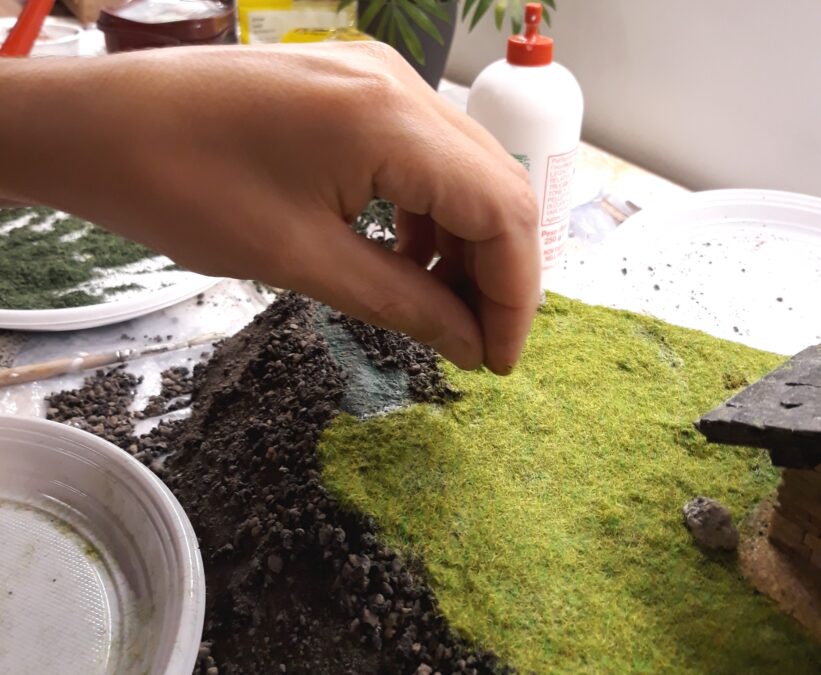
We grated a bunch of expanded clay balls to be our soil and attached it on the diorama with vinyl glue. I think the final effect was awesome, so similar to the real slope of a mountain lakeshore!
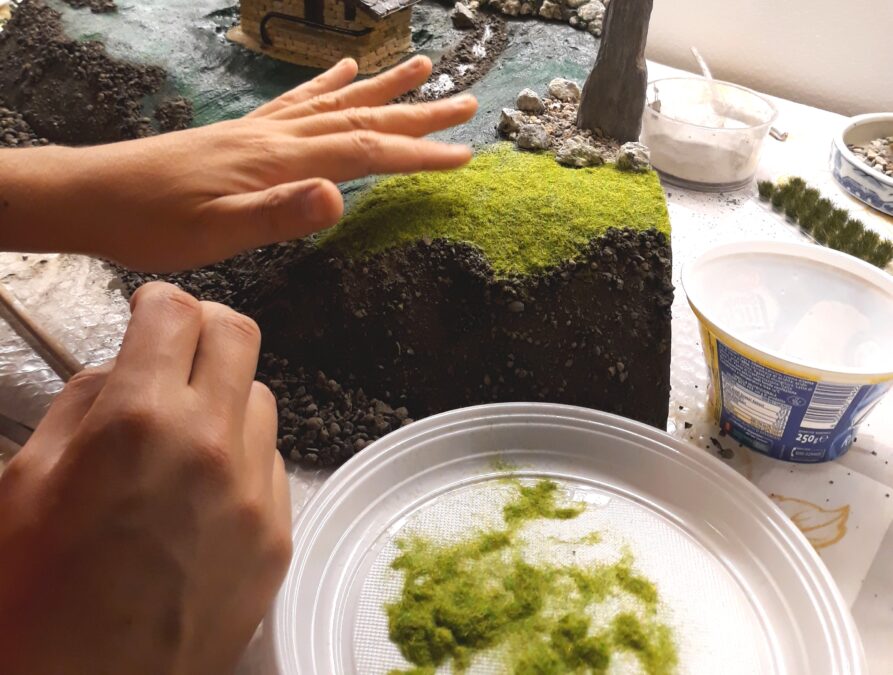
Next, the grass. We used proper grass for model making, and we highly appreciated the result. There are special tools to use as a grass applicator for models, it helps the grass stand straight up to have a more natural look. We didn’t have one, so we just glued the surface and spread out our grass. The result was good, though.
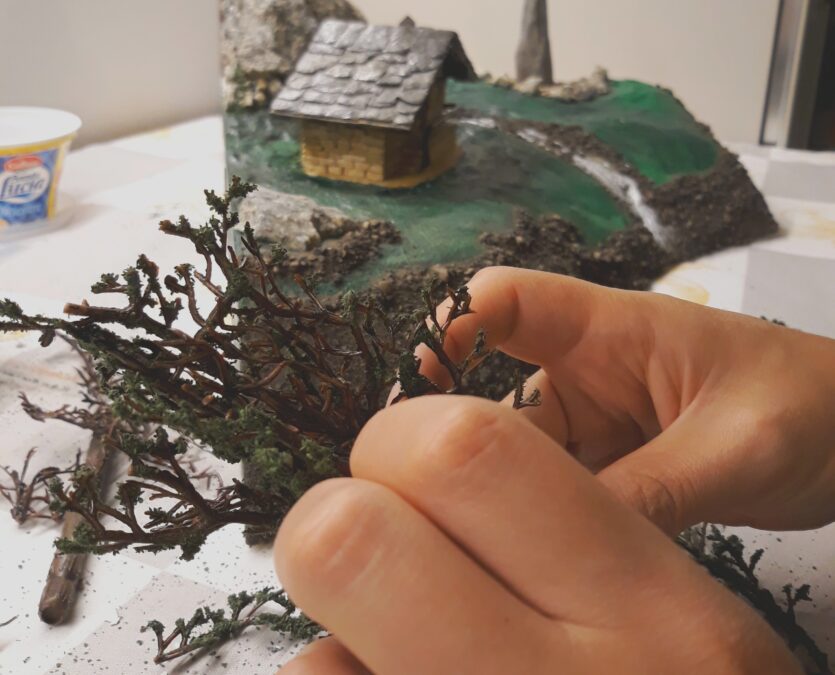
With darker grass and leaves, we then made the trees that we wanted to place behind the house.
At first, we wanted to follow a tutorial from YouTube to make trees out of copper cables, but one day in a shop we found a home decoration, a brown plastic seaweed that could be adapted to become branches. My husband cut it in pieces to be glued together to make the basic shape of the tree. He then glued modelling grass and leaves on the top branches.
I have to say the result was satisfying, but I think for the next project I will for sure try to make trees out of copper wires. The ones I saw around were fantastic, so why not give it a try?
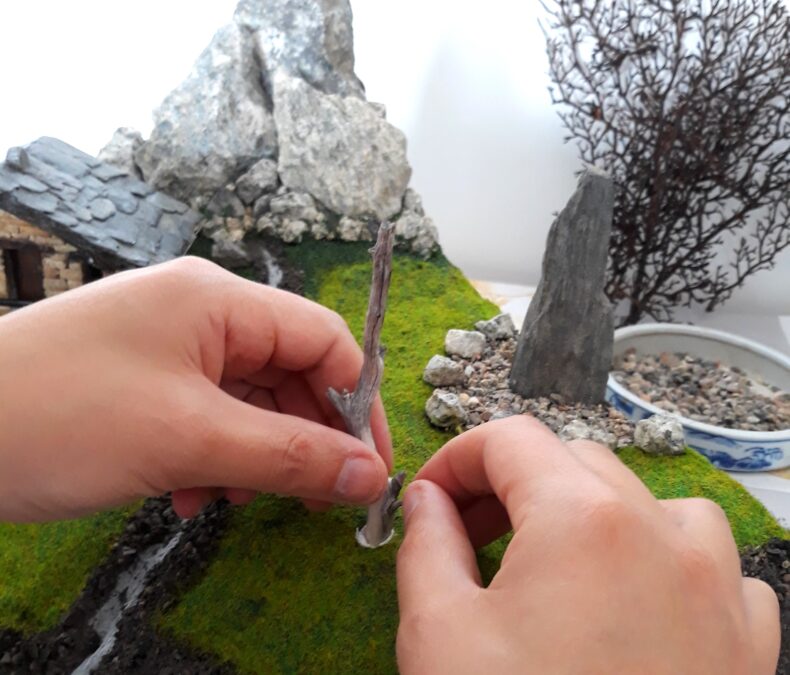
Plus, we added a small branch we found during a walk in the woods as a dead tree. Don’t you think it has the perfect appearance of an old dead tree in minature?

I have to say, during the making of this diorama our workspace was a mess: loads of different stuff all around the table! Thank goodness, we have a table to dedicate to our DIY projects!

Having the proper space for our creations is essential. It’s a corner in our living room, where we work on the tables my husband made before moving to this house. I should say more about them one day, do you agree?

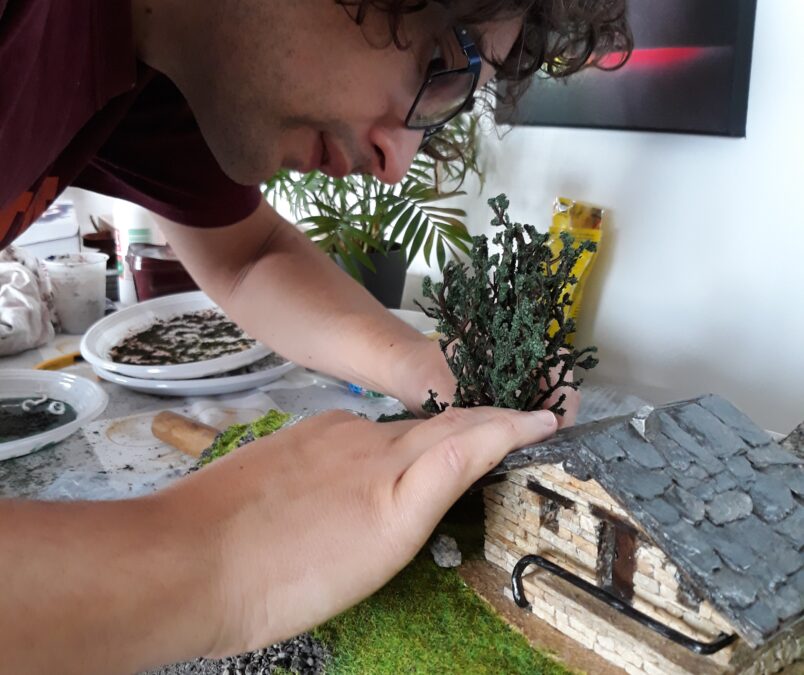
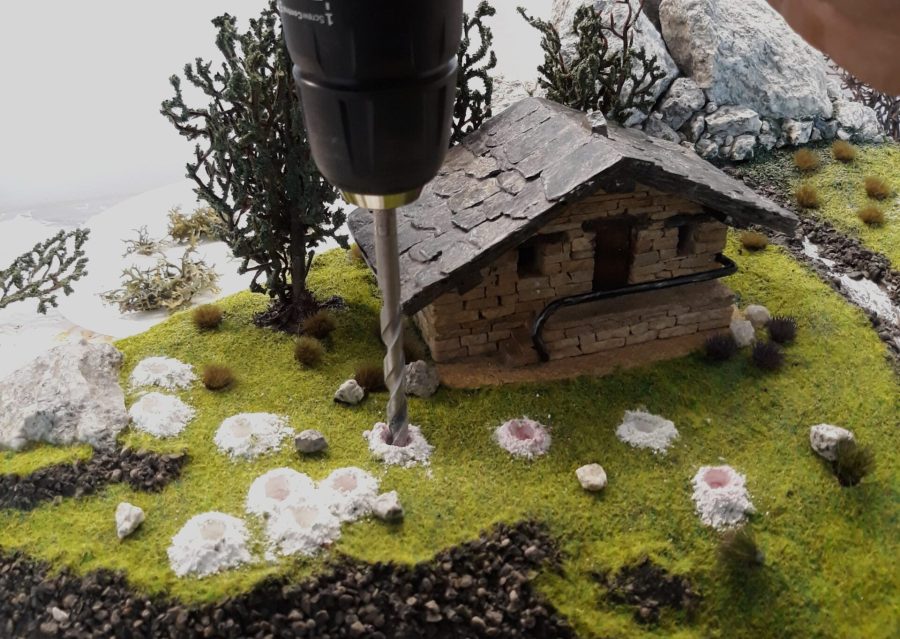
Well, after grass and trees we added bushes, scattered all over the meadow.
Those also came from the model making shop. My husband drilled small holes to accomodate each one, with vinyl glue.
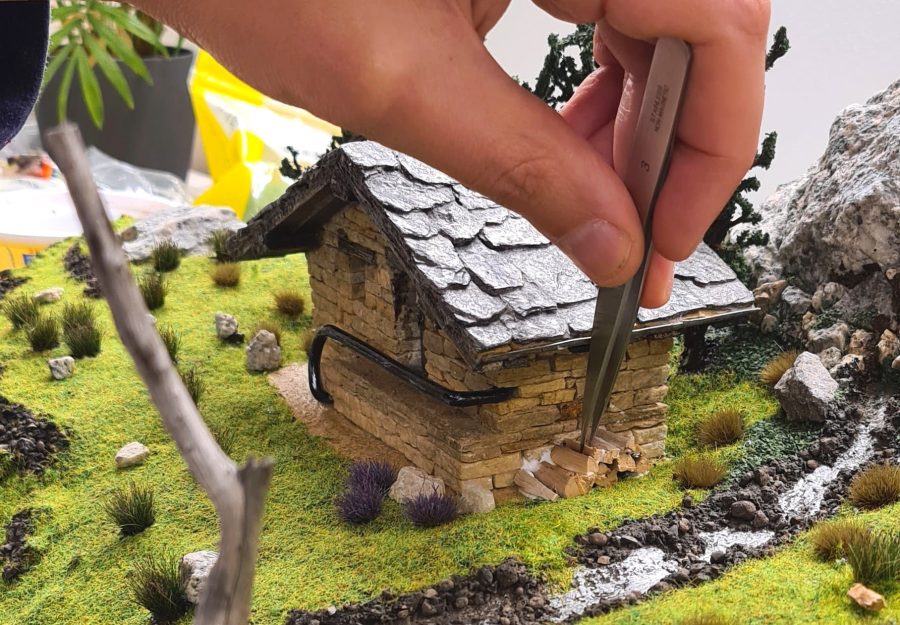
He also cut tiny pieces of wood to arrange a pile next to the cottage. Just to add a hint of human life to the diorama, since we decided not to add people or animals.
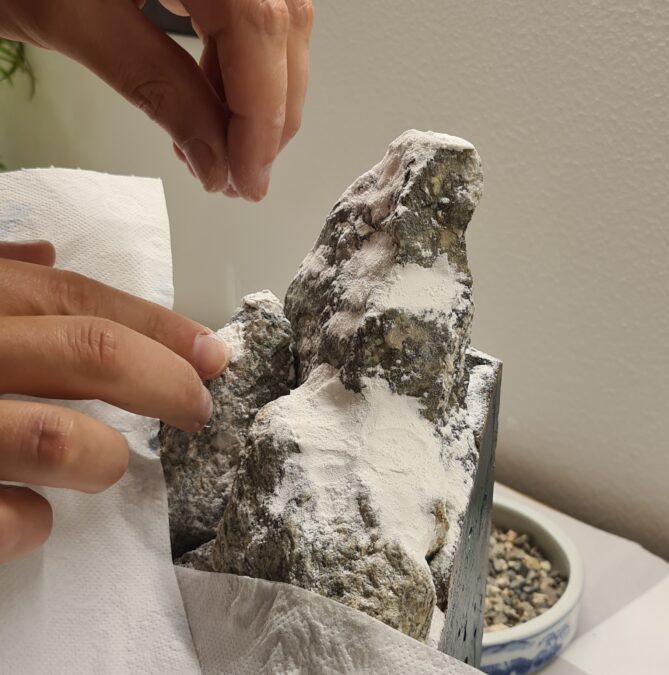
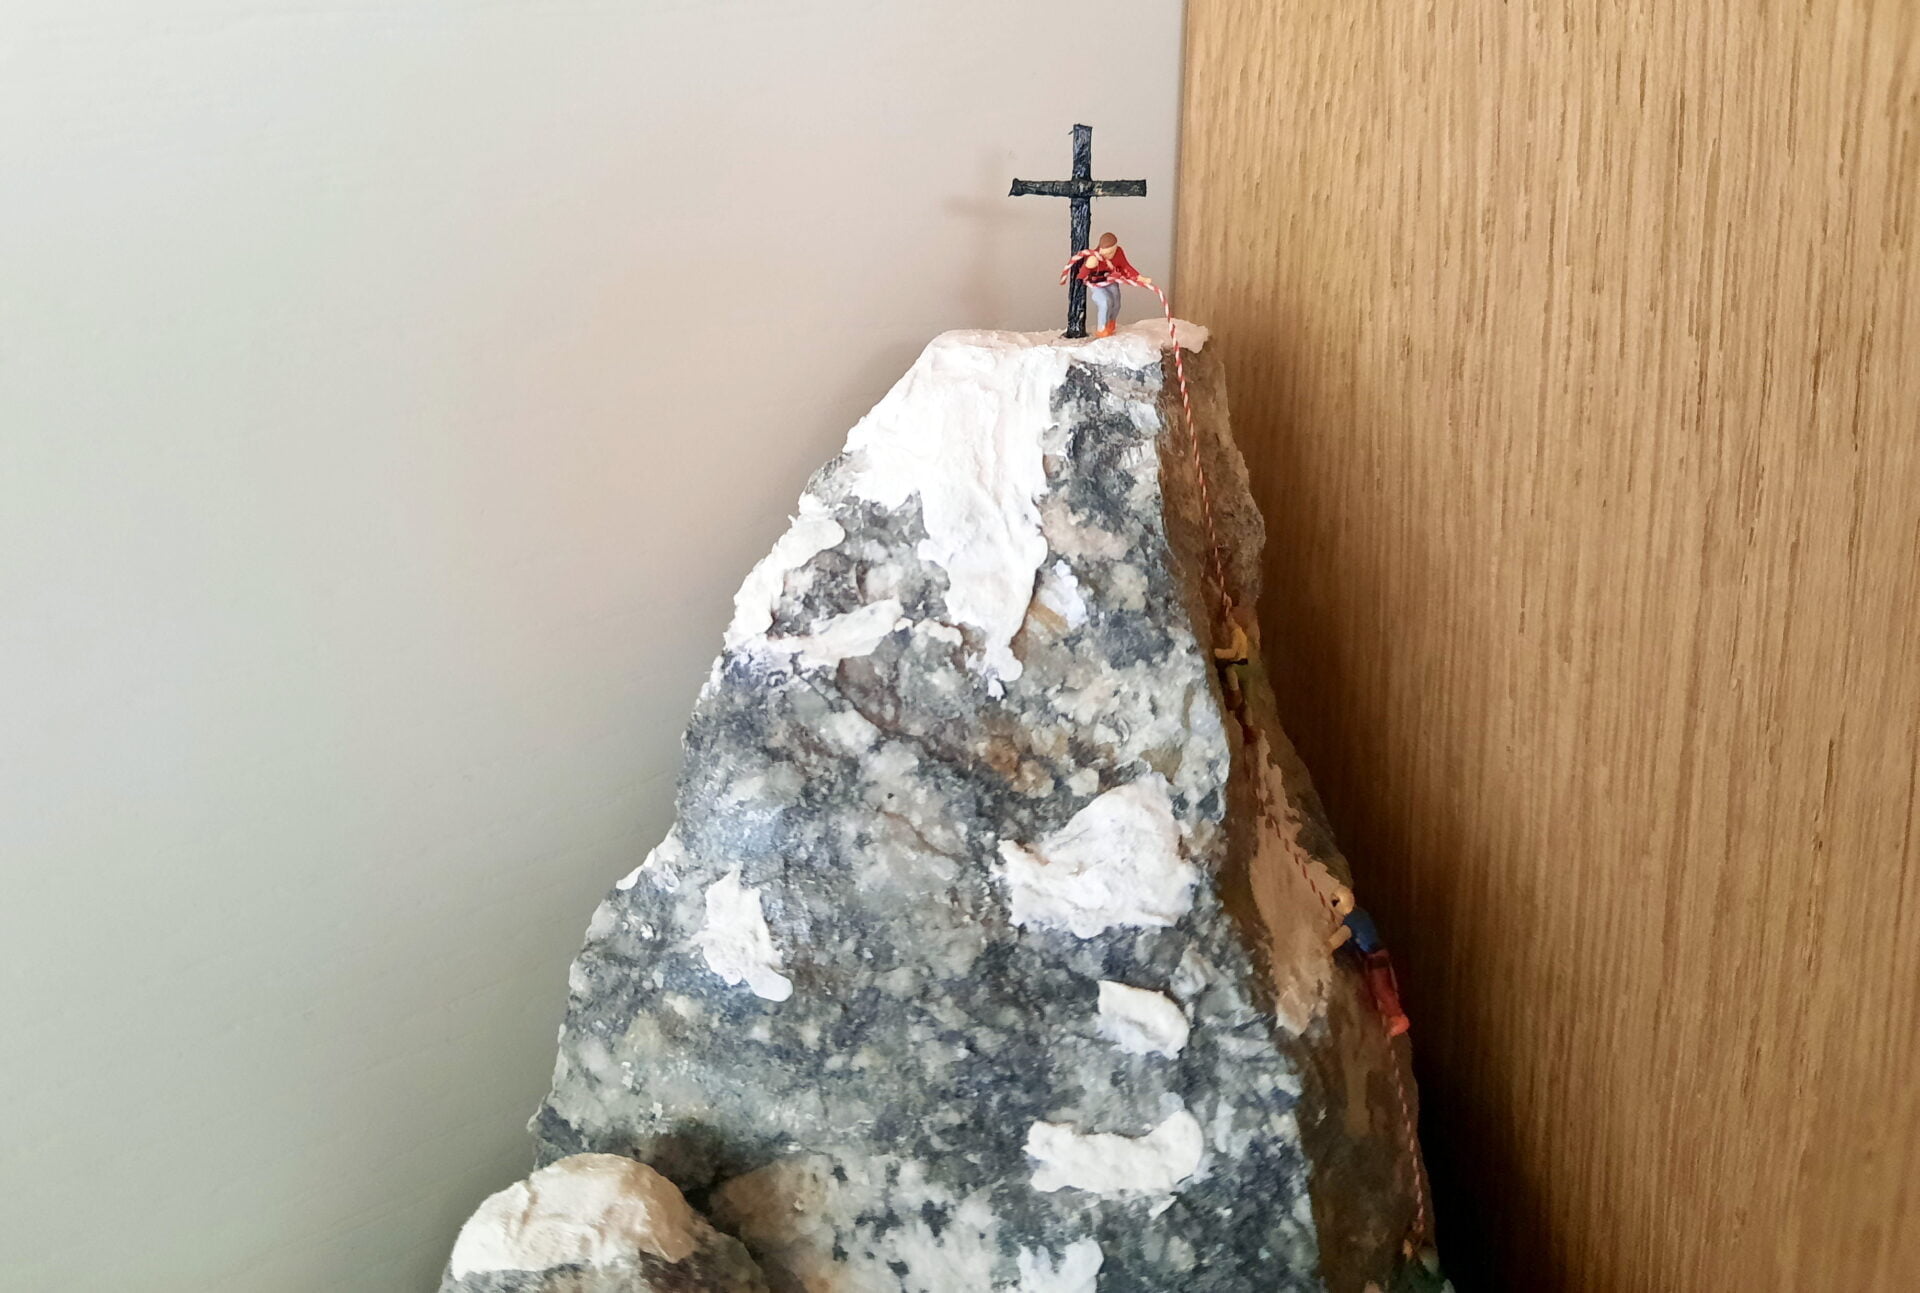
Next came the snow on the peaks.
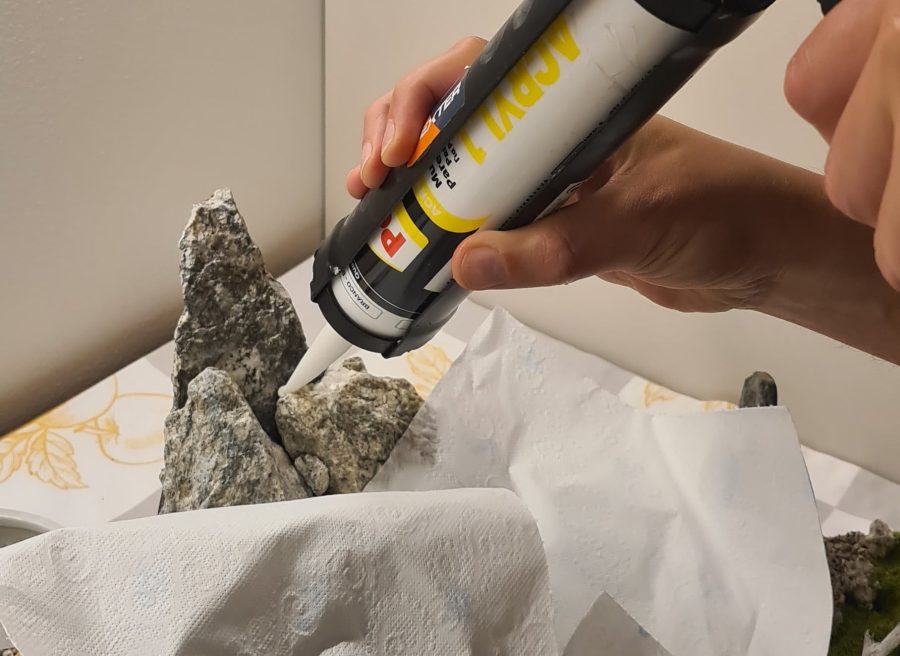
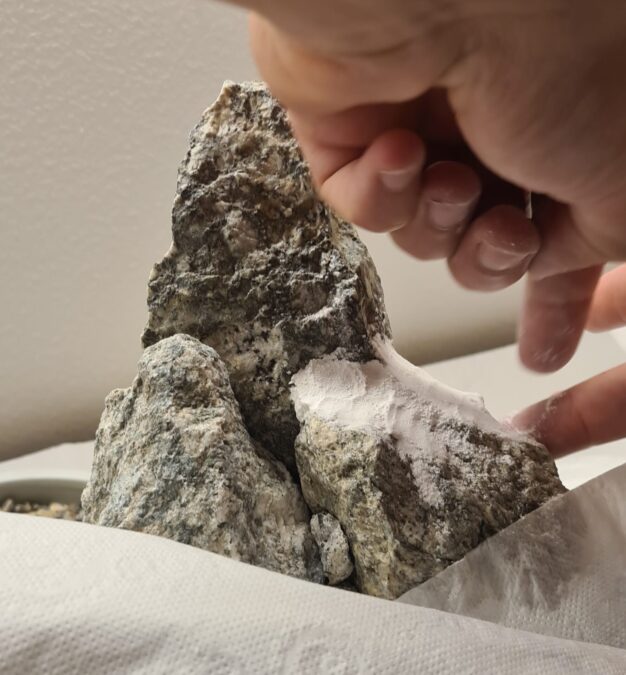
I have to say we’ve been lucky about it. In Val Veny we happened to find white stones that literally crumbled in our hands. We tried to grate them and obtained a soft powder that had the perfect appearance of snow! To attach it to the top of our mountains on the diorama, we used white sylicon glue. This way, we obtained a sort of compact old glacier on top of which rested fresh snow.
I think this feature added a plus to our project! Do you agree?


And after four months of work, finally time came for epoxy resin.
We made a mould being really careful about leaks: we took every precaution to avoid a leakage!
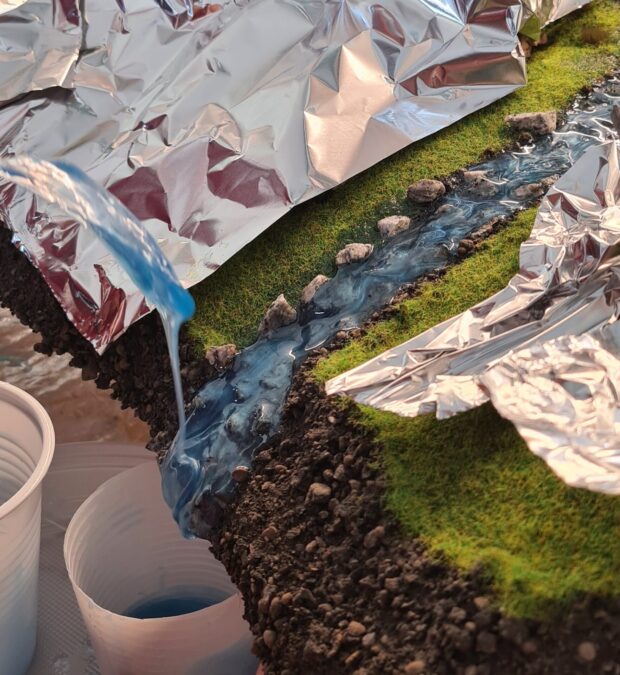
We mixed our 1:06 resin with a blue powder pigment. The final color was not what we expected: we wanted a semi-transparent look, we even placed algae at the bottom of the lake, but they aren’t visible now. I suppose we used too much pigment. No big bother, though, could have been worse for our first deep pour!
First, though, we poured the stream, even before placing the diorama inside the mould. We lifted the project and placed a plastic container to collect the resin falling from the stream. When it was dry, we poured the lake.
We followed the instructions on our resin, so we stacked three different layers. We poured the next one when the previous was not completely cured, so we could mix them together with a stick, to have a fluid color at the end.
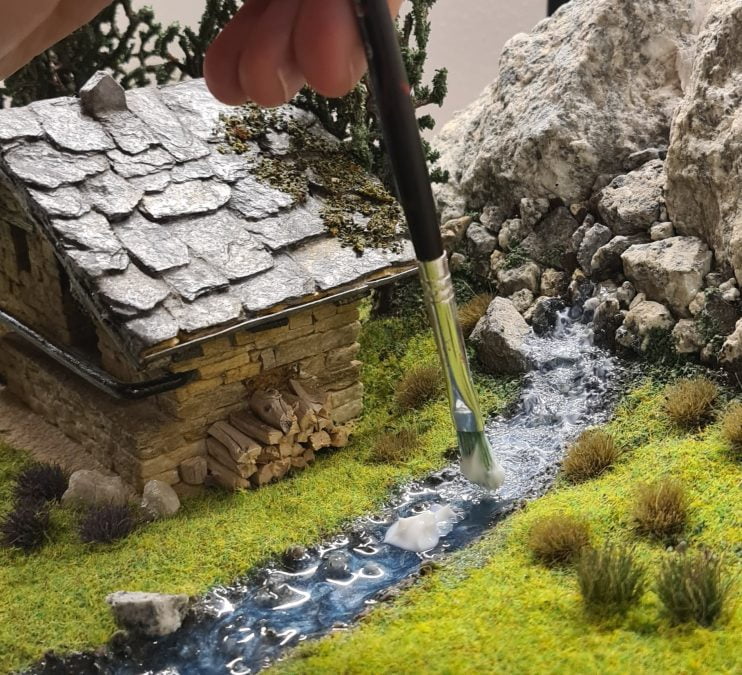
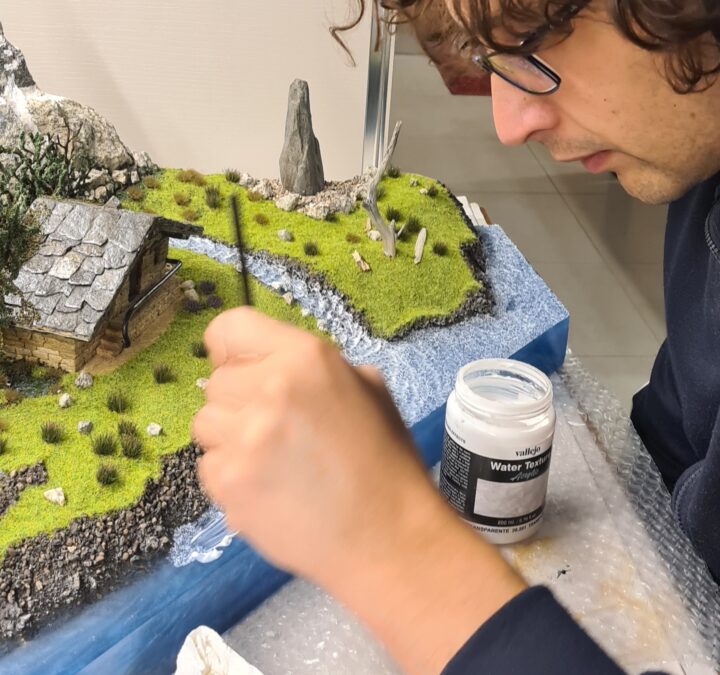
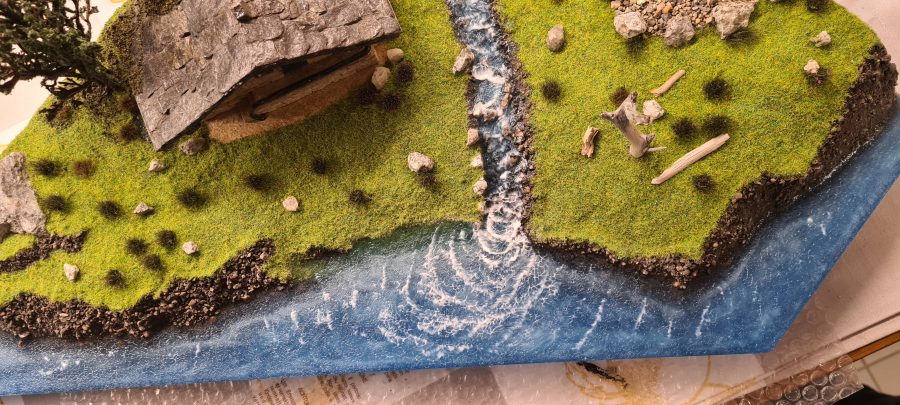
The resin alone was not enough, though.
With an acrylic water texture, my husband carefully added waves, both on the stream and the lake surface. It was super easy, and the final effect gave the whole water the natural effect we looked for.
While painting the resin with it, it seemed we were covering all the blue surface with a white layer, but after drying it became more transparent, so we even painted the waves crests white.


Last addition, one I particularly wanted, was painting the menhir with blue triskells, to remind us of the original one in Val Veny.
I was not able to reproduce the original drawings, since our rock is too small for the details to be seen. Of all the original menhir faces, I re-designed one, the most famous (and the easier to draw), then my husband painted it on our rock.
I think we managed to give it the feel we wanted, despite all.
In the end it took us five months from start to finish, it required all our skills, loads of different materials gathered here and there, but we managed to finish our first big diorama with a deep pour of epoxy resin.
Now it stands on our shelf, visible from our sofa. Every time we want to think about the mountains, Celtica and Valle d’Aosta, or simply to enjoy the sight of something we made ourselves, it’s there to be seen.
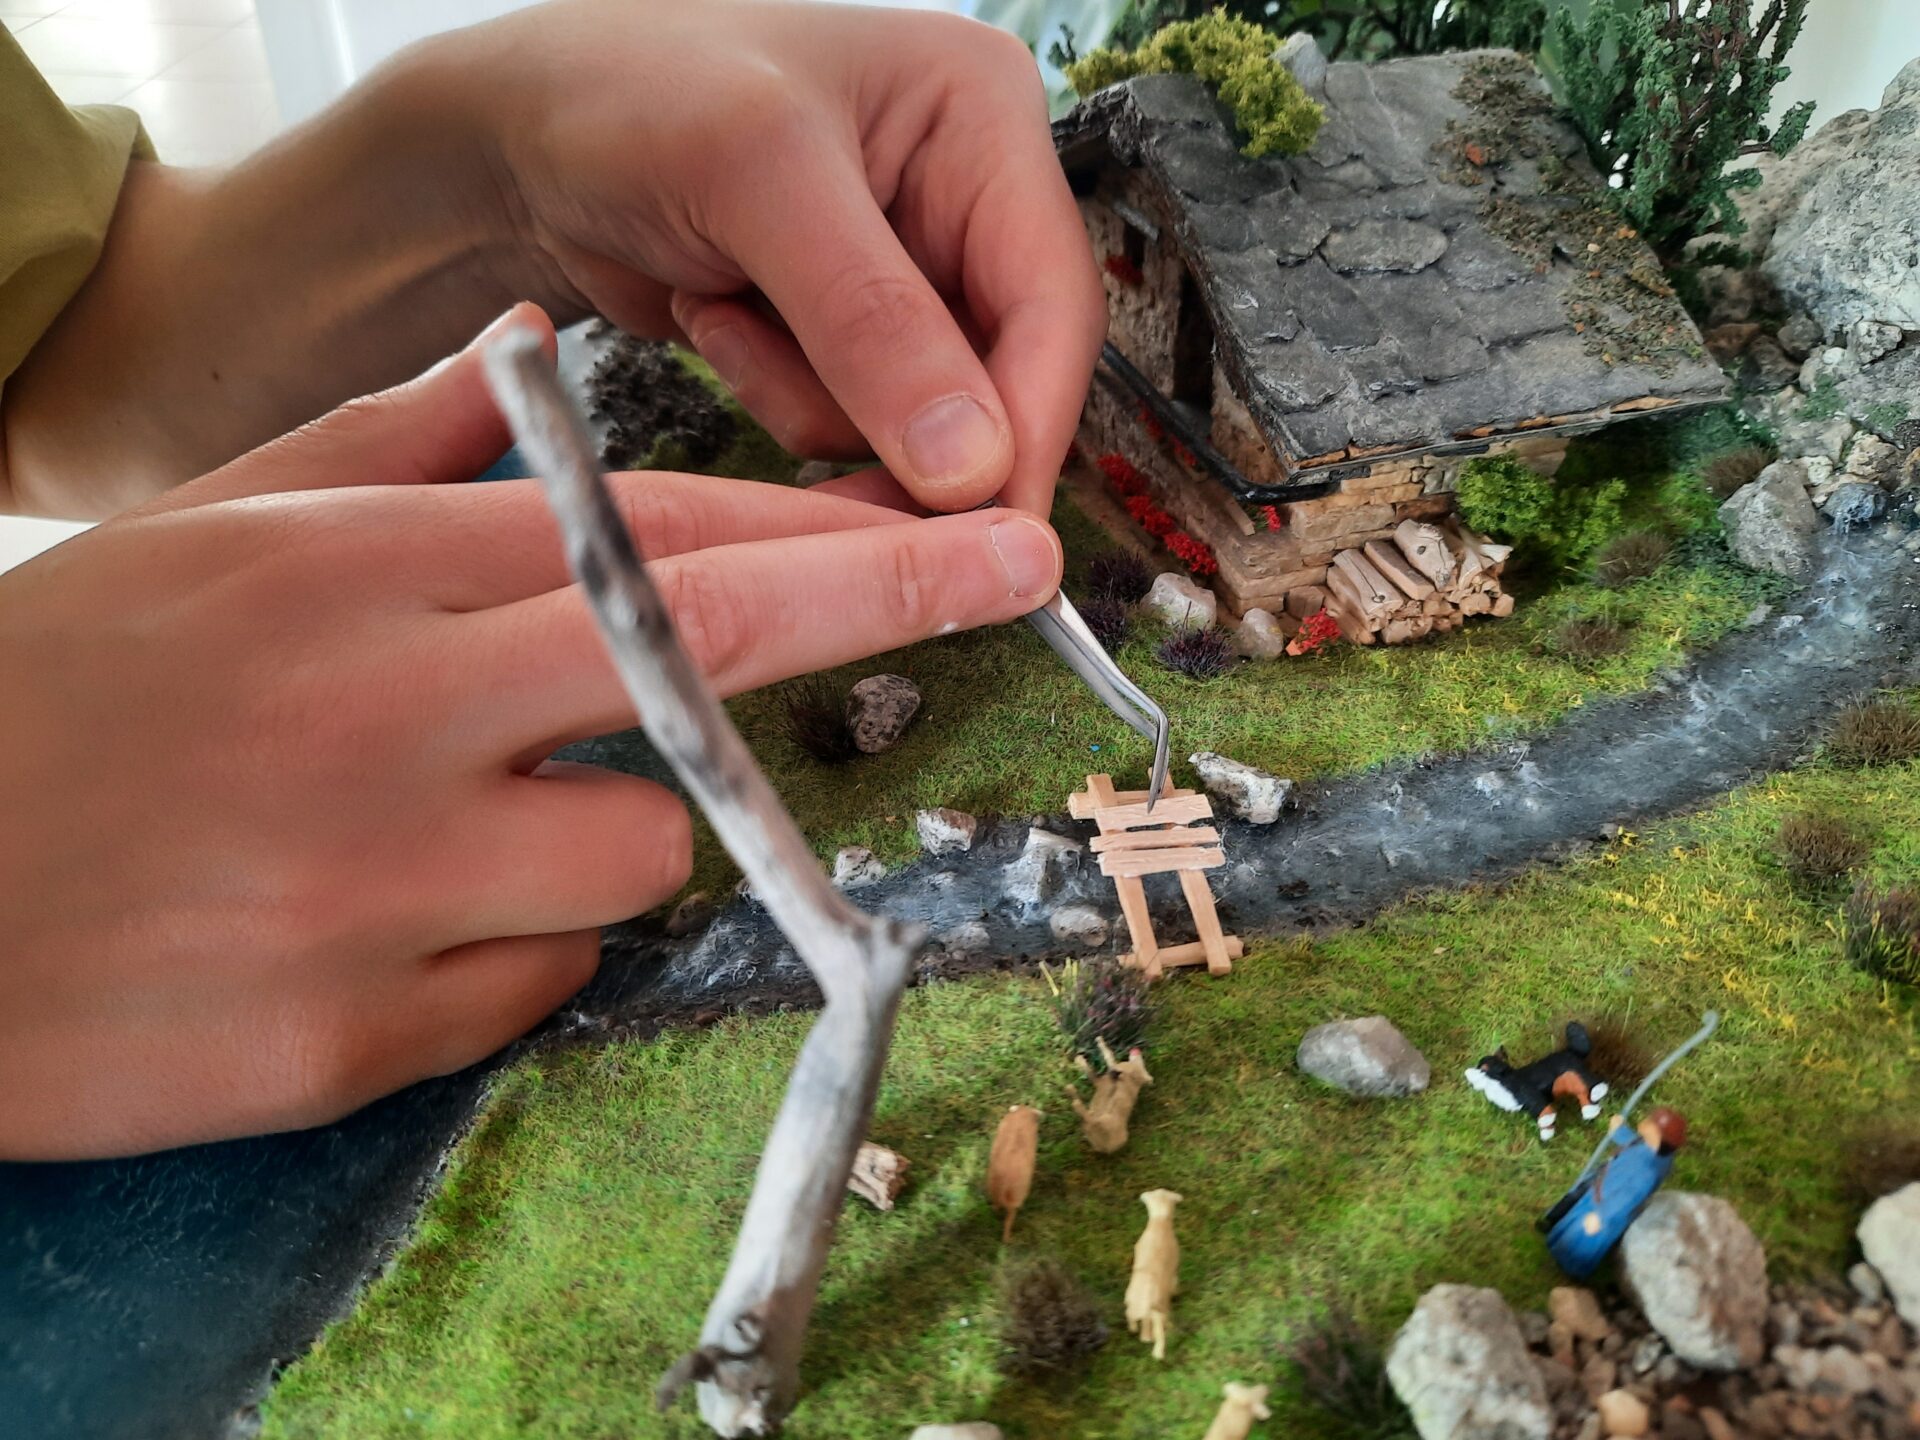
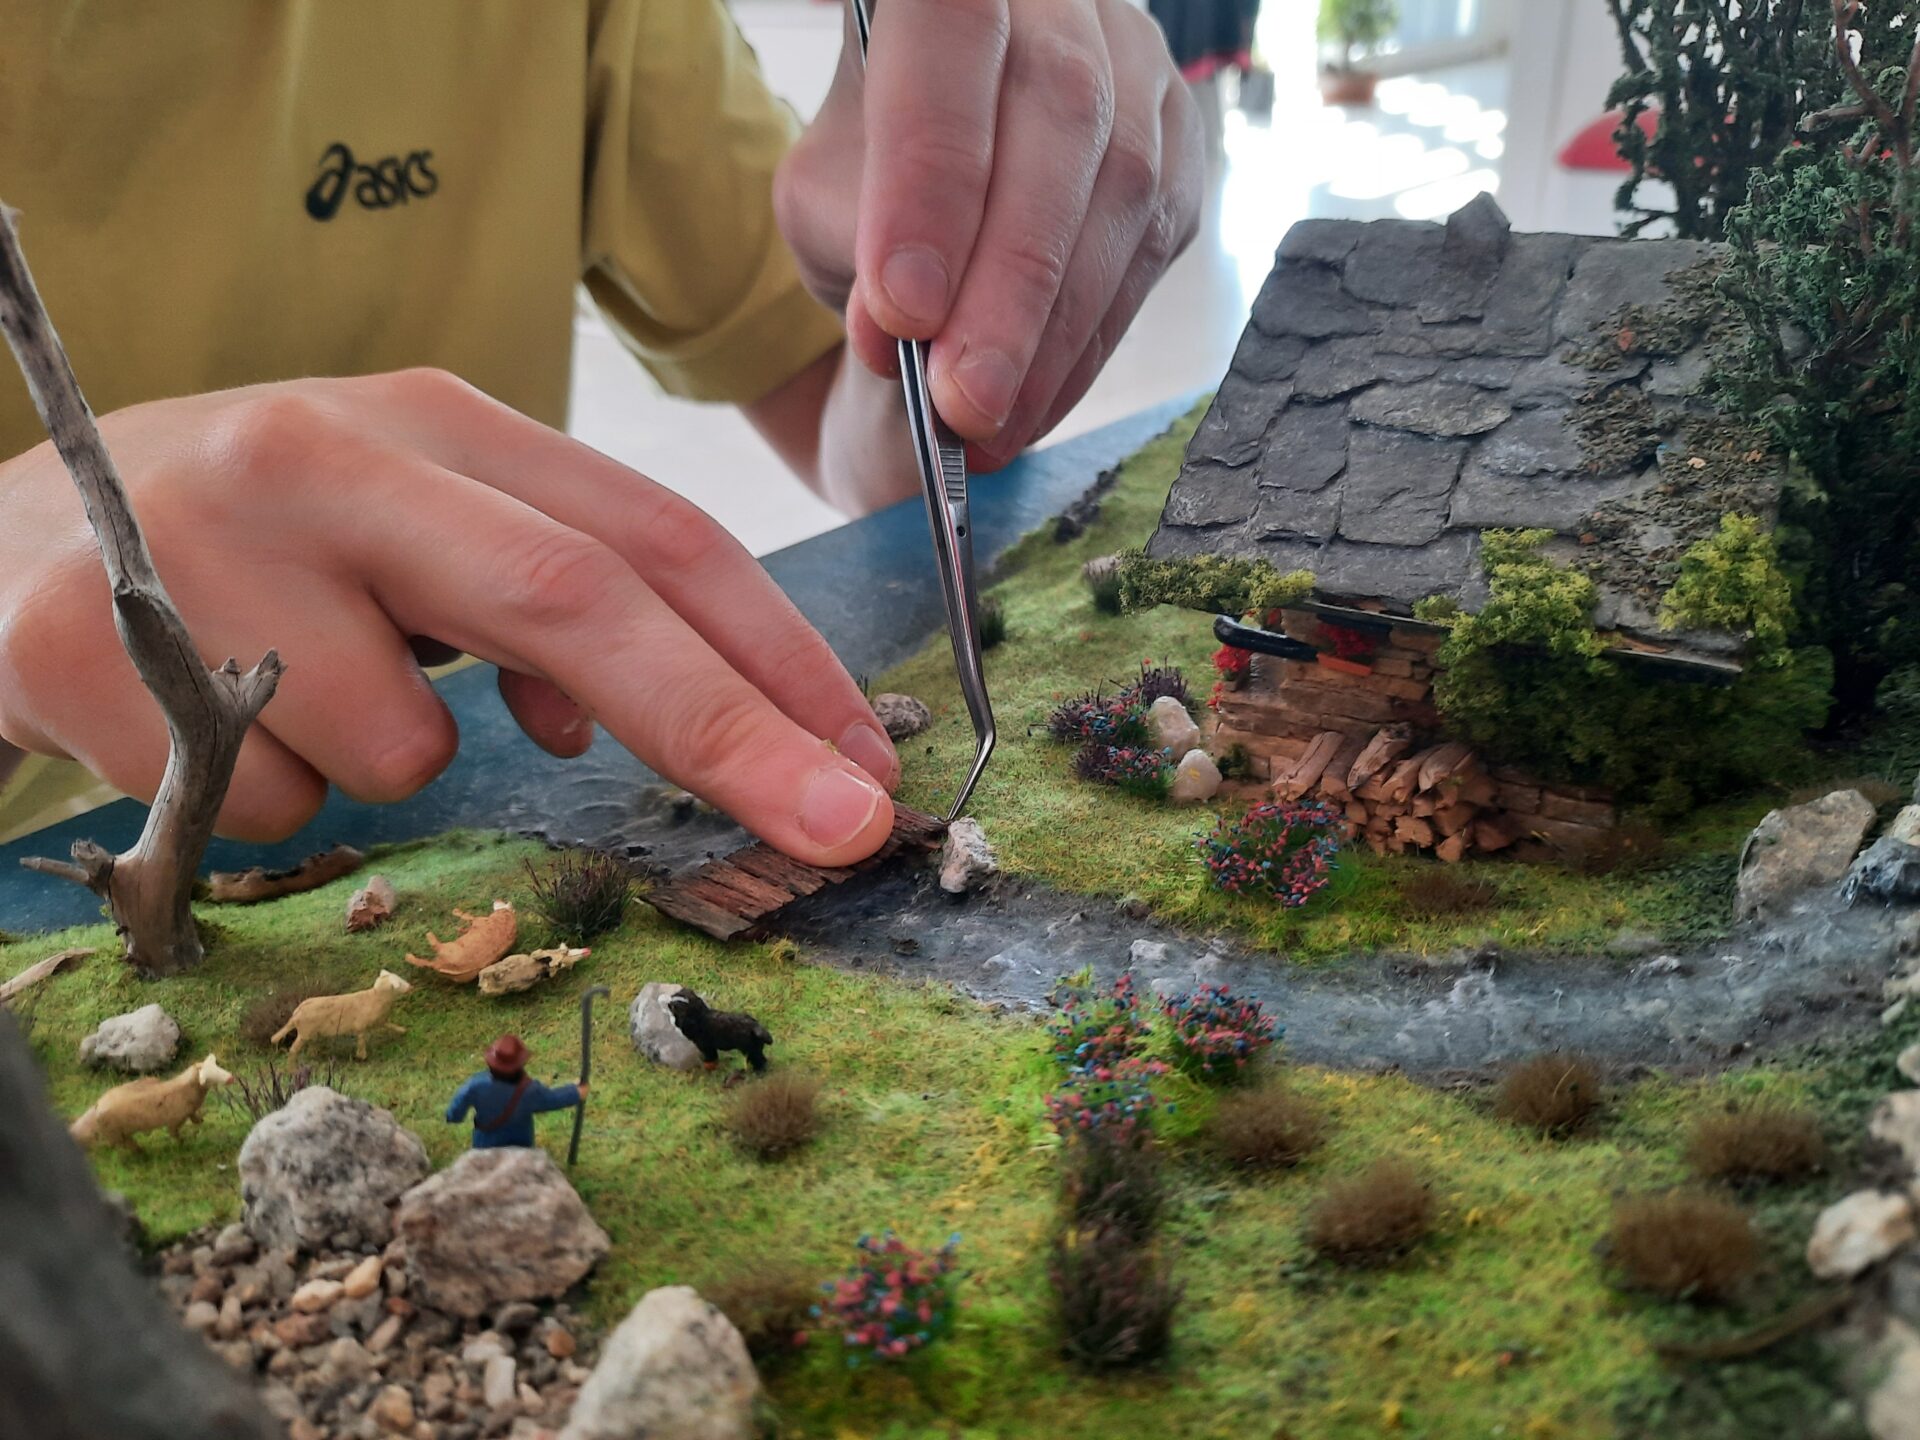
Well… I say finished, here, but… after this diorama rested for a couple of years on the shelf, we decided it lacked something. It still lacked life.
So we decided to add life to our mountain diorama!


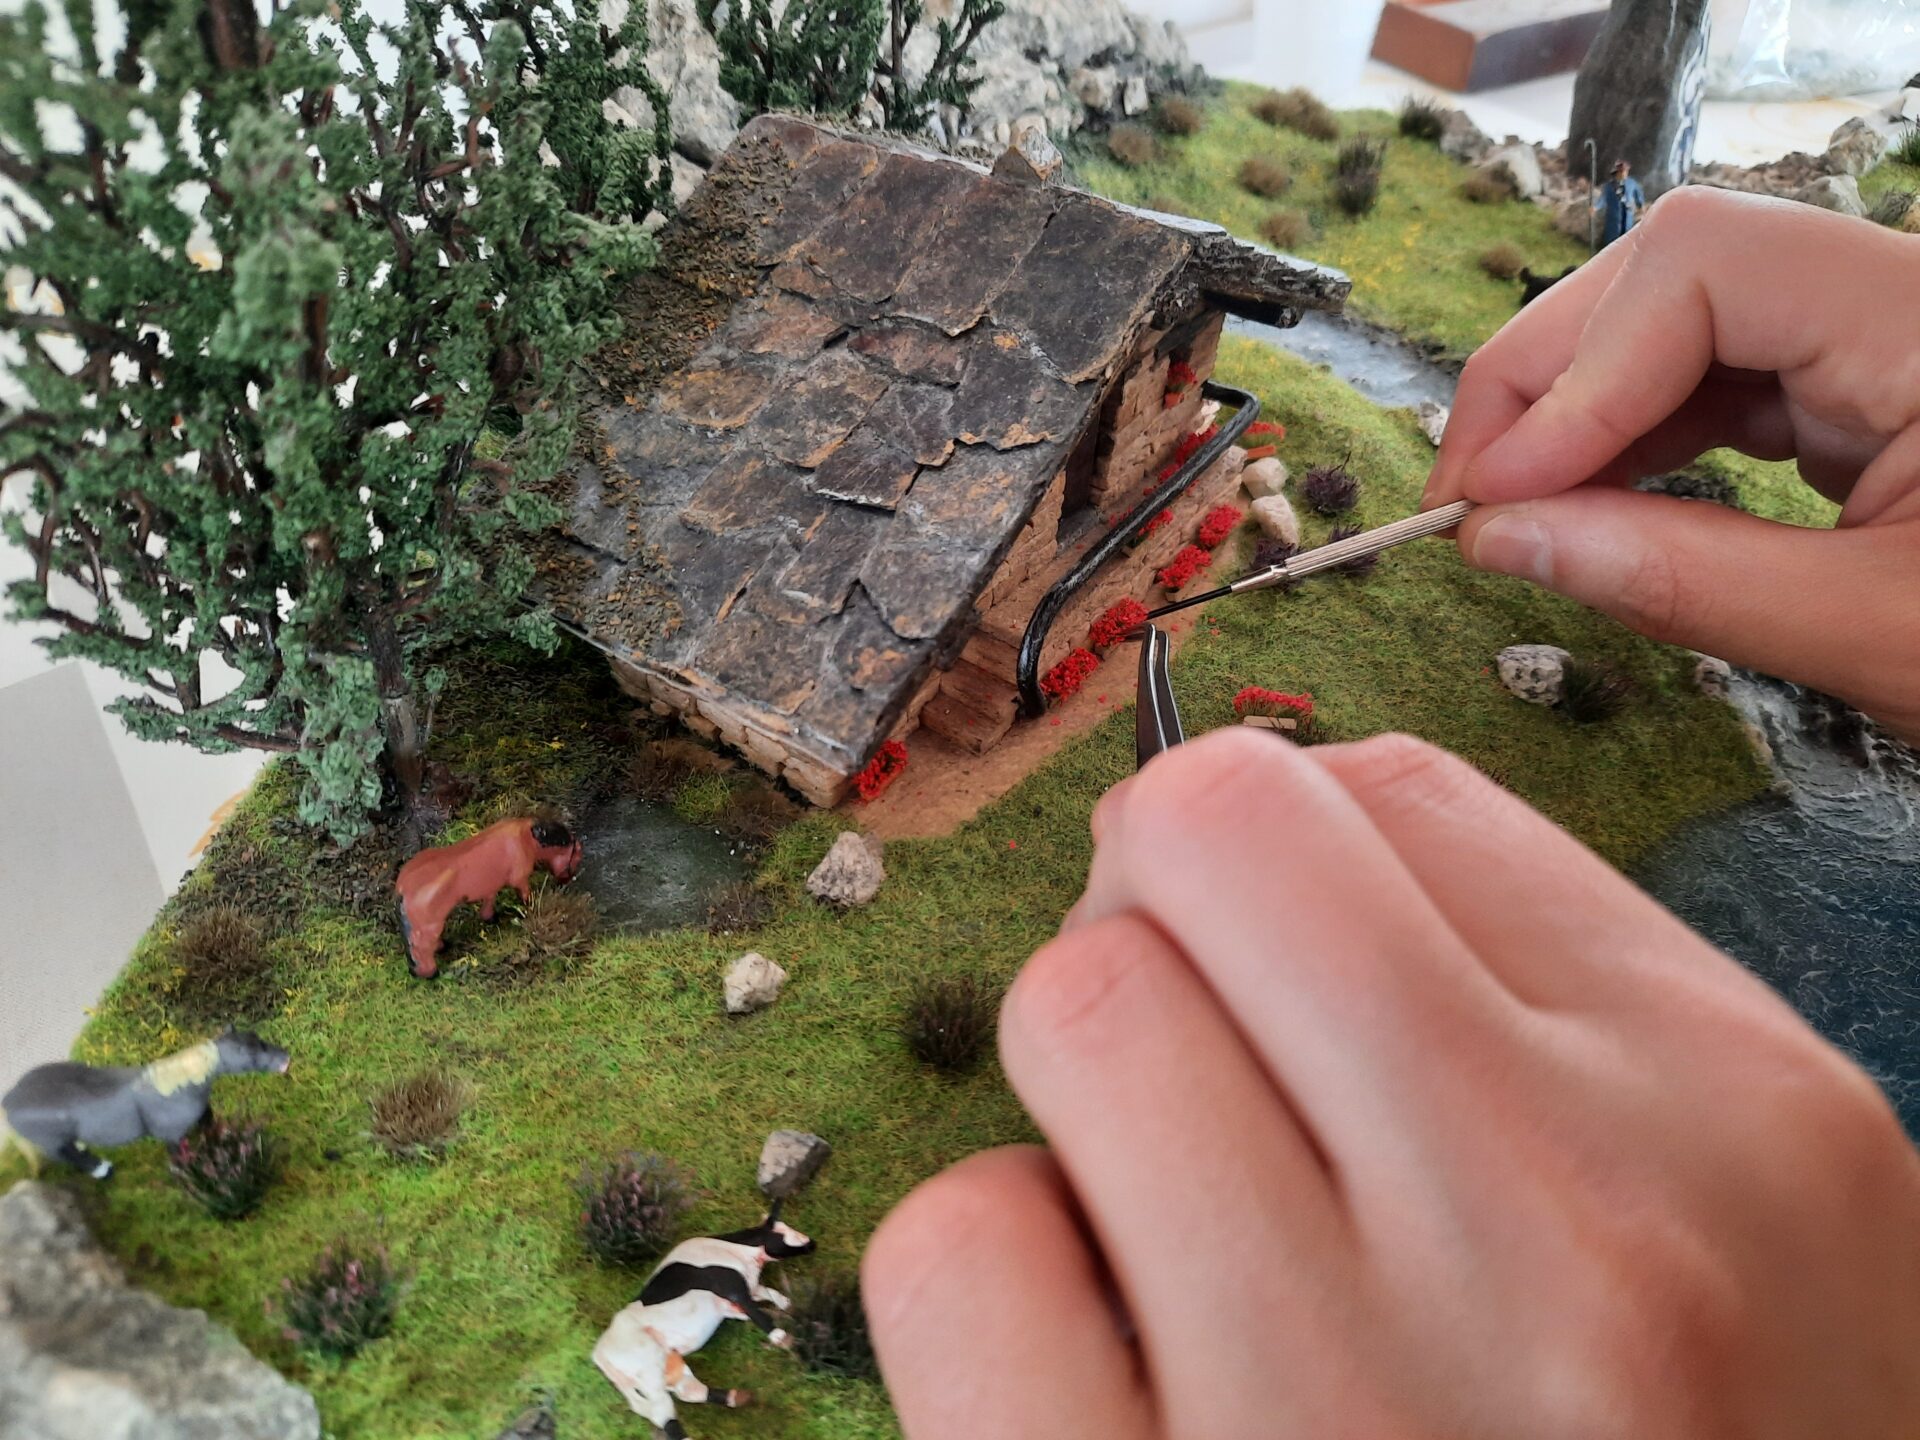
In total we added about 50 objects!
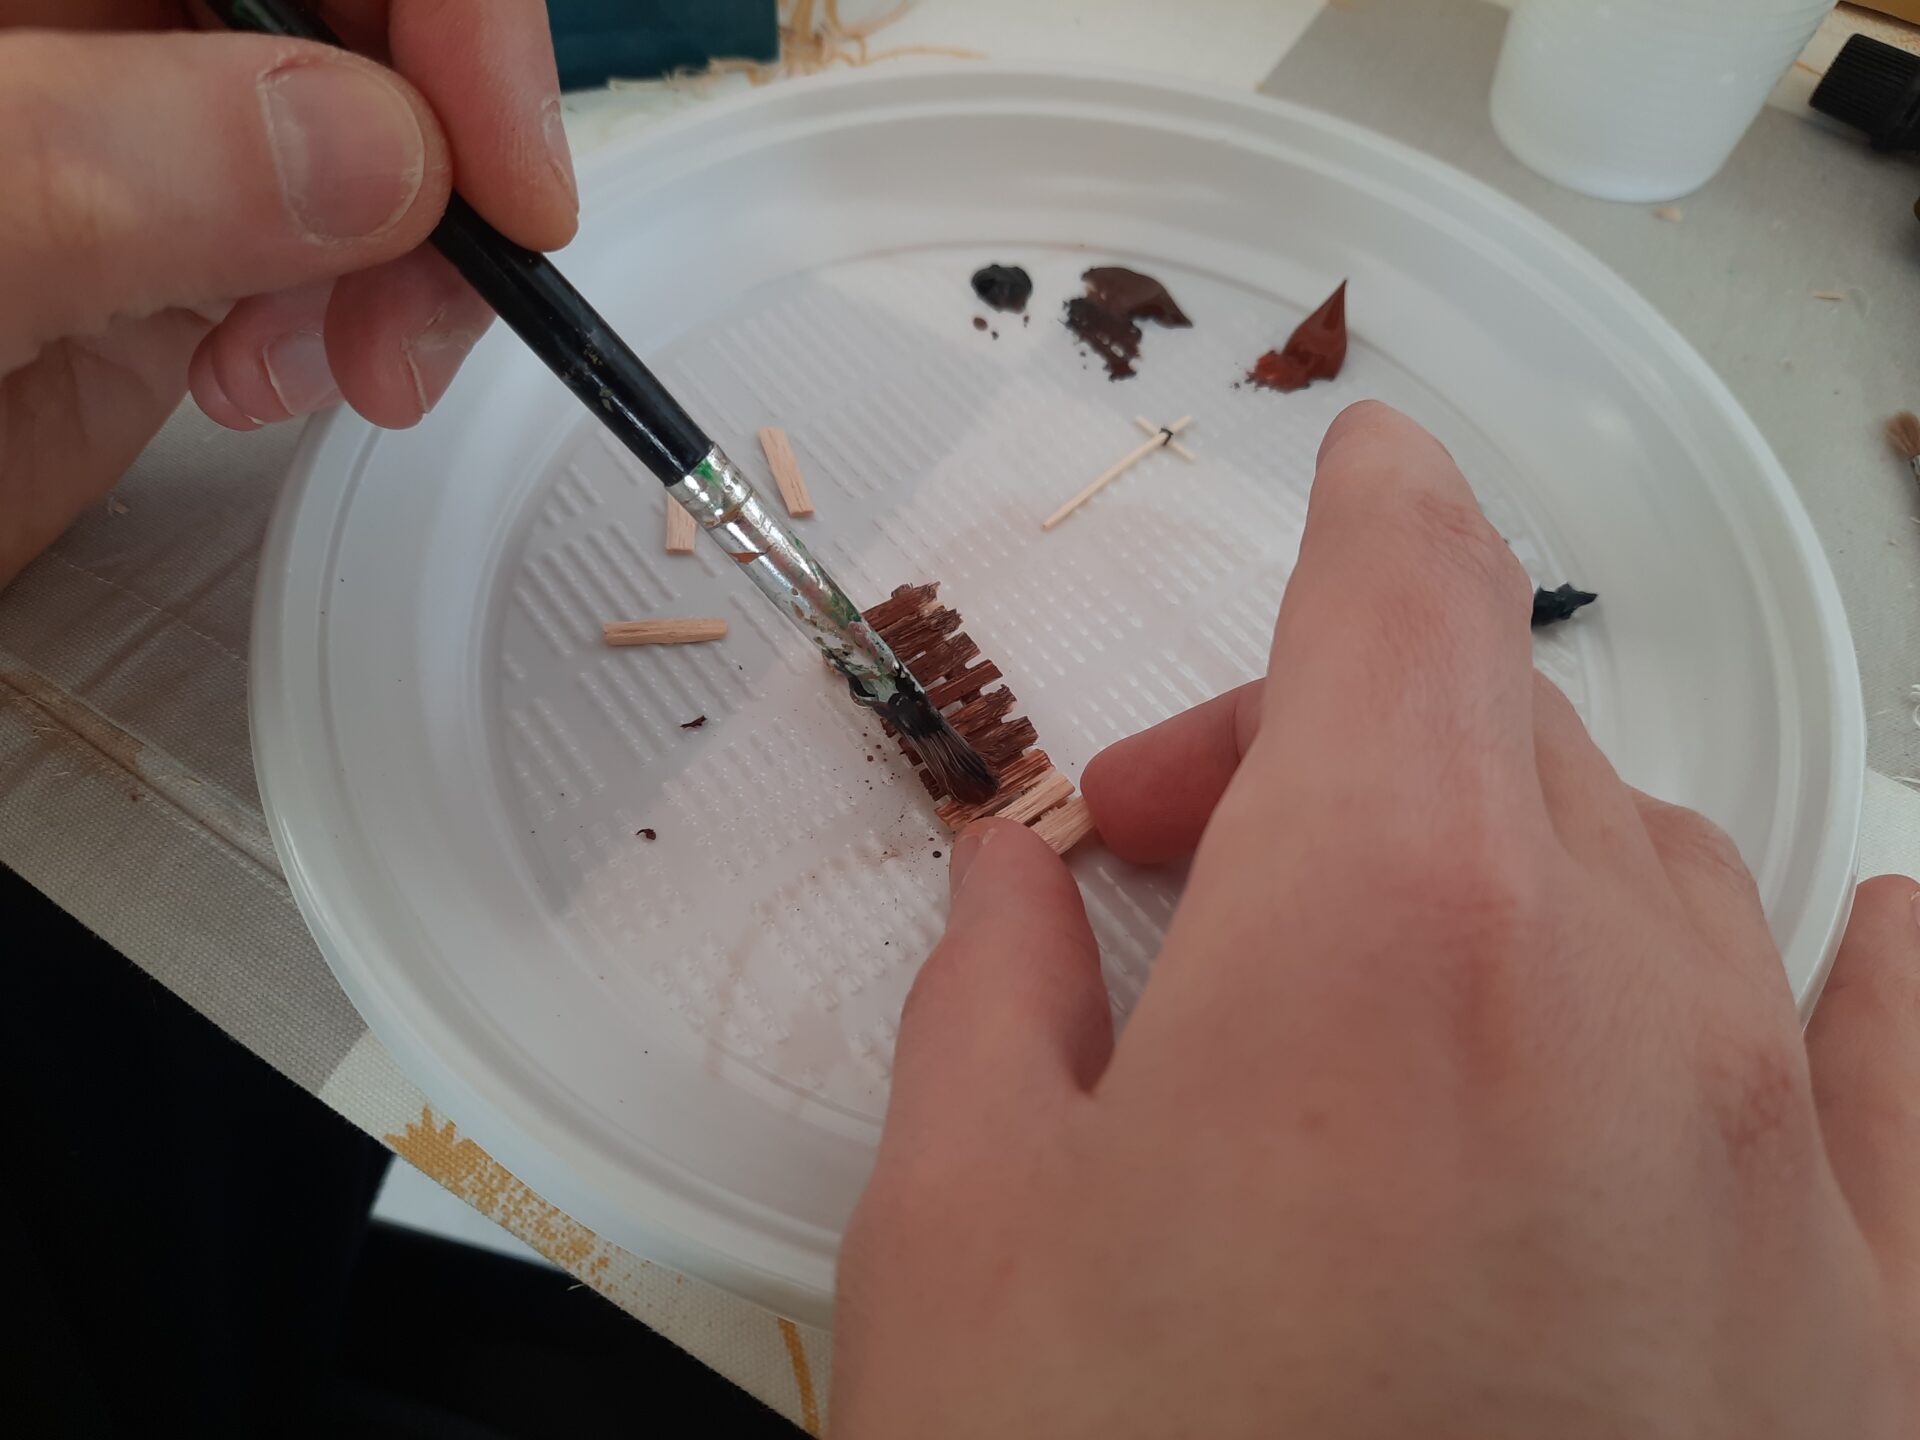
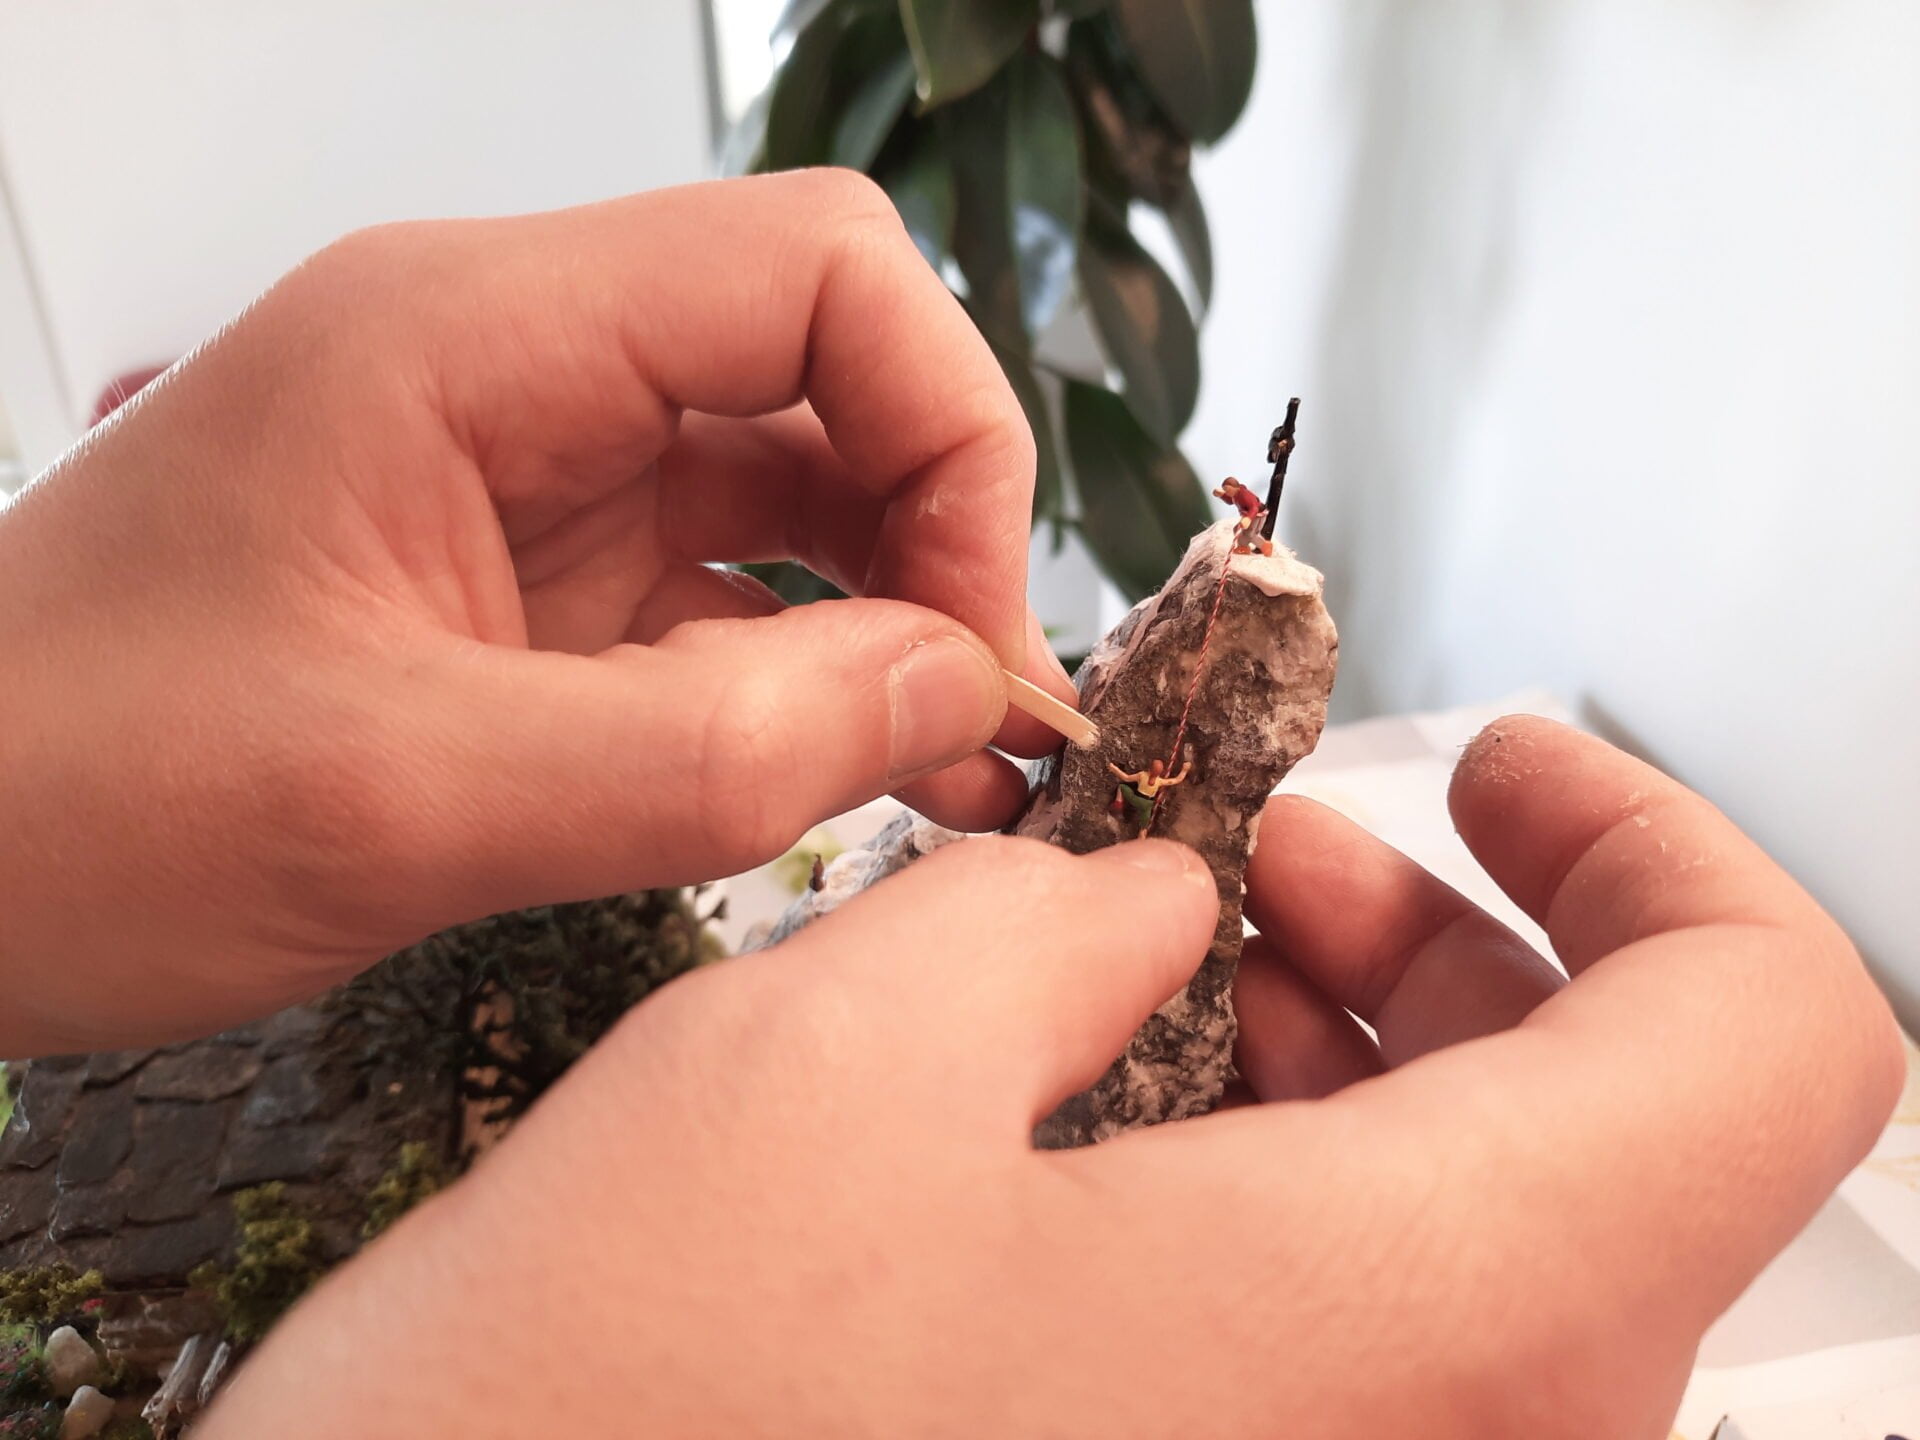
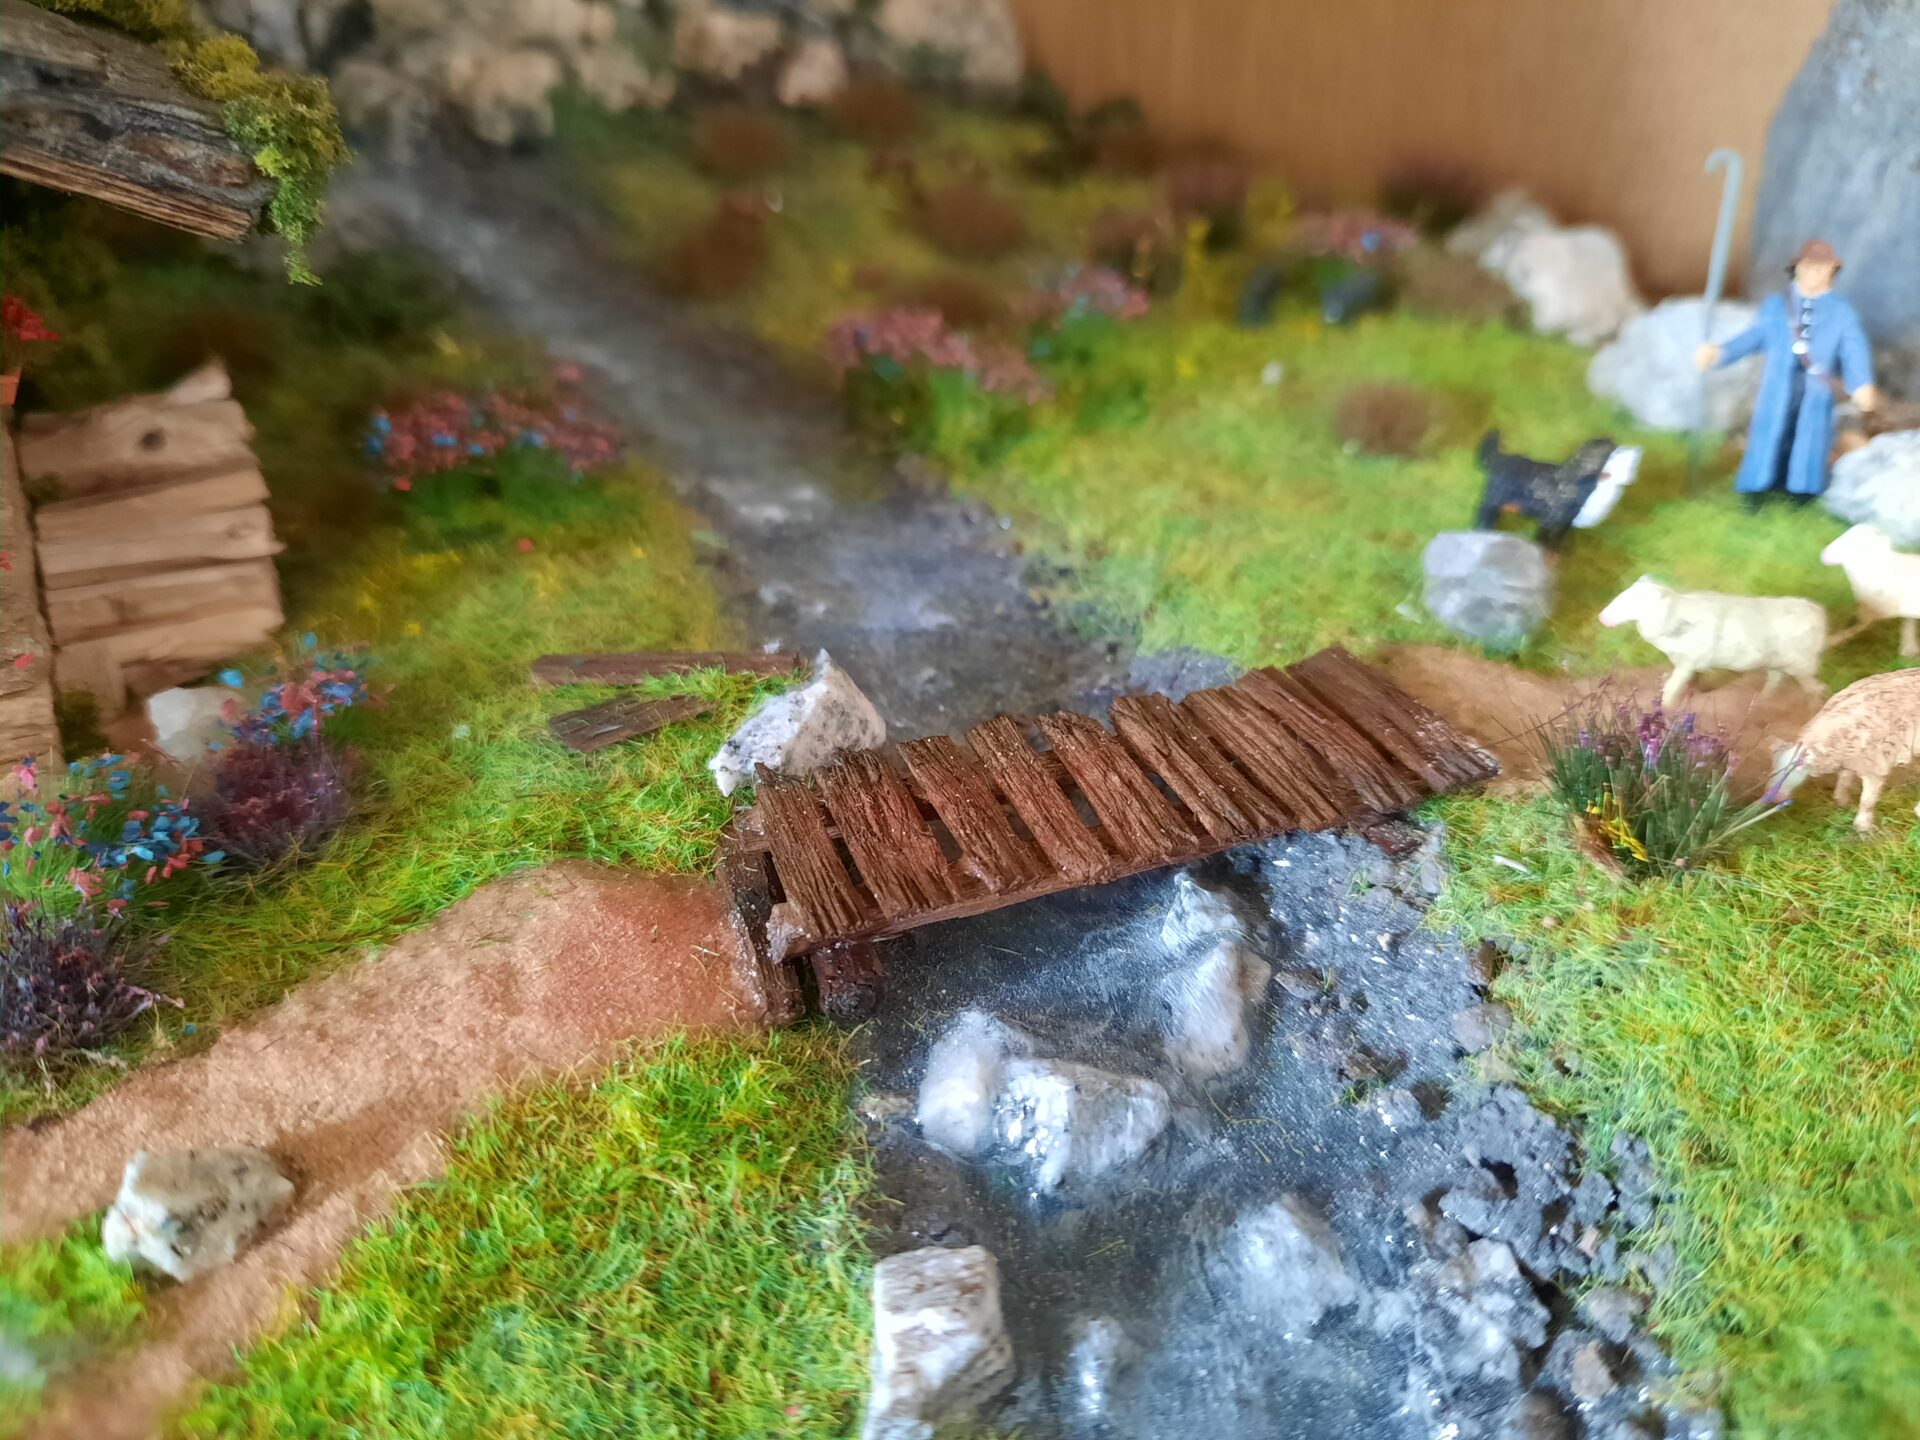
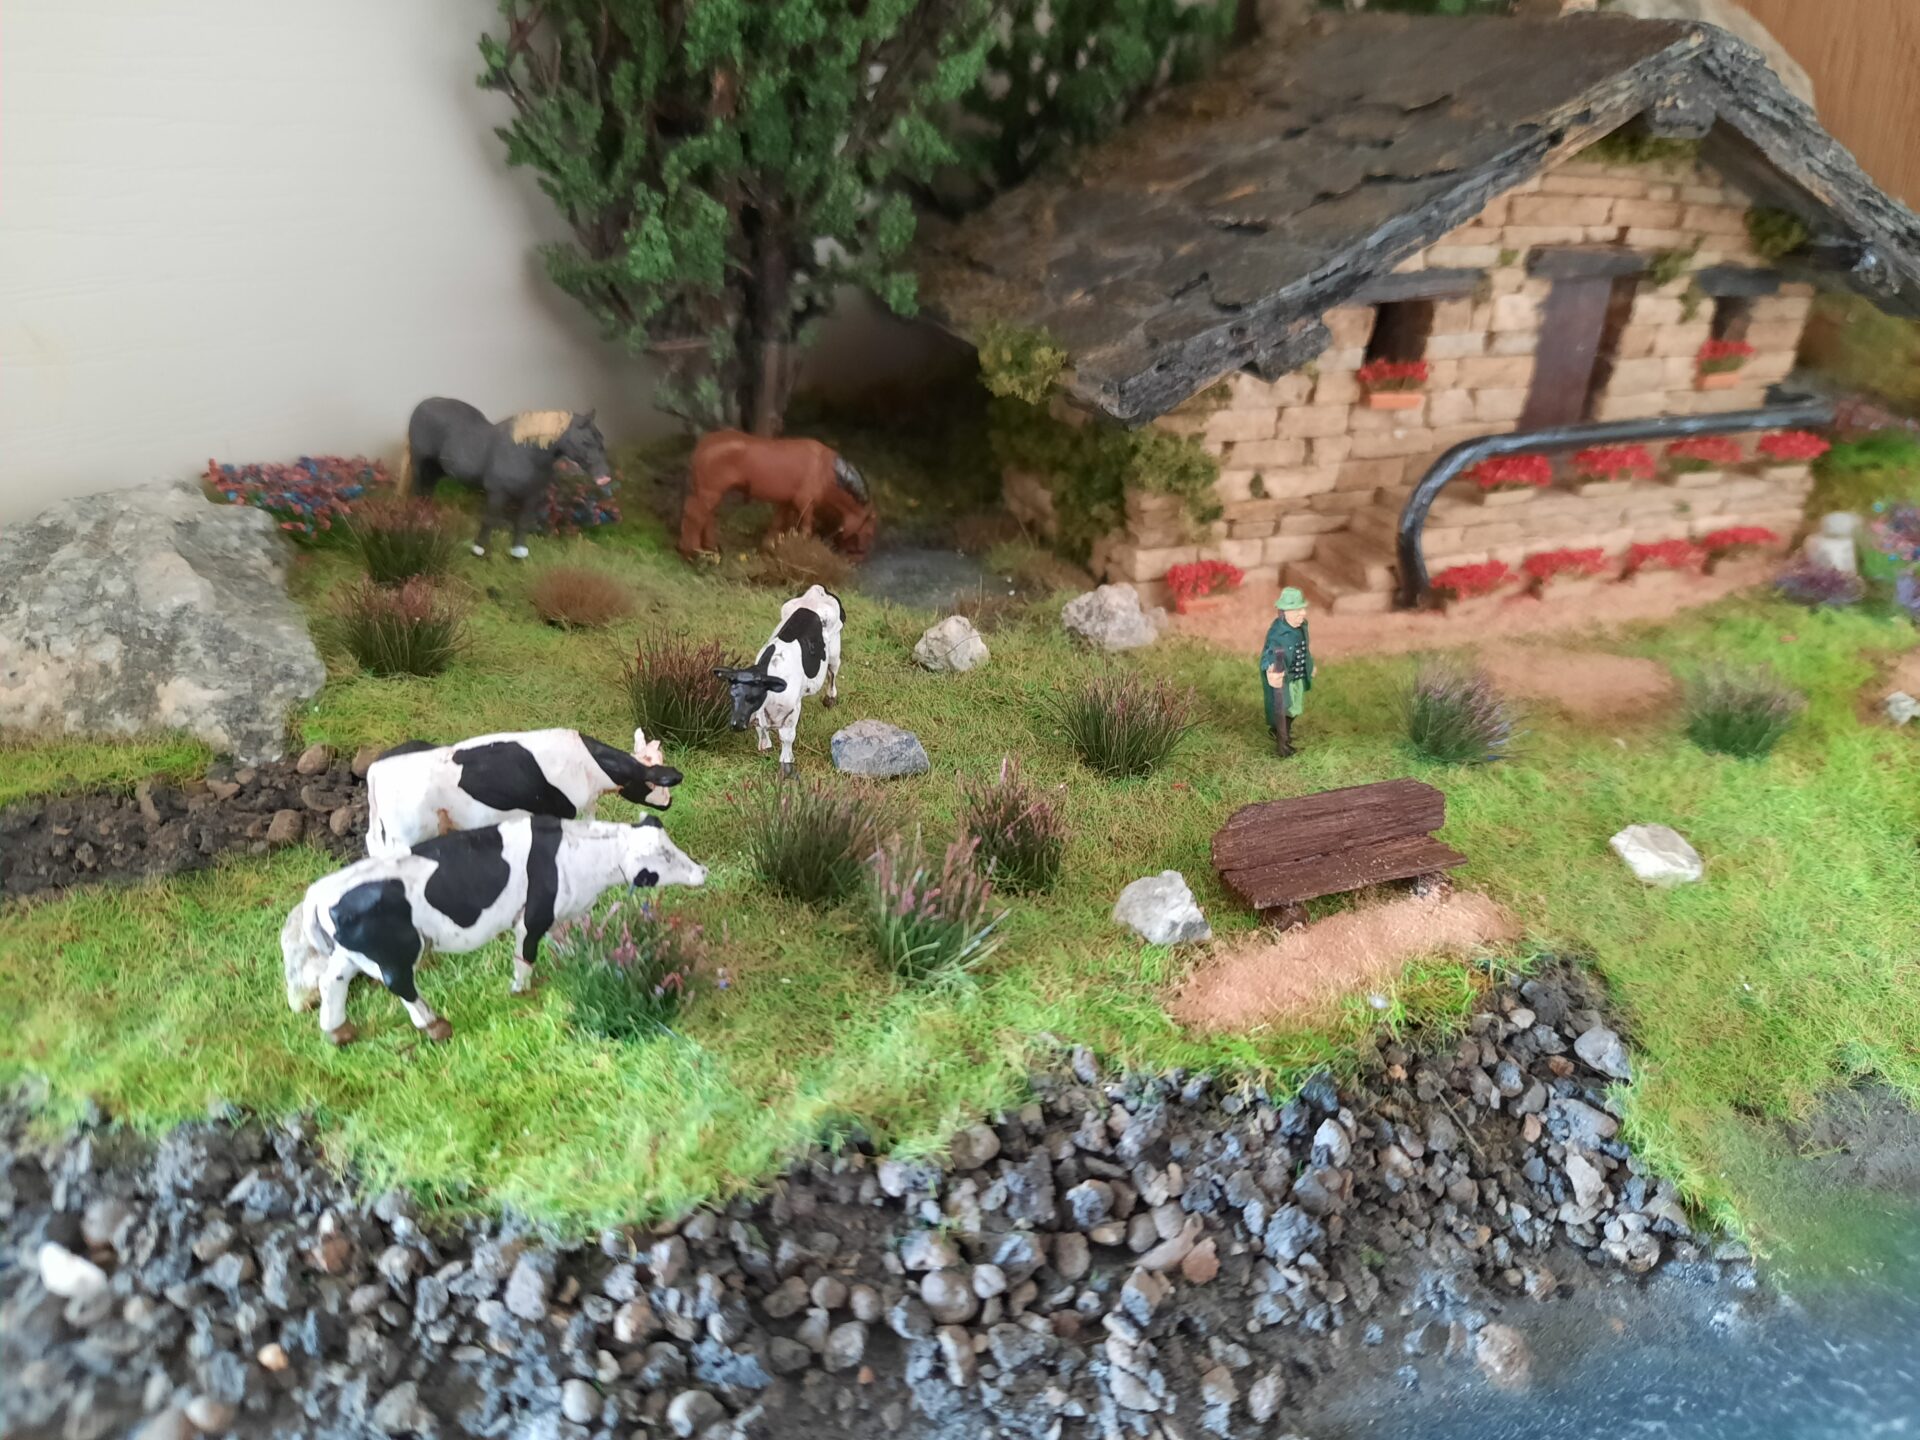
Locutus built a bridge on the creek, a bench overlooking the lake, and of course he added a bonfire next to the menhir, like the one burning during the Festival. Toothpicks were perfect to simulate burn logs among ashes.
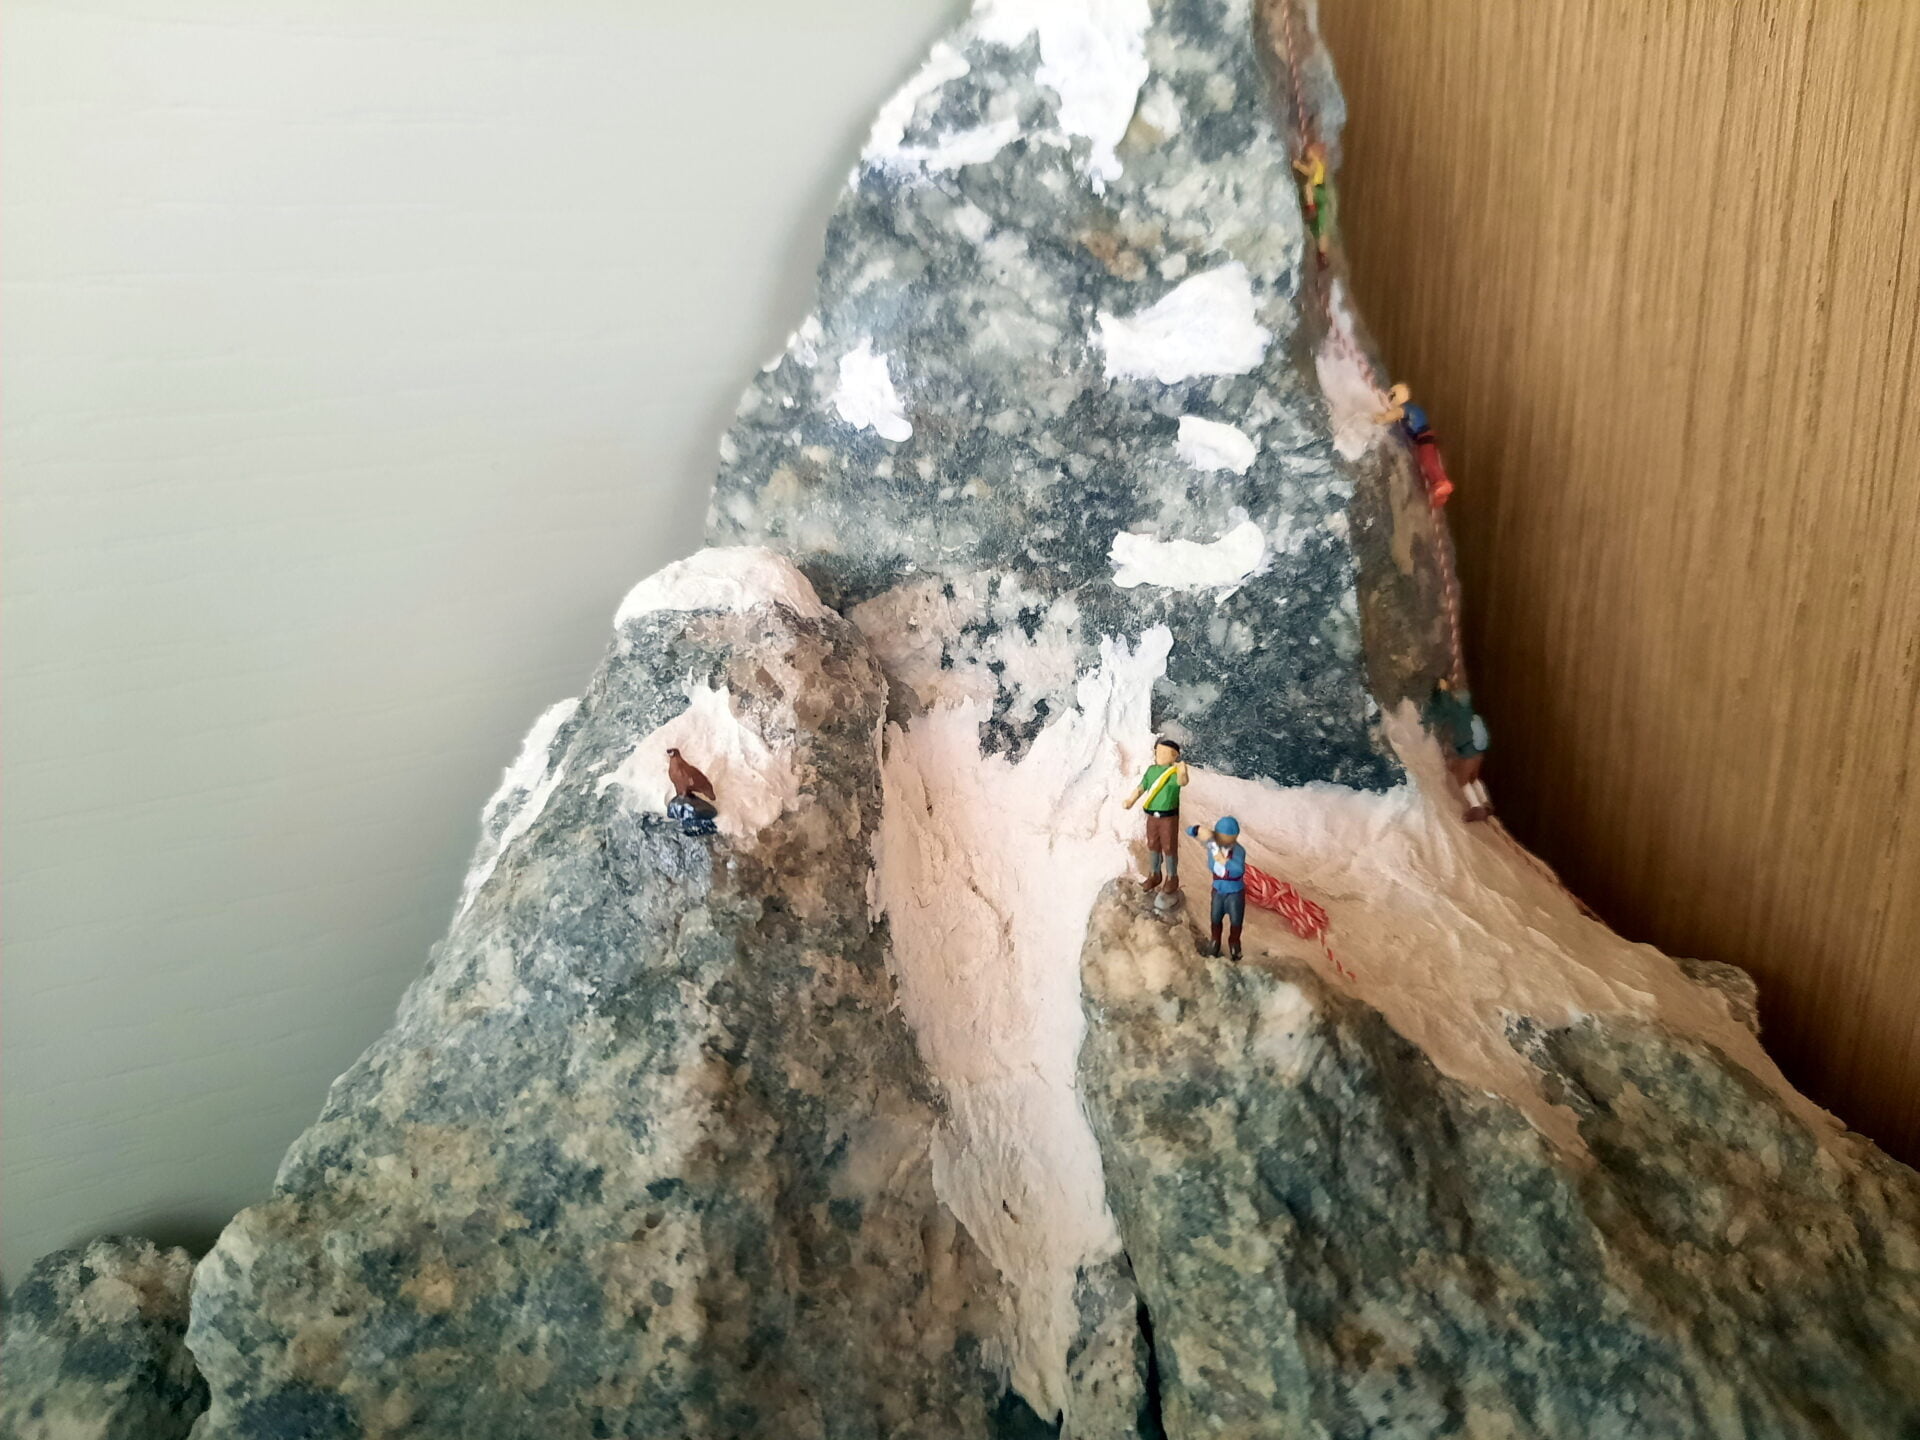
But that wasn’t enough: we added two shepherds, one with cows next to the house and the other with sheeps close to the menhir, dogs all around them. We added horses around the pond, wild animals at the base of the mountains, and I strongly wanted climbers on the mountains. Locutus made their cordage, and I love the climbers trying to photograph an eagle on the summit!
Also, we added several flowerpots as decorations for the house and greenery on the roof and among the grass.
Well, when we compared the diorama before and after those additions, we said to ourselves “how could we possibly consider that finished before?”.
Now, when we look at it, it really feels like to be there, among the mountains, enjoying those precious moments waiting for the Festival to begin.
Click on the project above to see the photogallery of all the details

