We have a young daughter, and if you follow us on social media, you probably already know her. Of all the projects we made for her, our Montessori bookcase with reading nook is the one we are most proud of, so I wanted to tell you how we built it and give you a few useful resources to make your own.
When she was just a few months old, she discovered the world of books. We started giving her books with crunchy pages, different materials to be touched, colorful drawings and features that appear if she moves a guide with her tiny finger. Well, she loved them so much! Books became quickly one of her favourite things to play with, mainly with mum.
Given her early love for books, my husband and I decided to create a special gift for her first birthday: we built a custom Montessori front-facing bookshelf. This DIY project is perfect for parents who want to encourage their children’s love for reading. It’s great for toddlers to be able to reach their own books when they want them.
This time, I took charge of the idea and the basic project, even though my husband is typically the family’s furniture maker! I selected the perfect location for the bookshelf, in an underused corner of my daughter’s bedroom. After meticulously measuring the available space (multiple times), I created the project plan. I presented my woodworking husband a ready-to-make plan, with sizes and details of all the pieces needed!
And… it turned out pretty well! We created a perfect reading nook that’s become her favourite play corner. It’s been half a year now she’s using it, and we couldn’t be happier of how functional the bookshelf is!

Explore the finished project detailed photos
This long-planned project was challenging, but left us immensely proud of the final result. We were so proud of it that I decided to share our success with others. I’ve prepared a free PDF plan of our project along with a calculator to help anyone replicate it. You can build a bookcase like ours, but with your own measures.
Table of contents
Creating a Montessori bookshelf: our DIY project

The project and the plans
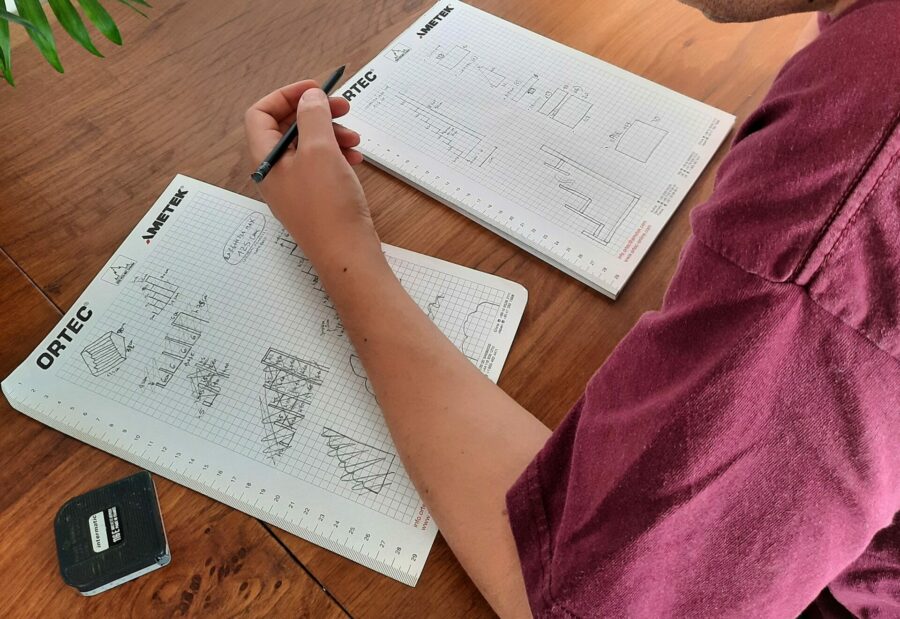
It all began with a carefully designed project.
I began working from a side view. I simulated a good width for the whole piece and also for each shelf. I wanted a piece of furniture that wasn’t too wide, otherwise the reading corner would have been too small to be comfortable. After a few tests made with pieces of cardboard as made-up shelves, I decided a totale width of 32cm would be ok, and also it allowed each shelf to be 6cm wide.
I planned a total of 5 shelves, 6cm wide each. The bottom shelf had a 10cm high front, to prevent the books from falling, and it was to stand 5cm higher than the floor. Then each of the following ones would stand 10cm higher than the one below. With such a project, each 6cm shelf had a 5cm front to keep books in place.
The top shelf was designed for bigger books, so it had a back higher than the others. Two triangular-ish pieces close the sides (the bottom angle is cut to match the shape of the bookshelf).
I measured the available space for the bookshelf’s maximum lenght. I wanted it to fit perfectly! So I measured multiple times, did scale drawings, checked and rechecked.
With all the measures I always considered the thickness of the wooden boards to be 1cm.
The construction
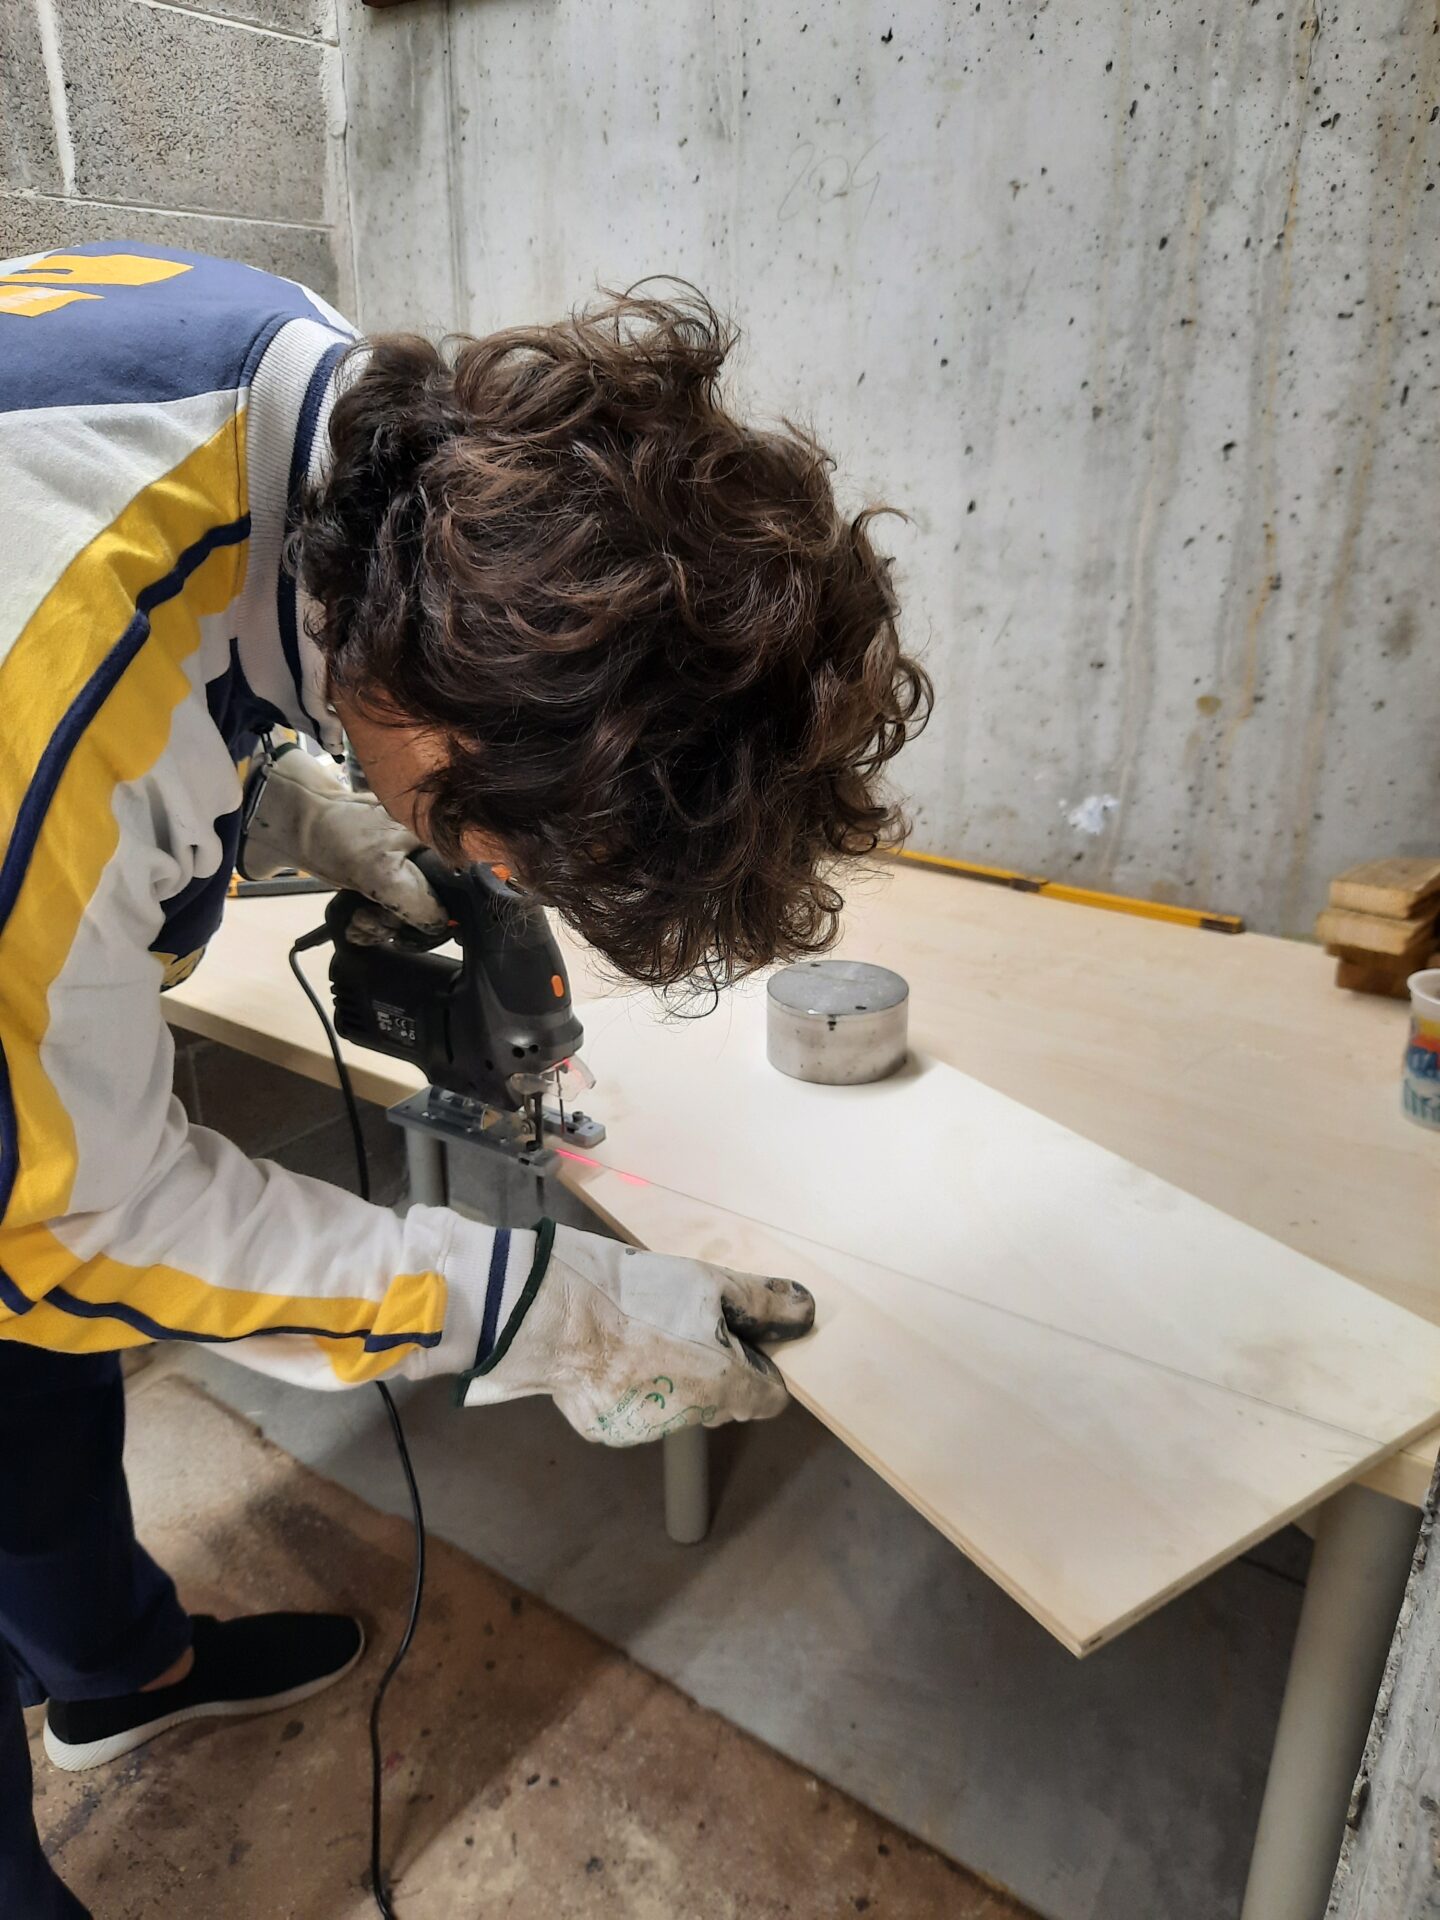
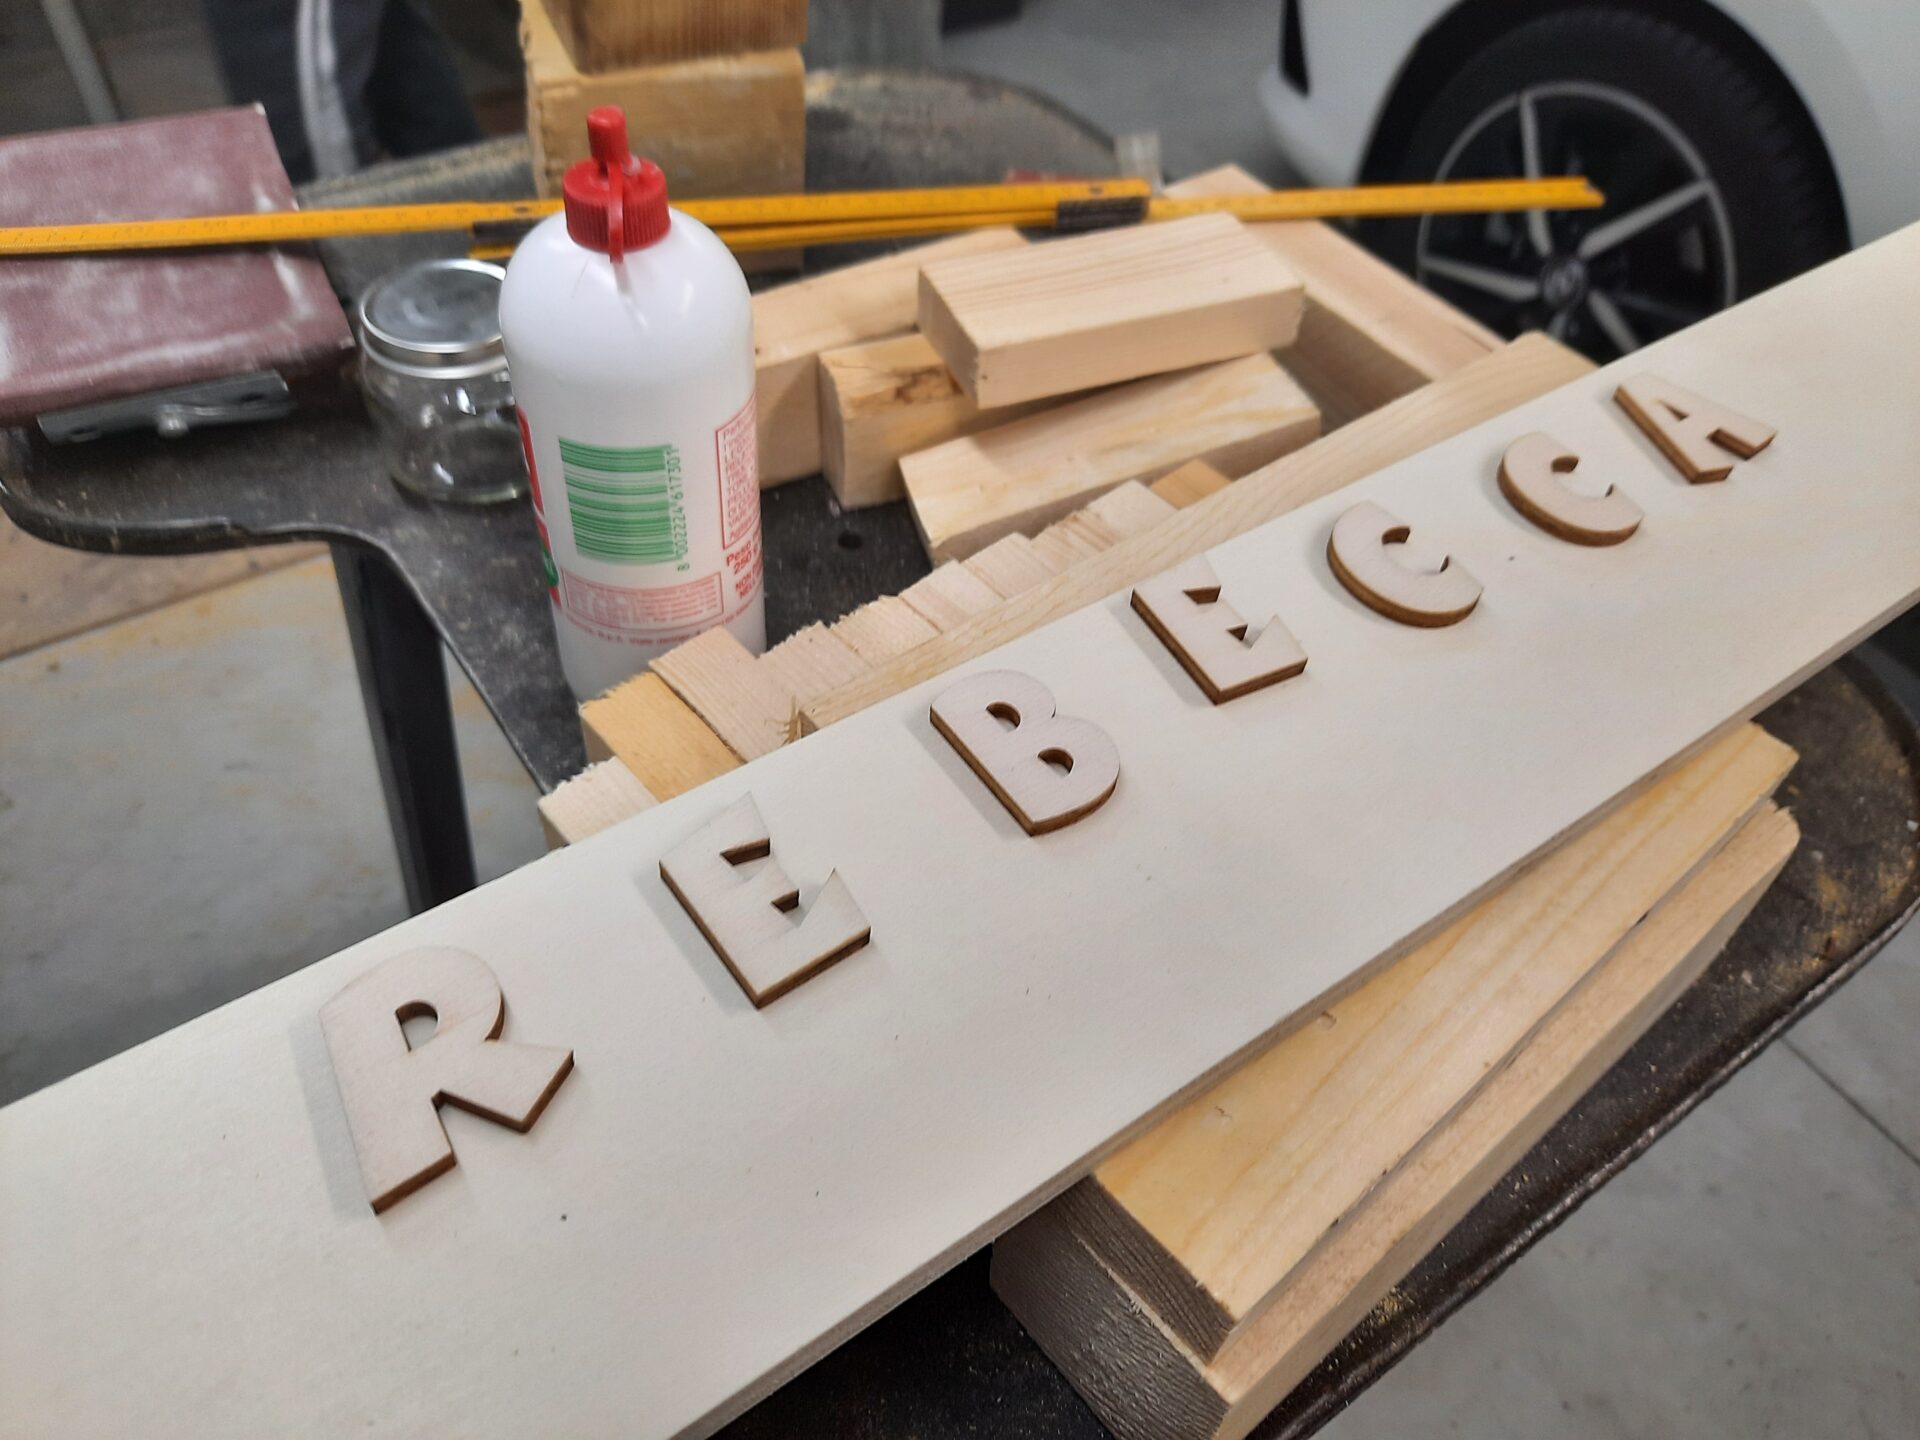
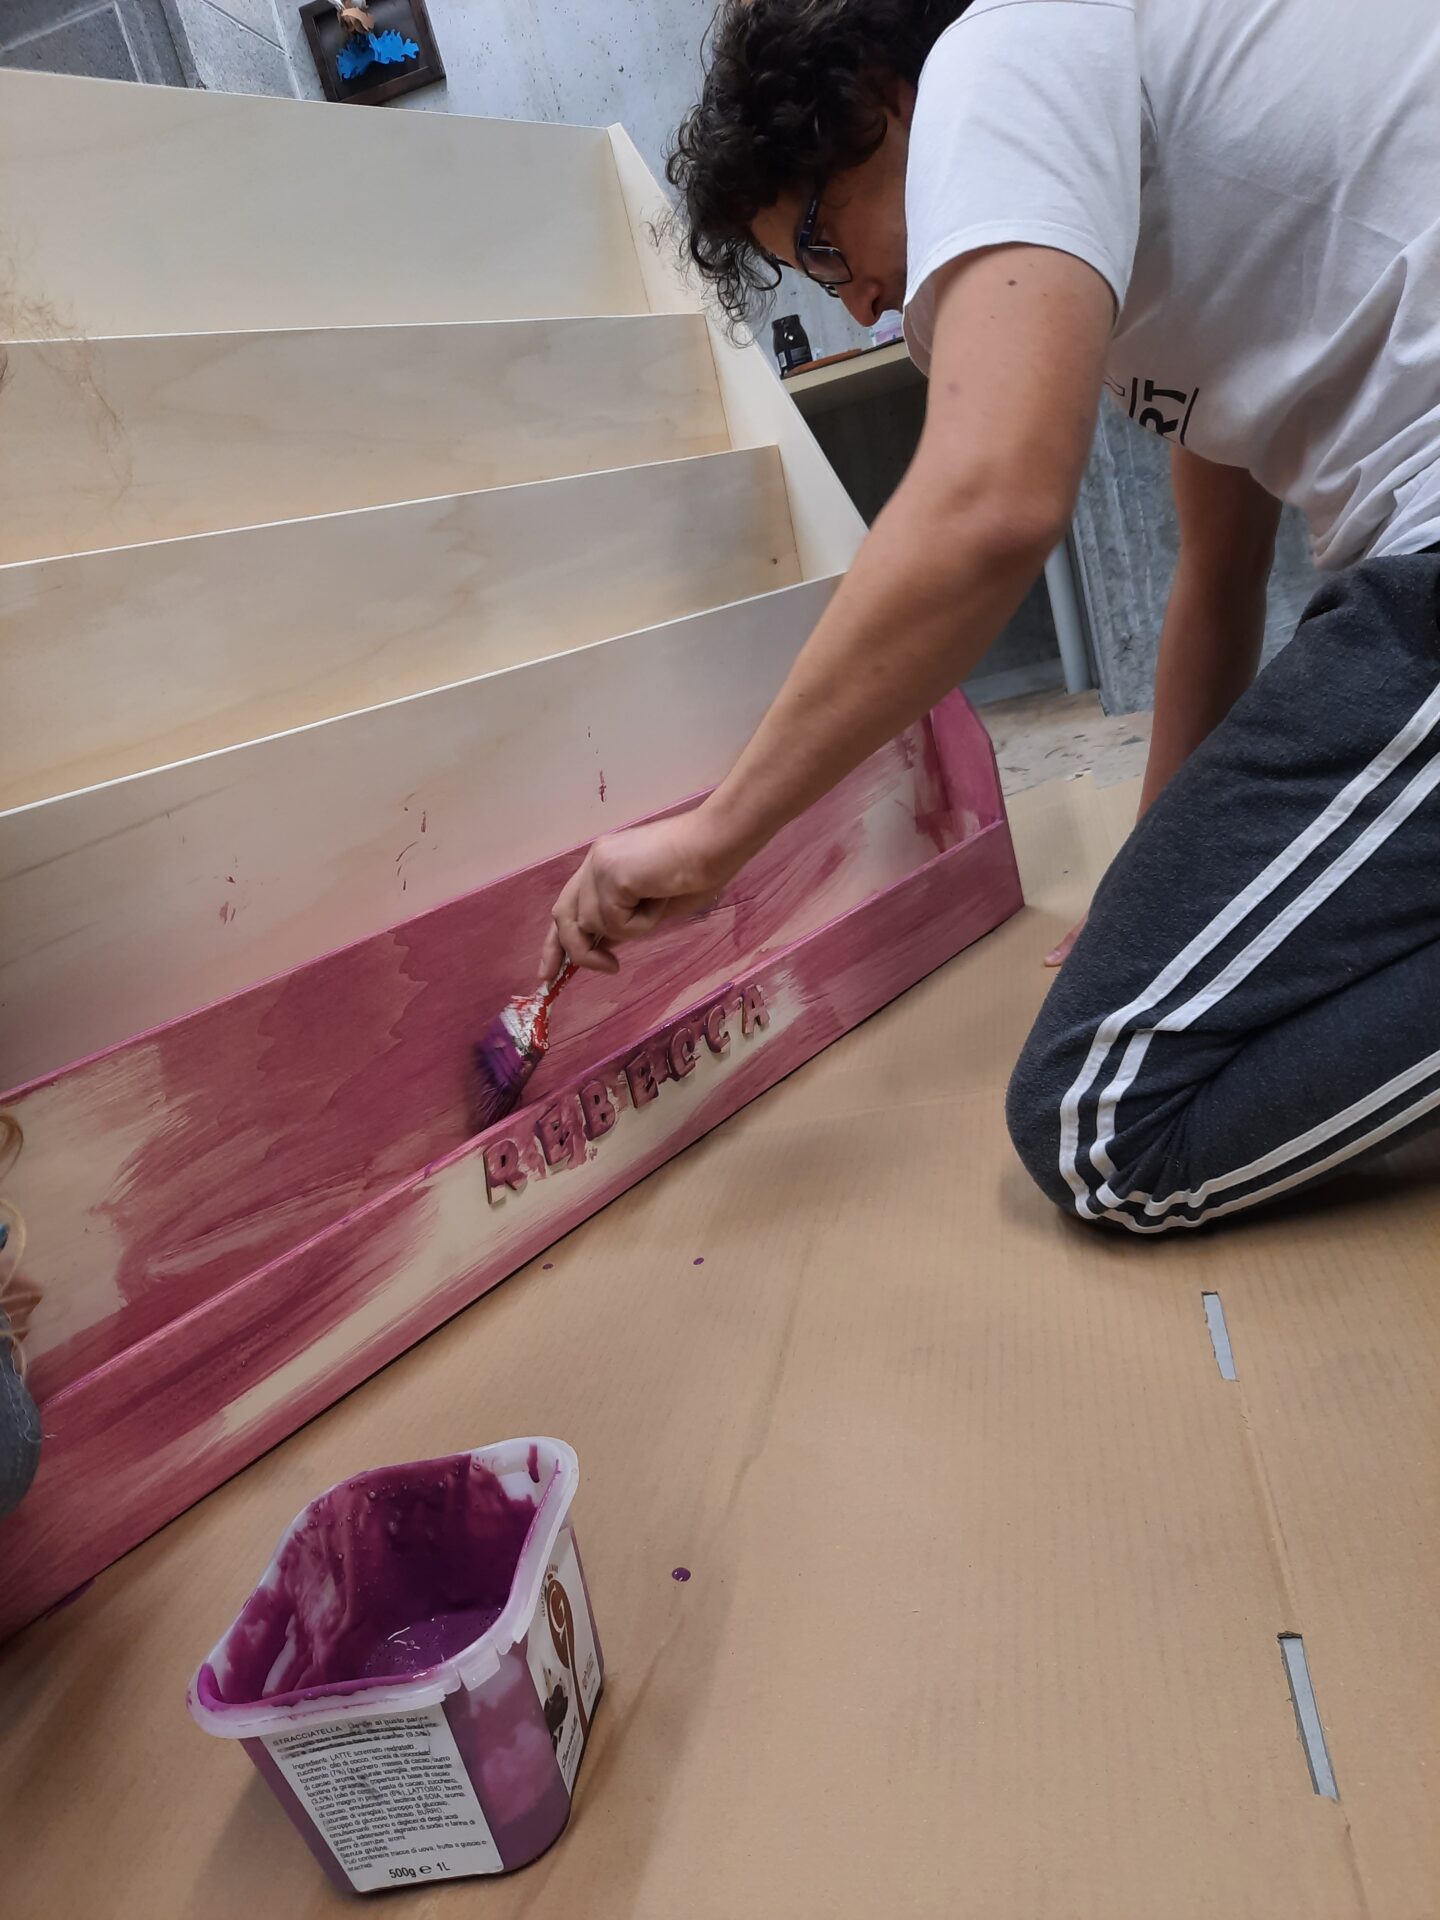
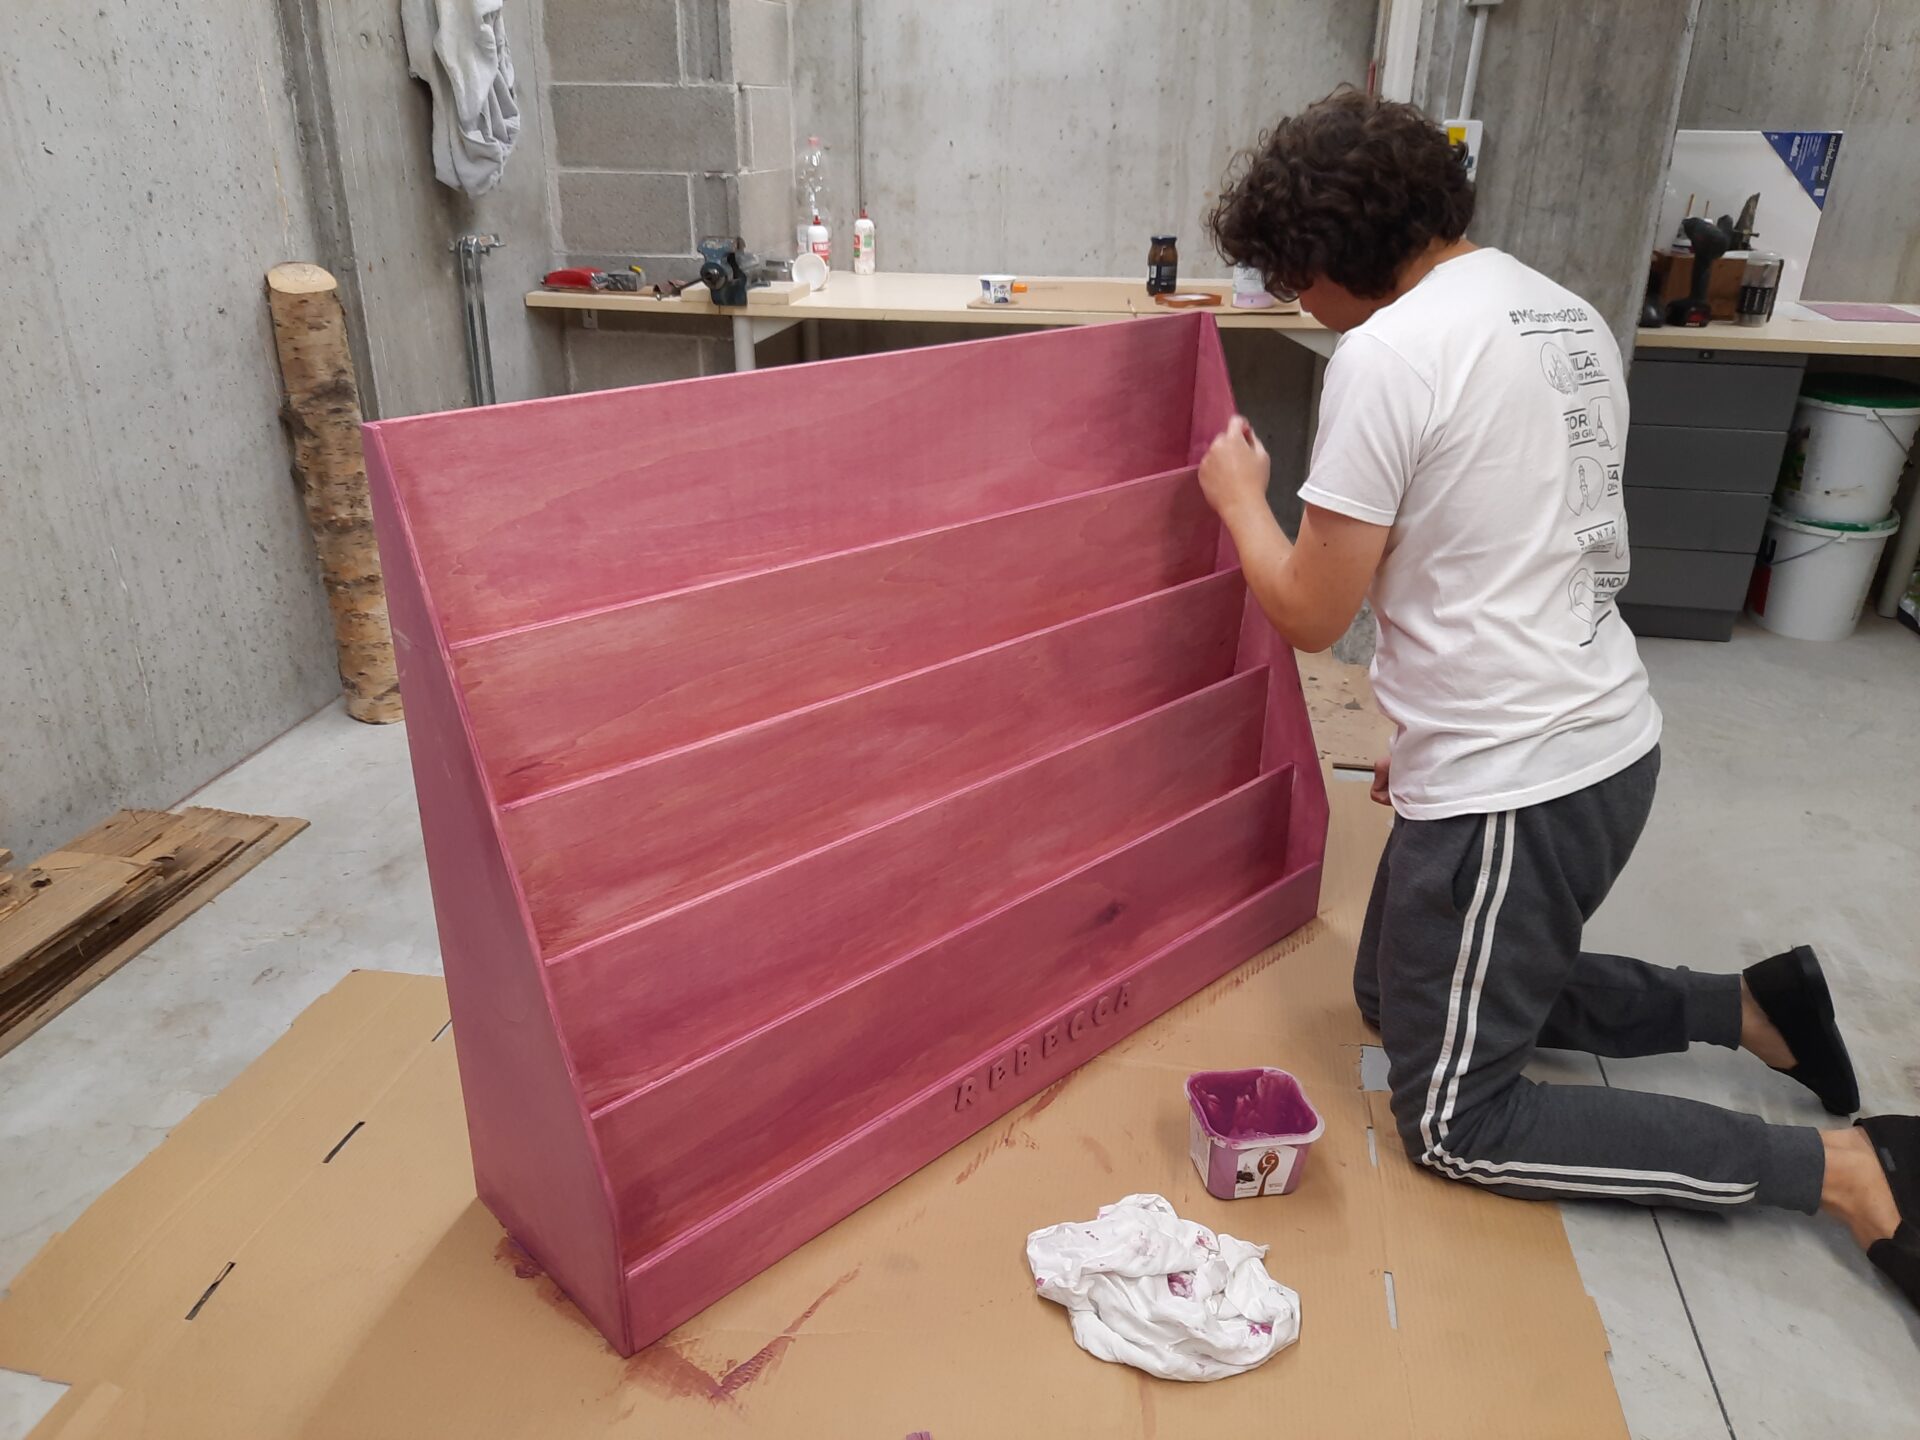
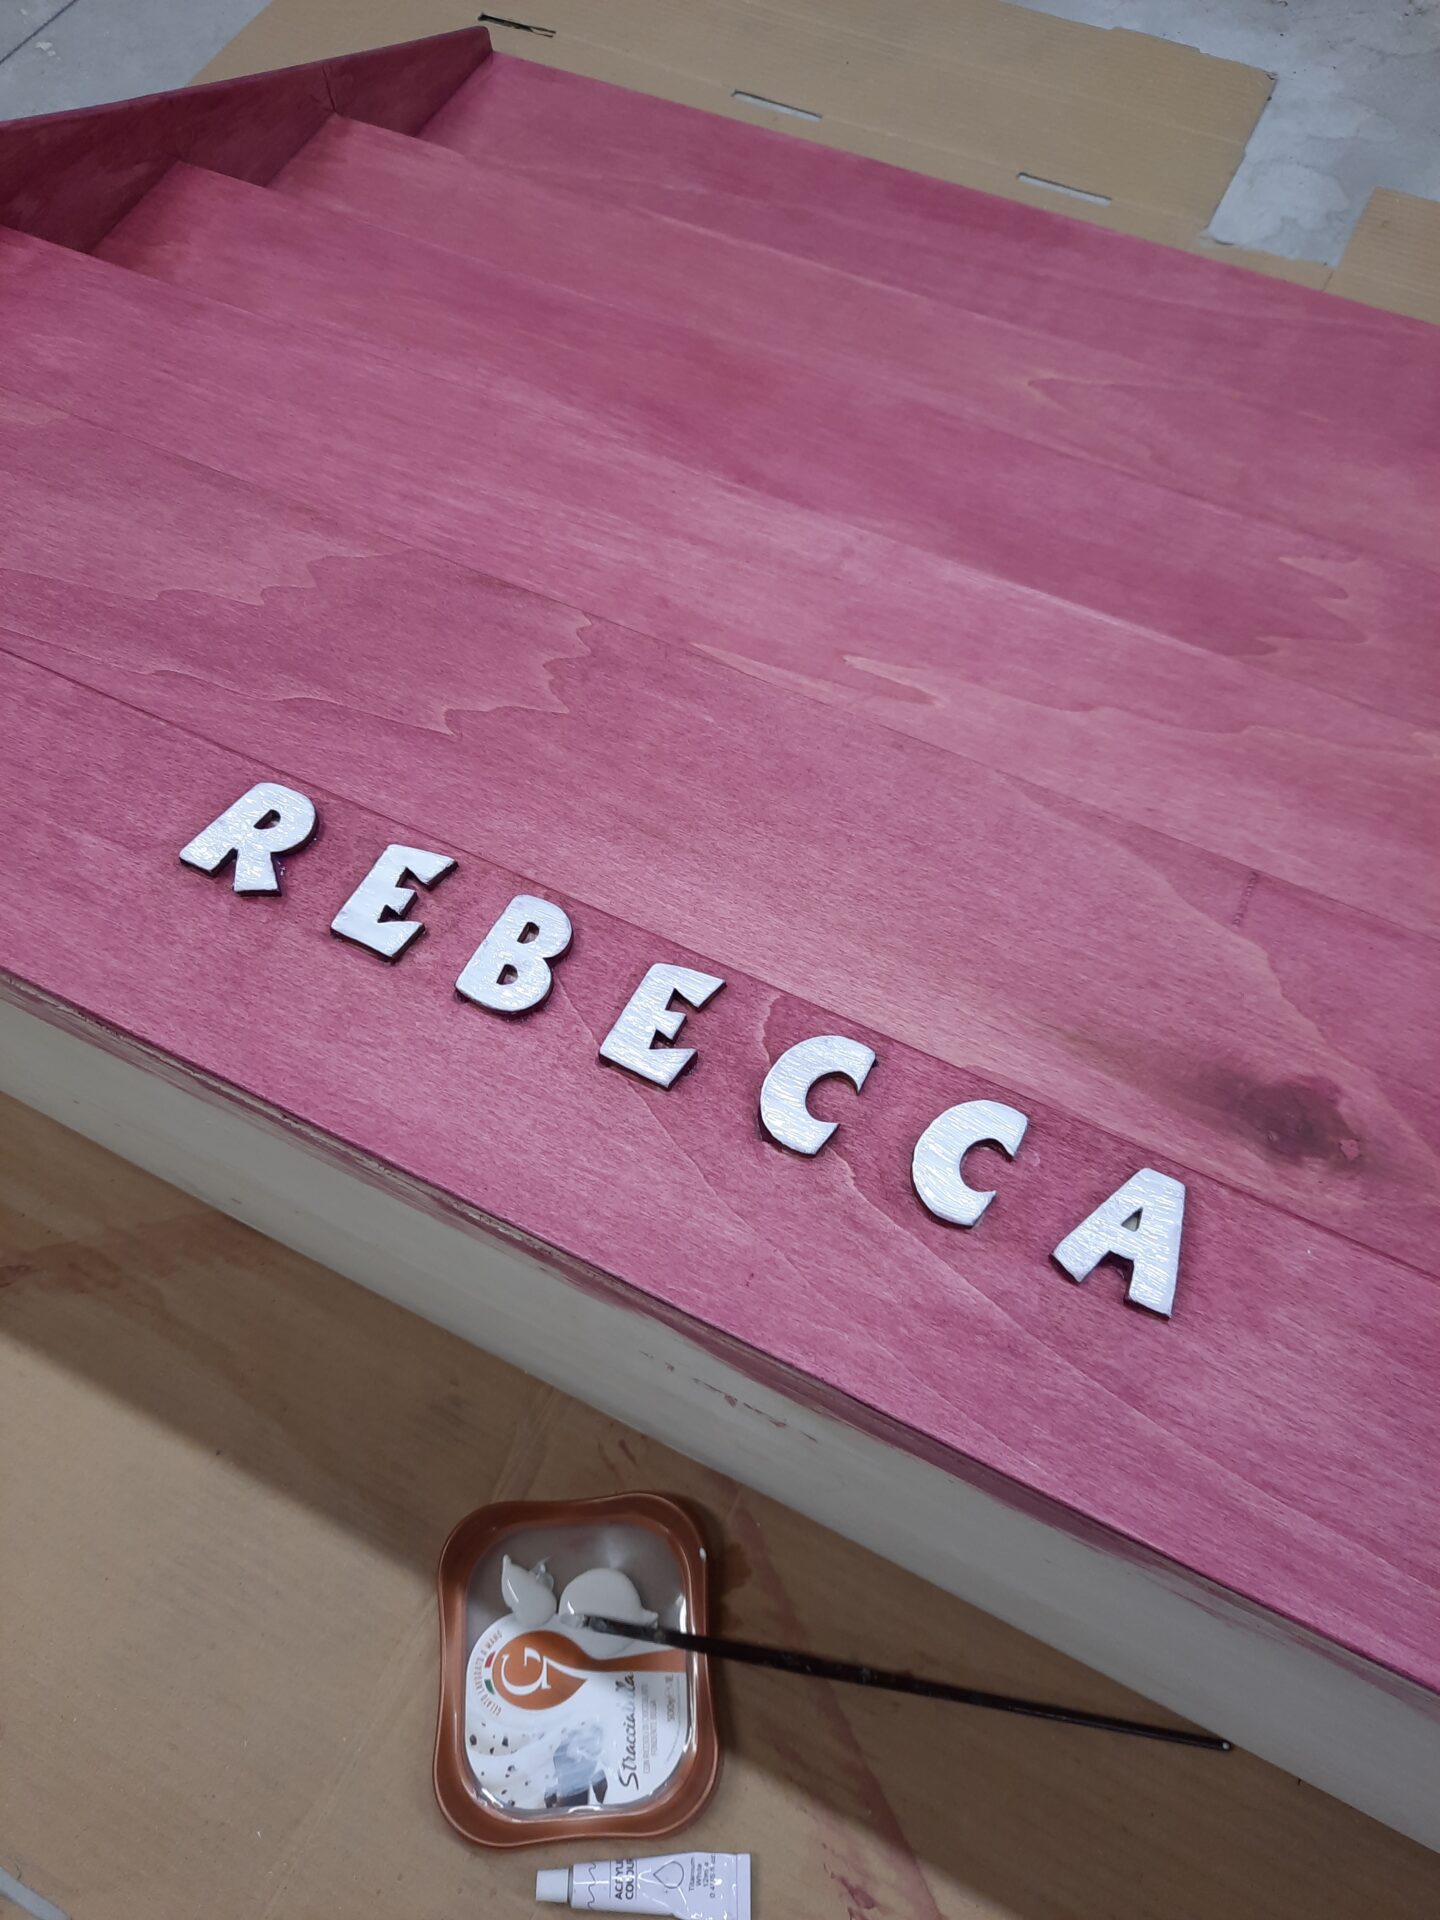
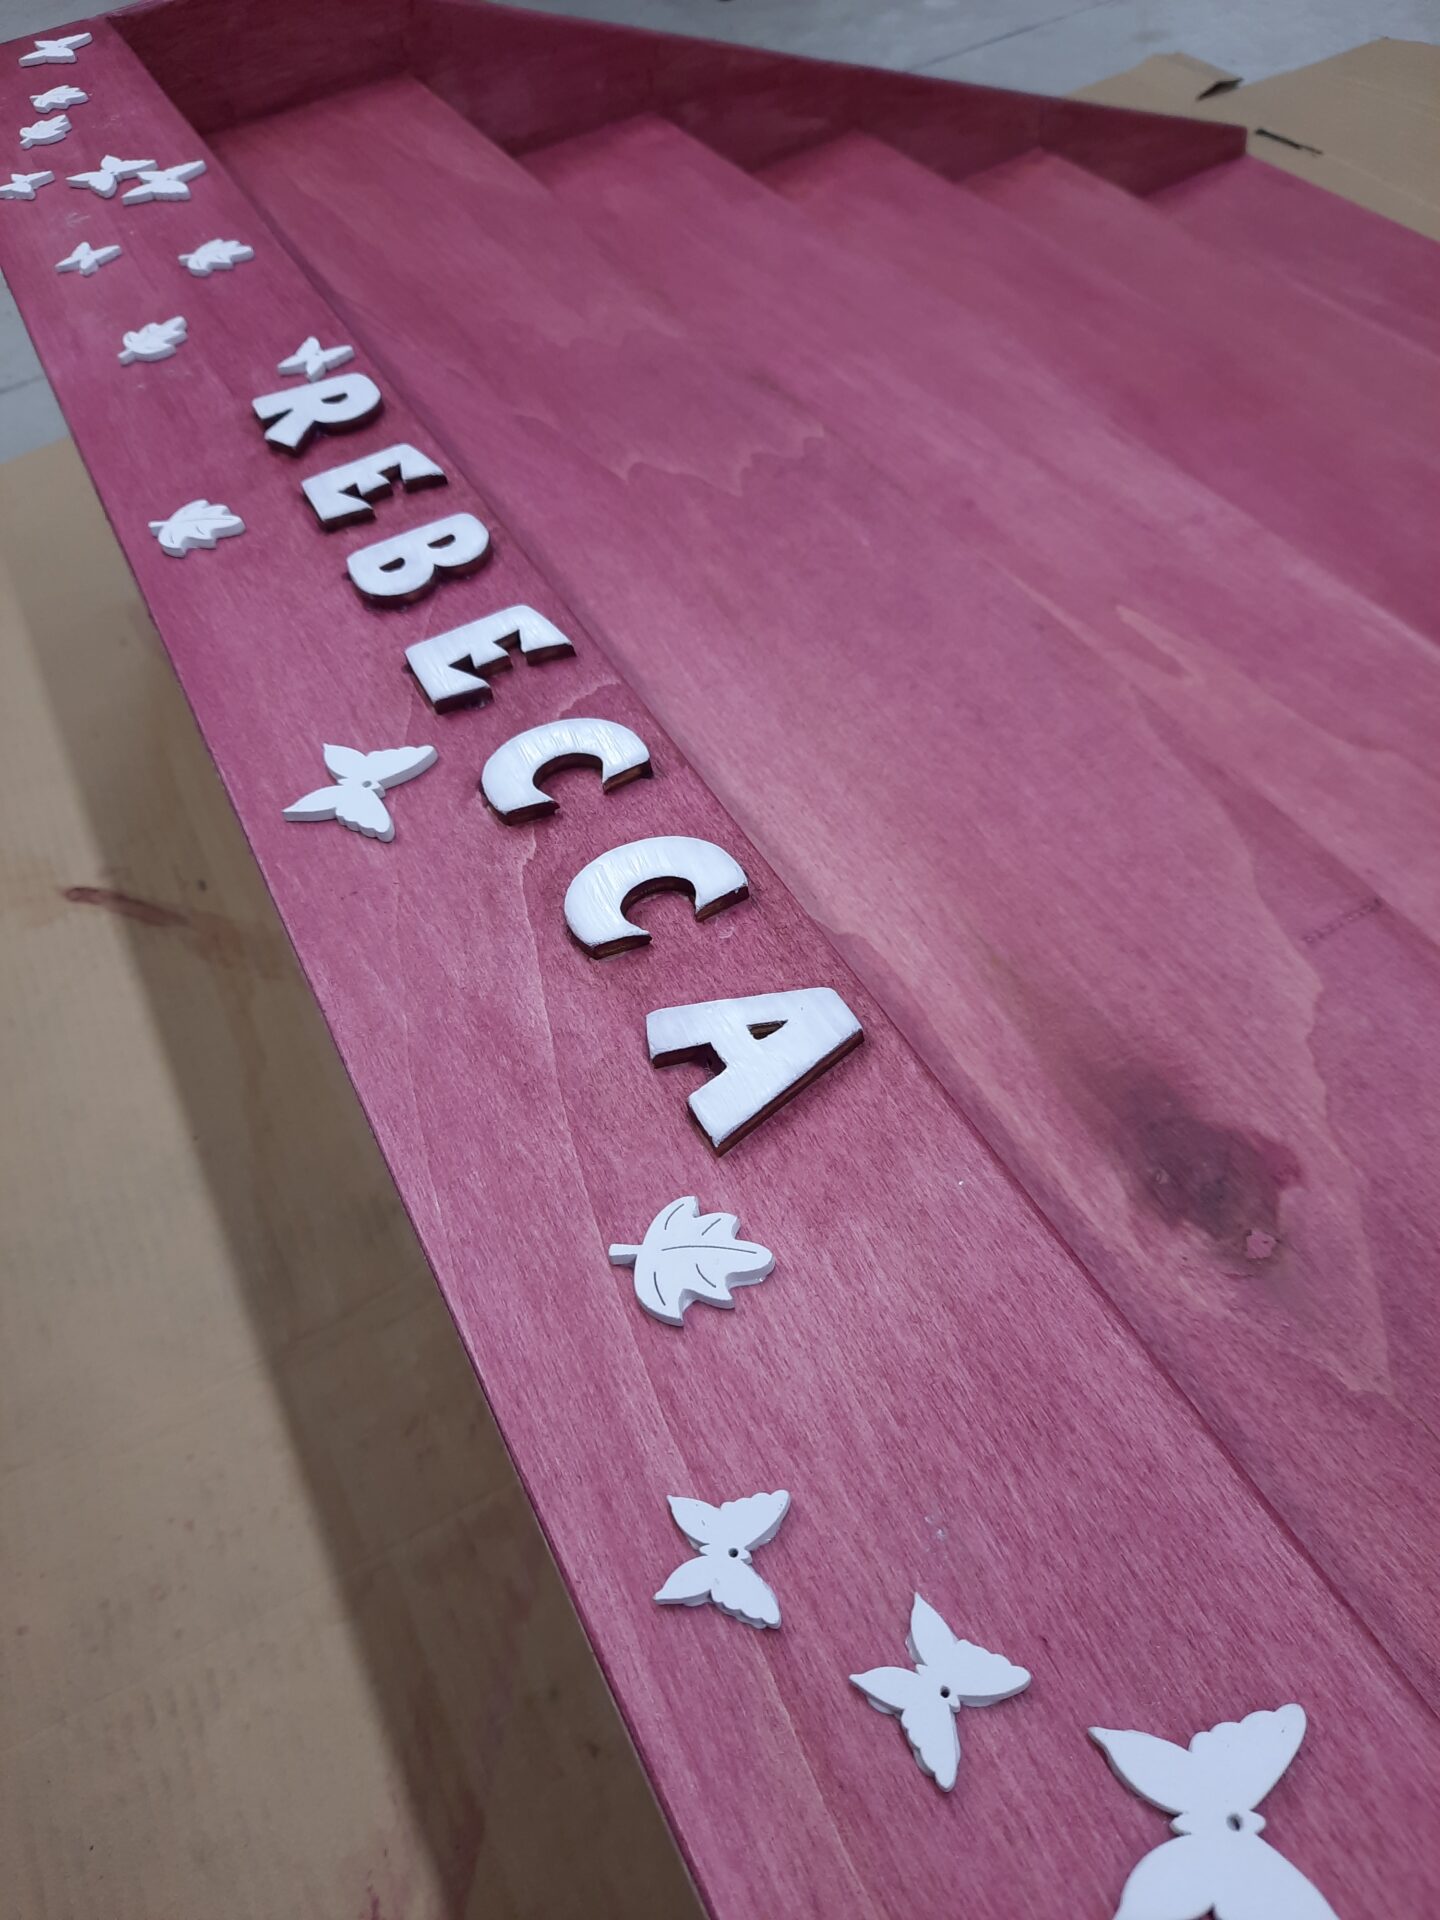
Next: shopping time! We bought all the necessary wooden boards, all pre-cut to the sizes needed. Just for the sides we needed to cut the triangles ourselves. We also found nice pre-cut wooden letters and other small decorations to attach to the lower front. About the final color, my husband found a dark pink paint he liked, a non-toxic one conceived for children’s bedrooms. I wasn’t convinced at first, but seeing the final color I admit he was right.
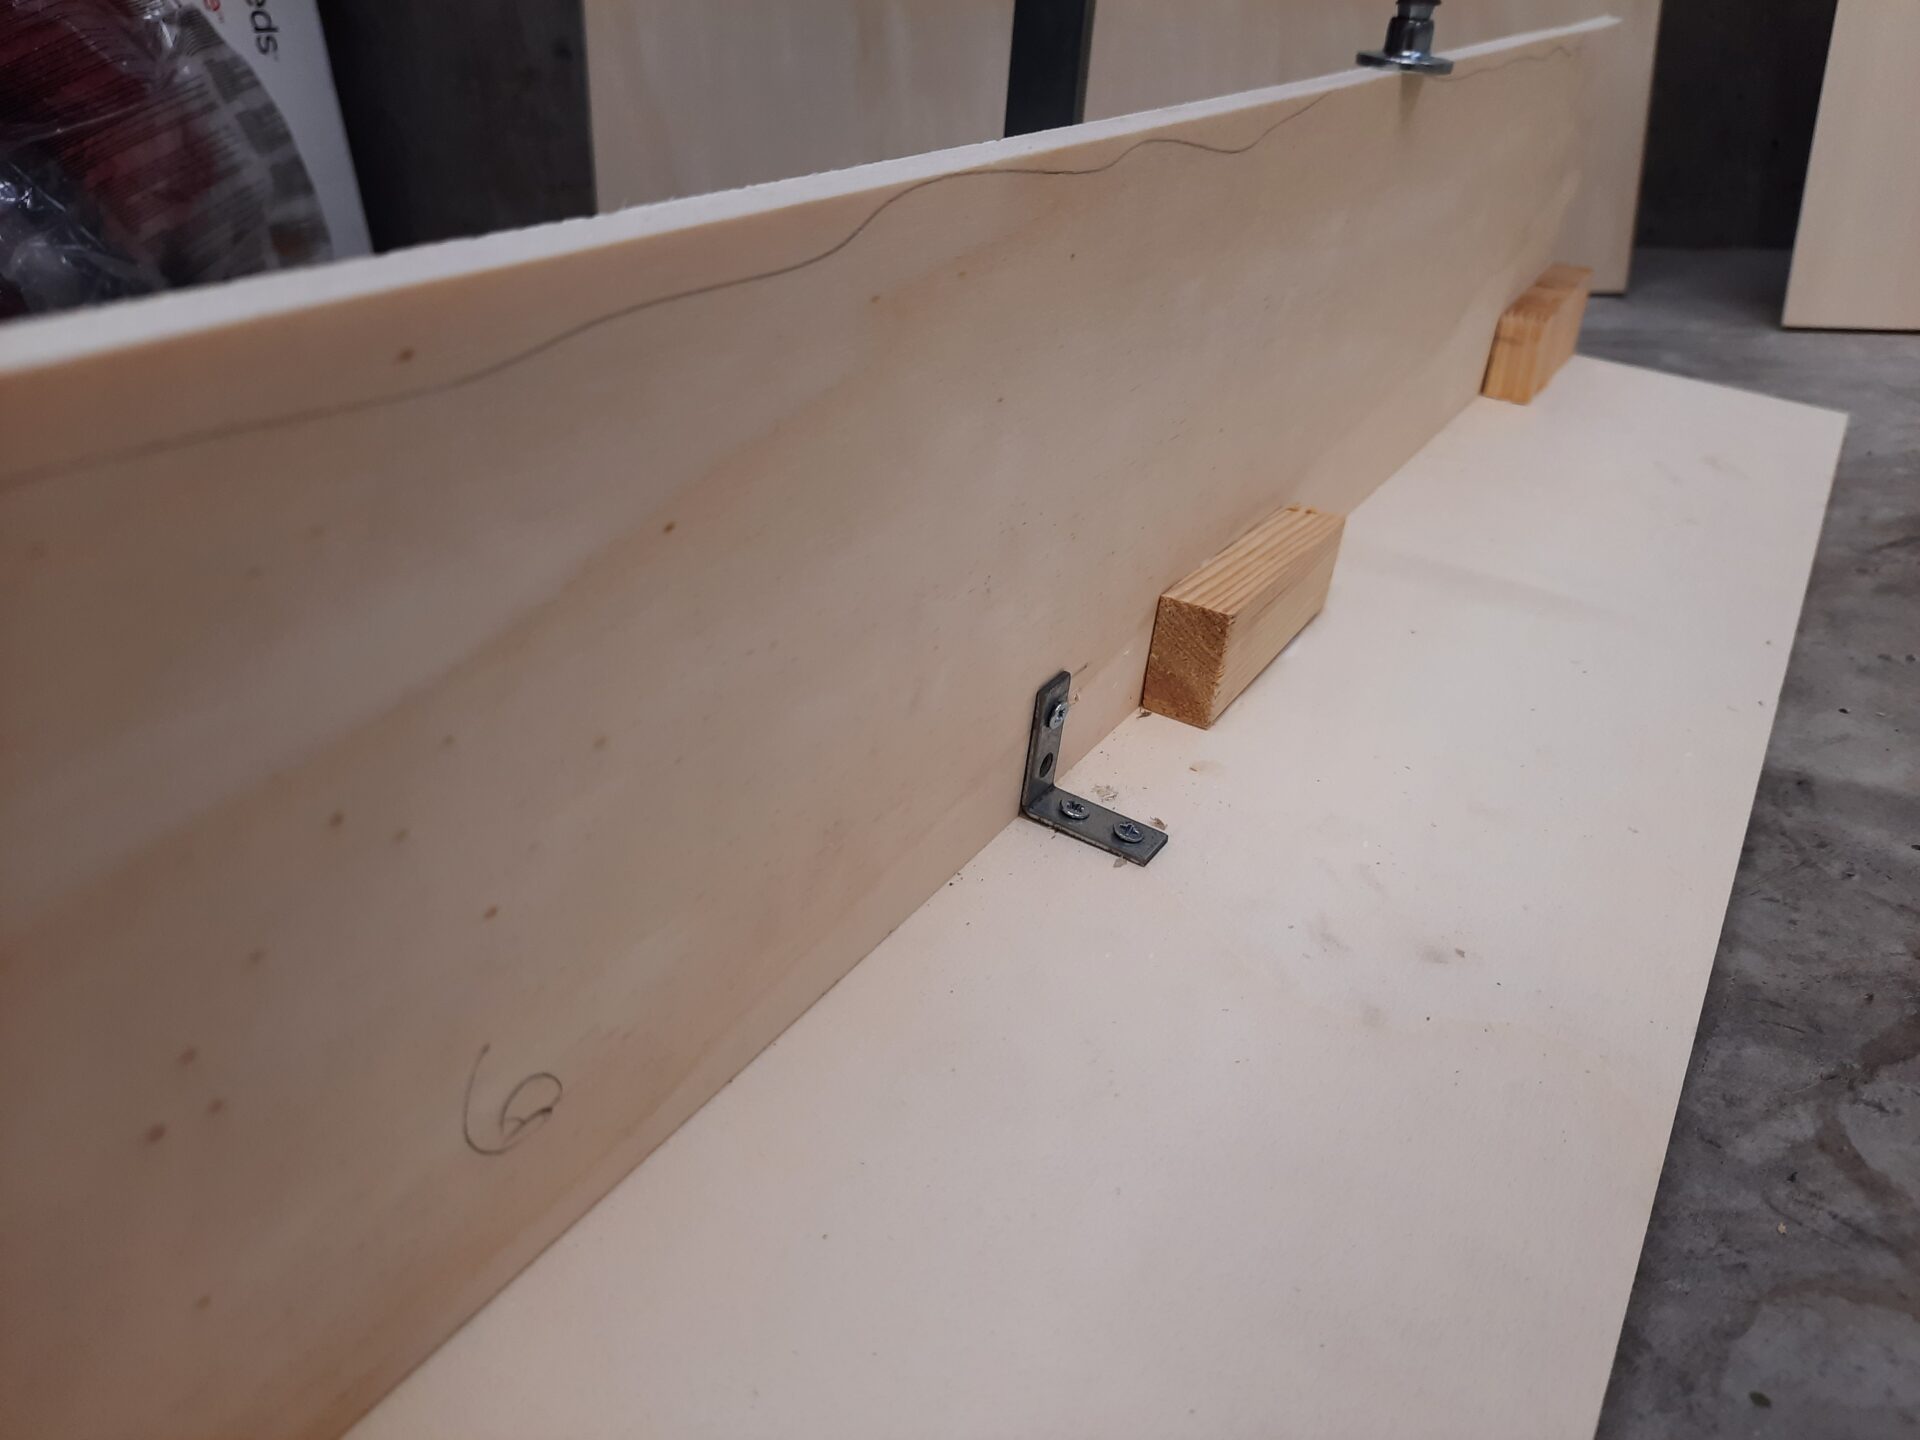
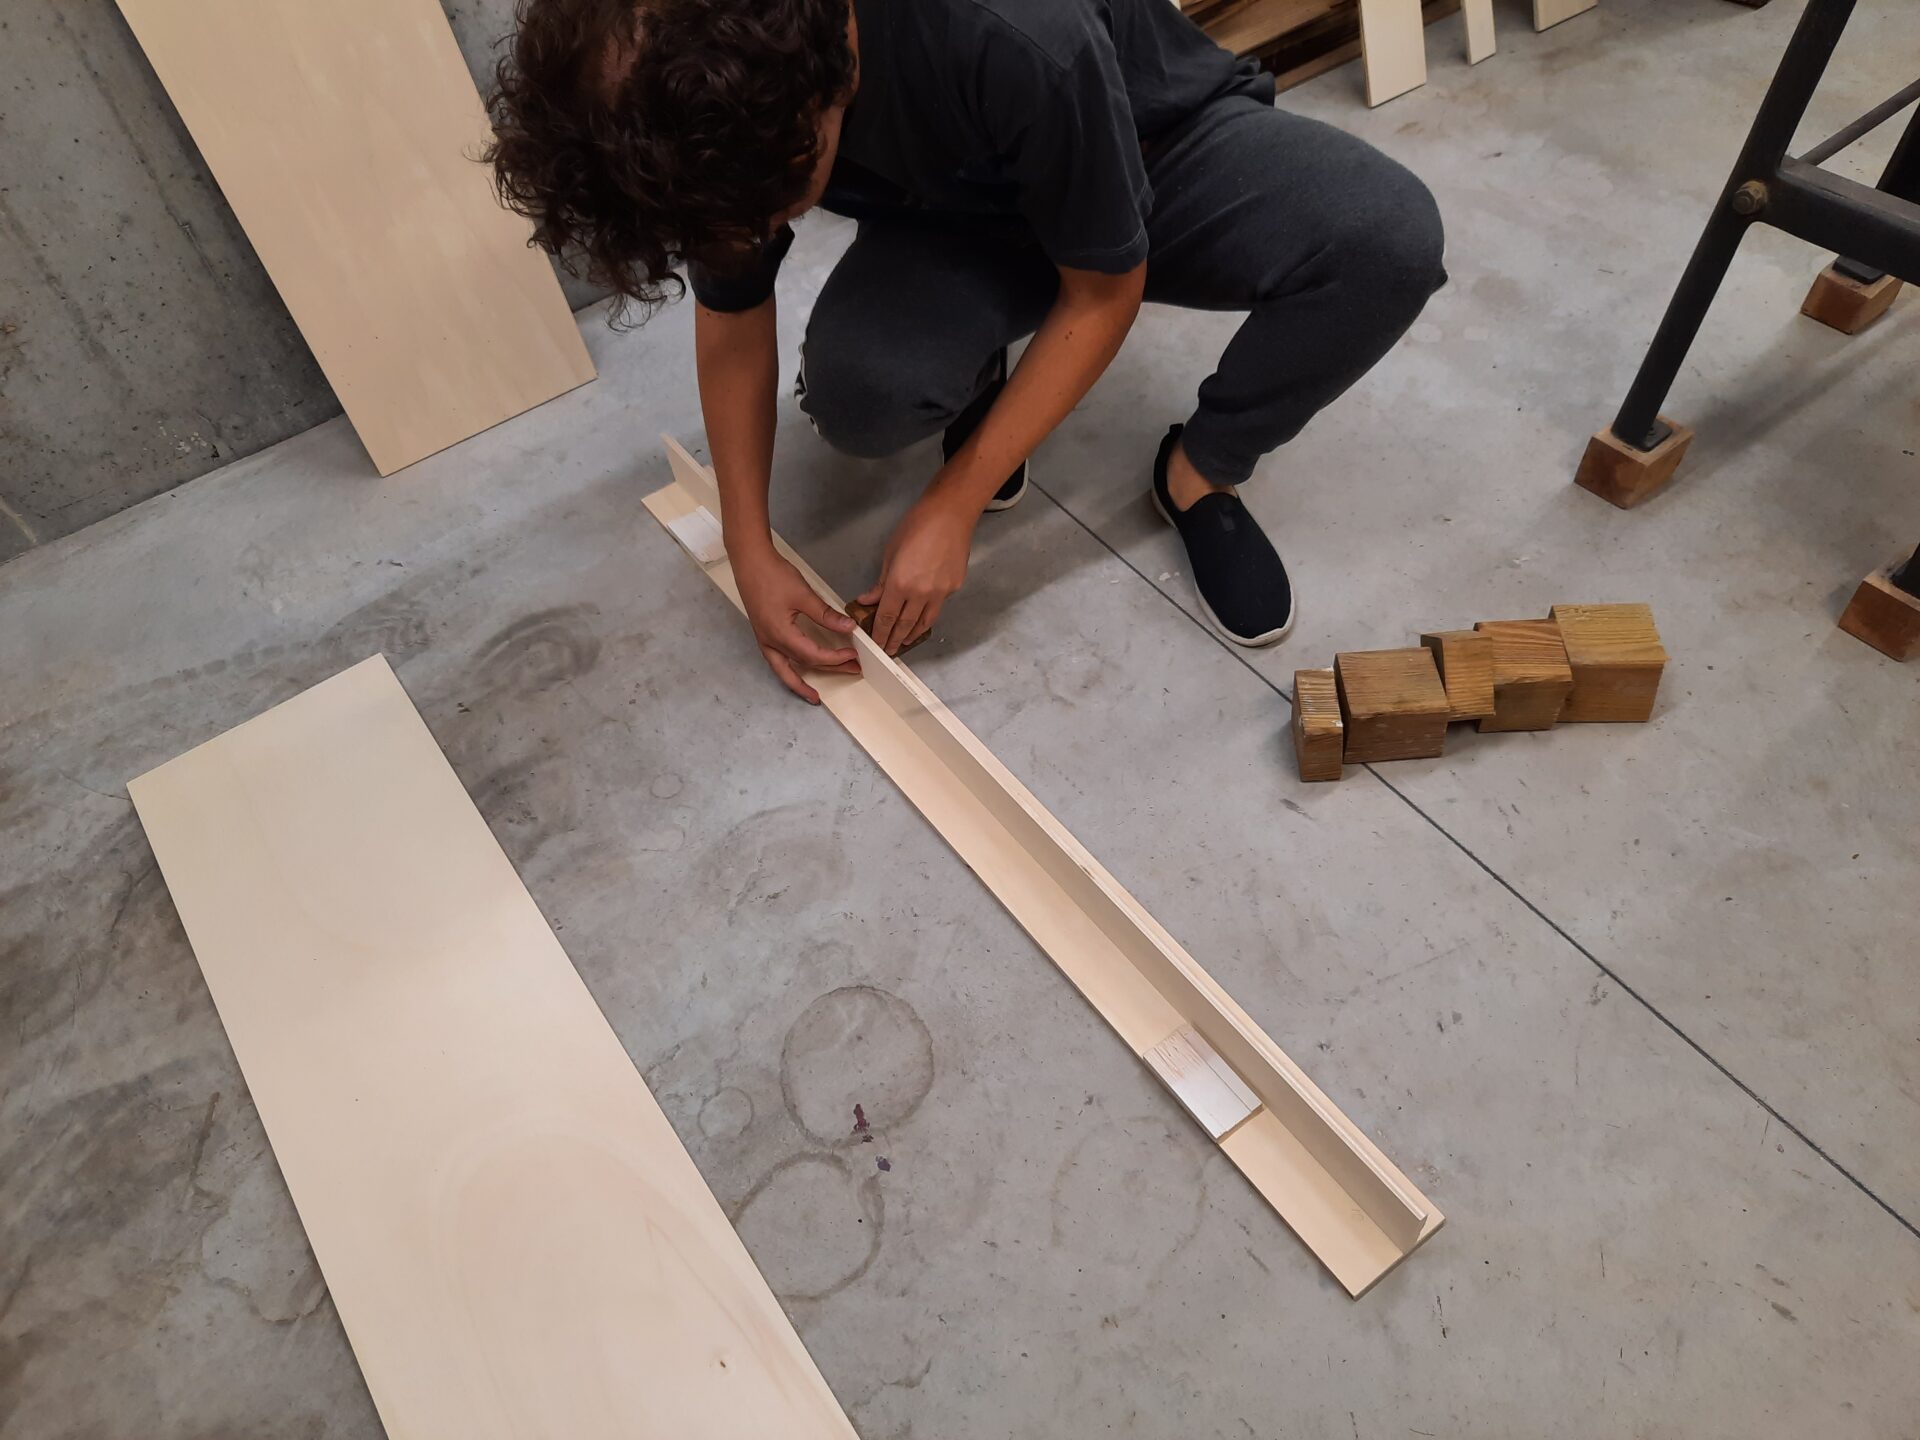
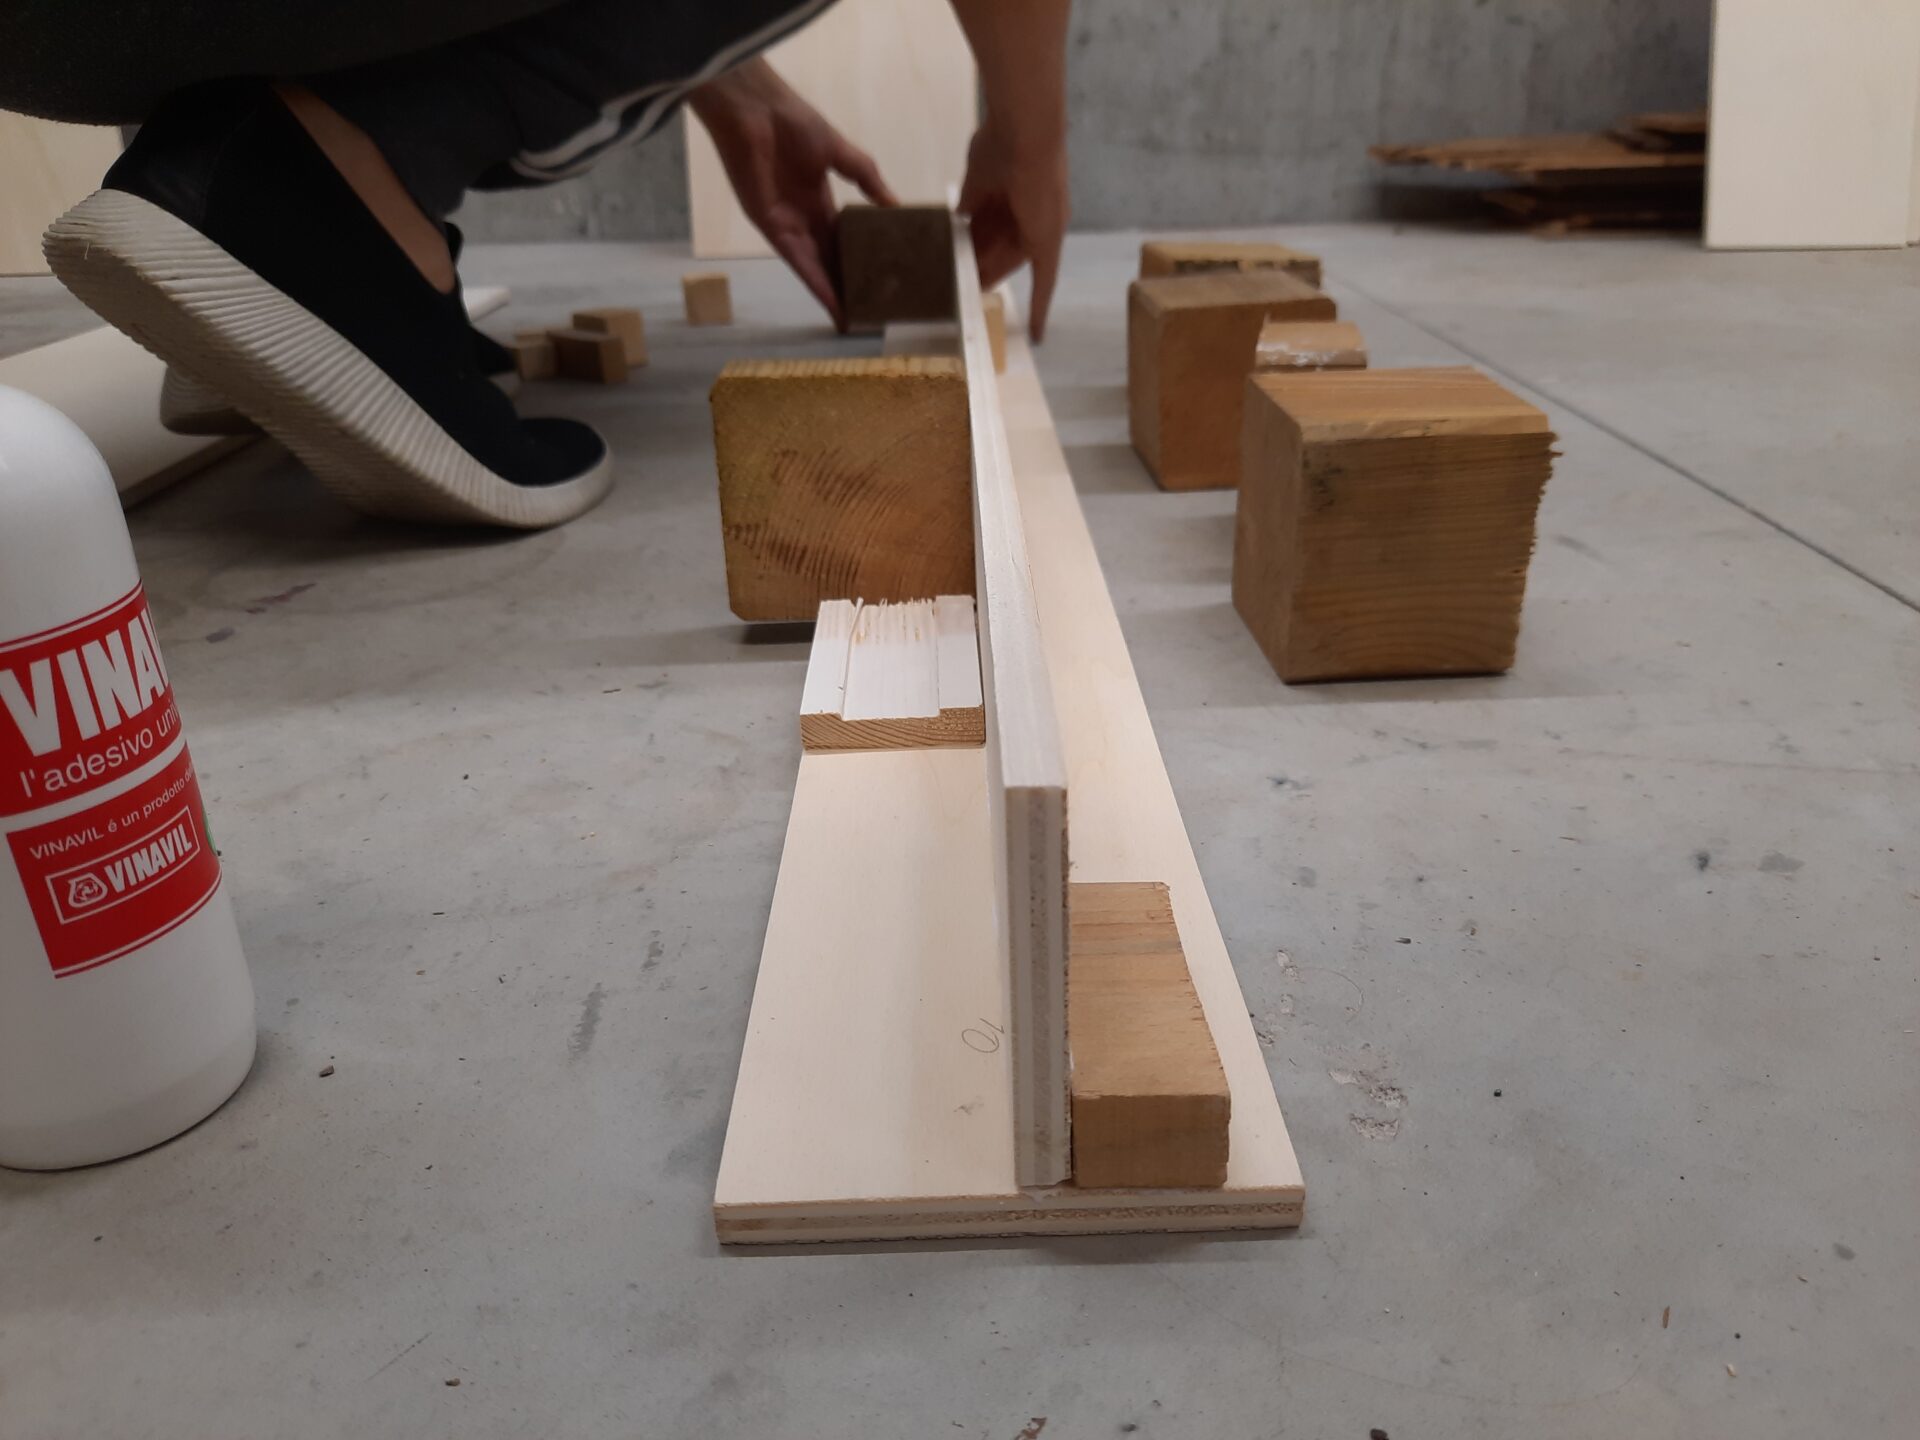
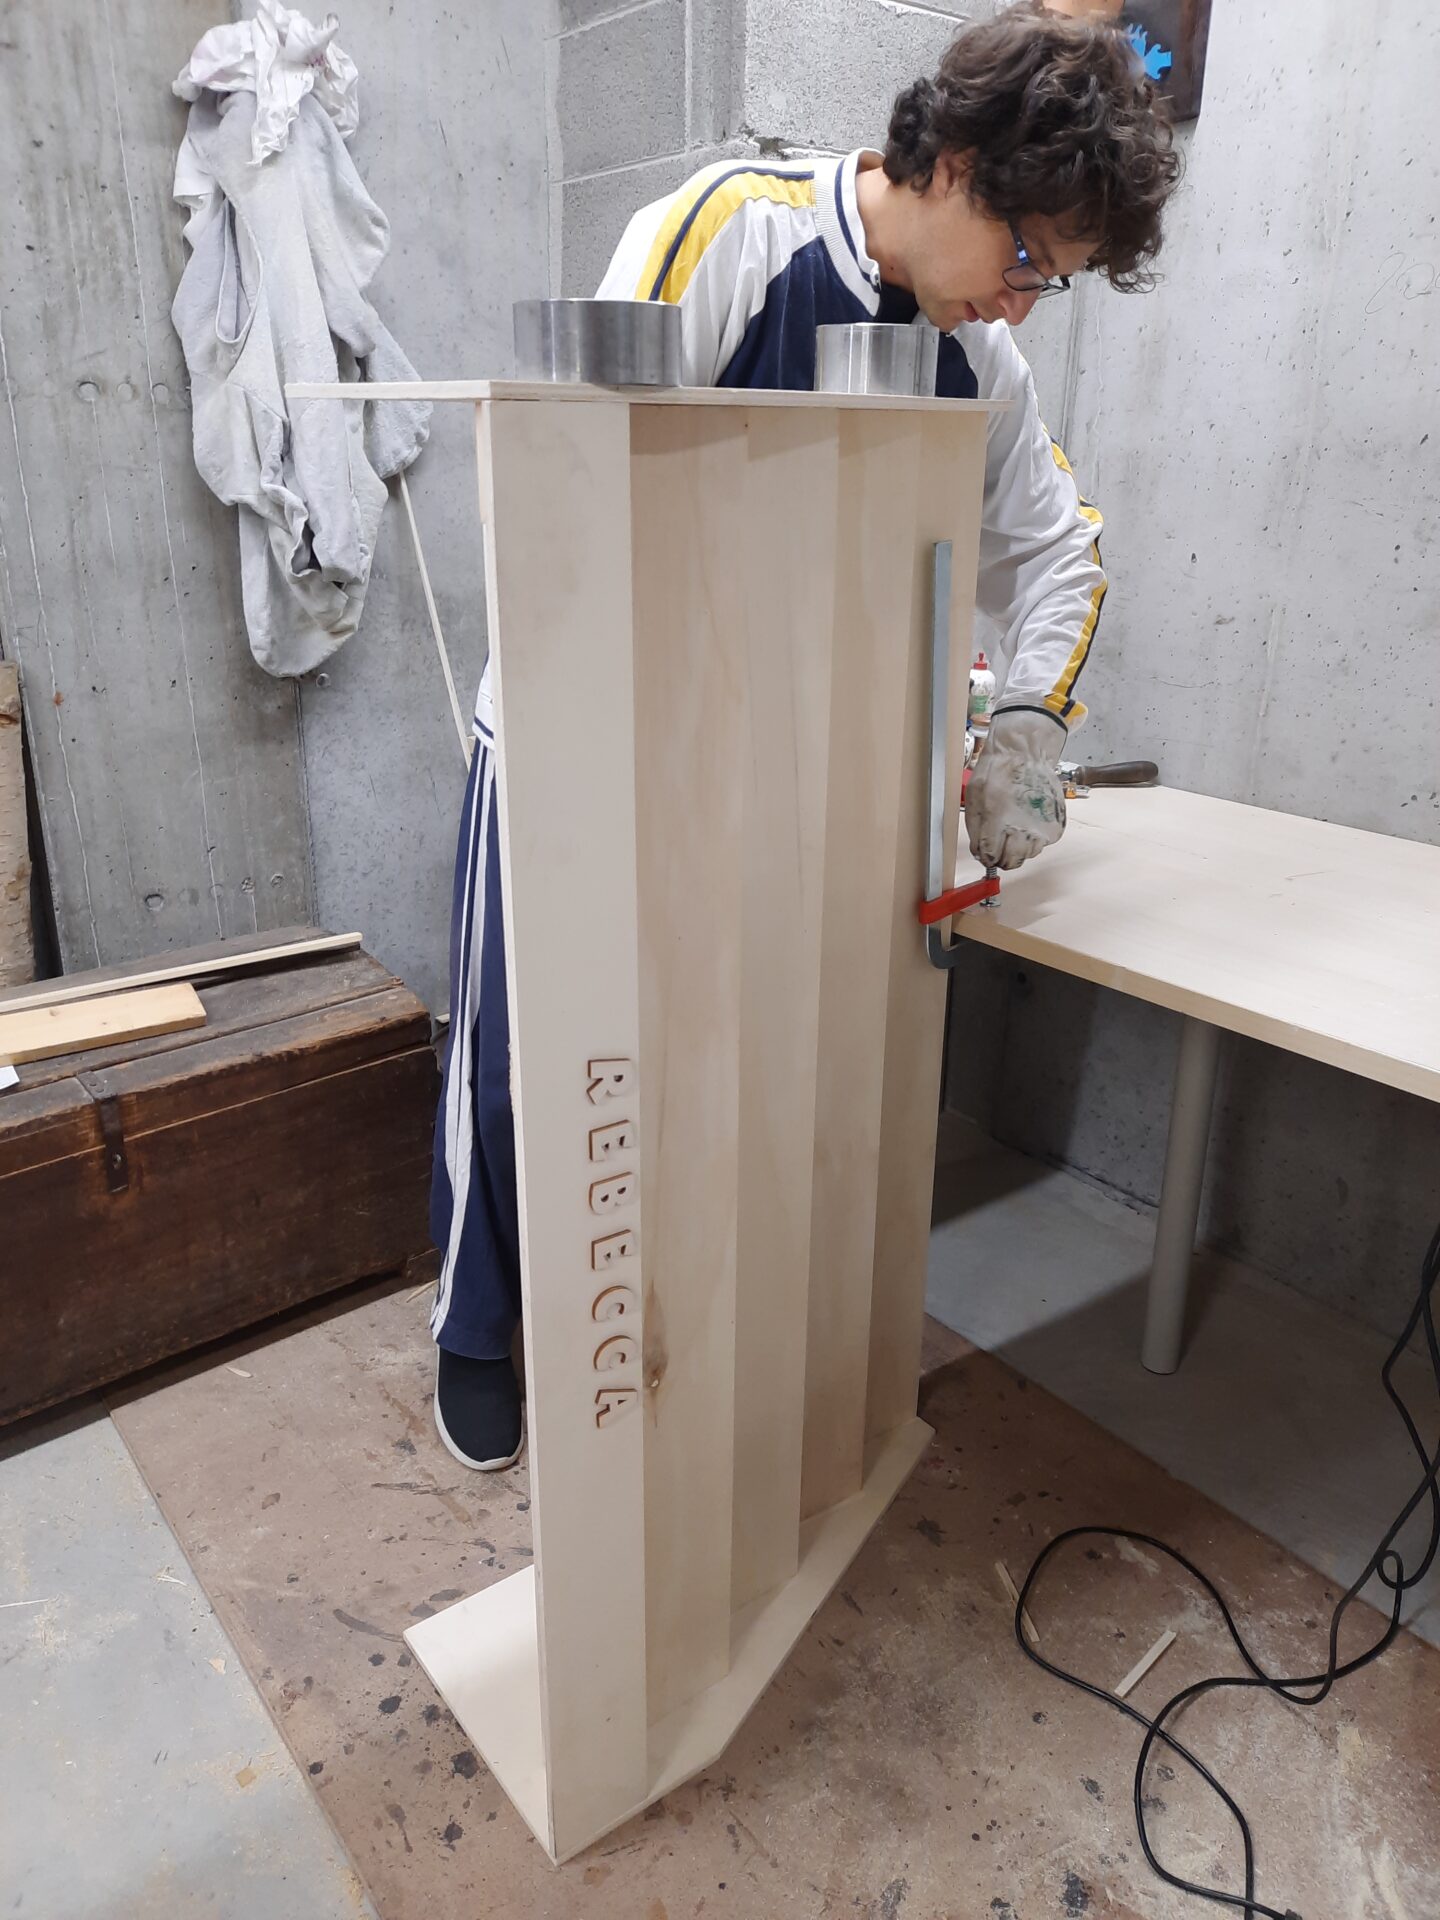
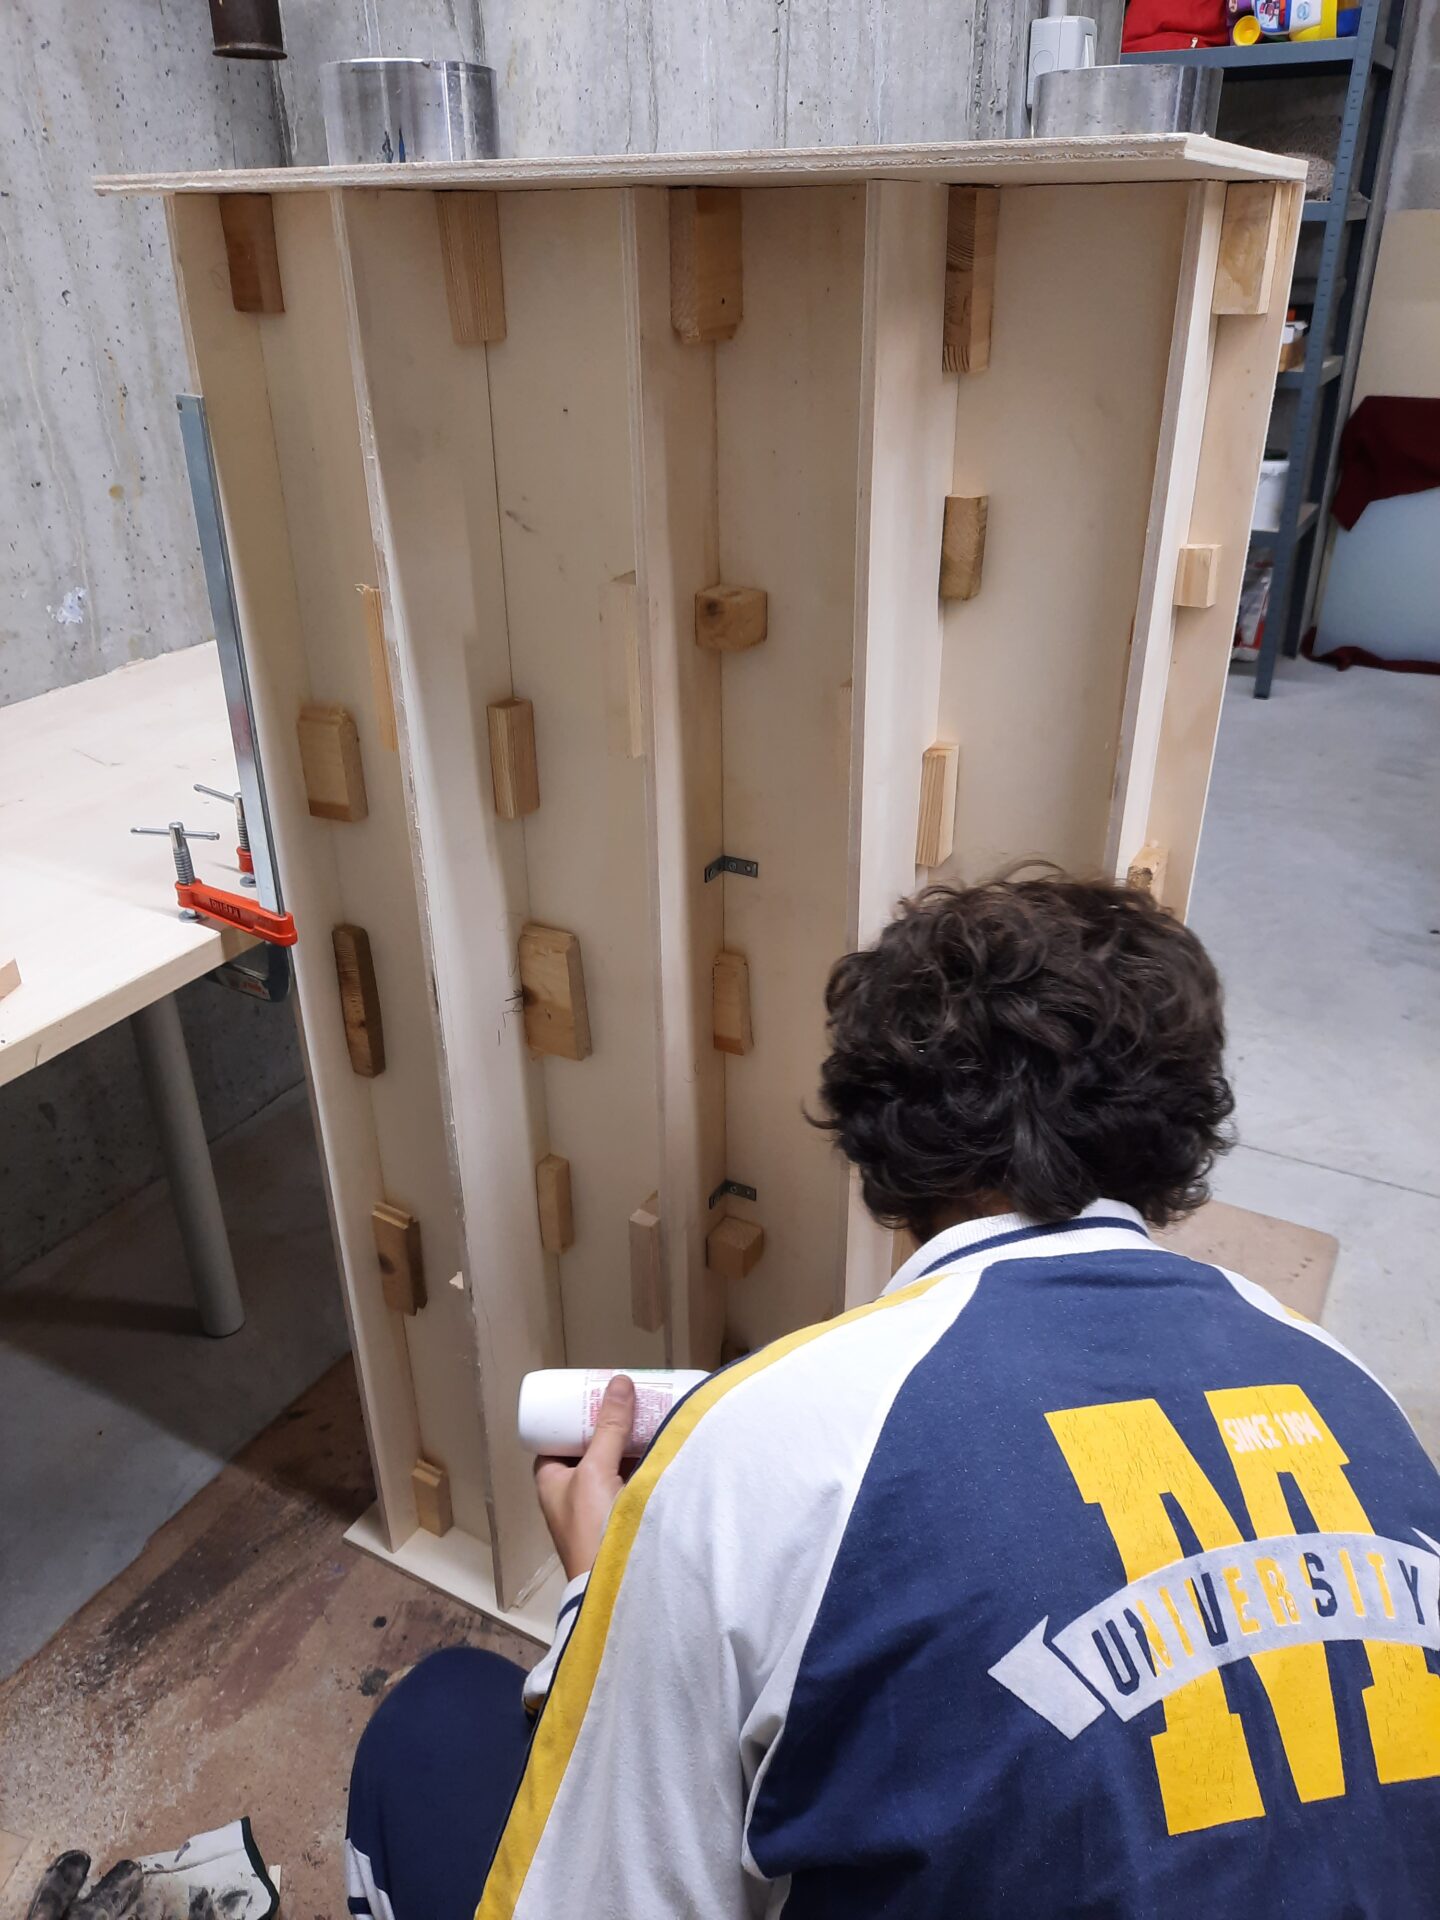
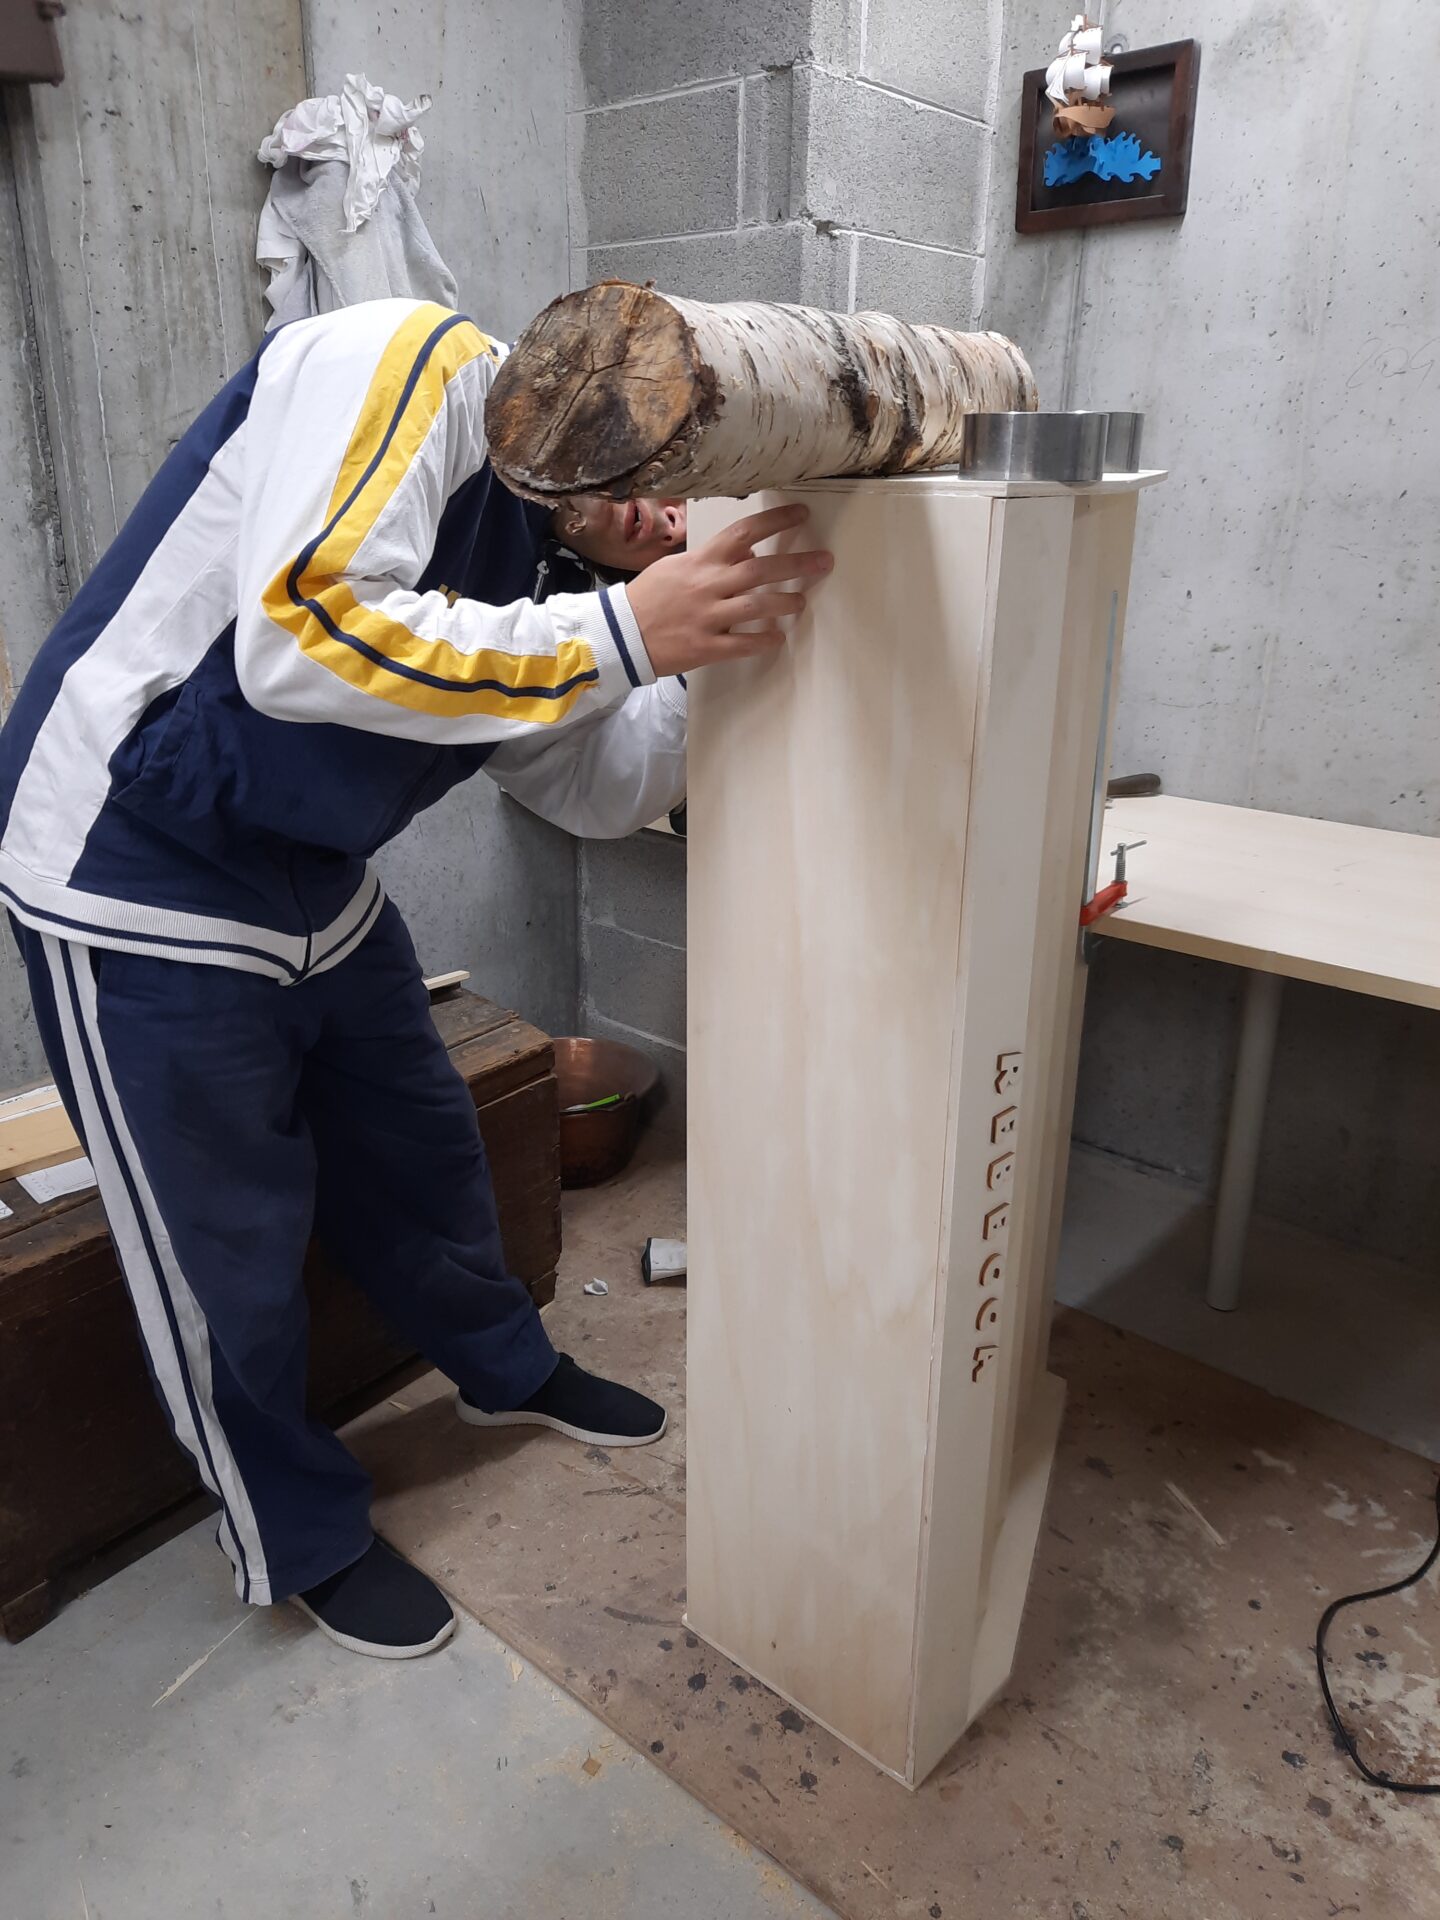
Then the real work began! We started constructing the “stair” that would become the front of the bookshelf. It was not easy, the hardest part being keeping all the pieces together in the right position while the glue was hardening. Under each shelf, we glued wooden blocks for stability and strenght, under the central shelf also metal reinforcements to be sure the pieces were joined at a perfect 90° angle.
Since each front was the same size, we built a jig as a guide to follow: we wanted to be sure to build the project following the project perfectly. We left a little margin for errors!
We joined each shelf to the following one starting from the topmost one.


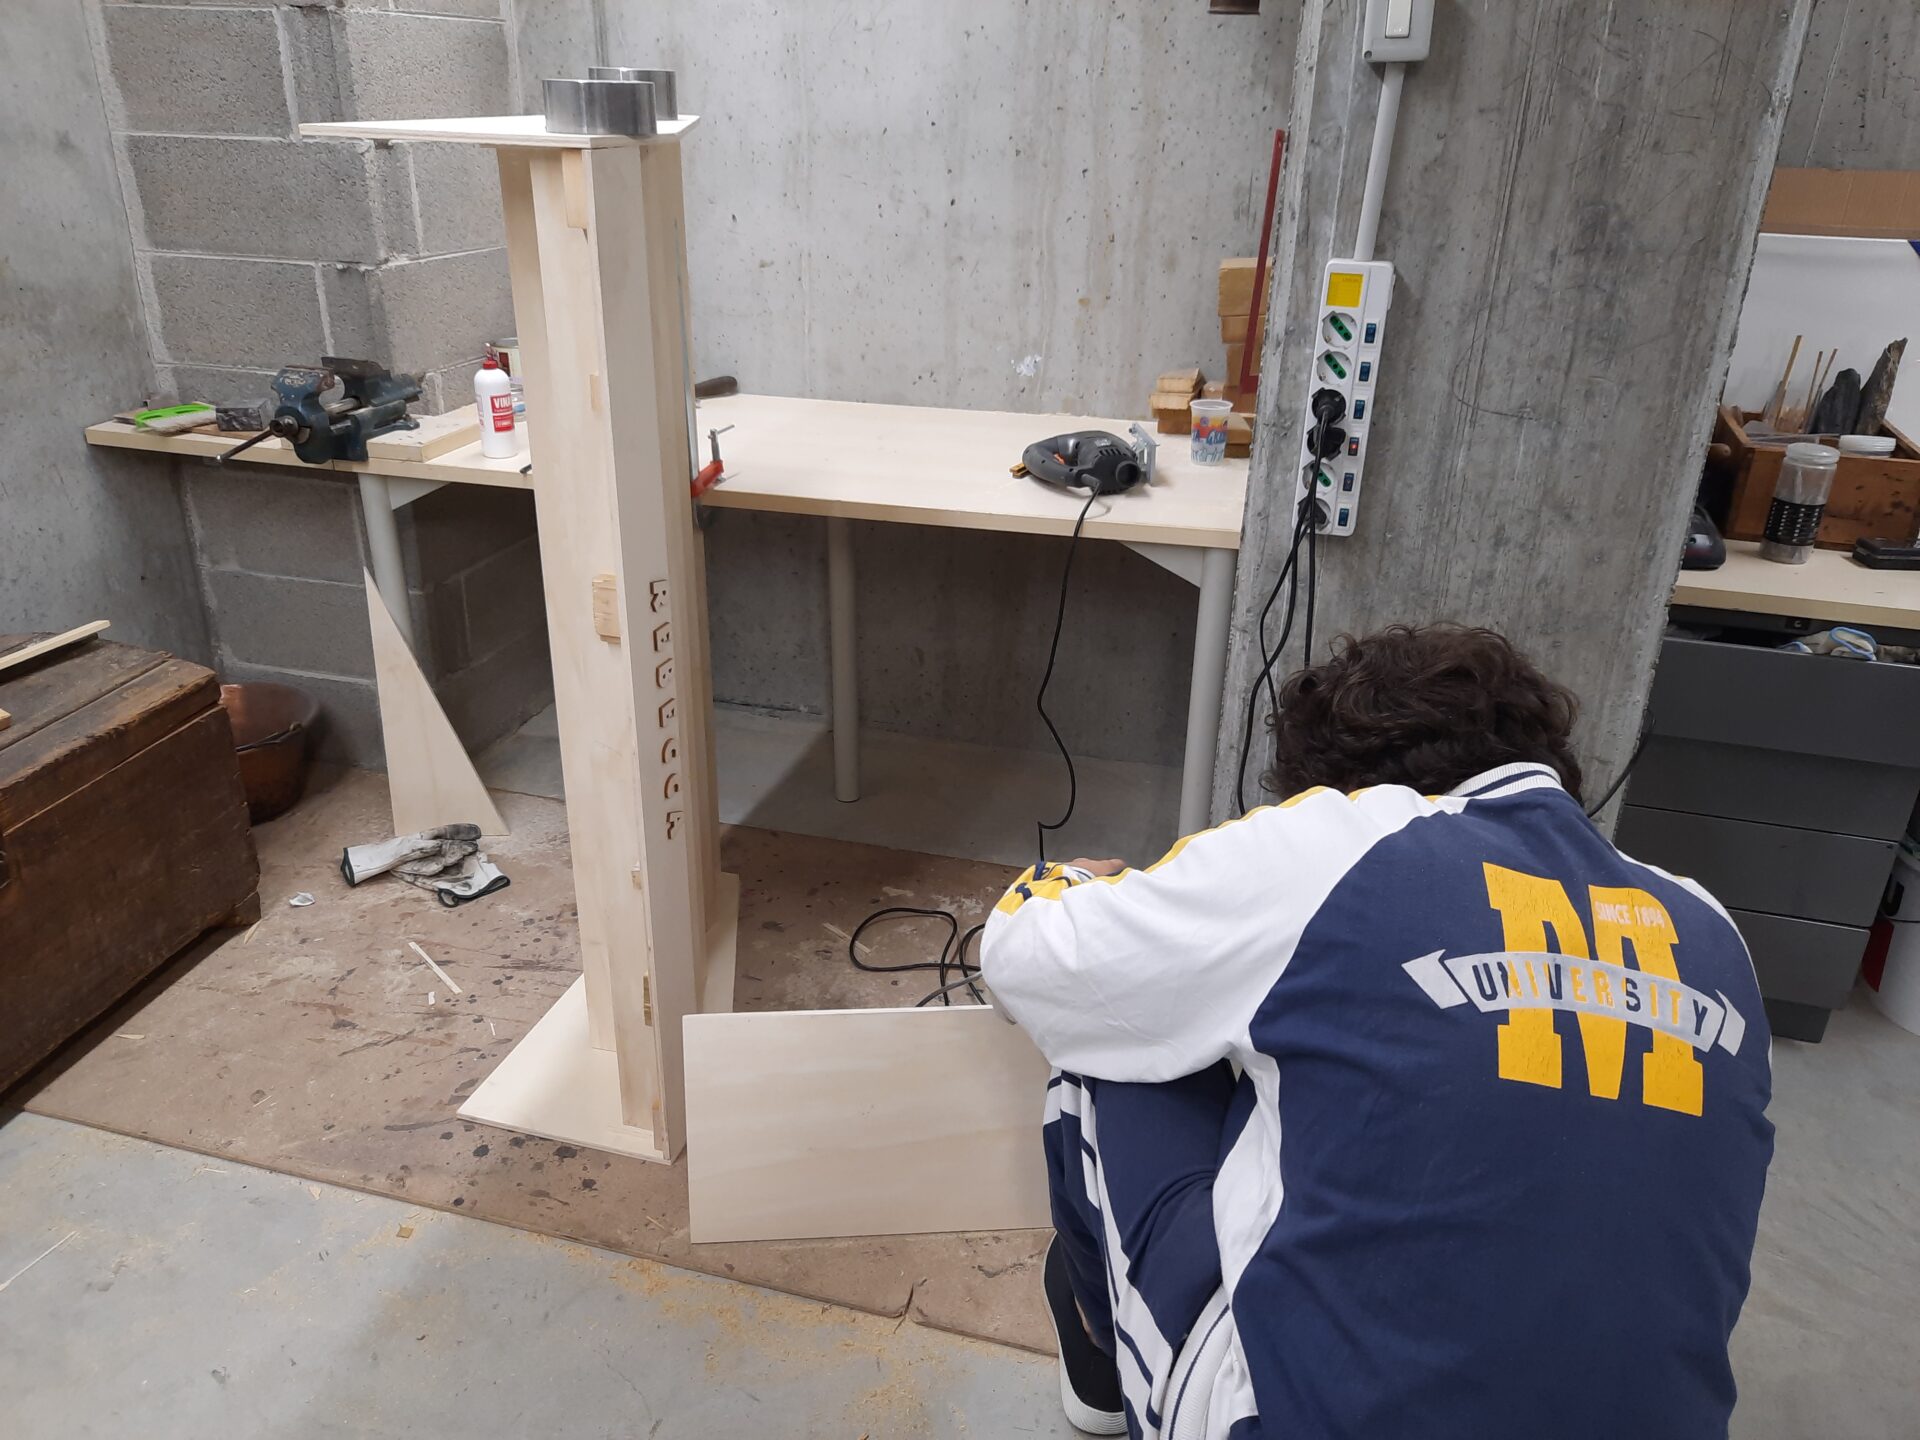
When the stair of shelves was finished, we added the sides, bottom and back.
About the sides, we had two rectangular boards that we cutted to give them the triangle-ish shape needed.
Next, we added the bottom. As a special reinforcement, we added under the lower shelf a few reinforcement blocks the perfect size to touch also the bottom board. We glued those reinforcements to the board to have maximum strenght here.
Another reinforcement (yes, with toddlers you never know!) was adding two strong and thick vertical boards under the fourth shelf from the bottom: those boards touched the bottom, to support the weight of the upper part of our project.
Also, my husband did a little change to the original project, for stability. To make the fourth shelf from the bottom (second to last from the top), he aske for a longer board, so the shelf could touch the back of the bookshelf.
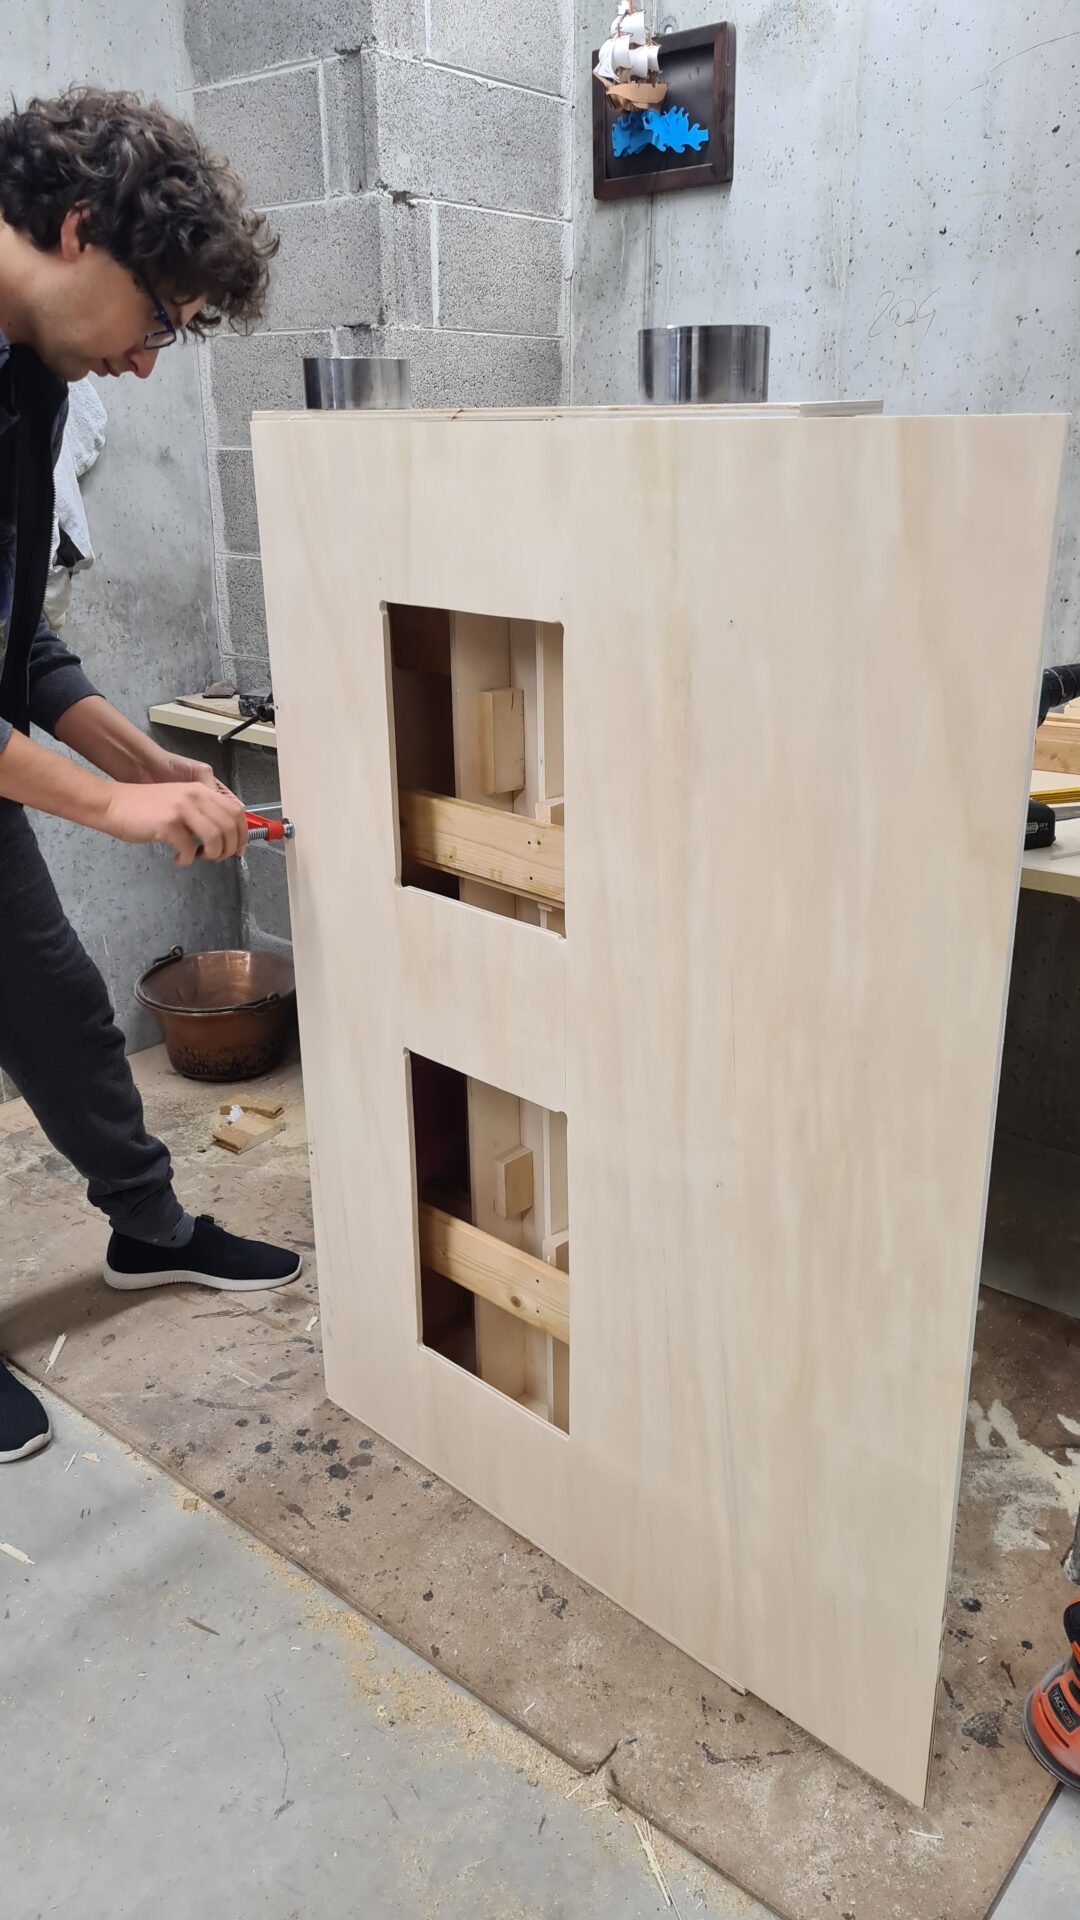
Last addition, the back. Before glueing it to the project, though, we had to cut a couple of holes because we needed to accomodate there the wall sockets of the bedroom. We also decided to make those holes very large, to let air flow inside the bookshelf and to have room for repairs, if needed.
Describing our work makes it seem easy and quick, but in reality this was a long process, carefully planned in each step!
Decoration and finishing
Finally, the most relaxing part came: decoration and finishing.
Step one: sanding. We rounded the corners and took care that all the surface was smooth and free from splinters.
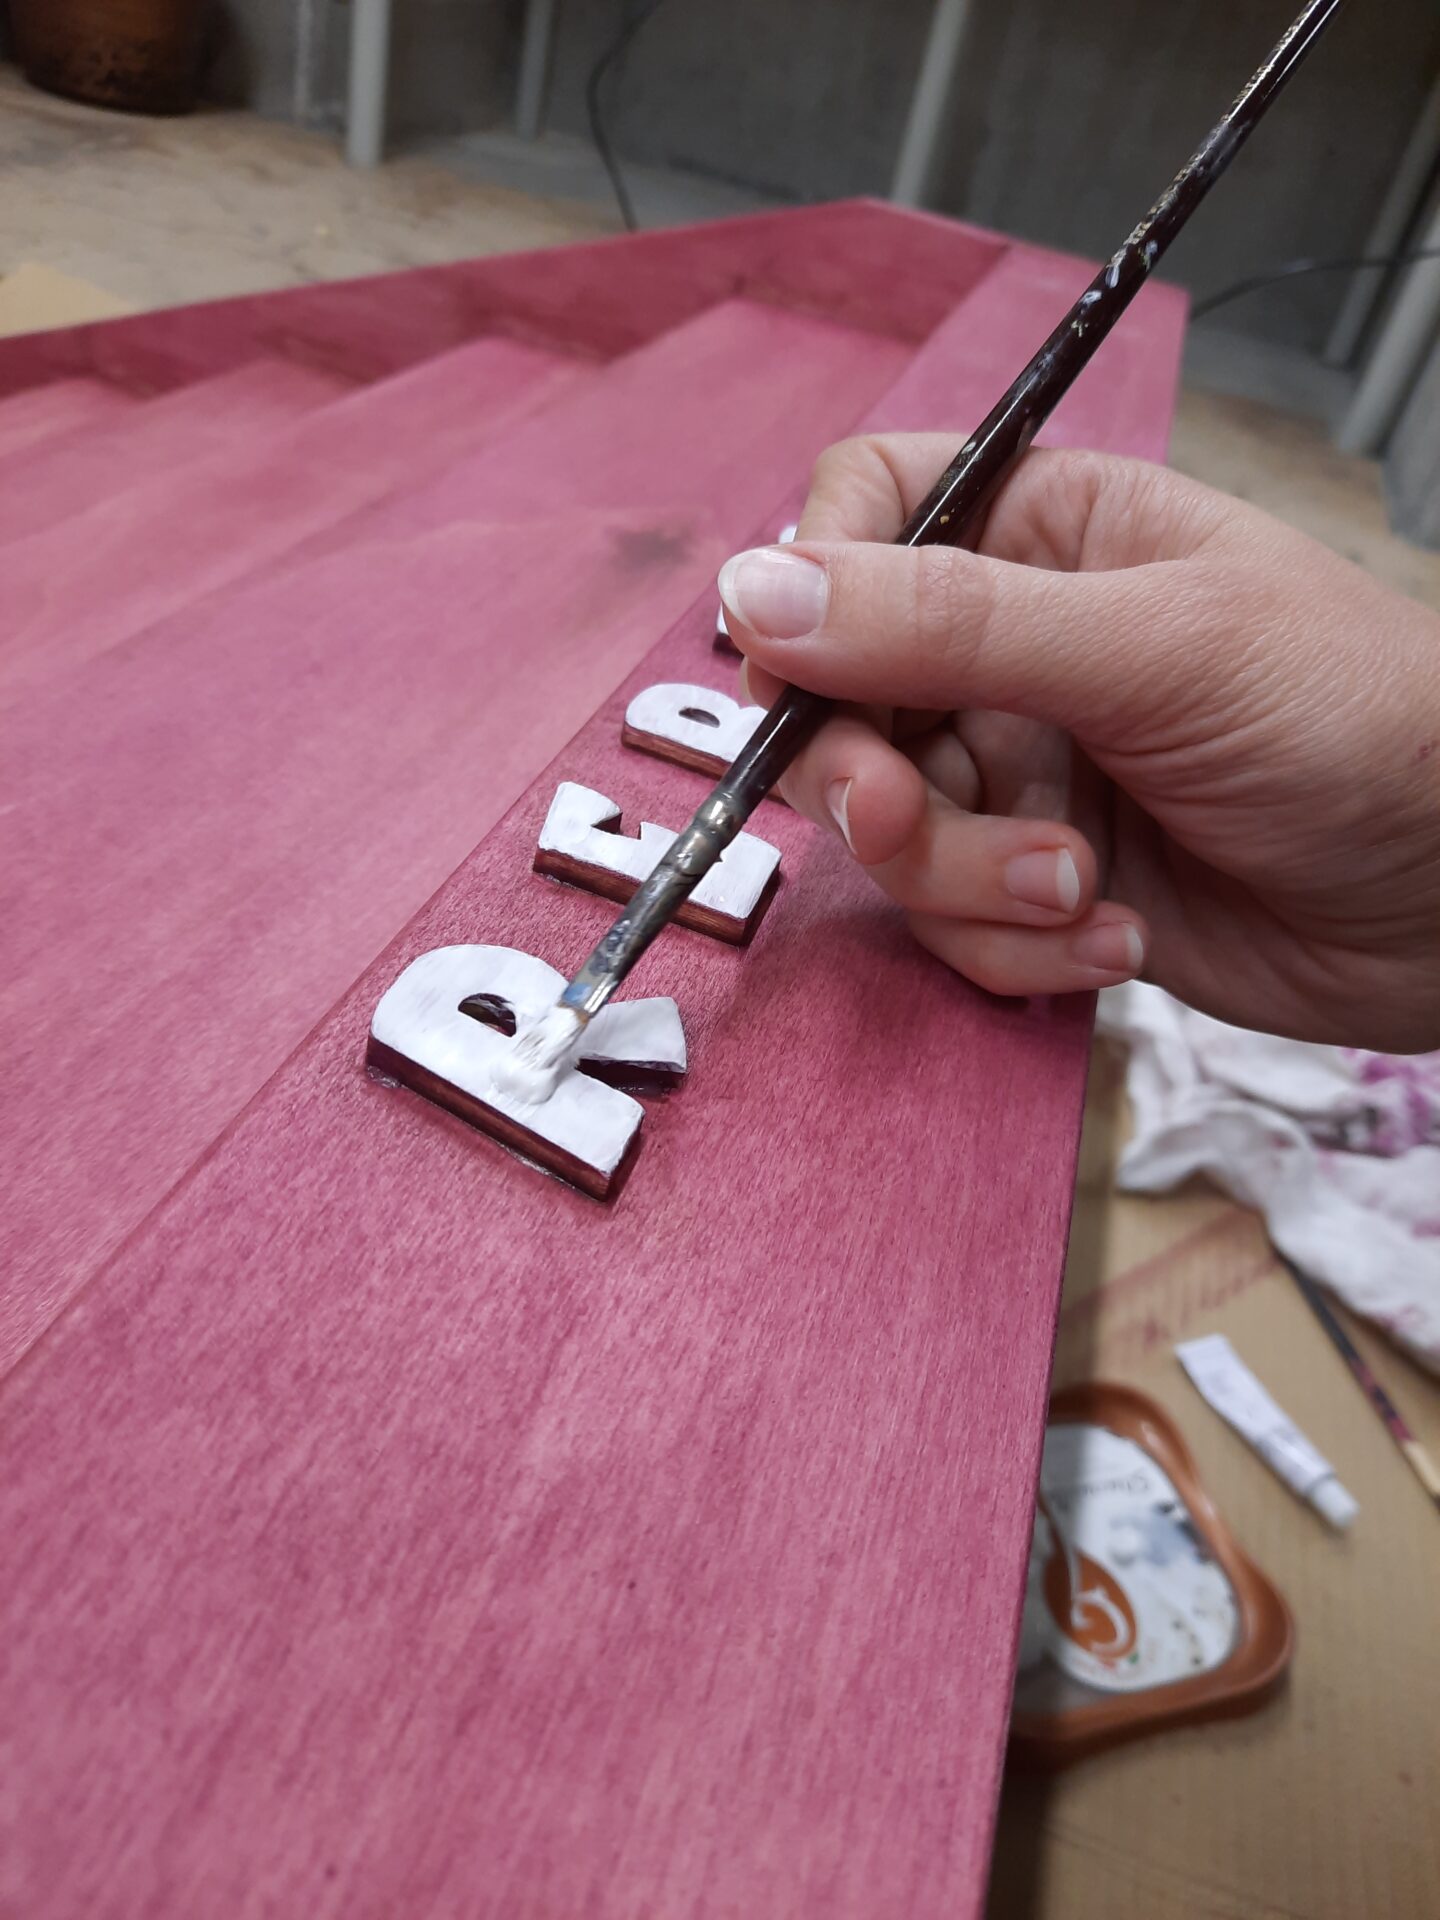
We painted the whole bookshelf pink, with white decorations on the front. We left the other parts undecorated because the plan was to decorate it with loads of books! Also, the choice to paint it all with one color was to keep the attention on the books themselves. With other colors and drawings, it would have been too crammed and confusing!
Two layers of paint were enough, completed with a little light sanding.


An important security tip
Each piece of furniture could be a hazard. The first time our daughter saw the bookcase, she thought it was ment to climb, like a ladder! Her beloved books were enough to convince her of the real use of her new bookshelf, but better safe then sorry. Always secure furniture to the wall with a strong anchor to avoid any tipping hazard.
Well, after six months of use I can confirm the project was a success! Our daughter uses it a lot, it’s her favourite play corner in the house. She can reach almost all the shelves easily by now, and she’s beginning to learn how to put her books back in place.
The play corner, next to the window, is completed by a soft handmade carpet, crocheted with love by my mum.
Every time we look at the bookshelf we feel proud of our project. We didn’t think at first we could be able to make it, instead it’s goodlooking and sturdy.
What are your thoughts on this project? Do you have suggestions for improvement, or do you like the final outcome as it is? Feel free to share your thoughts!
Resources for your own project
Download free pdf plans
If you’d like to try and build your own bookshelf, you can begin by downloading our plans, for free.
Here you’ll find our custom-sized project, with all the pieces needed and building instructions. The final sizes of our bookshelf are 125cm L x 32cm W x 90cm H, and the pdf plan is in centimeters.
Do you want to make your bookshelf with your own custom size?
Try out the calculator instead!
It works both with Metric and Imperial system.

Wood board calculator: make your own Montessori bookshelf
Besides a free pdf with the custom project we made for ourselves, I coded a wood board calculator.
You can input the desired sizes of your bookshelf, width and depth, and we’ll calculate the rest for you.
The results give you a list of all the wooden boards you need to cut (or ask your favourite supplier for a custom-cut). So you can have a project like ours, but custom-sized.
We also provide a visual guide, similar to the one in our pdf, to be able to identify at a glance which is which and what goes where.
Results
Choose and select ONE of the available options, depending on the desired number of shelves:
Enjoy our resources? Help us thrive!
If you’ve found our resources valuable, please consider making a small contribution. Even the smallest amount can make a big difference!
By donating, you’re supporting us in maintaining our website, acquiring materials to enhance our craft, and dedicating time to create more resources for fellow crafters.
No account is necessary to donate, and we never add any extra fees!
FAQs about Montessori bookshelves
What is a Montessori bookshelf?
A Montessori bookshelf follows the principle of Montessori furniture: each piece is child-sized and designed to increase your child’s independence. Those pieces are usually low and open, so a toddler or child can reach her own toys by herself without the help of an adult. Sometimes the height is adjustable, so the furniture can grow with the child.
The bookshelves in particular are also front-facing, meaning that books can be arranged so that the child sees the covers, not the spines. Pre-schoolers can’t read, so they need to see the images on the covers to determine the content of the book and decide which one they want. We are used to looking at book spines, but our sons are not.


Why is this front-facing bookshelf called "Montessori"?
The name comes from Dr. Maria Montessori, an Italian physician and educator who developed the education principles that have now her name. The Montessori method emphasizes a child-centered approach to learning, and encourages independence and self-directed learning.
This is why, in a Montessori classroom or home environment, the bookshelf is designed to be accessible to children, allowing them to choose and handle books independently. It typically features low, open shelves that make it easy for children to see and select books, promoting literacy and a love for reading from a young age.
What is the best way to arrange books on a Montessori bookshelf?
The shelves shouldn’t be crowded, with books on top of each other: each item should be well visible and in reach. If you are worried your child would not be able to have all his books available, that’s not a real problem. Instead, rotating the books from time to time would keep your child interested.
Did you ever notice that after a short while your son looses interest in that toy that seemed the one, that he carried with him all around? Children tend to loose concentration soon, they are attracted from things that are new or they haven’t seen in a while. Not overwhelming them with too much stimuli will help increase their concentration: while playing, one activity at a time, one item at a time would be a great benefit to learn how to focus.


A few tips on displaying books on a Montessori shelf, that we experience with our daughter:
- You can arrange them from tallest to shortest, even by color, to help your child develop a taste for order and keep visual interest. An eye-catching book display will encourage your child towards books. Also, our higher shelf has more room for taller books: the tallest ones we have are also destined to an older age.
- You can group books by subject so your child could find easily what he want to read. He’ll be encouraged to follow a reading path and pass from book to book, even to create links between them. Our daughter became able to spot a feature in a book and tell it appeared somewhere in another book, even pinpoint in which one!
- Changing places, even daily as you use the books, helps your child be an explorer. Remember, you can arrange the best display, but your child will always have the final word on it! Don’t stop his creativity, but encourage it! After a while of displaying her books ourselves, with good learning results, everything changed. We stopped arranging because our daughter started to rearrange herself. She would at time take each and every book down then put them back to place. She was beginning to have her own mental order, and we wanted to embrace this. Isn’t this the basic Montessori philosophy, after all?
What's the ideal height for a Montessori bookshelf?
Seing the purpose of the bookcase, the ideal height varies with the age:
- 40 cm (or 16 in) for infants
- 60-81 cm (or 24-32 in) for toddlers or pre-schoolers
- 81-101 cm (or 32-40 in) for school-age children
Our advise, though, is to think in advance for the future: children grow fast!
We chose to make the highest shelf 65cm high (about 25 in): at the beginning we could use the lower ones and fill the others as our daughter grew. We wanted to think about the future, to make the bookshelf useful and appealing even after a few years.

Types of Montessori bookshelves

Tiered book display
This is the kind of bookshelf we decided to make. It provides easy access to all the books, provided the maximum height is age-appropriate.
The shelves are organised as a staircase, which gives stability to the whole structure and allows the child to see all the book covers.
Some variants may have bottom drawers or open shelves for toys or out-of-rotation books. We decided not to add those, so our child could have the best access and the maximum storage possible. Our out-of-rotation books go in a higher storage, out of reach and out of sight, so our daughter can concentrate on the already numerous books at her disposal.
Low open shelves
These are the most traditional Montessori bookshelves. They are typically low to the ground, usually at a child’s eye level, with open shelves.
Such a piece of furniture is good also for toys, clothes or items thicker than a book. They can also provide a wide top shelf to be used in various ways, sometimes also as a bench (but beware of weight limitations).
It’s also the most affordable solution, as many furniture producers such as Ikea have plenty of cheap and functional options available.


Wall-mounted shelves
Wall-mounted bookshelves are attached to the wall at a child’s height. They are an excellent choice for small rooms where you need to save floor space.
They fit well in underused corners, such as under windows. You can place multiple shelves in various configurations in different areas. More shelves could mean having topic-specific corners (food books in the kitchen, bedtime stories next to the bed…).
You can be creative in choosing your shelves: use old pallets (well-sanded, though!) or spice racks.
An idea from montessoritips.com to repurpose wall-mounted shelves when your child grows: flip the shelf upside down to turn it into a clothing rail!
Sling bookshelves
Sling bookshelves are similar to the wooden tiered ones, but they have fabric or canvas pockets to hold books. These pockets make it easy for young children to flip through the books. They can also become a creative space for hide-and-seek games! Also, the softness of fabric protects the book cover and corners.
This is an option we did consider, but discarded for one reason. We had to fit our bookshelf in a closed corner, between two walls and a big wardrobe. Not easy to move, then. When you have fabric pockets, small toys can easily slip out of the sides, as they are open, thus hiding under the bookshelf. We wanted to avoid going around the house for months looking for lost items. Or, better… it’s something we have to do weekly if not daily, so we prefered the full-wood solution.


Rotating bookshelves
Rotating bookshelves can be rotated to access different books, placed on four sides, like in certain shop displays. They are efficient for storing a larger number of books while still keeping them easily accessible.
This type is more used in classrooms than in home environments, because it has the benefit of offering different sides to different children all at once. It has, though, the downside of floor space, since it can’t easily fit into a corner or lean to a wall.
If you like to display your books spine-forward, this kind is great and provide plenty of storage space. For displaying the covers, though, it’s not my go-to choice: at each height, you have four sides, one book each, no more. Since you can’t make it higher than your child, it looses it’s main purpose.
Movable book carts or crates
Montessori book carts or crates are mobile book storage solutions. Their wheels make them portable: they can be moved around the room or to another room, making it convenient for children to choose books anywhere they want to play and return them to their designated spot. Book carts are often used in Montessori classrooms to make books easily accessible in different areas.
To be moved by toddlers, they need to be small, also for security reasons, so they can contain less books than other fixed solutions. It all depends on your needs and space.

I hope your DIY journey into making your own front-facing bookshelf is great! If your child has the appropriate age, you can involve them in the process: I love when our daughter watches us make things, being for her or not. I think it’s a highly educational moment. She learns that you need time to make something out of raw materials and she learns that things can be repared or repurposed to be used again.
Remember also that a Montessori bookshelf is not just a place to store books. It can be a peaceful nook to nurture the love of reading and encourage your child’s independence. It can create a place to be used with pleasure for years. Adjust the setup as your child grows and their needs change, and most importantly, enjoy the journey of reading together.


)
10 Comments. Leave new
Hey! Thanks so much for the plans!
I had a couple issues when using the calculator in inches. It seems like it doesn’t account for the width of the wood for the vertical walls of the shelves. For a 22-in tall, three shelf bookshelf, it’s telling me it should only be a 9-in base which is an inch too short.
Similarly, the back board doesn’t nest in like it should due to the width of the shelves. I ended up having a tack it on the back.
Admittedly, this could be human error, but I wasn’t sure…
Thanks again!
Hello! Thanks for telling me, I’m going to check the issue. If I find an error in the calculations, I’ll tell you when fixed. I really appreciate you describing your issue!
I’ll also doublecheck the cm to in conversion. I am European, so I started in centimeters, then added the inches conversion.
Thank you again!
Has this issue been checked to make sure it has been resolved? I am from the U.S. and I typically use inches as well when I’m working. Thanks!
Hello. Yes, I worked on the issue, but if you are experiencing other problems please tell me and I’ll have a closer look. Thank you!
Hi, wondering why the calculator recommends a lower height if I chose the 5 shelf option, and a higher height if I chose the 3 shelf option?
I wanted dimensions of 60inch wide 15 inch deep with 5 shelves, it recommends about 20inch height. For 3 shelves, it recommends about 30 inches
Hello. Thank you for coming to me with your issue and sizes! I will check what the calculator outputs and come back to you. May I write an email to you if necessary to check your issue further?
Yes, you are totally right, this shouldn’t happen. Fixing soon!
Hi Meg! Thank you for pointing the issue to us! I found a miscalculation and corrected the issue. Please try again the calculator now and tell me if anything seems fine. Thank you again!
What are the best fasteners for this project, and is there a special placement of them ?
We just simply screwed it to the wall. There’s plenty of step-by-step guides around, video or written. Our system resembles this, if it can help you.