My daughter has always been drawn to handmade things: she’s always seen us make what we need, repair what’s broken or adapt what’s not perfectly suited. One day I shared with her the incredible fabric books made by Ricami di Carta, and she was instantly hooked. As I expected, she didn’t ask me to buy one for her: she asked instead if we could make one.
What do you think I answered?
We sat down together, I opened my DIY notebook and we started sketching out ideas. The scenes she loved most from the book we had seen were the train station, the beach and the gelateria. Since we often go watch trains pass by at the station, and Summer was approaching, I proposed her to craft a train that would take us to the seaside.
I wanted to keep it simple and use only what we already had, mainly to have it ready for our next Summer vacation to the beach. So I pulled out my stash of felt paper, mostly scraps left from her Spiderman and Rocket costumes.
That’s how this little felt busy book came to life.

Click for the finished project detailed photos
Table of contents
The basic design

With my daughter’s ideas in mind, I sketched out all the pages one by one. I wanted the book to feel like a real little journey, so I planned the story in order: the cover would be the entrance to the train station; then a double page with a tunnel (where we could also keep the train when the book was closed) and two platforms; next, a bright beach scene; then a sea spread with waves, a boat, and little sea creatures all the way down to the seafloor; and finally, the back cover would be the gelateria.
Once we were happy with the layout, I decided on the final size of the book and created a page template I could reuse while cutting the felt paper. My plan was to cut two pages side by side as a single long piece. Folded in half, that long rectangle would become a double page, front and back, with all the seams hidden neatly inside.
After making all the double pages, all their elements attached, my idea was to stack them together, like signatures in a book, and join them using a thick ribbon as the spine. Simple, sturdy and easy to sew. Or so I hoped!
Making the pages
After sketching all the pages, I began with the first block: the cover and the tunnel page. For the station entrance, I cut out each piece, while my daughter watched closely, curious about every step. On top, I added a little clock, and in the middle a large glass door, with a horizontal architrave above that would later hold the station’s name.
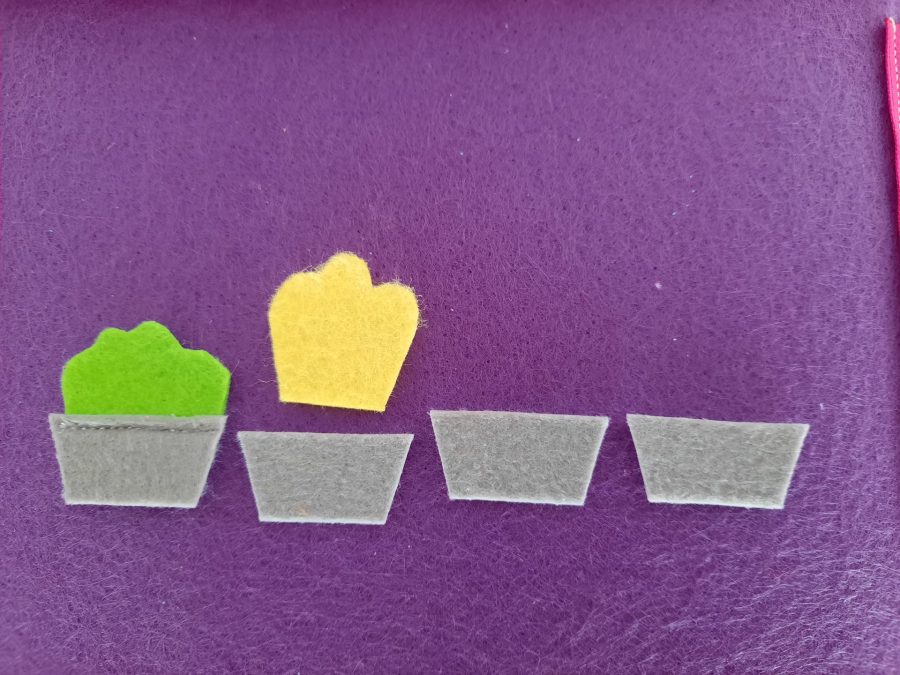
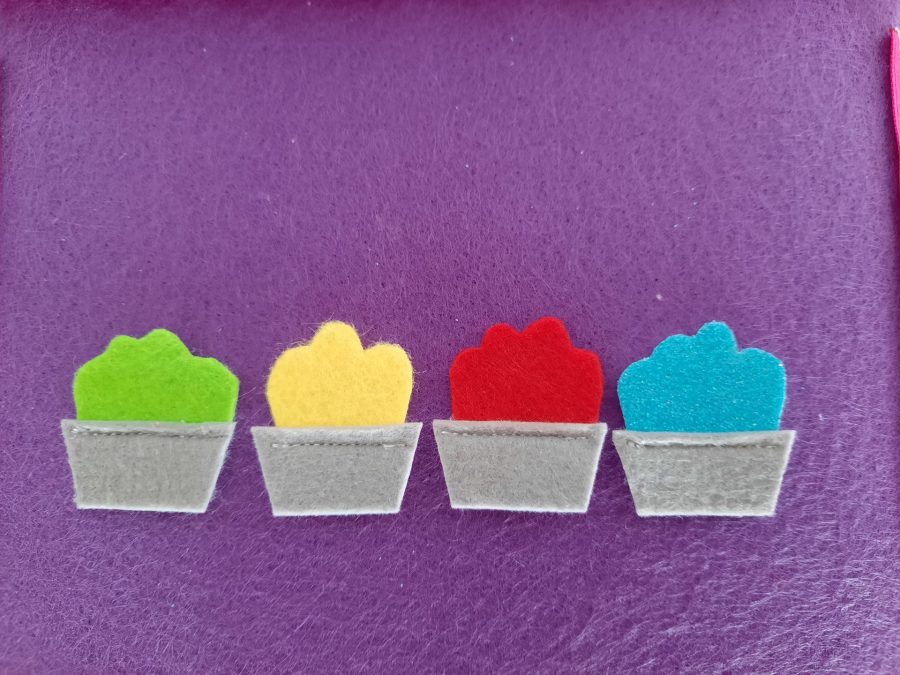
On either side of the door, I placed two windows, each with a little bench below. I topstitched in white on both door and windows to suggest the glass frames. To make the windows feel more lively, I decided to add tiny felt flowerpots, for which I hand stitched flowers with French knots. I know I wanted to keep the book simple, but I simply could not resist adding a little embroidery!
On the other side of this orange double page, I worked on the tunnel. I cut it from brown felt, giving the opening a black background to suggest depth. The tunnel took up the lower half of the page, wide enough for our little train to pass through. Even here I could not resist the big chunk of brown, and added tiny white embroidered daisies.


The train itself was cut from light blue felt, with a separate locomotive and wagon, each featuring grey windows. I made two sides for each piece, so the train would be reversible, and I used small black buttons for the wheels.
To the upper part of the page, I added a stoplight, using buttons for the three colors, and a big tree rising from behind the tunnel. The tree was full of little surprises: hanging red apples, a tiny nest with a removable bird, and even a small white button to represent its egg. I left a little space behind the tree crown so my daughter could place the bird (or any new birds we might make and add over time).
Next came the second double page: one side for the train platforms, the other for the beach. I chose a soft yellow background, because the sand on the beach side was the most prominent color.
For the train tracks, I cut two thin grey strips and added brown sleepers at regular intervals. Sewing those tiny sleepers, trying to keep them in place and aligned, was not easy at all!
I placed the tracks evenly on the page, adding a small orange label for each platform number. A handstitched light blue line, worked in chain stitch, became the platform floor. Each platform got a little bench, and I later added a timetable: platform one going to the lake, platform two to the beach.


The beach page was a bit more complex. I wanted to replicate many of the elements from the original book by Ricami di Carta, but with my own touch. I started with a blue sky at the top, with a smiling yellow sun and a fluffy cloud made from shiny white fabric, lightly stuffed for dimension.
For the sea, I cut out a felt wave and stitched the top edge with my favorite blanket stitch to suggest foam. I made a parasol in four bright colors, doubled like the train so it was reversible, with decorative hand-stitching connecting the colors. At first I considered making the pole in felt, but for sturdiness I used a popsicle stick instead. To keep the parasol upright, I stitched two small yellow felt sand hills on the page, open on top, for sticking the pole in, allowing two different positions to play with and also keeping it secure when the book was closed.
Next to the parasol, I added a green bucket, and used my faithful lucet to make a green cord as the handle. The bucket was open at the top, so little beach toys, like a tiny shovel, could fit inside. I also created a stackable sandcastle: the bottom part fixed to the page, with two removable parts to build higher towers.
Finally, I added a fun interactive detail: an oblique cord stretching from the bottom right to the top left of the page, with a little kite attached. The kite could slide up and down along the cord, giving my daughter another playful element to explore, and one that could remind her of the kites we usually saw and played with at the beach. Thank you, Ricami di Carta, for the lovely idea!


The final double page was the one my daughter had been waiting for the most: on one side, the sea; on the other, the gelateria. She could barely wait for me to finish it: every day she asked if the ice cream shop was ready yet!
I started with the sea. To build some depth, I cut several layers of felt and stacked them from the sandy bottom all the way up to the sky. Each wave became a little pocket where boats or sea animals could hide. On the seafloor, I stitched algae, corals, and even a tiny shell that opens to reveal a pearl inside.
Then came the sea creatures: tiny crabs, fish, an octopus, a jellyfish. I made them small enough to fit but big enough not to get lost inside a pocket immediately (at least in theory!).
Then it was time for the gelateria, which turned out to be the funniest part of the whole project. I added a striped tent at the top with the shop’s name, “Gelateria del Mare”. For the rest of the page, I cut two large panels to form two large shutters, big enough that when opened they would reveal a full ice cream shop inside. Both the outside and the inside of those shutters needed decorating.
On the outside, I used a shiny light blue felt to create a glass door and two tall windows. Behind those windows, I built tiny pieces of furniture so you could “peek inside” the shop: on the left, a little table with a chair and a drink; on the right, another table with an embroidered pot full of tiny daisies.


Inside the shutters, the right panel became a candy display: a set of little shelves with pockets where my daughter could store all the toy candies and desserts she had been collecting. The left panel is my personal favourite: a small table with two chairs, and above it, a window looking out onto a miniature version of the previous page.
I recreated the beach in tiny scale: the parasol, the sand, the sea, even a tiny boat. I embroidered the waves with blanket stitch to give them a foamy texture, as I did on the previous page. On the table below, I added two cups, each with a pocket so my daughter could swap out the ice cream flavours.
To finish, I added a ribbon closure so the shutters could stay neatly closed when the book was stored.
But of course, the gelateria needed its most important part: the actual ice cream shop inside. When you open the shutters, the central page reveals the heart of the whole scene. I recreated a full gelato display, complete with colourful flavours (naturally based on my daughter’s favourites).
On top of the display, I added a tiny removable menu listing all those flavours so it could be “brought to the table” during play. On the opposite side, I made two little bowls: one for the cones and one for the wipers. For the wipers, I cut tiny scraps of white fabric and tucked them inside the bowl with my needle, so they looked like the real thing.


The doll


I could not consider our busy book complete without a little character to explore it, so I set out to make a doll who could adapt to every page. I knew from the start that she needed both a bathing suit for the sea and a dress for the train ride, so I began with her body.
I cut her main shape out of a soft pink felt, then embroidered her eyes and mouth with simple, gentle stitches. The hair, however, needed something special. My daughter has the most beautiful curls (don’t judge me, I am the mothers, of course her hair is the best for me!), and I wanted the doll to reflect that. So I asked my mum for help: she’s a far better crocheter than I am, and I immediately thought of the crocheted vines she once made for my stuffed pumpkins. She crocheted a handful of tiny curls in just the right shade, and after fully embroidering the back of the doll’s head in matching thread, I attached the flowing curls one by one.
For the clothes, my daughter wanted her doll dressed in shiny light blue. I stitched a little bathing suit directly onto the doll’s body, and then made a removable dress in the same sparkling felt. With her curls bouncing and her outfit ready for both the train ride and the seaside, the doll was finally complete.
The final assembly
Once every page and tiny detail was finished, it was time to turn everything into an actual book. For the spine, I chose a thick, sturdy ribbon that could hold the weight of all the double pages. I folded each spread in half and stacked them neatly, one after the other, in the correct order.
This was the trickiest part: I needed to sew each center fold onto the ribbon, one by one. The first double page had to be stitched on top of the ribbon, the last one on the bottom, and the middle one between the two. It was a slow, precise process, but when I was done, I finally had something that looked and felt like a real book.
The last step was closing up all the double pages to hide the seams and the backs of the stitches. My sturdy sewing machine really earned its keep that day: felt can be thick, especially when layered, but it handled everything beautifully.
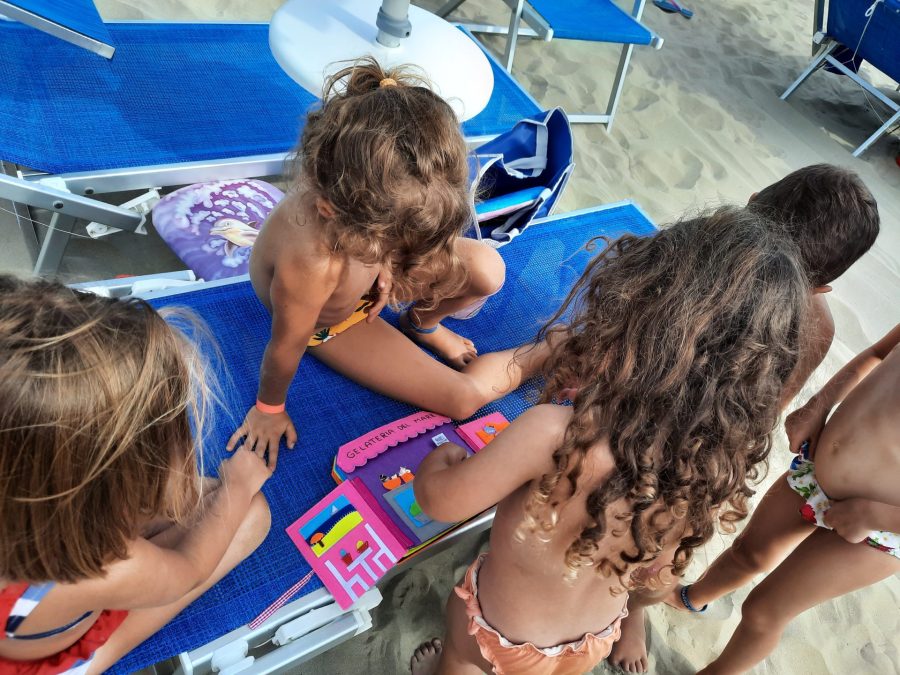
And just like that, our ride to the seaside busy book was complete, finished right on time to join us on our family holiday at the beach.


Explore our "Train trip to the seaside"
To share the full story of our busy book, which we titled “Train Trip to the Seaside”, I filmed a short video where we explore it page by page.
We start at the station on the front cover, where our doll arrives and checks the time looking at the clock. The train appears from the tunnel, and she decides to wait for it at Platform 2, the one that takes you straight to the beach.
Once she arrives, she slips off her shiny blue dress to reveal her bathing suit and plays with all the beach toys: the kite, the sandcastle, the parasol. Then she heads into the sea, where the waves hide boats, fish, crabs, an octopus… She can swim through the layers of waves and dive all the way to the seafloor, where the corals, algae and the pearl shell are waiting.
When she’s finally hungry, it’s time to get dressed again and walk to the gelateria. We open the shutters, step inside together, and explore the candy shelves and all the colourful gelato flavours. She picks her favourite scoop, sits at the little table, and enjoys her ice cream while looking out the tiny window onto the beach scene we just visited.
It’s a simple story, but exactly the kind of imaginative journey that tells the story of a lovely family trip to a favourite place of ours.
The end of a craft, the beginning of...
Of course, we took the book with us to the beach. And honestly, nothing made me happier than watching my daughter proudly show it to her little beach friends, explaining every page and inviting them to play. She was so proud of what we had made. Together.
I know she won’t play with it forever. She’s growing so fast, and her interests shift with every season. But what I treasure most isn’t just the book itself: it’s the process. The planning, the drawing, the choosing of colours, the tiny details that came from her ideas. She learned once again that when she needs something, she can come to us, not to buy it, but to make it. And that things crafted with our hands, shaped around our own needs and imagination, become more meaningful.
She’s already starting to create her own little crafts. No pressure from us, just her natural instinct to do what she sees at home. And that, for me, is the best part of all this.
Do you want to see her first little crafts? Let me know in the comments.
And if you’ve made something together with your family, I’d love to hear your stories, too.


