
During reenactments, I love making historical crafts. Embroidery, sewing, even weaving, sometimes woodworking with my husband. Even if you are not a skilled crafter, there’s an ancient tool you can use easily (for a reenactment or in everyday life): a lucet fork.
The lucet is a tool for cordmaking or braiding: it helps you make cords, laces for shoes or drawstrings for pouches, decorations, laces for clothes or hair. Super useful even in everyday items!
After my husband made me my first lucet fork, I started learning how to properly use it and researching its history and shapes. Here I want to show you how I make lucet cords.
And if you’d like to know more about the history behind the tool itself, I’m carrying out a historical research and writing a brief history of the lucet.
I’m an archaeologist, after all, and even if I’m no more working on the field I like to come back to my origins when I have the occasion!
Reenactment, indeed, is for me a way to keep my connection with my ever lasting love for ancient history.
What’s the history of the lucet?
Some say it’s Medieval, others claim it was invented by Vikings, a few are convinced that it never existed before the 16th century… I tried to unravel the mystery and began an archaeological research on the matter. Read my thoughts about it, with a list of archaeological finds, their timeline and map, a list of museums with their artifacts.
How to make the basic cord: the beginner's method
I found this method the most friendly one for beginners. It’s not the fastest one, you pause to switch hands, but it’s good to get the first grasp on the tool.
It doesn’t matter if your lucet has a hole or not.
I find a hole handy to hold the braid in place while working, but you could just find any pronged object, like a fork without the central prong, and work as well with that.
Since my tool has a hole, I’ll show how I use it.
Also, notice that this technique involves turning the lucet fork after each “stitch”. You’ll have to turn it clockwise, from right to left.

Step one: set up your thread to begin
First, how to begin? Beginning and ending weaving or knitting projects has always been the trickiest part for me, while learning a new way to do it.
Hold your lucet with your left hand and use your right one to work with the thread.
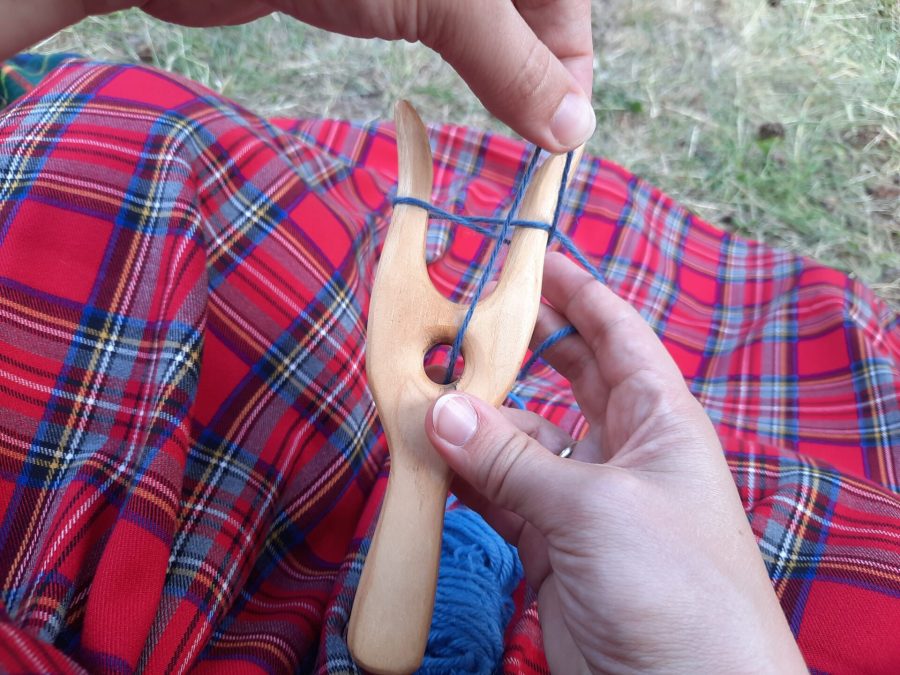
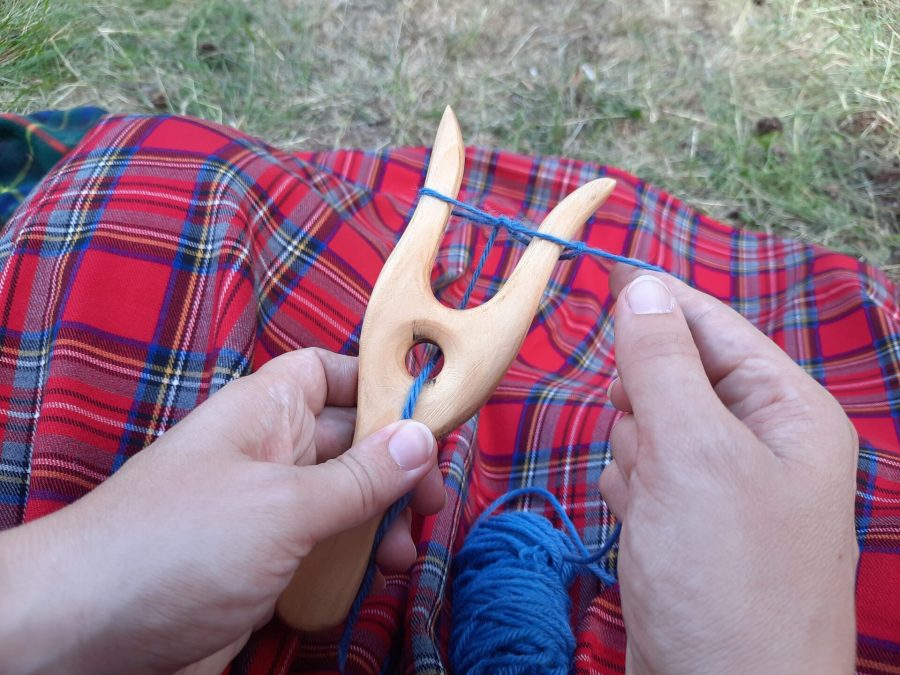
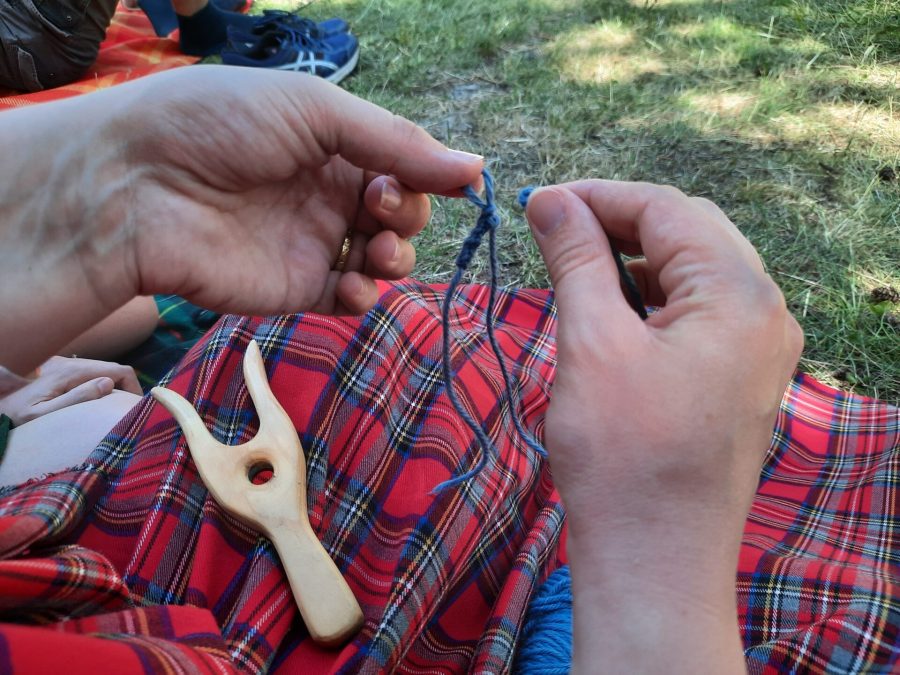
Pick your thread and pass it through the hole of your lucet, it will become the tail of your cord. Use your left hand to hold both the lucet and the tail. Then pass the thread around the prongs: first pull it right and pass it behind the right prong, then through the center towards you, then over the left prong and behind it, come out again through the center and pass the thread over the right prong.
You need to make a figure of 8, going behind the right, over the left and over the right prong again.

Step two: lift lower thread behind the right prong
Now, we can begin braiding. Notice that the beginning is always the hardest part, it’s normal. Going on with the “stitches”, the process will become easier.
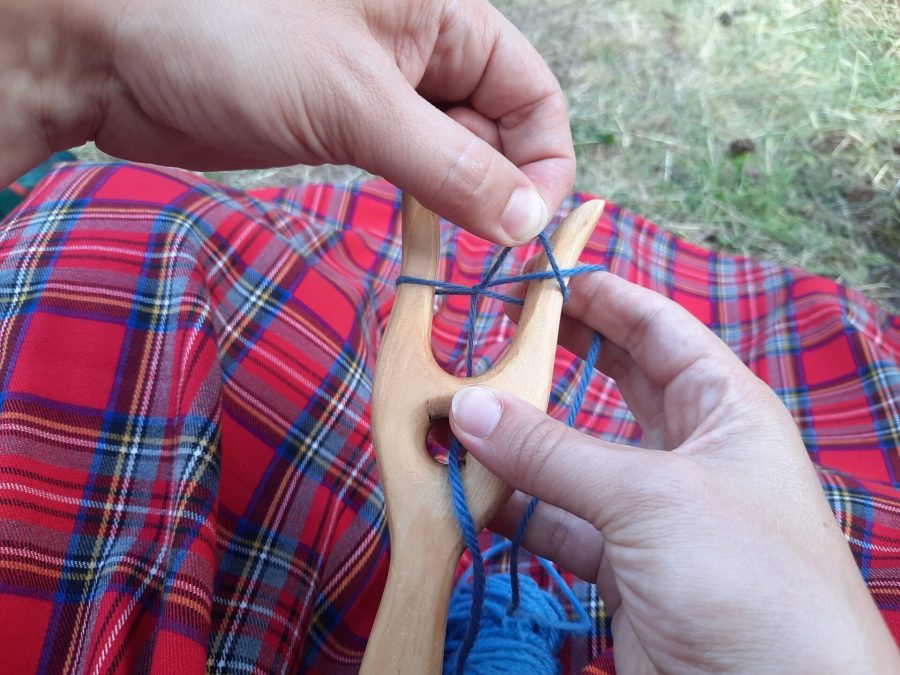
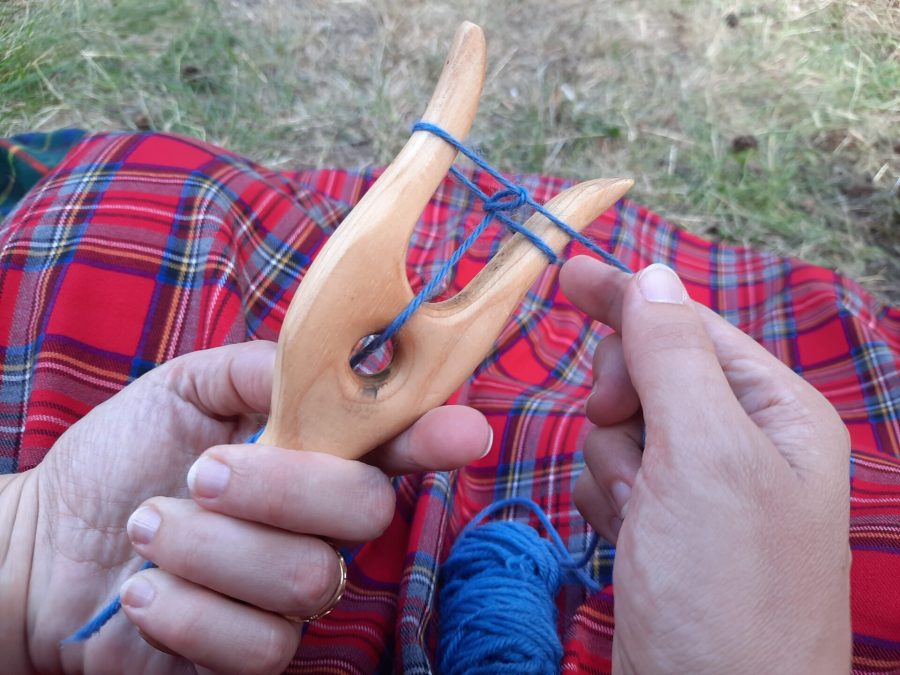
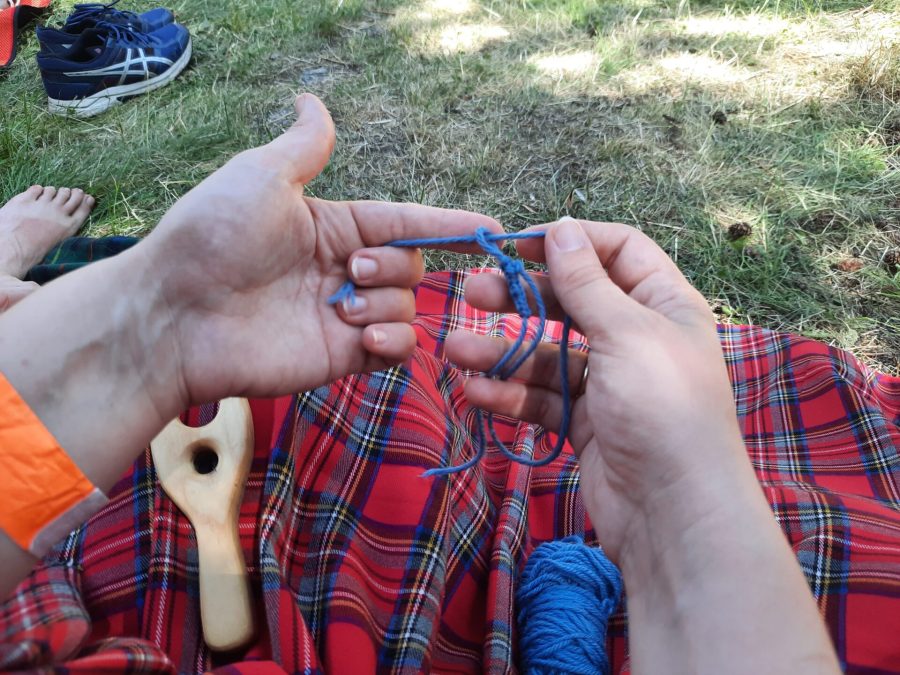
Hold the lucet with your right hand, between thumb and ring finger, picking also the tail of your cord. With index and middle fingers of your right hand, keep the loose strand, so it rests around the right prong of the lucet.
Use your left hand to pick the lower strand on the right prong, the one that comes out of the central hole. You need to lift it up to pass it behind the right prong, going over the loose strand that your right hand is keeping in place. When you gently pull the thread with your left hand, you’ll feel the tail slip away from under your right fingers. Don’t worry and let it slide.
Now, your thread is behind the right prong. Hold the lucet with your right hand, also picking the tail. With your left hand, gently pull the loose thread to the right to secure your first knot.
Pulling the thread is important to keep a good tension. With a little practice you’ll find the best way to keep the right tension, and you’ll get even stitches as you go on braiding.

Step three: turn to the left to adjust the knot and make next stitch
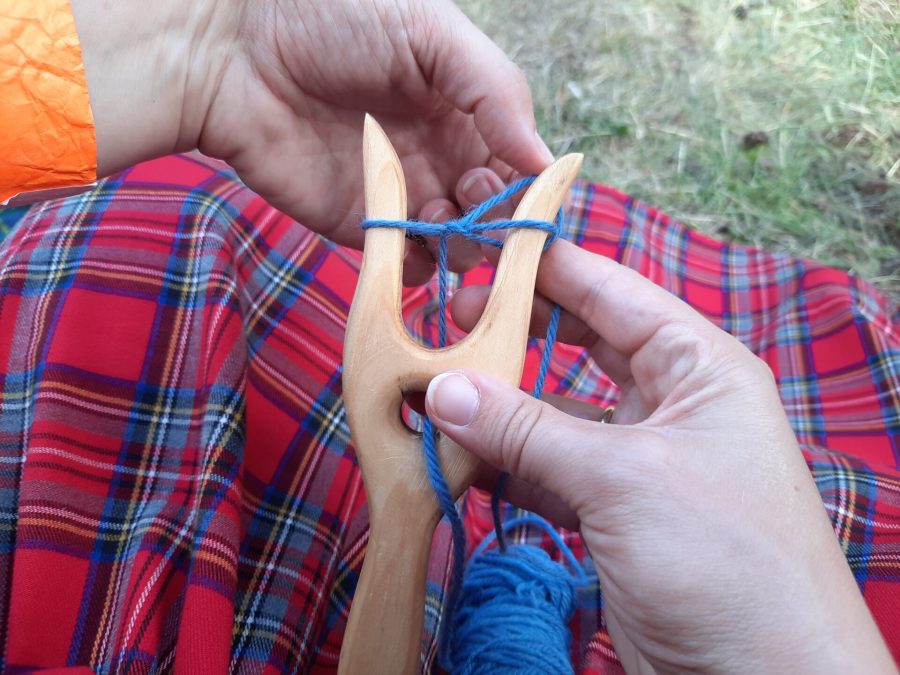
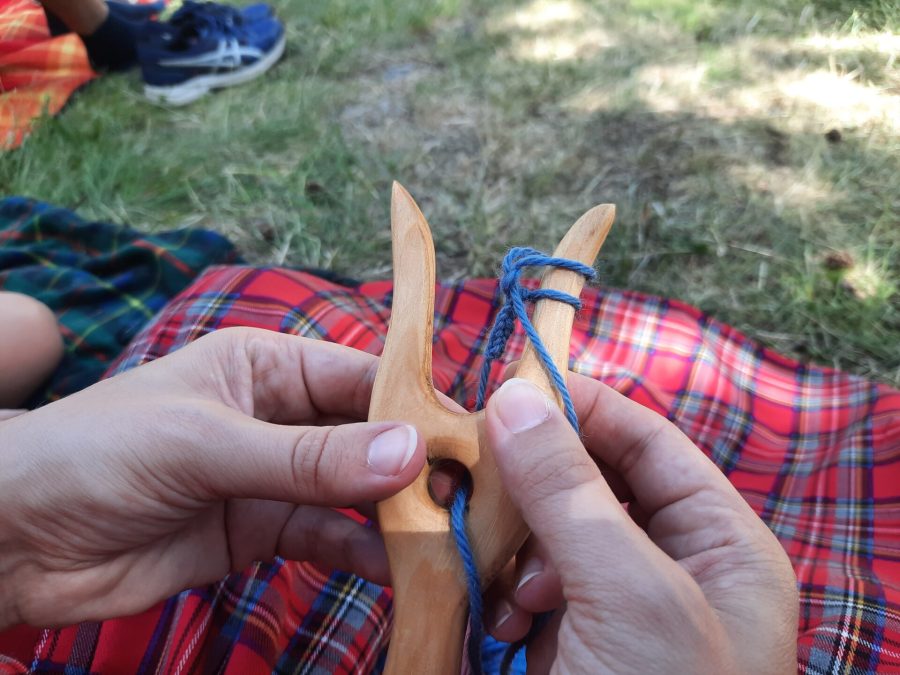
As you turn your lucet clockwise, always from right to left, you’ll create a knot.
Adjust this knot to position it in the middle of the two prongs, and now you are ready to start over with another stitch.

Step four: make all the stitches you need
Now you have to repeat step two and three, as many times you need.
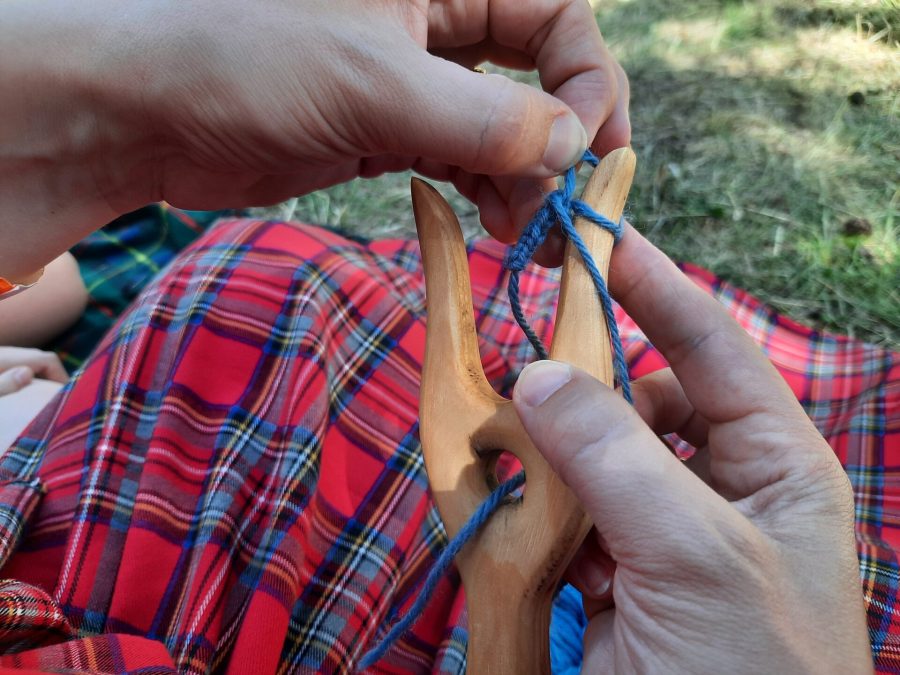
Always work on the right prong, pick the lower thread, lift it up and leave it behind the prong. Now, turn your lucet clockwise. Gently pull the loose thread to the right to secure the stitch. Adjust the stitches to the center, in the middle of your prongs, and repeat.
Getting the right tension is the trick to make it work. If it’s too tight, your thread won’t go over the prong, if it’s too loose, your braid will come out uneven and wobbly.

Final step: how to close and finish
Pull gently the left ring to secure the central knot closer to the right ring. Now move the left ring over the right prong. Now work as you’d make a normal stitch, passing the lover thread over the upper one and pulling. You should remain with a single loop.
Cut your thread to have a tail you could use to make a knot, pass it inside the loop and pull. You can also make another final knot to give strenght to the closure.
What if I don’t have a lucet?
If you don’t have a lucet fork and you don’t have the tools, materials or skills to make one, don’t worry. You can find lucet-like tools in everyday items! You could use a fork with just two prongs, a camping fork, even a Swiffer duster. The only limit: your imagination.
Lucetting is easier than it seems at the beginning! Believe me.
Getting the right tension is the trick to make it work. If it’s too tight, your thread won’t go over the prong, if it’s too loose, your braid will come out uneven and wobbly.
Starting from scratch and making the first braids can be slow and not satisfying, but keep on. It requires just a little practice to get it right, then you’ll see it’s something you can do almost anywhere without too much thinking!
And if you want a quick visual recap, watch the Web Story with all the beginner’s tutorial, step by step.
If you feel this method is not right for you, try the Ziggy fast grab or other variants where you always keep the lucet on the right and the yarn on the left hand. If you are righthanded: for lefthanded people, everything is inverted.
Do you want to make your own lucet tool?
“If you can think it, you can make it”. Our #LRCrafts motto is here for a reason: when we need something, the first question is “can we make it?“. In most cases the answer is “yes”!
When I needed a lucet, my husband made a beautiful, handmade, functioning one just from a picture in half an hour. Find out how he made it.




2 Comments. Leave new
How thickness is it please
Do you mean the thickness of the finished cord or the thickness of yarn? Consider that the final thickness of the lucetted cord depends on your working tension. If you lucet too tight, the final thickness could be roughly 4 times the yarn thickness.