If you’ve been following my adventures with the lucet for a while, you already know that I enjoy pushing this small tool beyond reenactment purposes: I made bracelets, decorations, coasters, door stops… I like to play with the lucet and its cords to see what can happen.
At some point, I was asked in a comment on my lucet projects list for more detailed instructions on how to make the octopus toy I crafted for my kid. By then, I had already been making a couple of small toys using a lucet, mainly animals. Nothing overly complex or technically demanding, just simple shapes made almost entirely of lucetted cord. They’re fast to make, since they are not amigurumi, nor sewn plush toys. We used them as quick, portable toy friends, small enough to fit in a pocket or in a toddler’s little bag.
I started with an octopus and a snail, both tested and approved by my daughter, and I plan to expand her little collection over time. Think of this as an open-ended project: a growing list of toys, all made with the same basic tool and a bit of imagination.
As always, you could probably achieve similar results with crochet or knitting. But if, like me, you enjoy lucetting and find it relaxing, this is another excuse to keep your lucet close at hand: to turn a simple cord into something that makes a child smile.
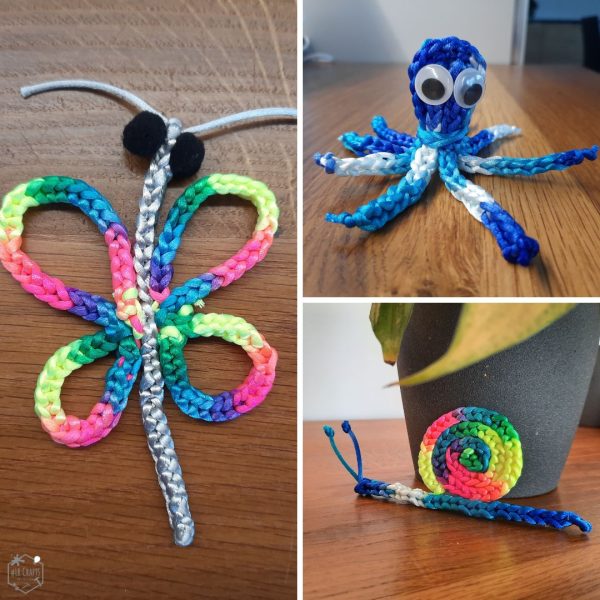
Table of contents
Basic materials and supplies

To make lucetted animals, you’ll need:
- Lucet
- Yarn or cord. For my animals, I like to use thick satin rattail cord (a smooth, non-stretch nylon or polyester cord), usually multicolor for a fancy fantasy look.
- Scissors for cutting your yarn and trimming ends.
- Tapestry needle or latch hook or small crochet hook, to help tuck in yarn ends and secure details. My go-to is always the latch hook.
- Optional embellishments to add eyes:
- Buttons or, beads or plastic googly eyes
- Hot glue to attach plastic elements
- Needle and sewing thread to sew on buttons or beads
As for additions and embellishments, no limits to your imagination!
The octopus
This is one of the easiest animals to make with the lucet.
First, decide the size of your finished octopus: the length of the tentacles and the height of the head. You’ll need to make four lucetted cords of equal lenght, that will give you eight tentacles. Each cord must be long enough to form one tentacle and the head height, plus one centimeter (0.3in) of extra length for ease. I also like to secure and cut away the lucetted cord tails to finish them neatly.
Once you have made all eight cords, locate the midpoint of each one. Starting from the midpoints, lay the cords flat and space them out so they radiate like rays from a center point. When they are evenly spread, fold all the cords in half together, keeping the midpoints together on top of a compact bundle. If needed, use a temporary piece of thread to tie around the midpoints: this will help keep the cords aligned and evenly spaced while you work.
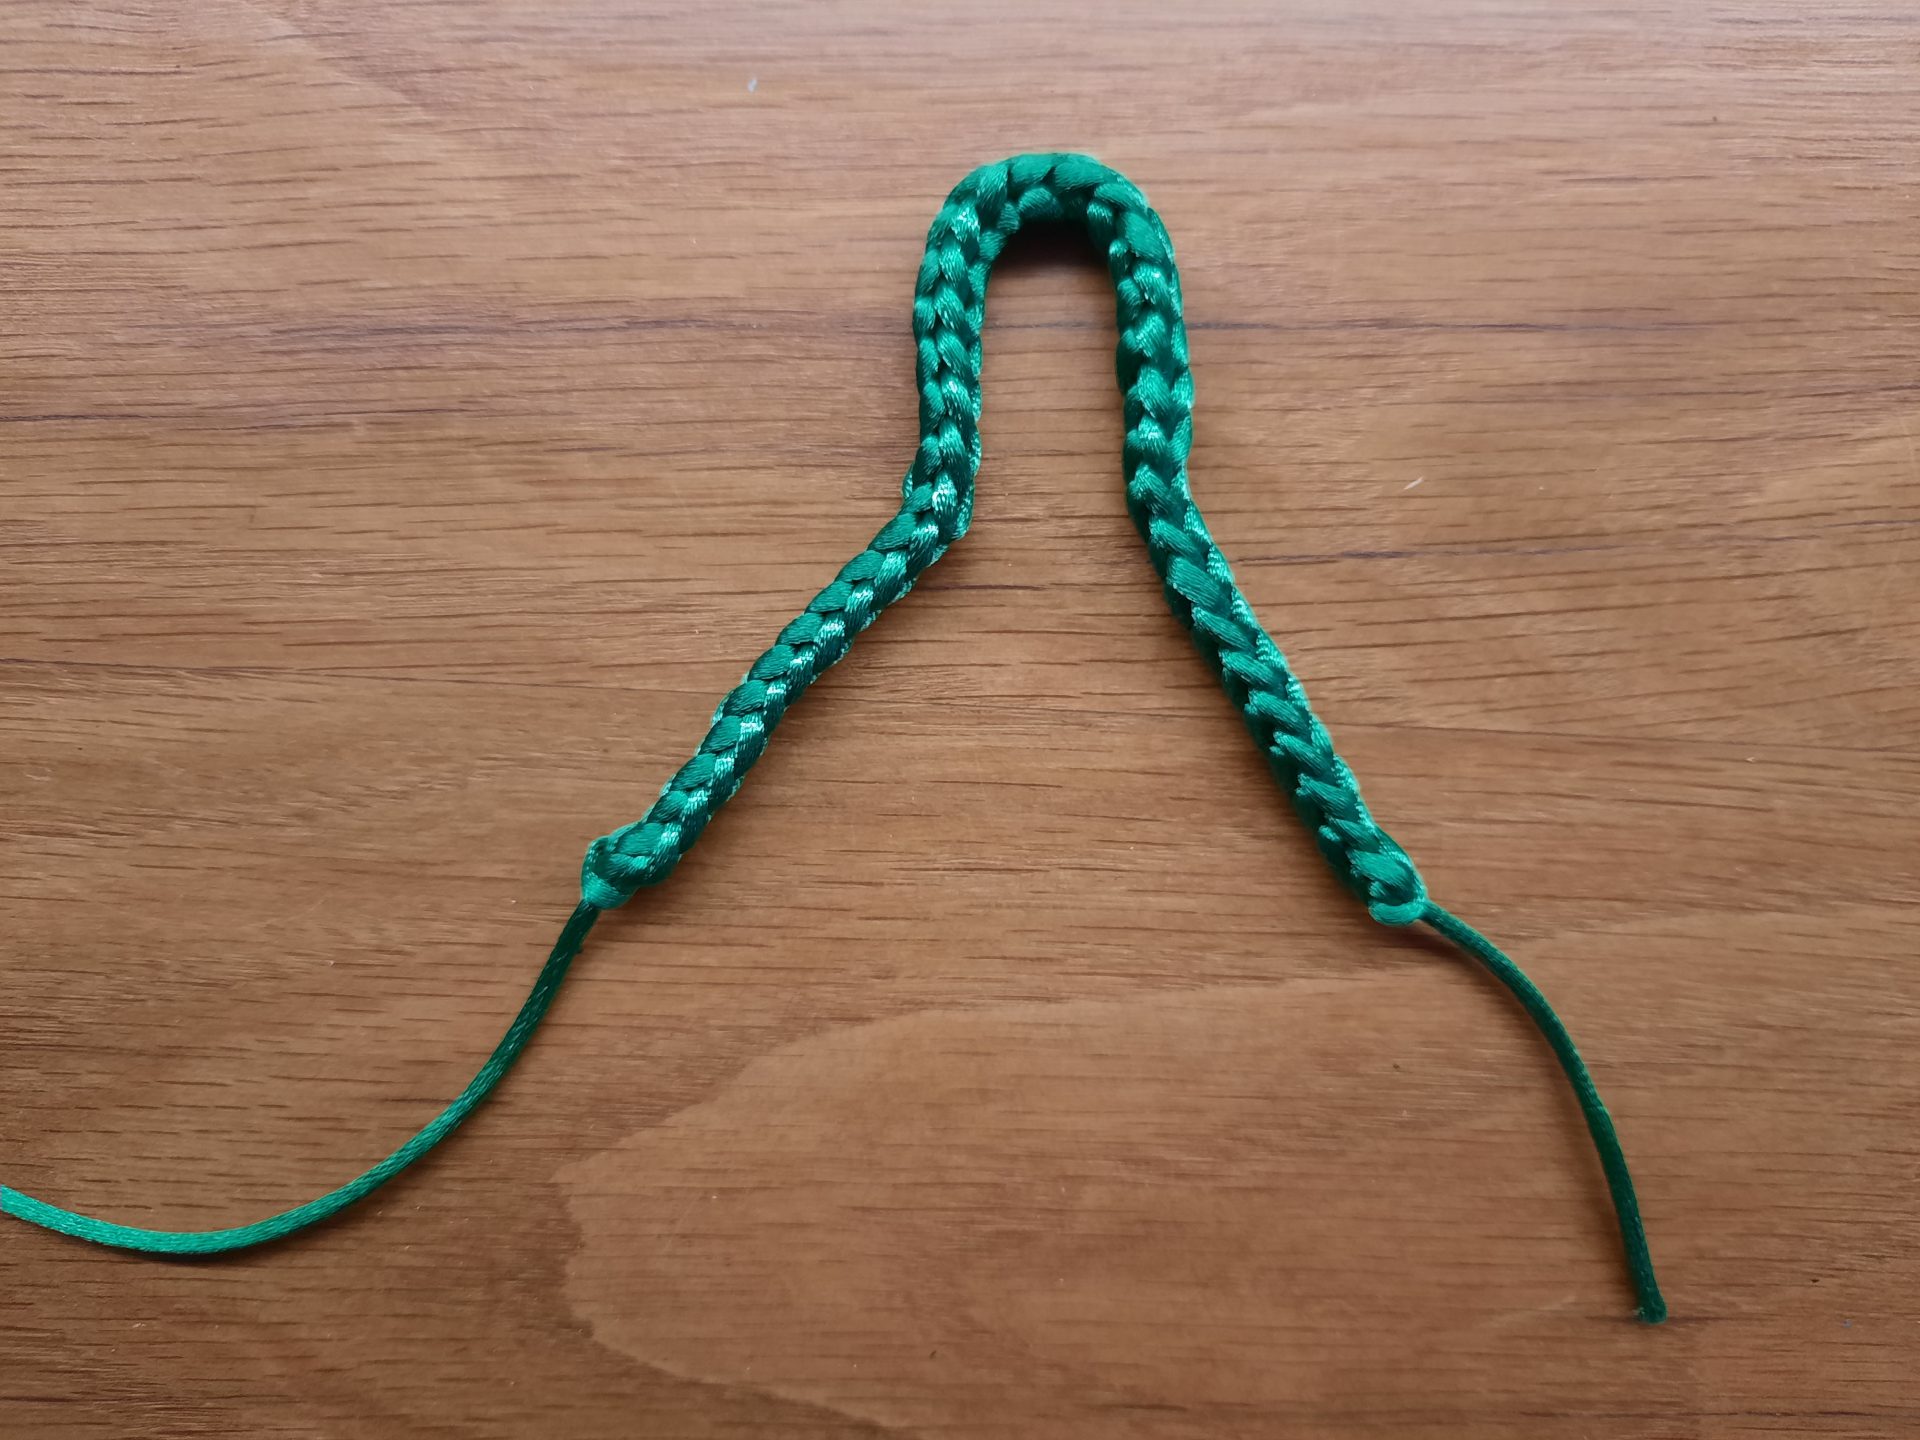
Making the octopus toy with the lucet: I folded the first cord roughly to obtain the octopus shape, to see the head on top and the tentacles on bottom. A way to give you an idea of the final size
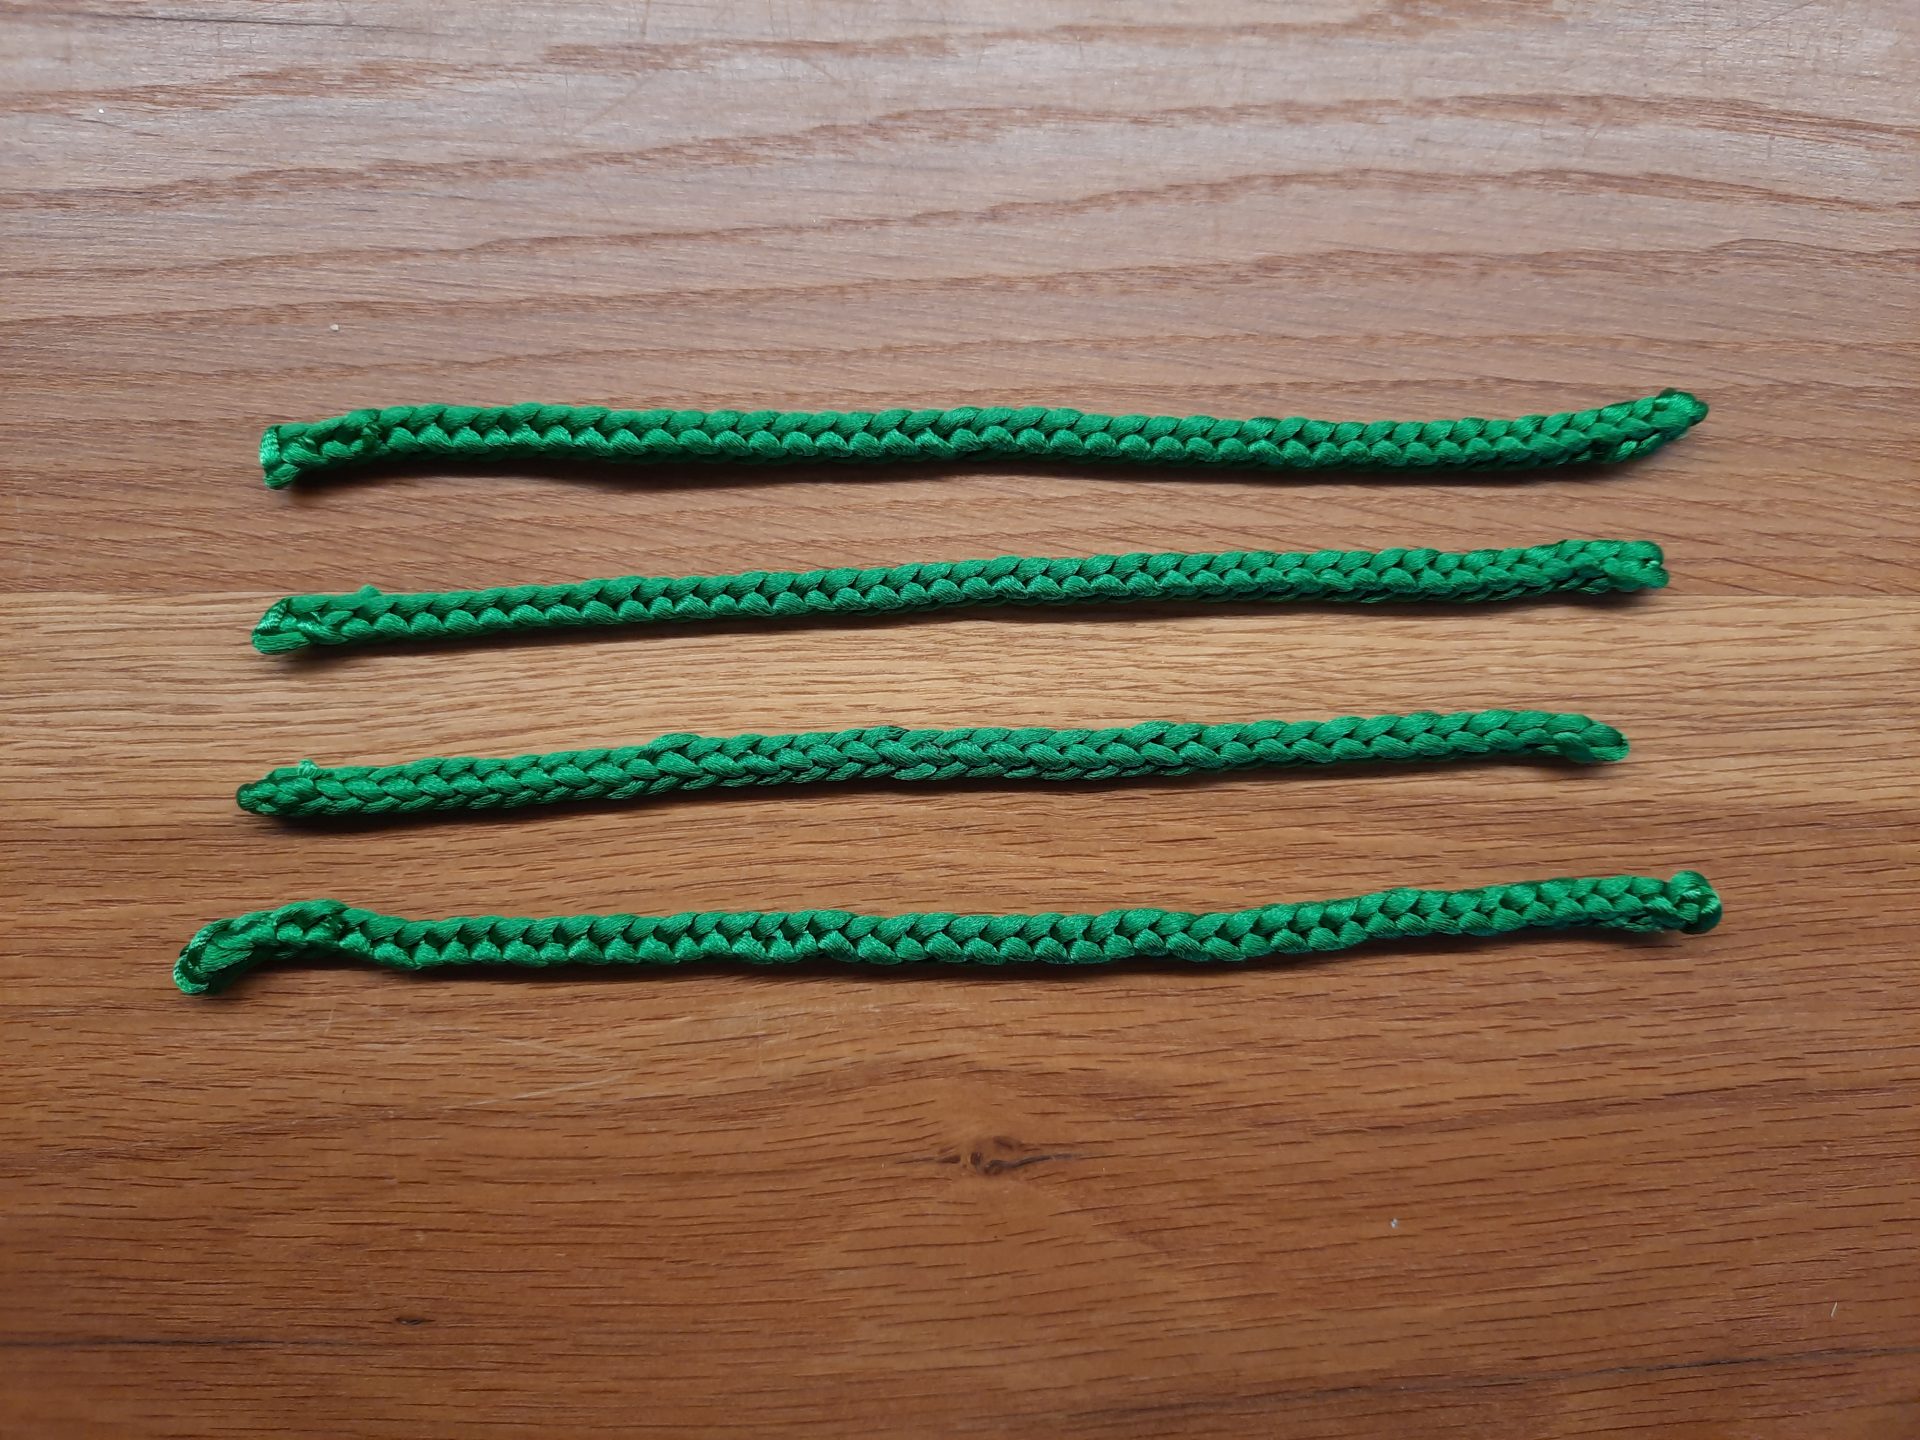
Making the octopus toy with the lucet: make four equal length cords to obtain eight tentacles
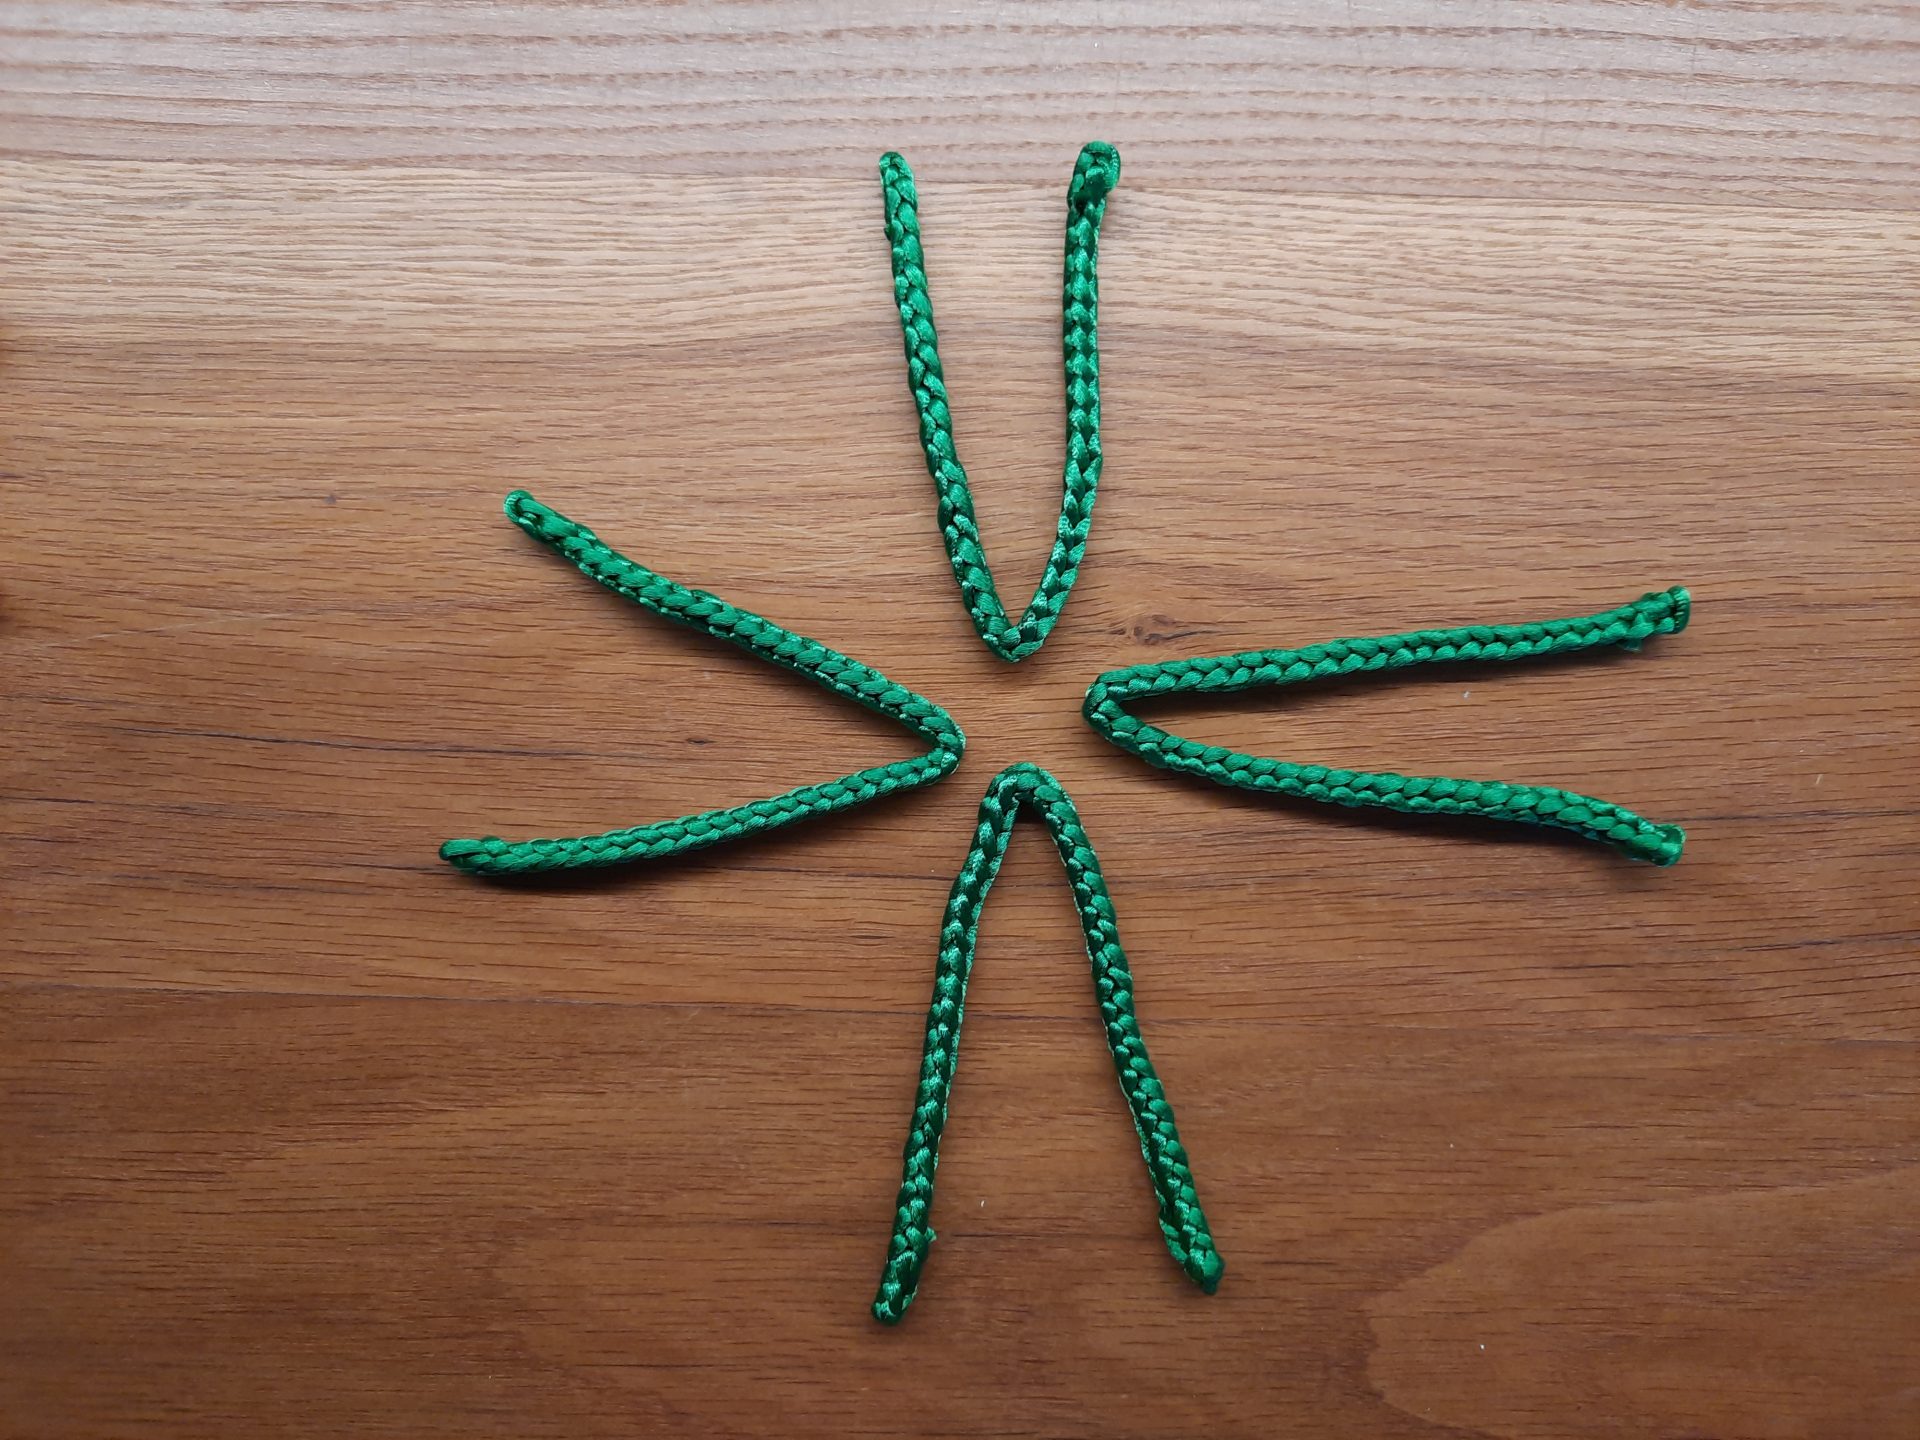
Making the octopus toy with the lucet: find the midpoints of each cord
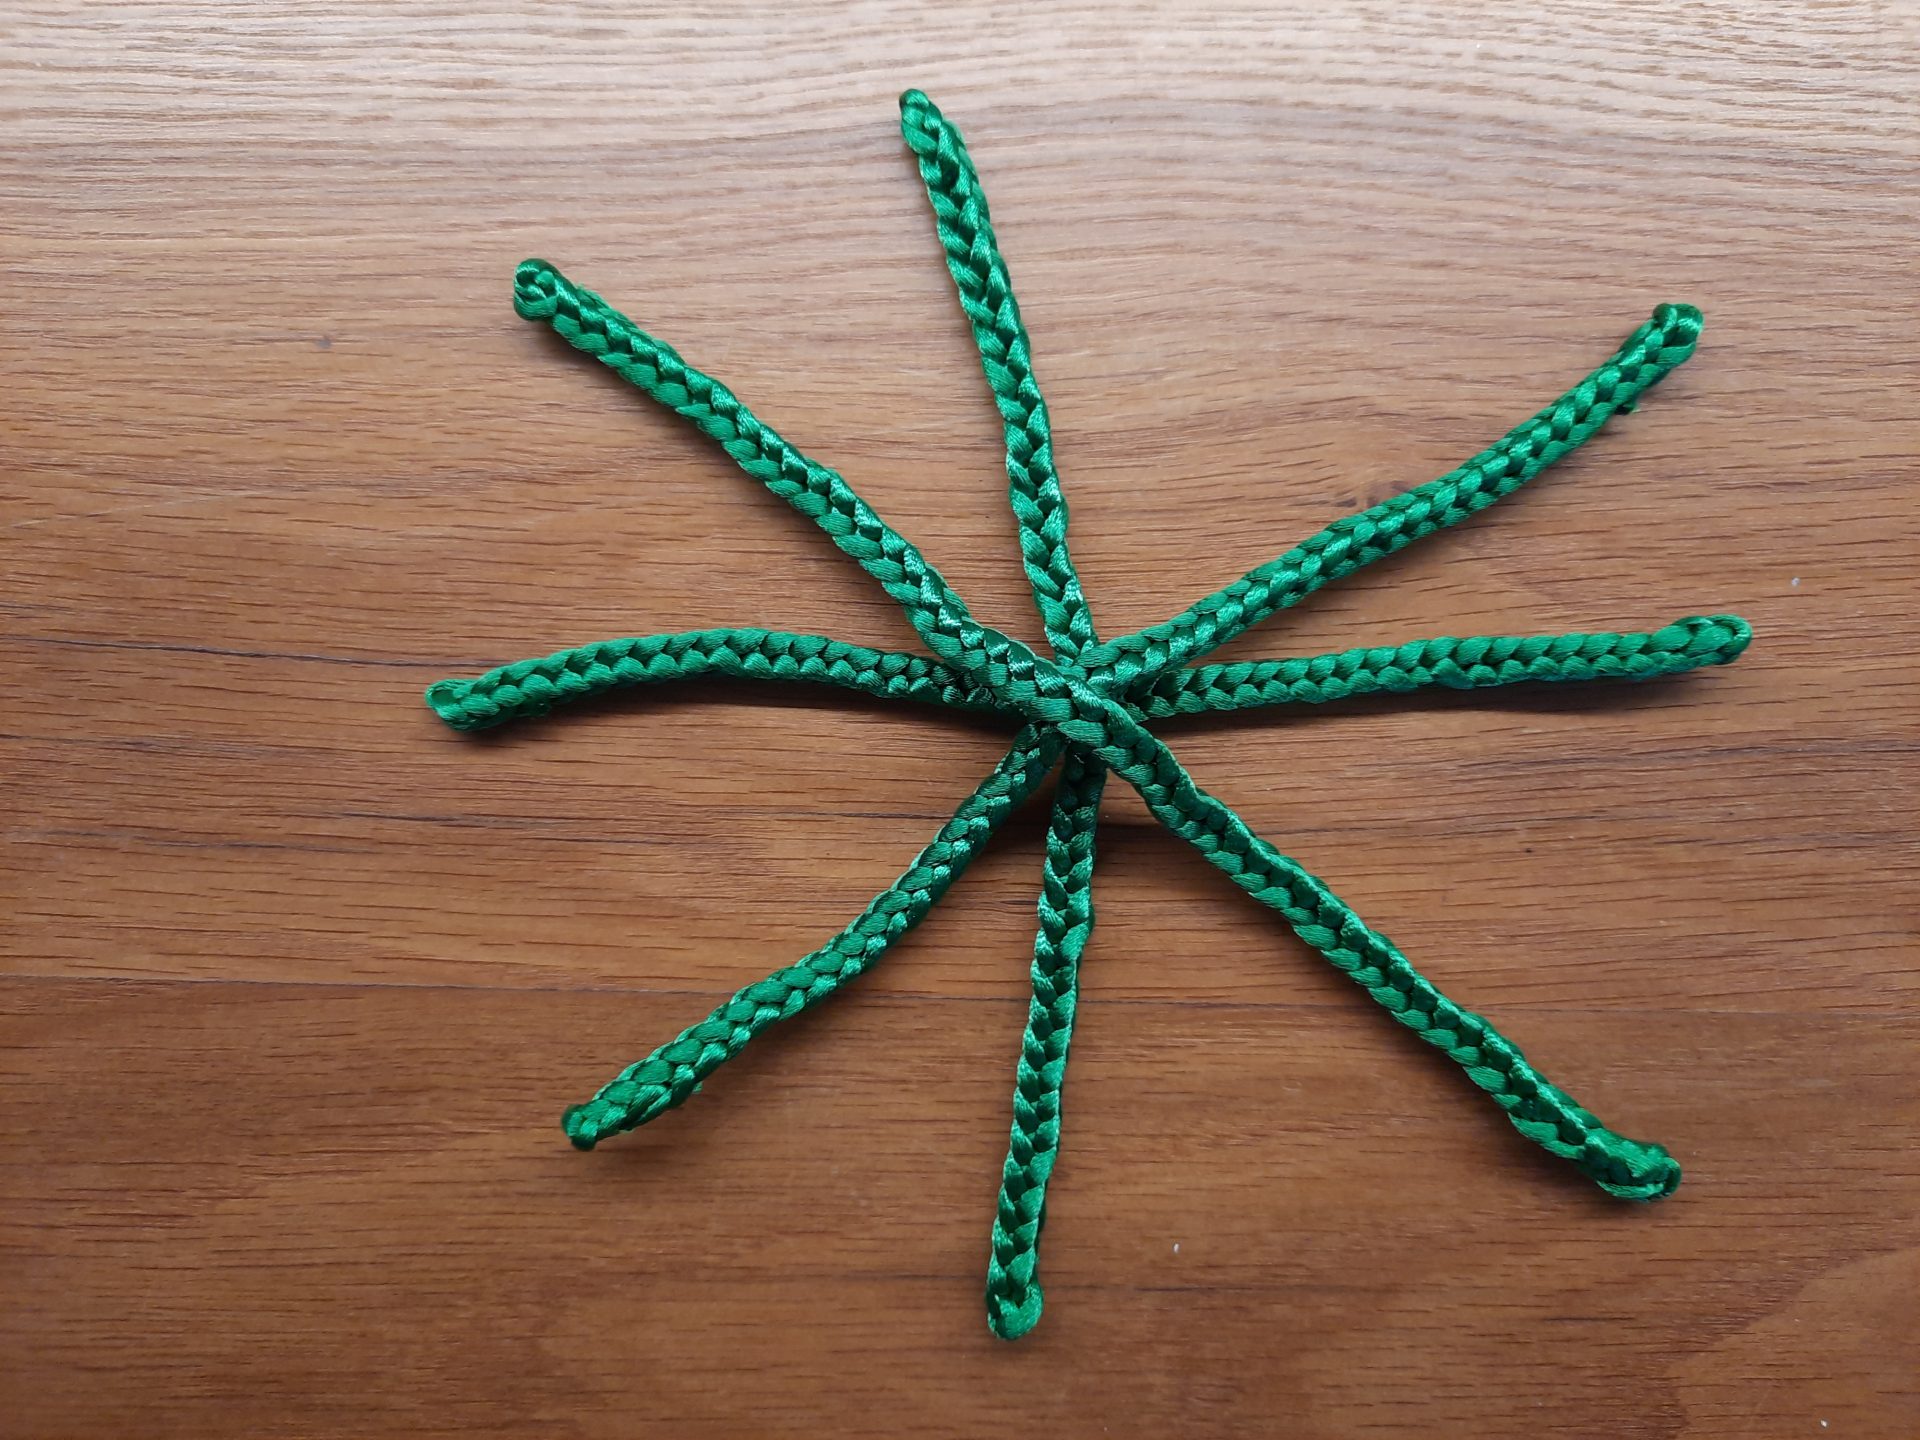
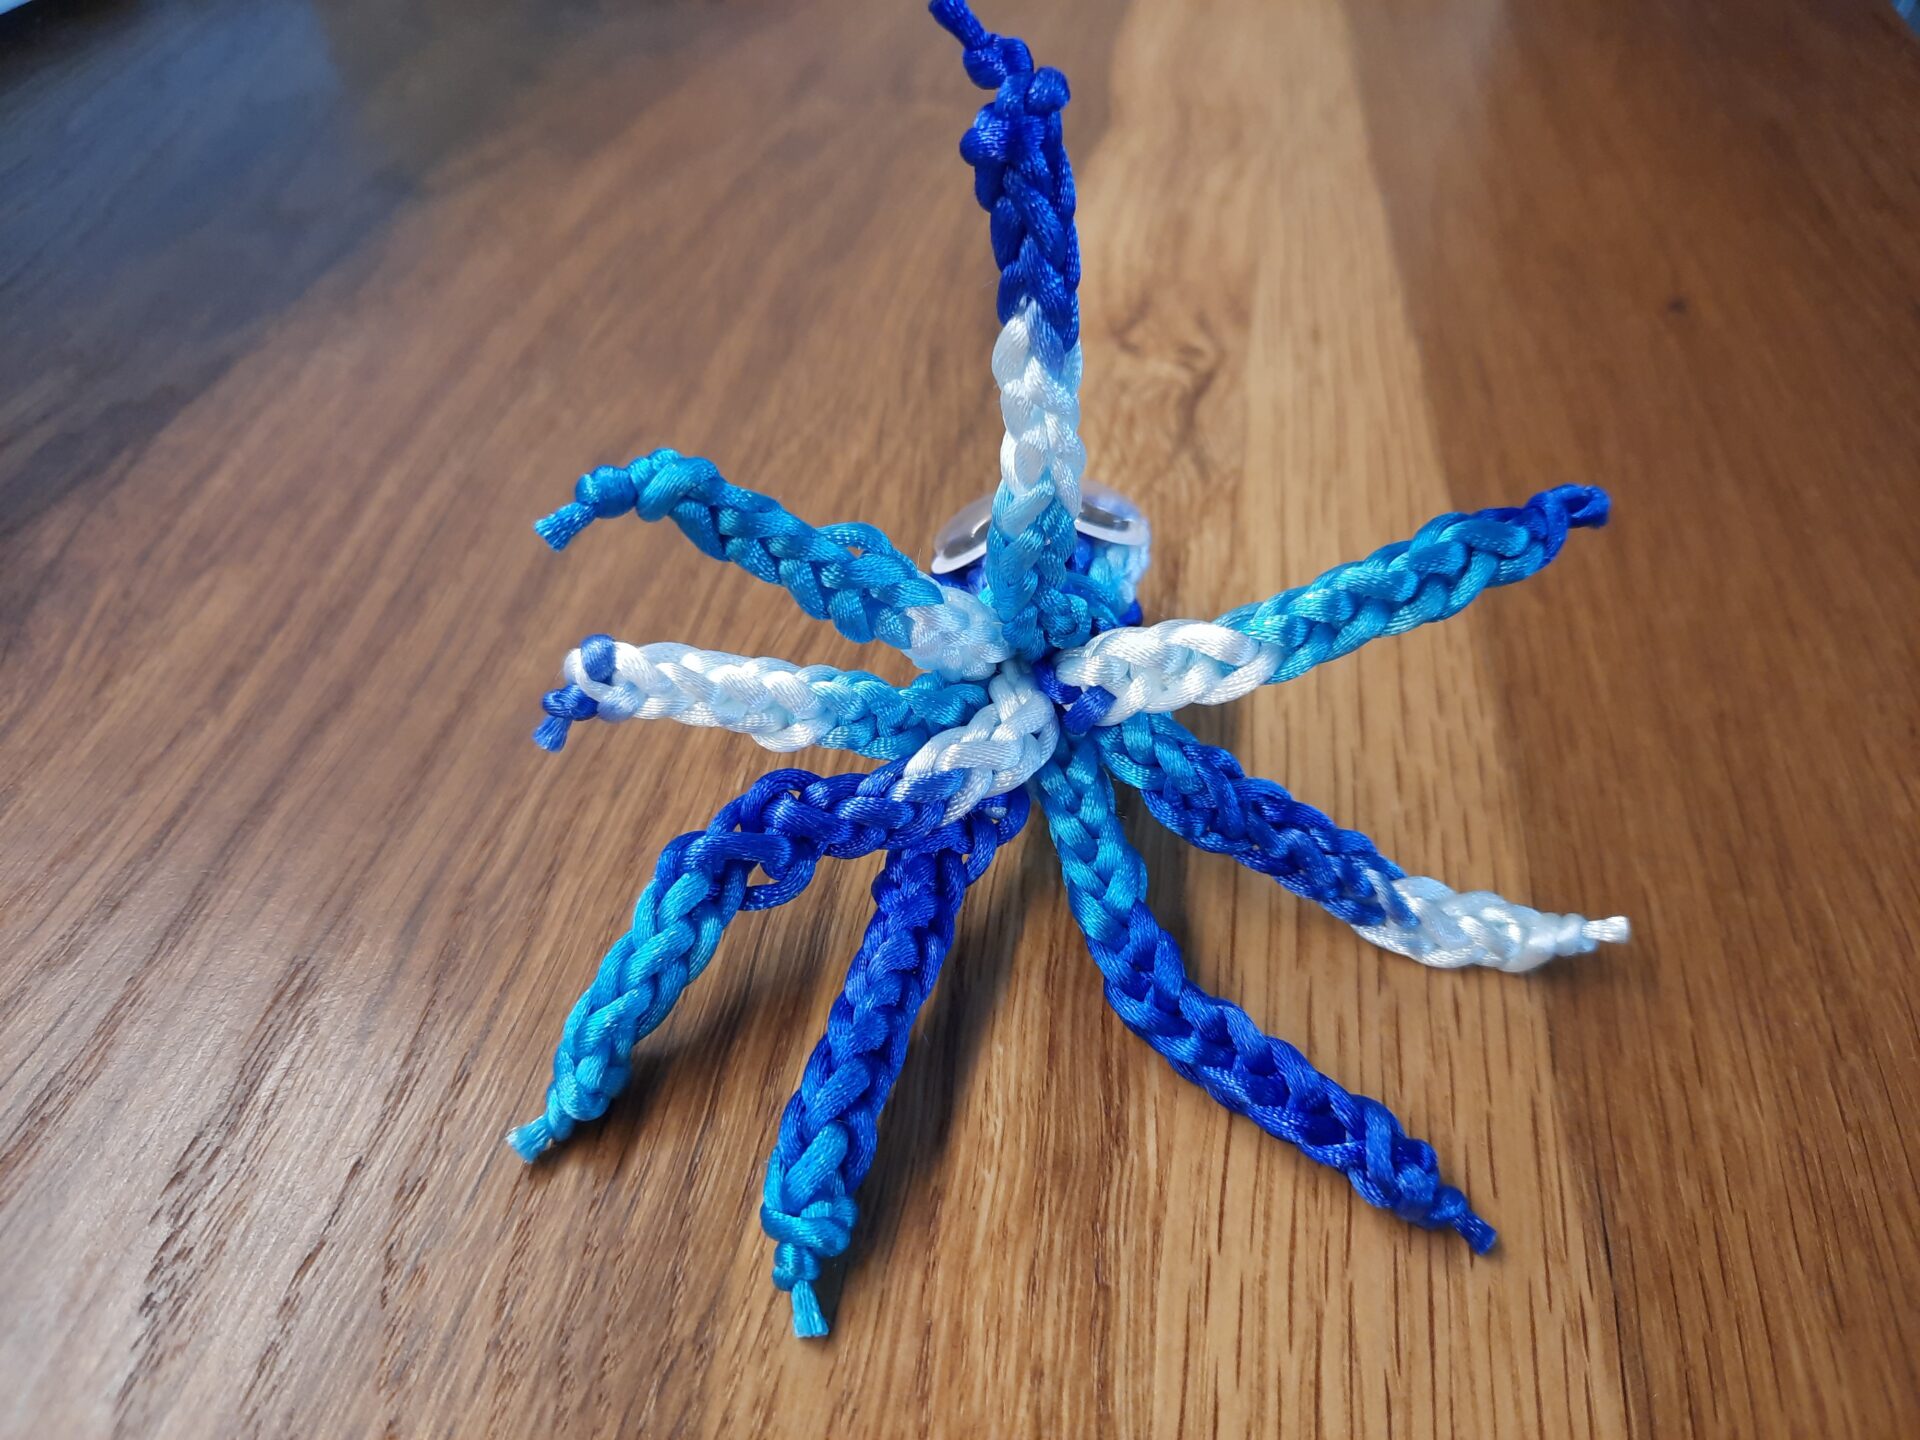
Making the octopus toy with the lucet: spread your cords ray-like to keep their midpoints together
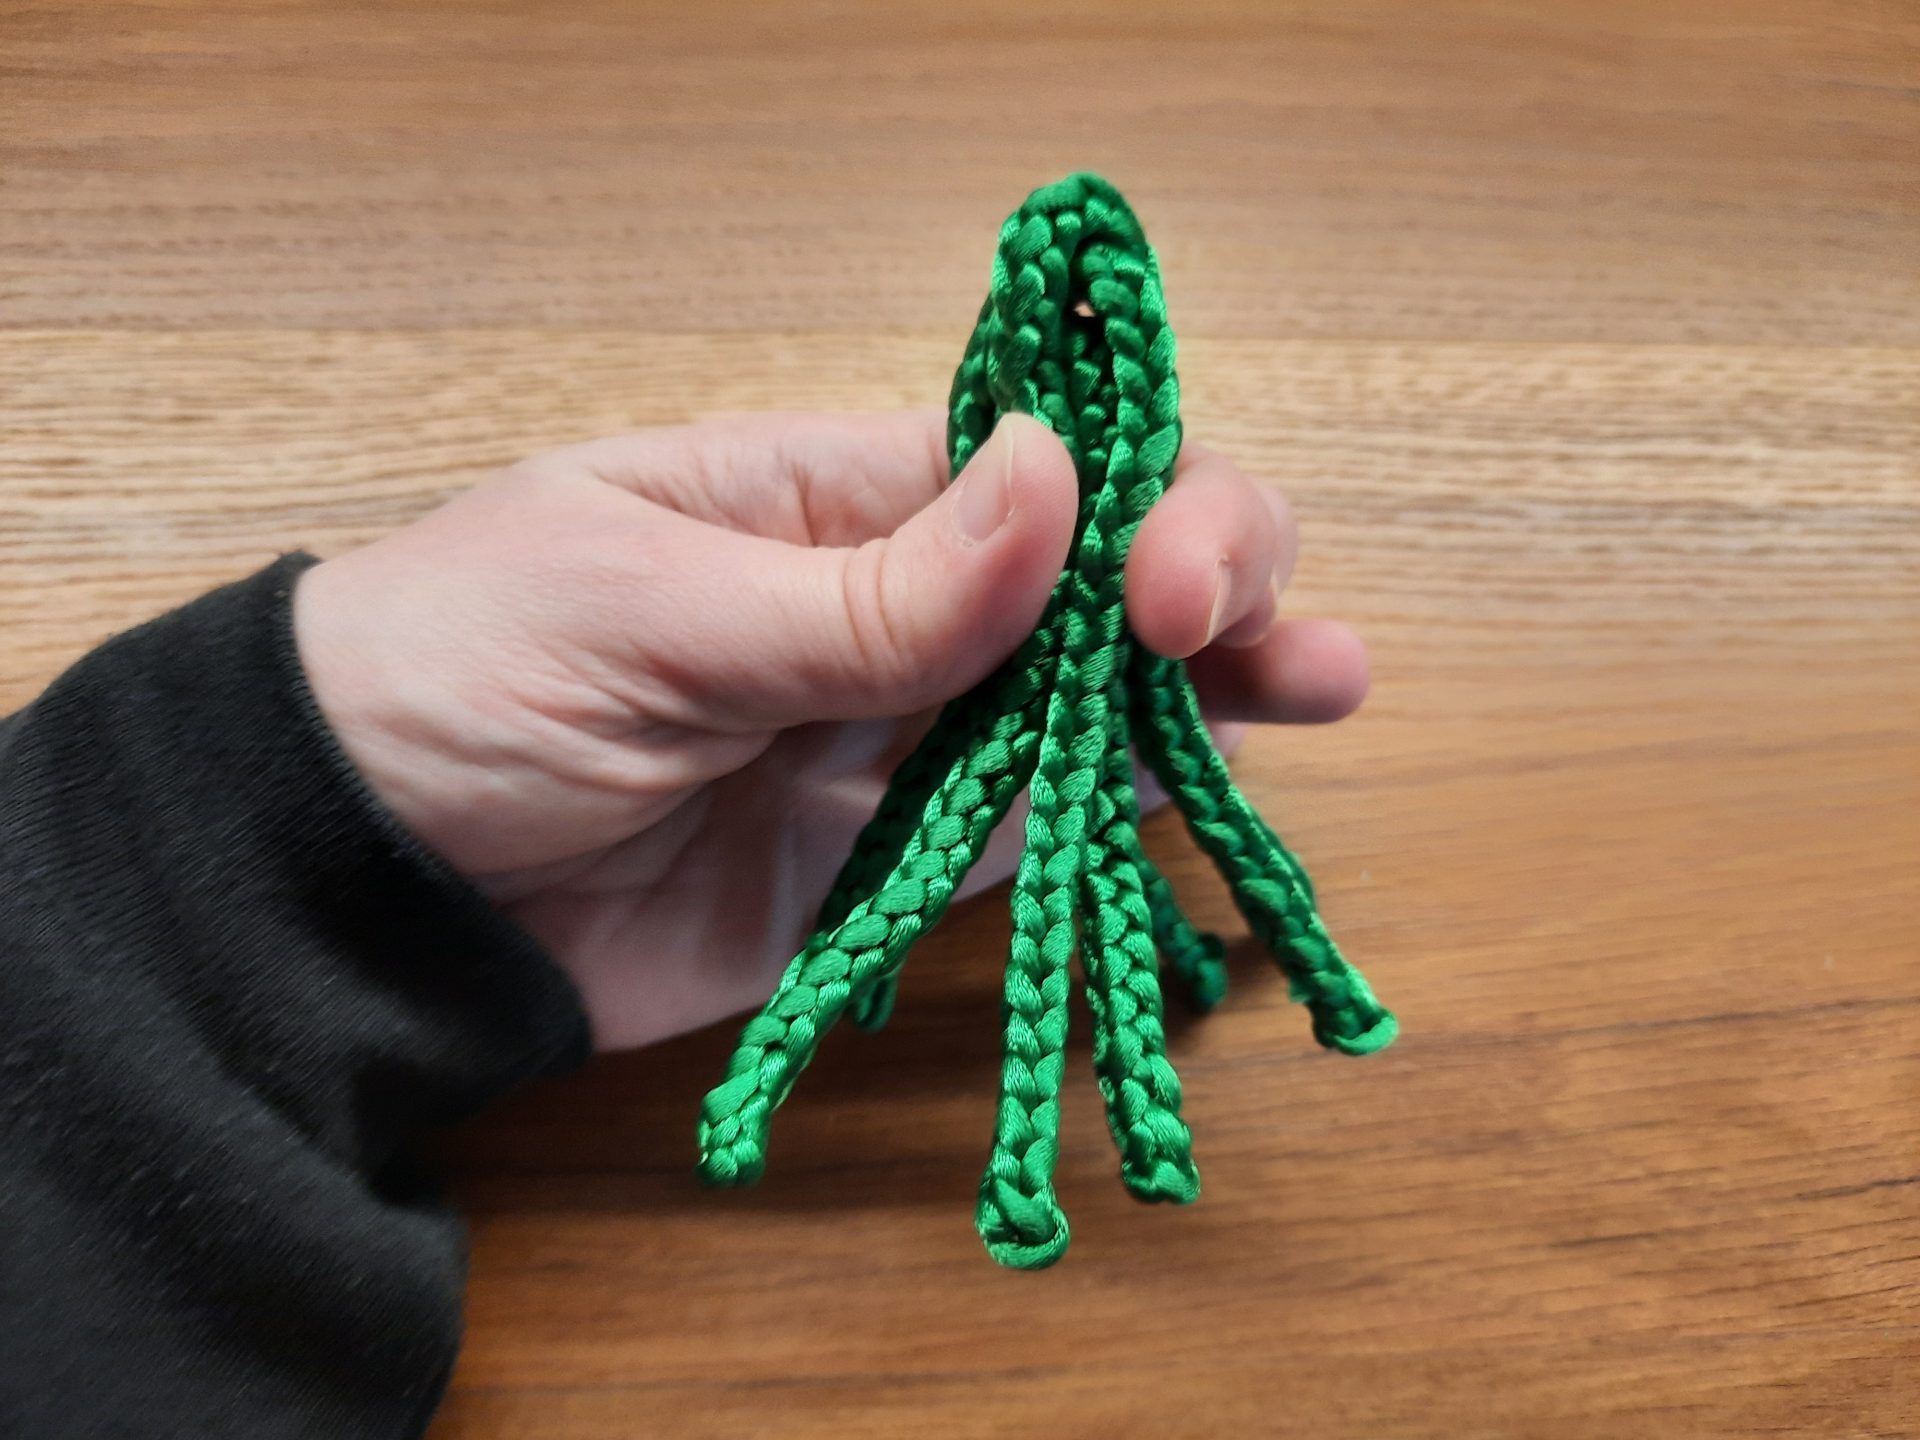
Making the octopus toy with the lucet: fold all your cords together, keeping the midpoints on top, in a compact bundle
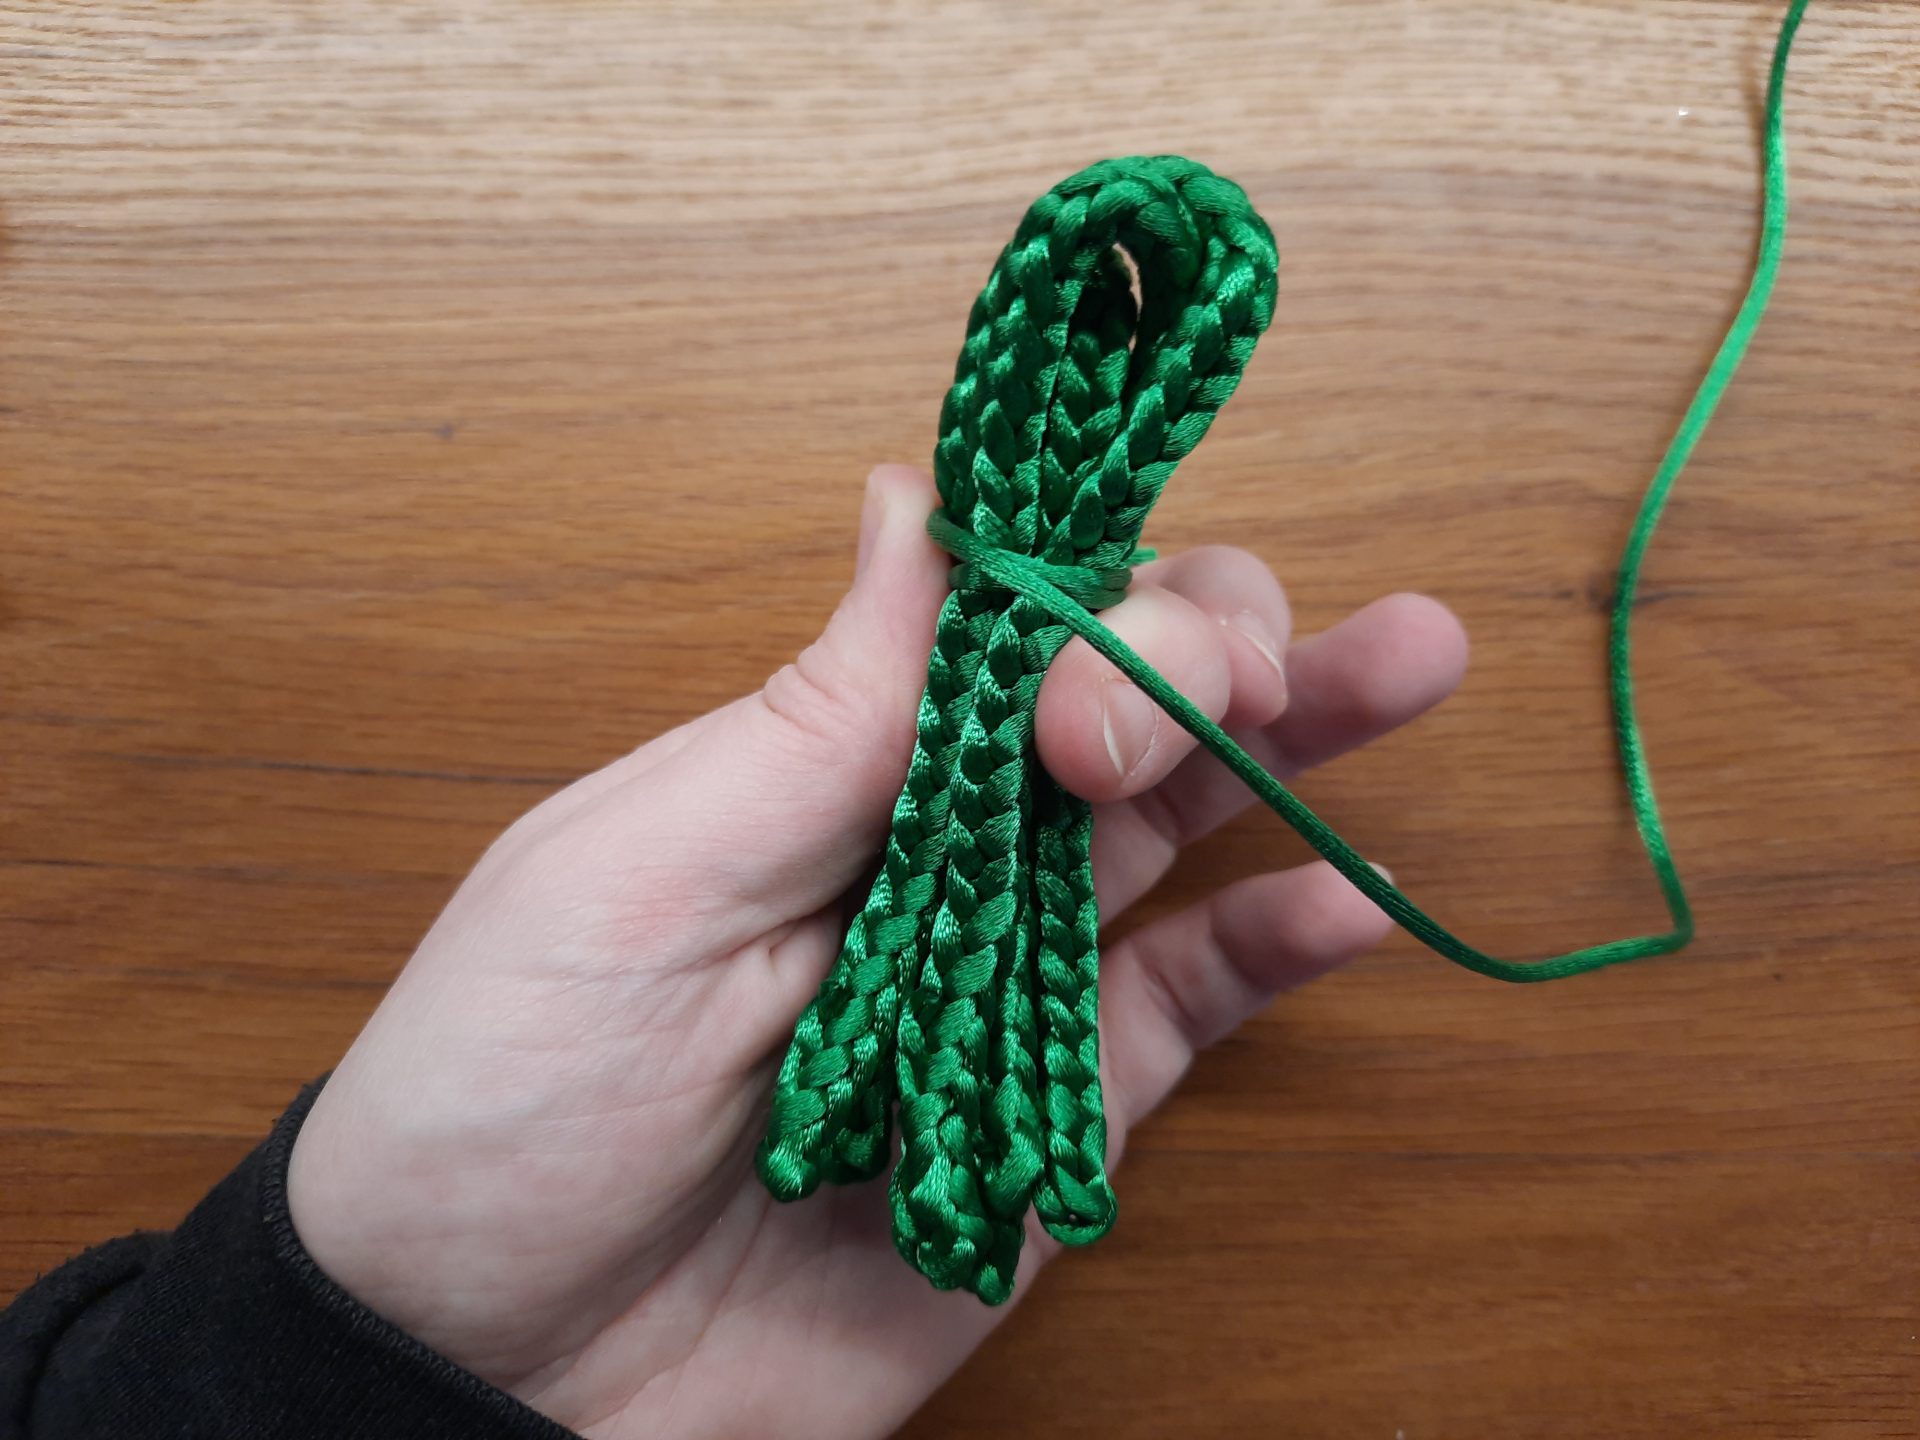
Making the octopus toy with the lucet: at the point where you want the head to finish and the tentacles to begin, wrap the bundle with yarn and secure
Making the octopus toy with the lucet: at the point where you want the head to finish and the tentacles to begin, wrap the bundle with yarn and secure
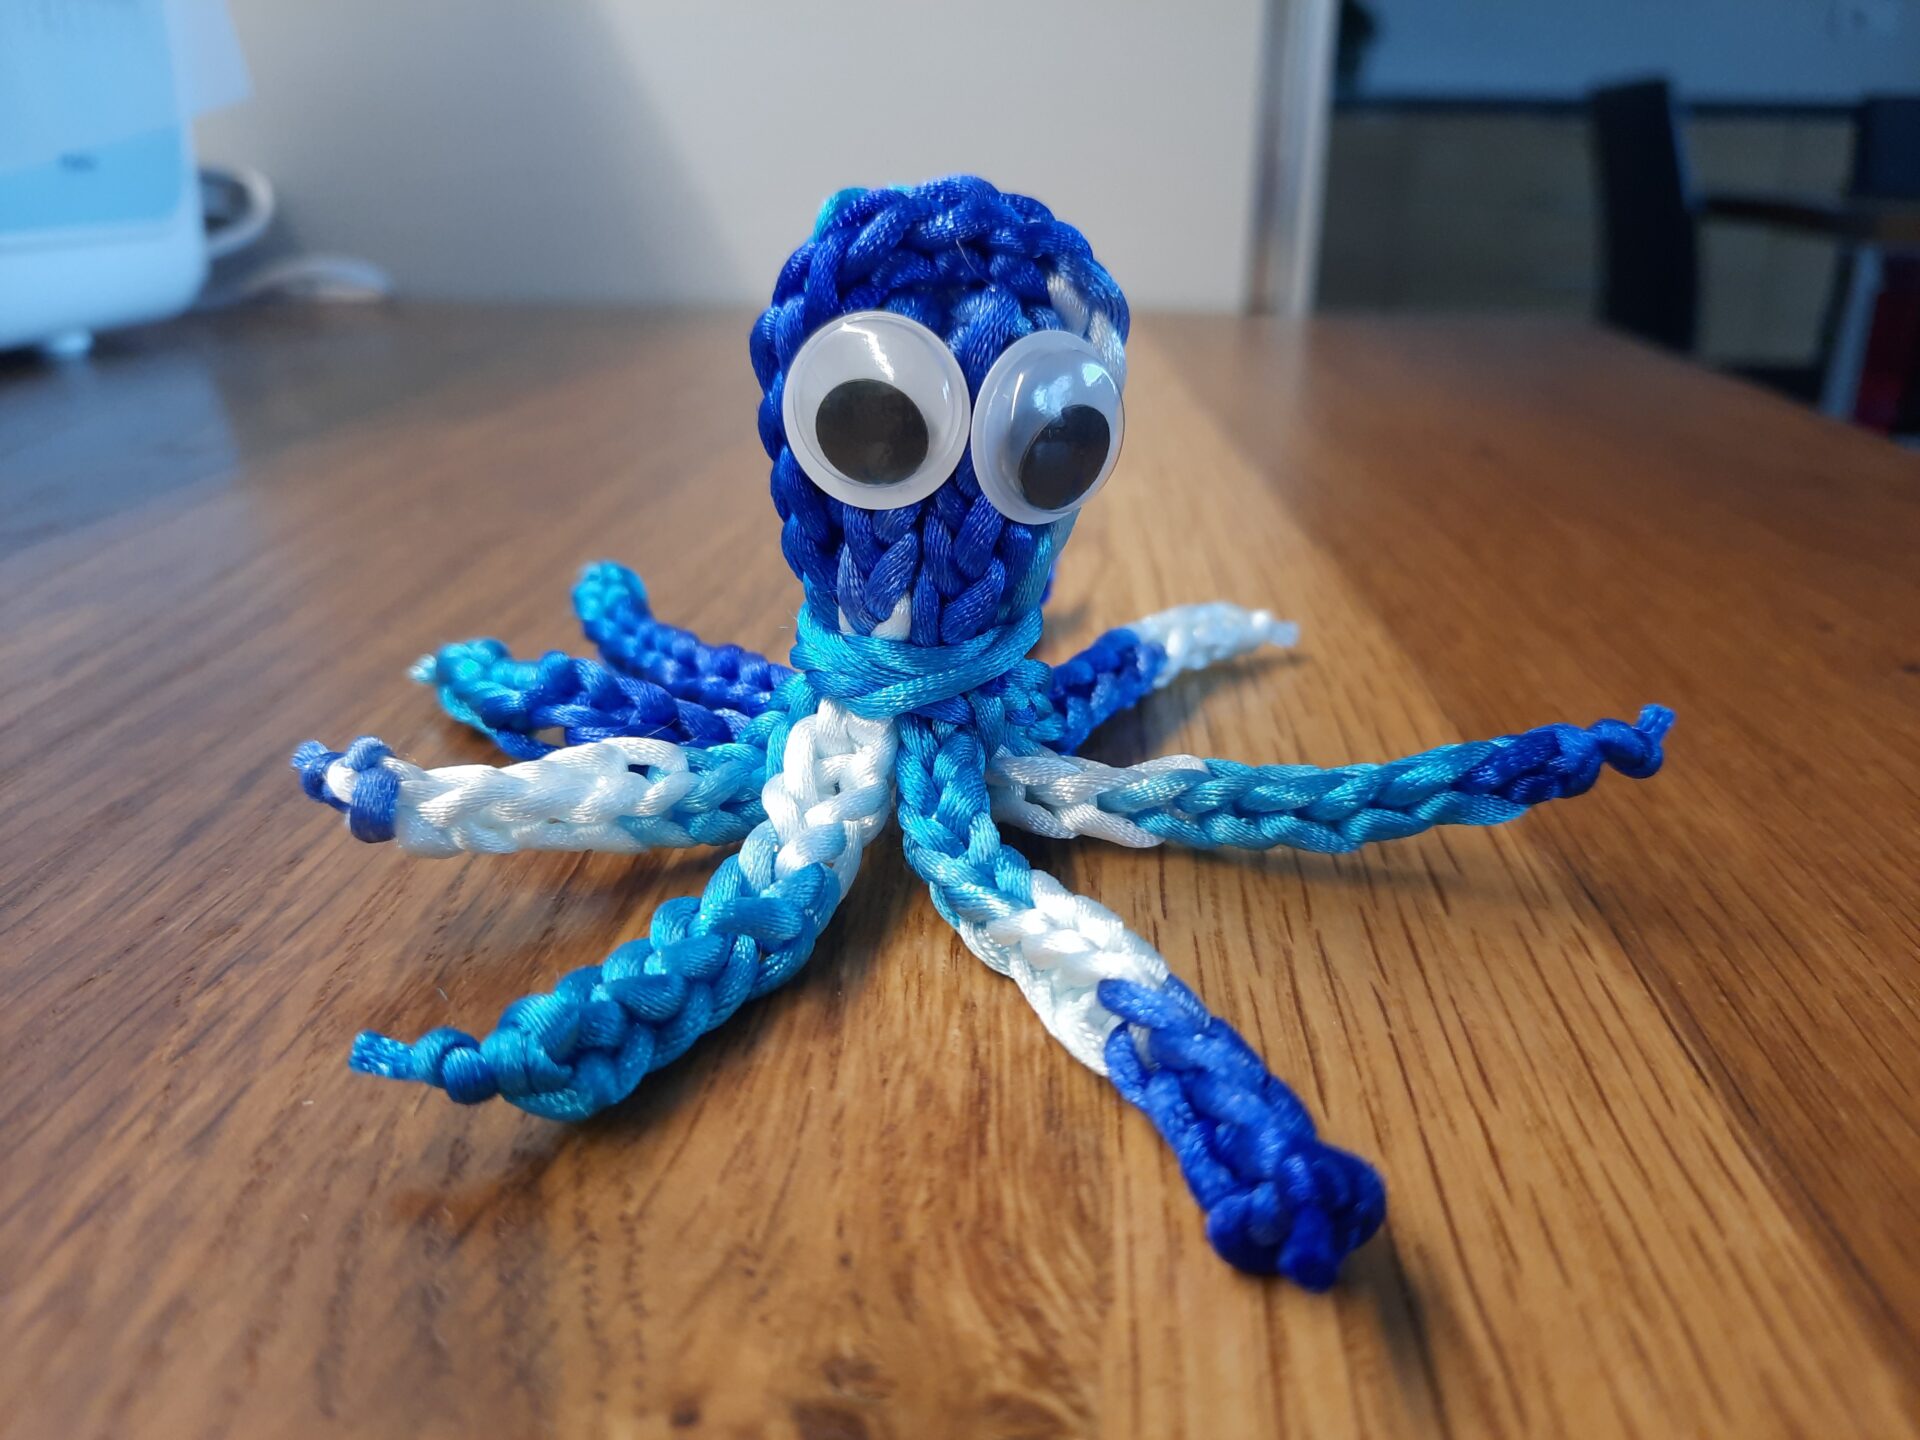
Little toy octopus made with the lucet
Little toy octopus made with the lucet
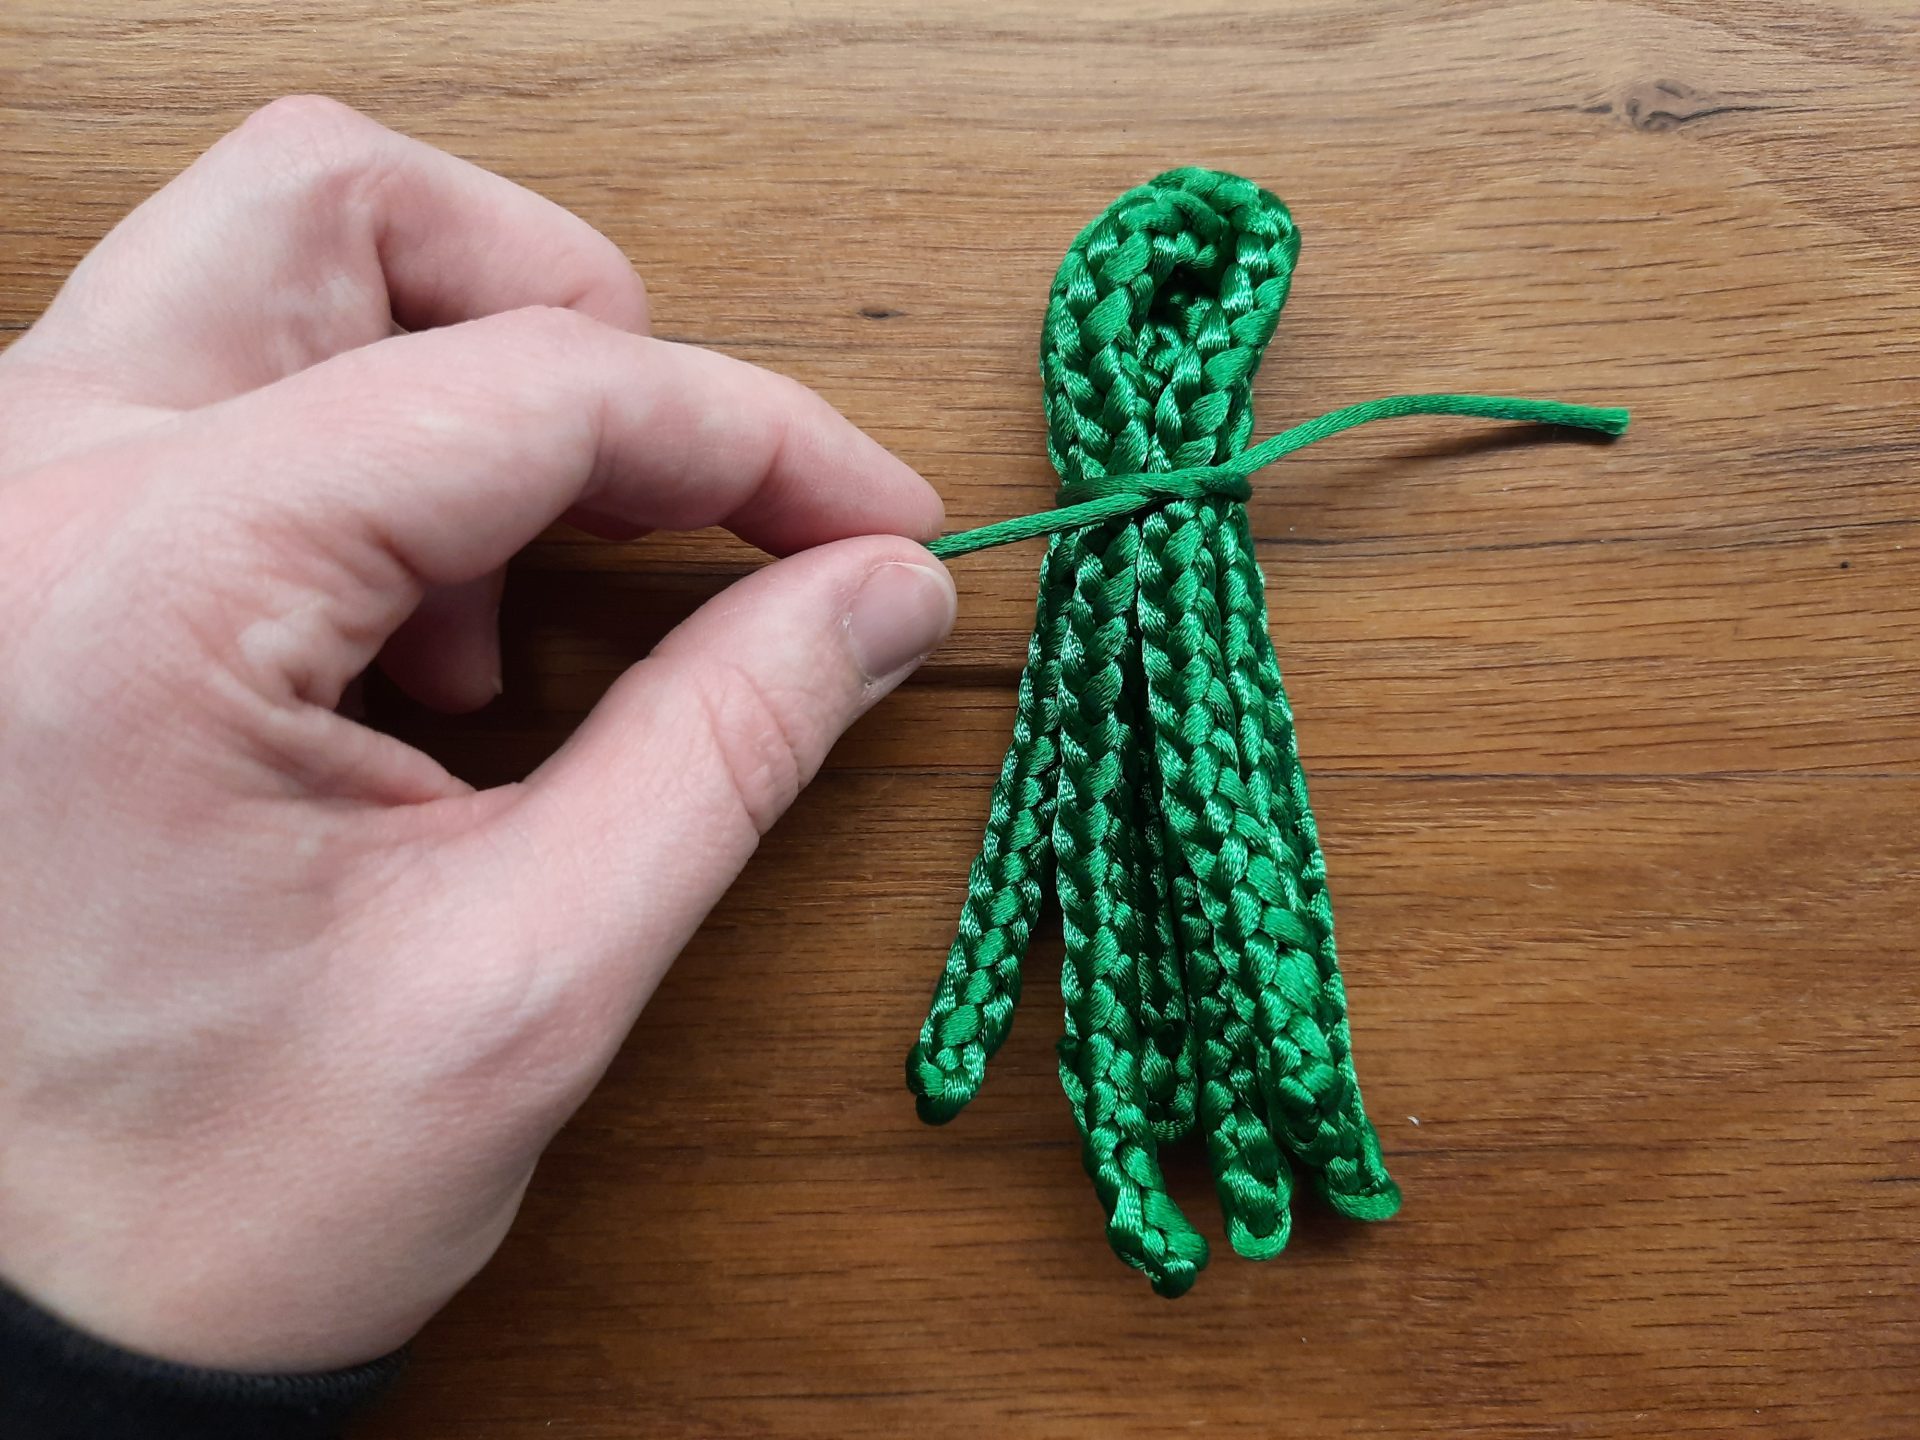
After gathering all the cords together into a compact bundle, it’s time to form the head. Measure the desired head height starting from the top of the bundle (where all the midpoints meet) and going down along one cord. Wrap the bundle tightly at this point, using the same yarn or a contrasting one to define the head. If I cut long enough tails while finishing my cords, I use those leftovers.
Knot securely, then hide the yarn ends inside the head, with the help of a needle or a small hook.
At this stage, you should have a simple octopus shape, with eight tentacles hanging freely below the wrapped head. You can add eyes using buttons, embroidery or glued embellishments. I decided to attach plastic googly eyes to mine, using hot glue, as I chose a thick satin rattail cord (smooth, non-stretch nylon or polyester cord).
The snail
The snail is made with two cords, one for the crawling body and a longer one for the shell.
It’s easier to start with the shell, because its size is trickier to predict. Make a long lucetted cord, then hide the ends neatly.
Lay the cord flat and begin wrapping it around itself in a spiral. Begin from the center, wrapping the cord around itself and securing it in place with a needle and thread as you go. You can use the same yarn, or a thinner matching thread or embroidery floss for more precision. For example, I used a satin rattan cord for the shell and thin white sewing thread to hold the spiral in place, almost invisible with my chosen cord.
When the shell is finished, make the cord for the body. As you lucet, you can place the shell on top of the cord to check proportions and decide the final length. When you are satisfied with the length, leave a long tail on one end of the body cord while trimming the other end: this will become one of the antennas. Sew the second antenna next to the first using a tapestry needle. I like to finish the antennas with small knots at the top to suggest eyes, but you could attach buttons, beads or other embellishments instead.
Finally, attach the shell to the body by sewing it in place. Make sure the end of the spiral touches the body, just like a real snail emerging from its shell. And with that, your lucetted snail is ready.


The butterfly
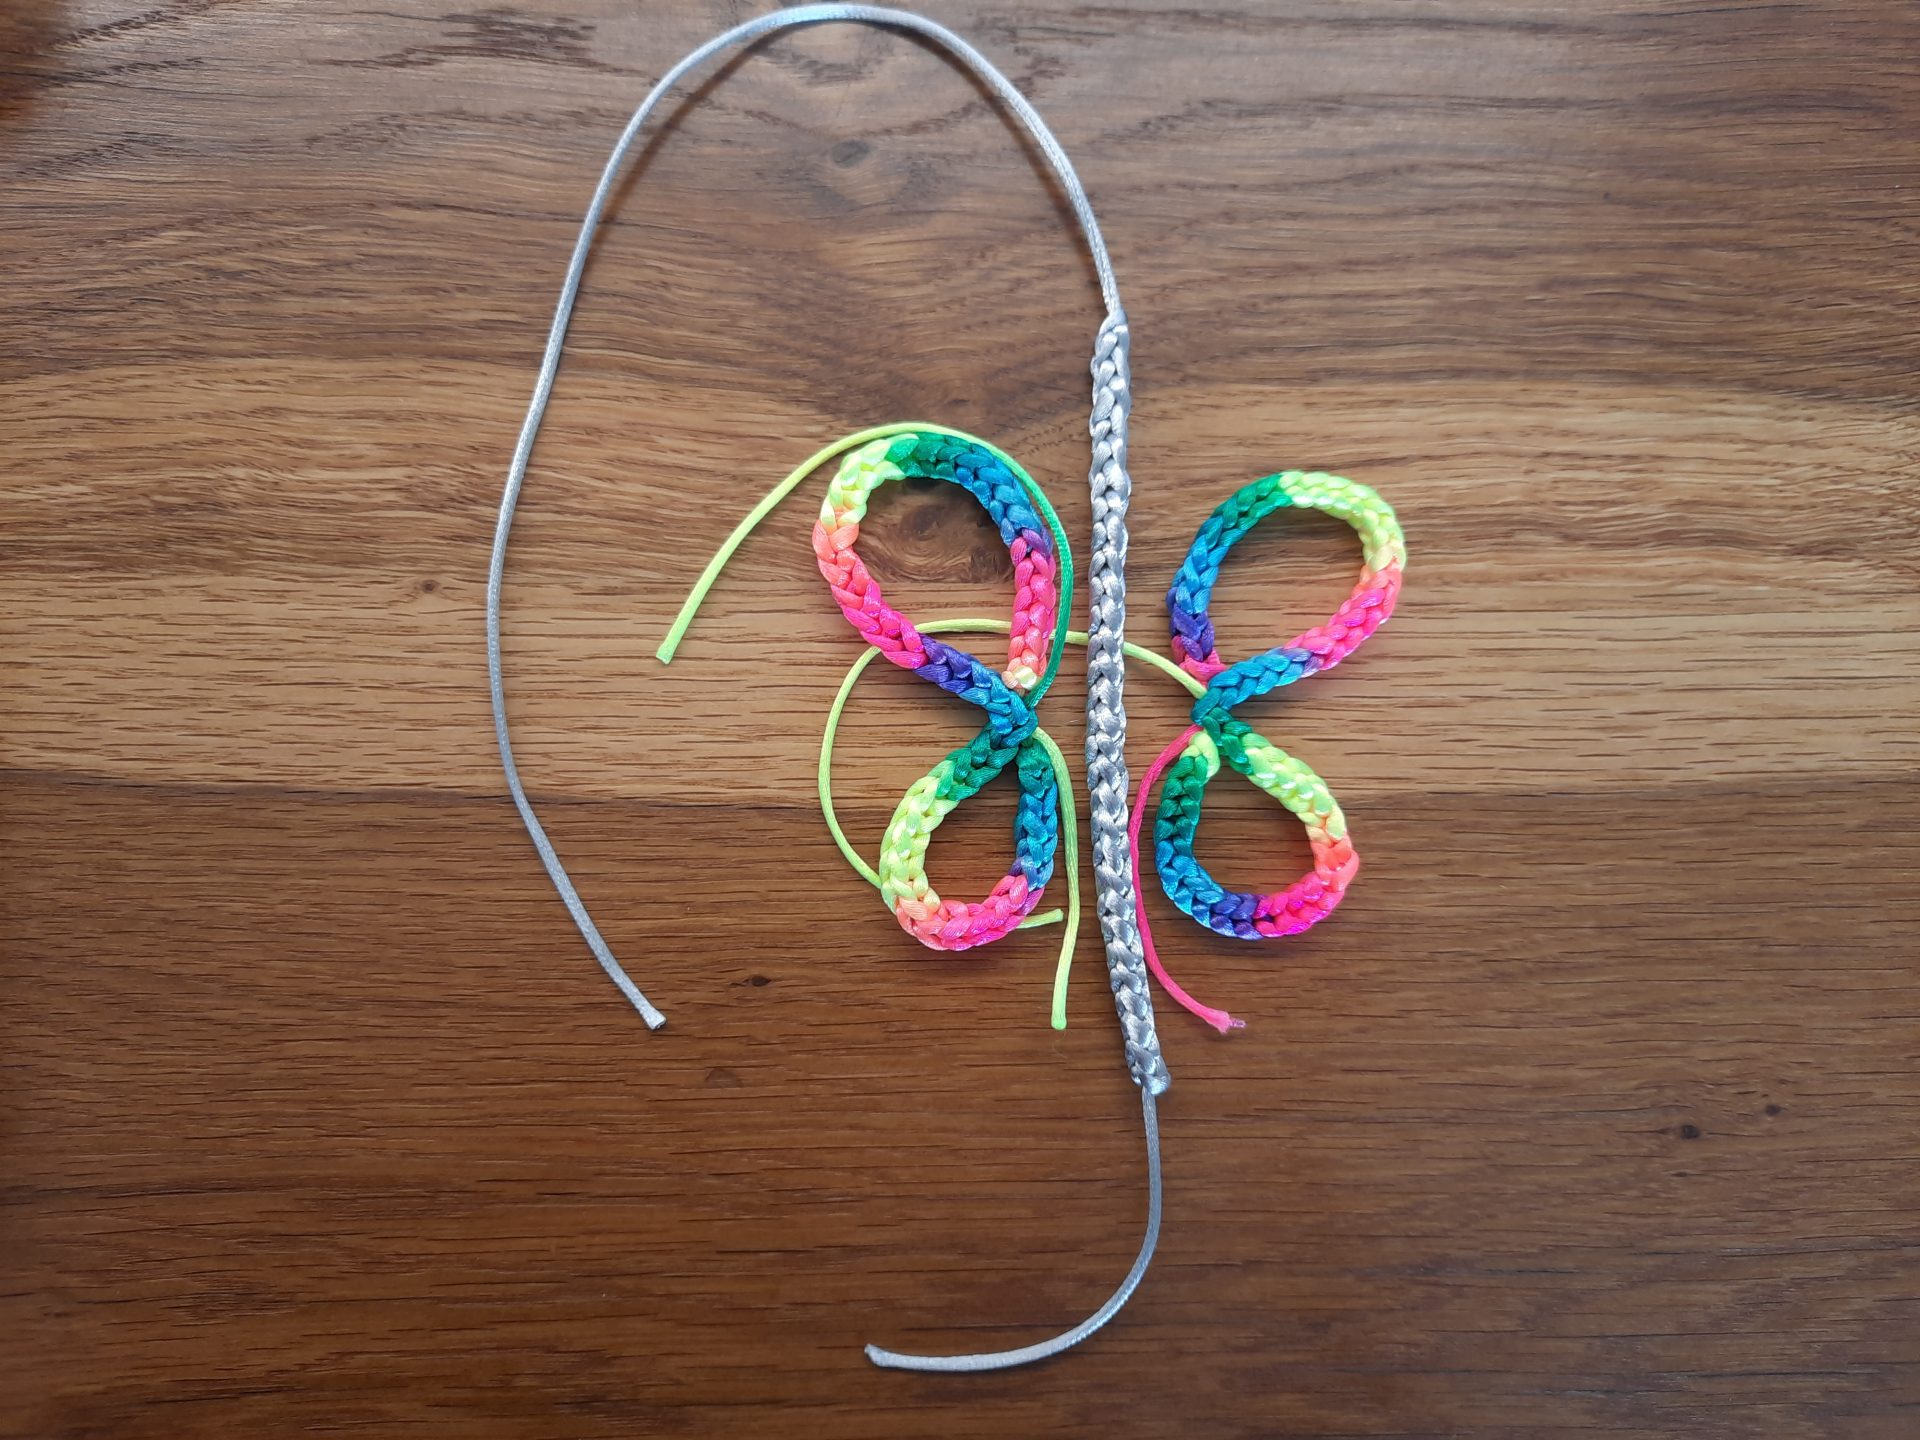
How to make a butterfly using the lucet: here the three cords I made, placed in the shape of the wings and body, ready to be assembled
The butterfly is another easy companion to make, and it requires a total of three cords: one for each wing and one for the body.
Start by making two cords of the same length for the wings. I chose a rainbow satin rattan cord, but you could also begin lucetting in one color and then change yarn for the lower part of the wing. There are no limits to your imagination. Next, make a third cord for the body. I made mine roughly half the length of the wing cords, but to determine the final size I suggest playing with a few pieces of yarn, laying them on your table in the shape of a butterfly to decide the proportions that suit you best.
For this project, do not cut or hide the cord tails. Instead, leave them long and use them to assemble the butterfly.
Start with the first wing. Knot the two tails of one wing cord together to form a loop. Pinch the loop at the knot to create two connected loops, with the upper one slightly larger than the lower one. Secure this shape by wrapping the two cord tails tightly around the point where the loops meet. Make the second wing in the same way.
Now find the midpoint of the body cord. Using a tapestry needle or latch hook or crochet hook, thread the tails of the first wing through the body cord on one side of the midpoint, then thread the tails of the second wing through on the opposite side. Pull gently to secure both wings in place, centered on the body, and secure by threading and/or knotting.
To finish the butterfly, hide the bottom tail of the body cord, and keep the top tail to form one of the antennas. Add a second antenna by sewing an extra tail next to it with a tapestry needle. I had two tiny black pom-poms in my stash, and I sewed them on either side of the body where the antennas begin, to suggest the butterfly’s eyes.


The lollipop


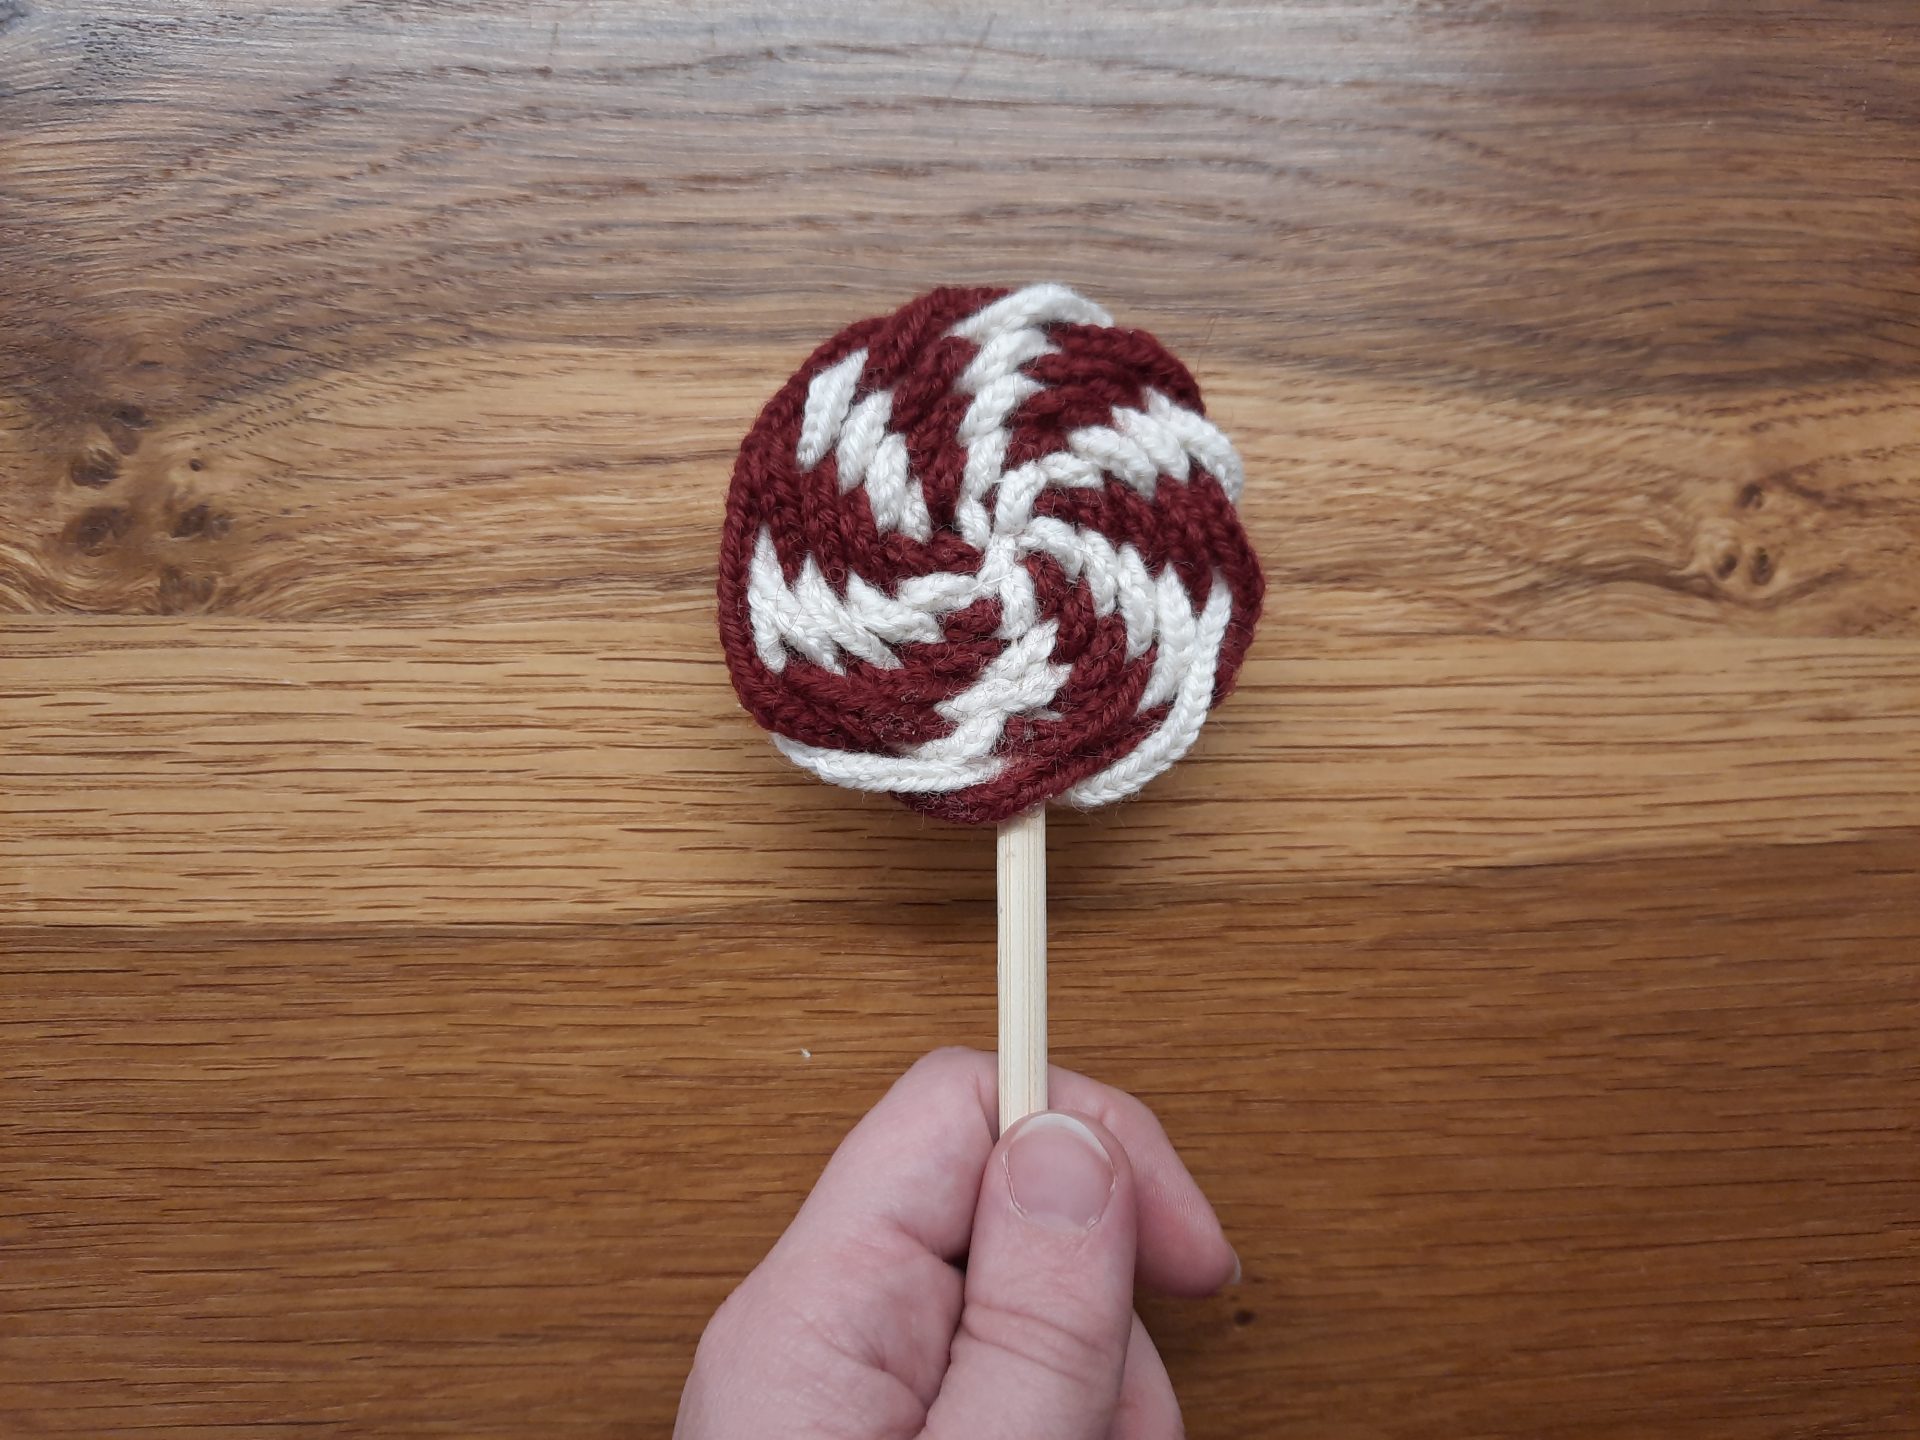
Following the same procedure used to make the spiral for shell of the snail, I made a lollipop my daughter could use to play with her dolls and plushies.
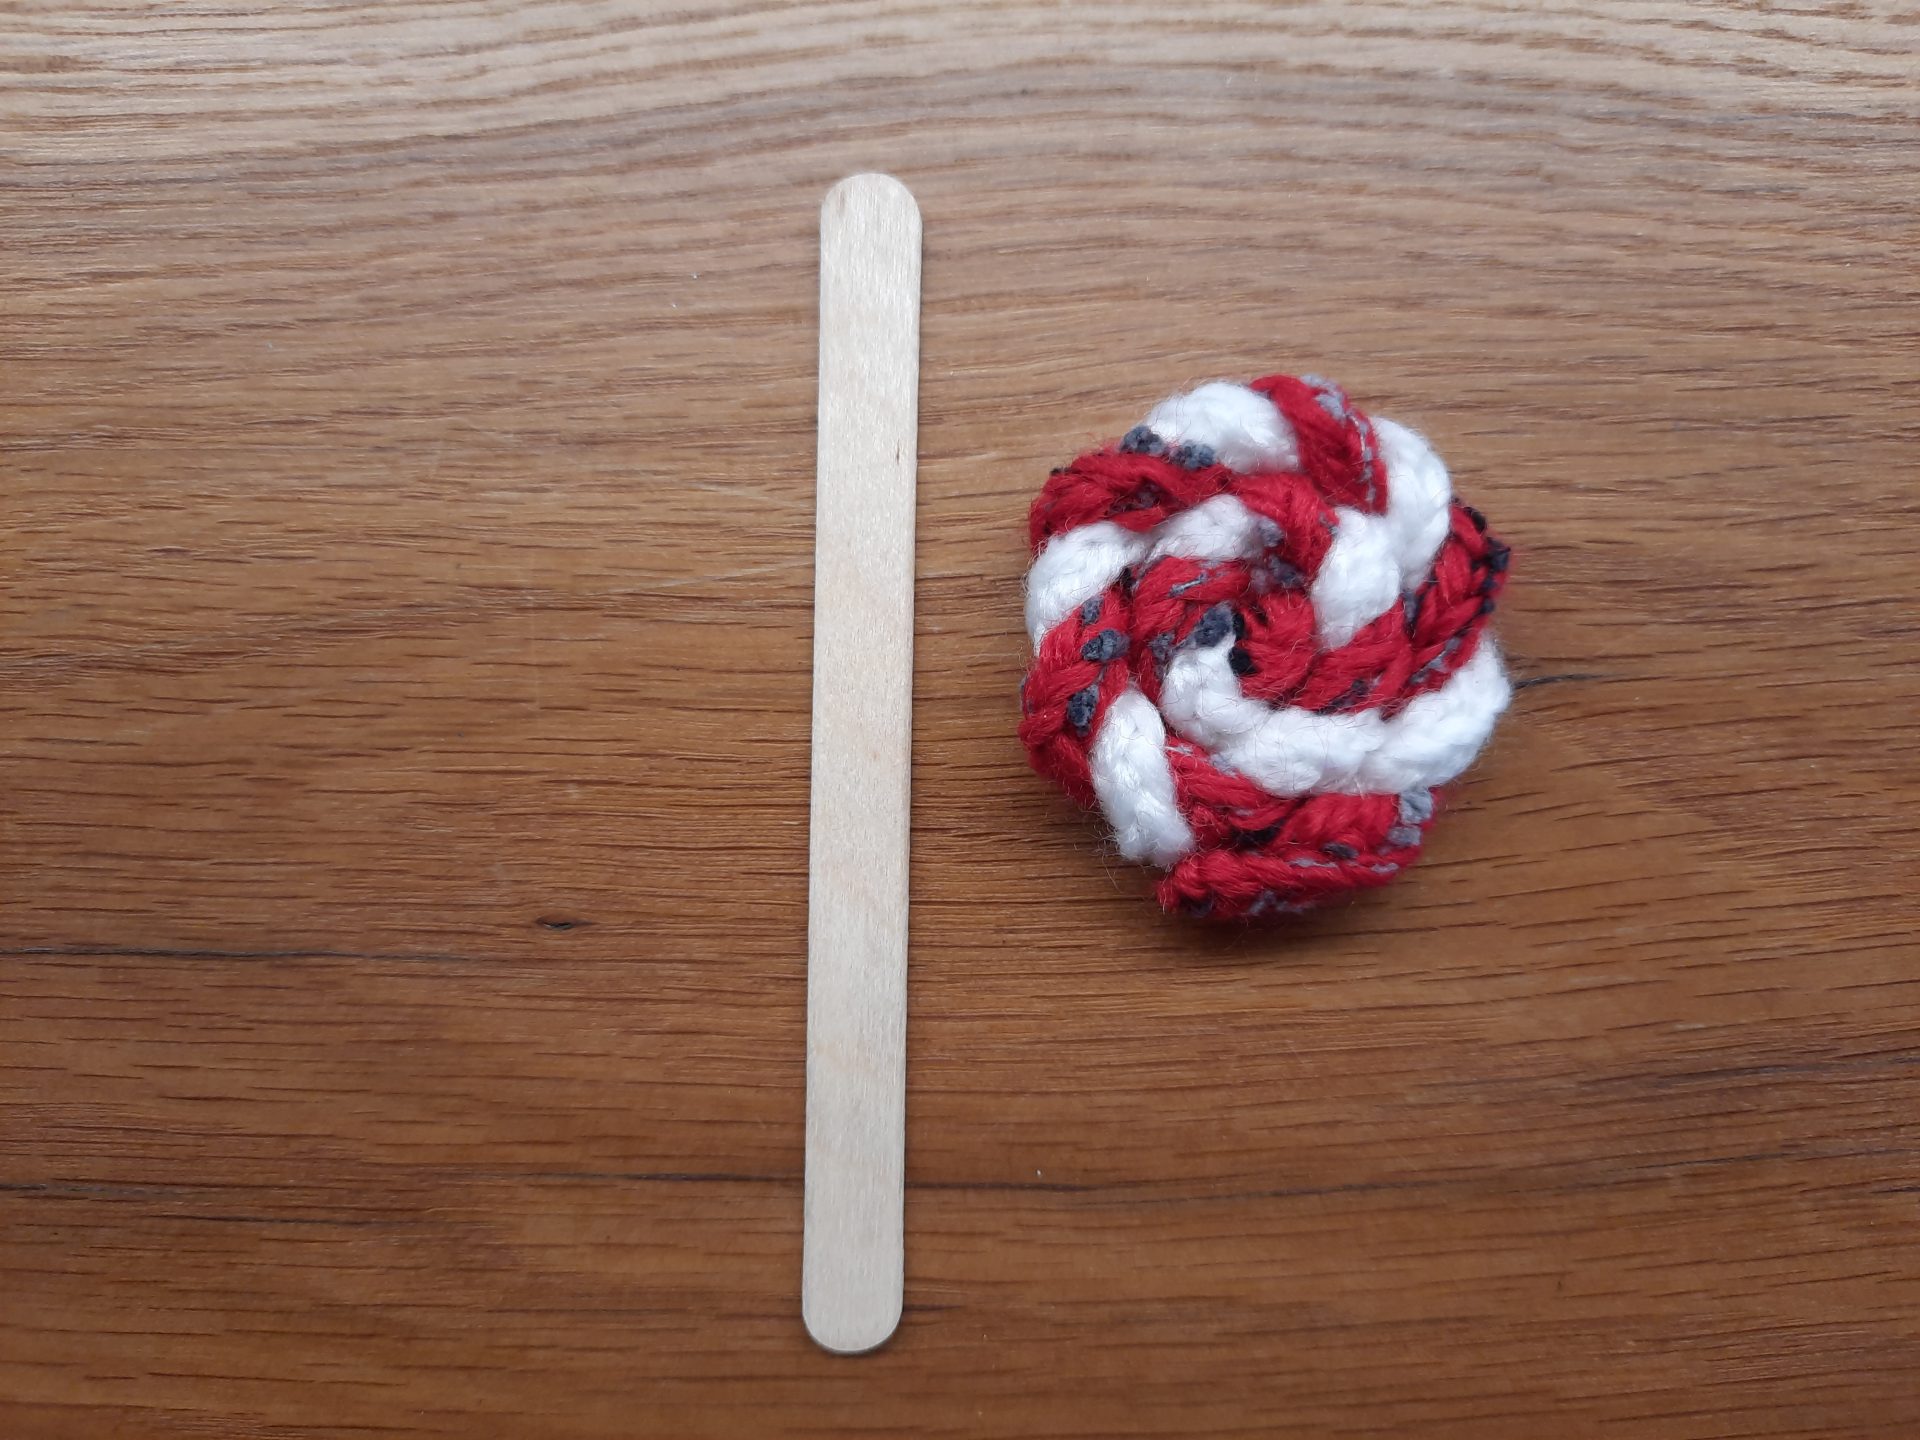
For this project, you’ll also need a stick to hold the lollipop. I had some unused Chinese chopsticks left over from another project, so I decided to use one of those, but I would suggest using a popsicle stick instead. It’s easier to glue to the spiral and has a more suitable length, which makes for a better balanced toy. But it all depends on the final size you want to achieve.
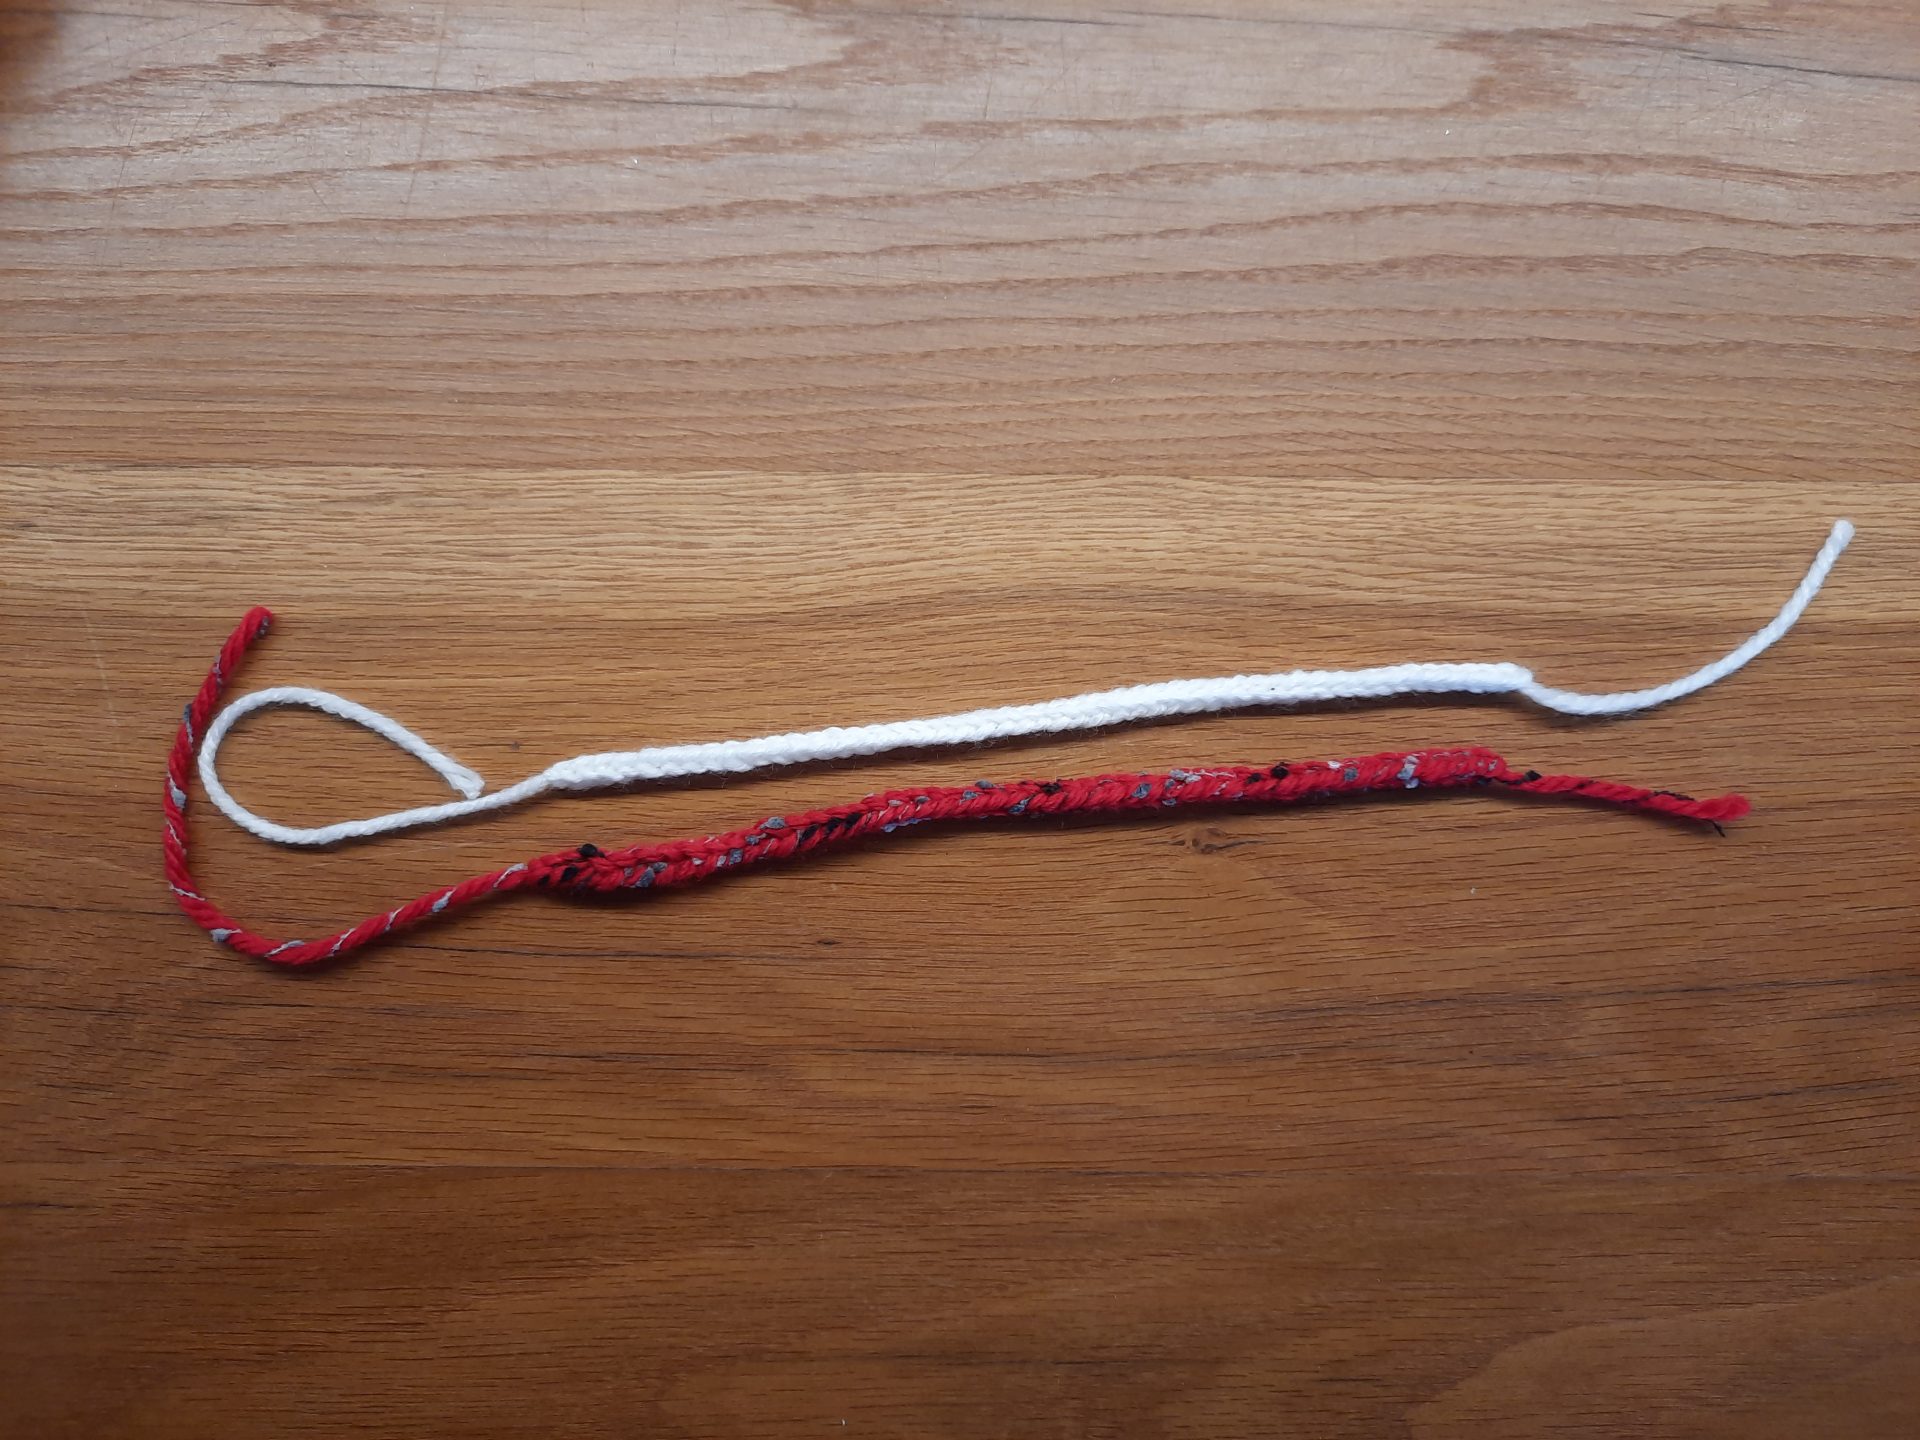
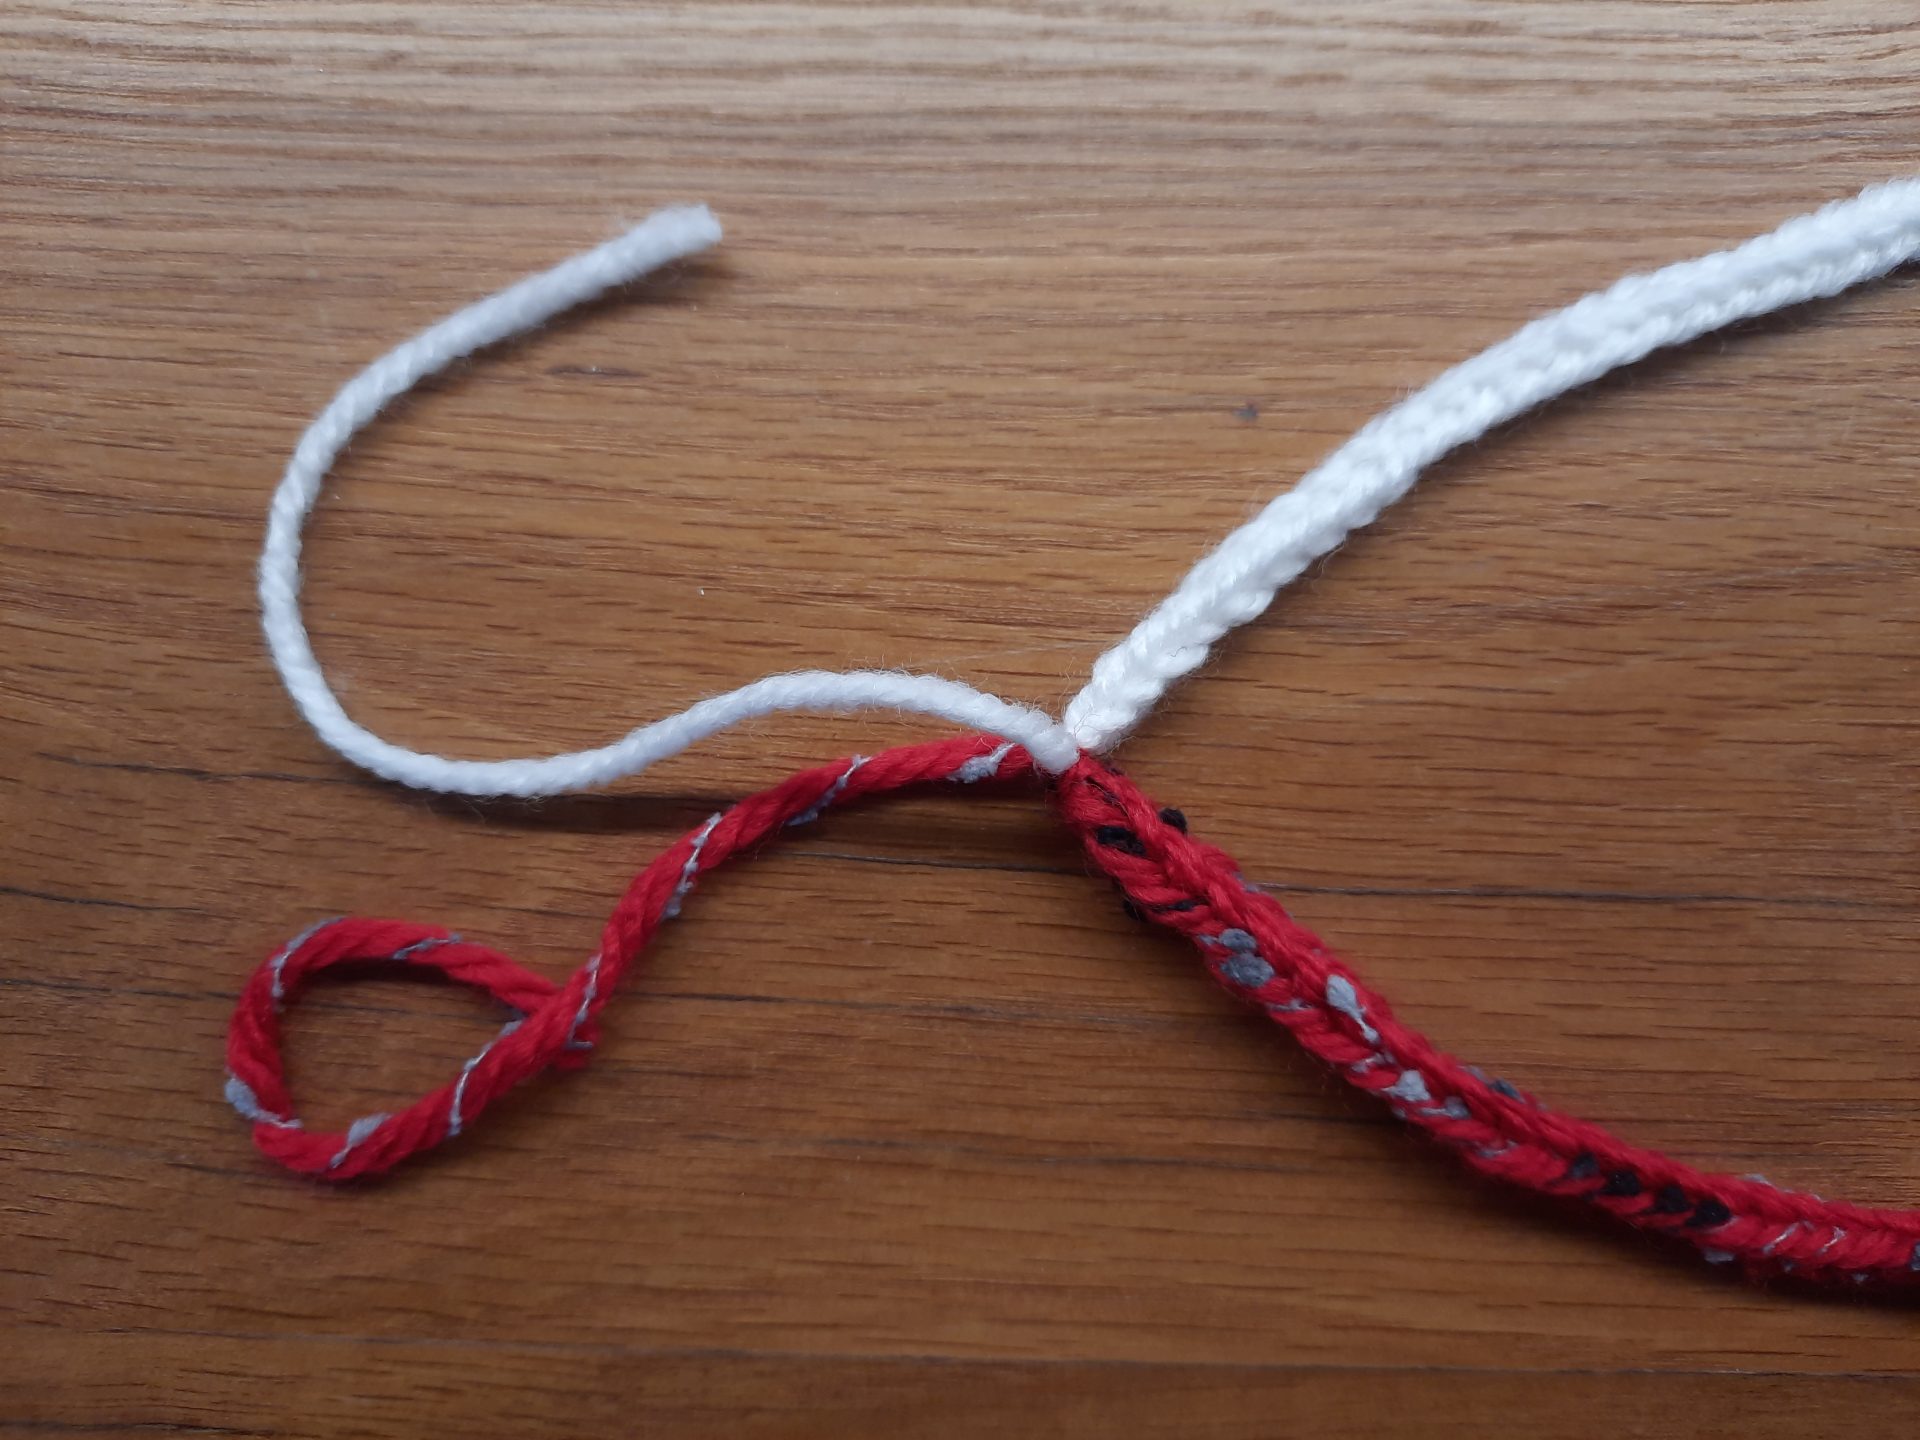
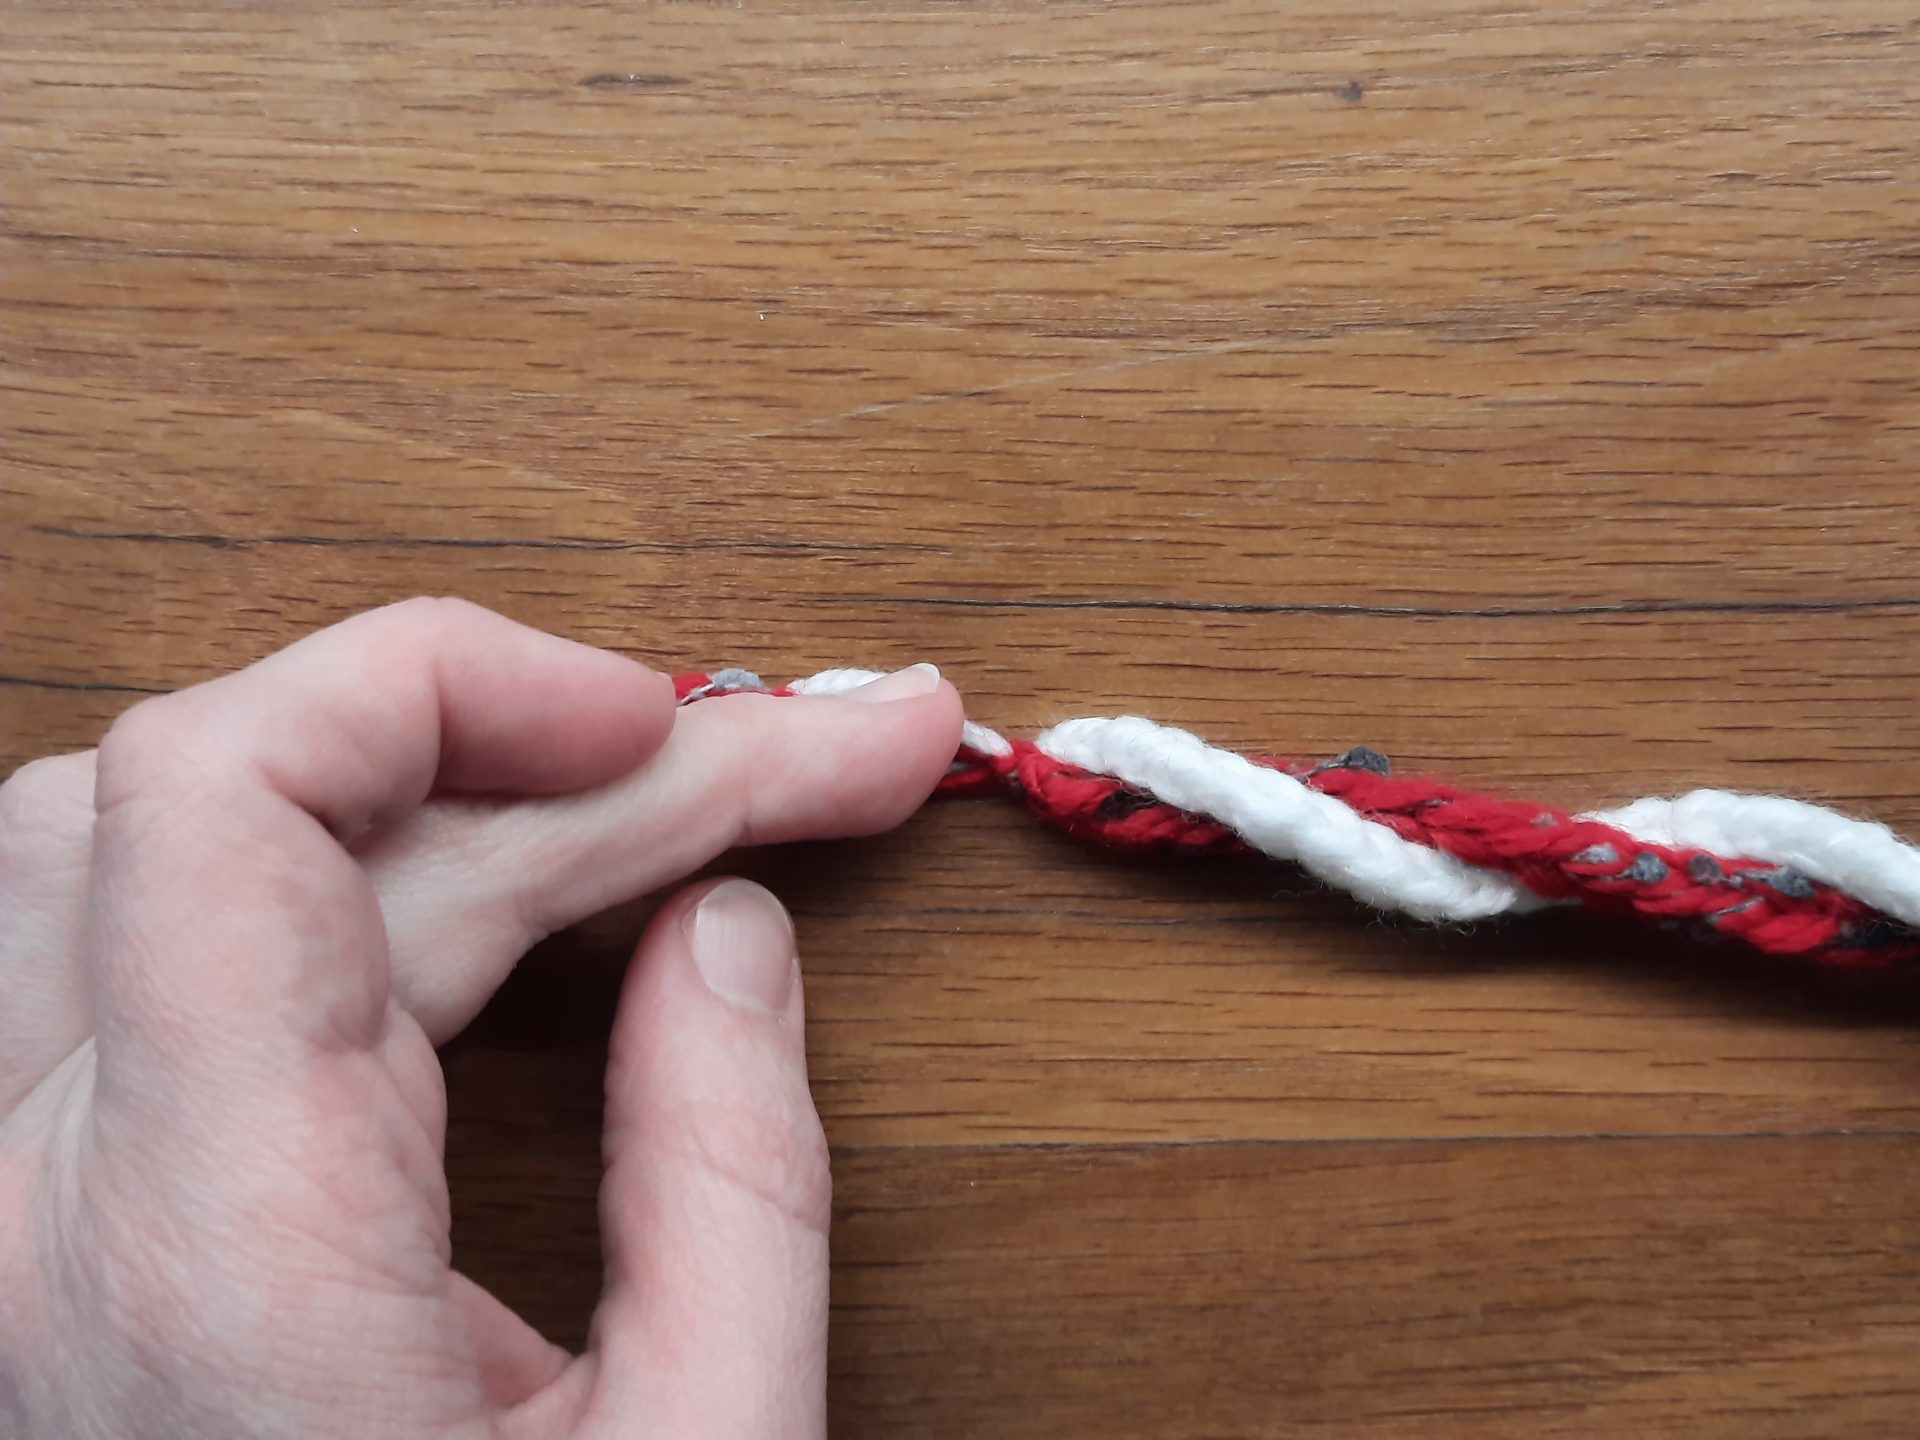
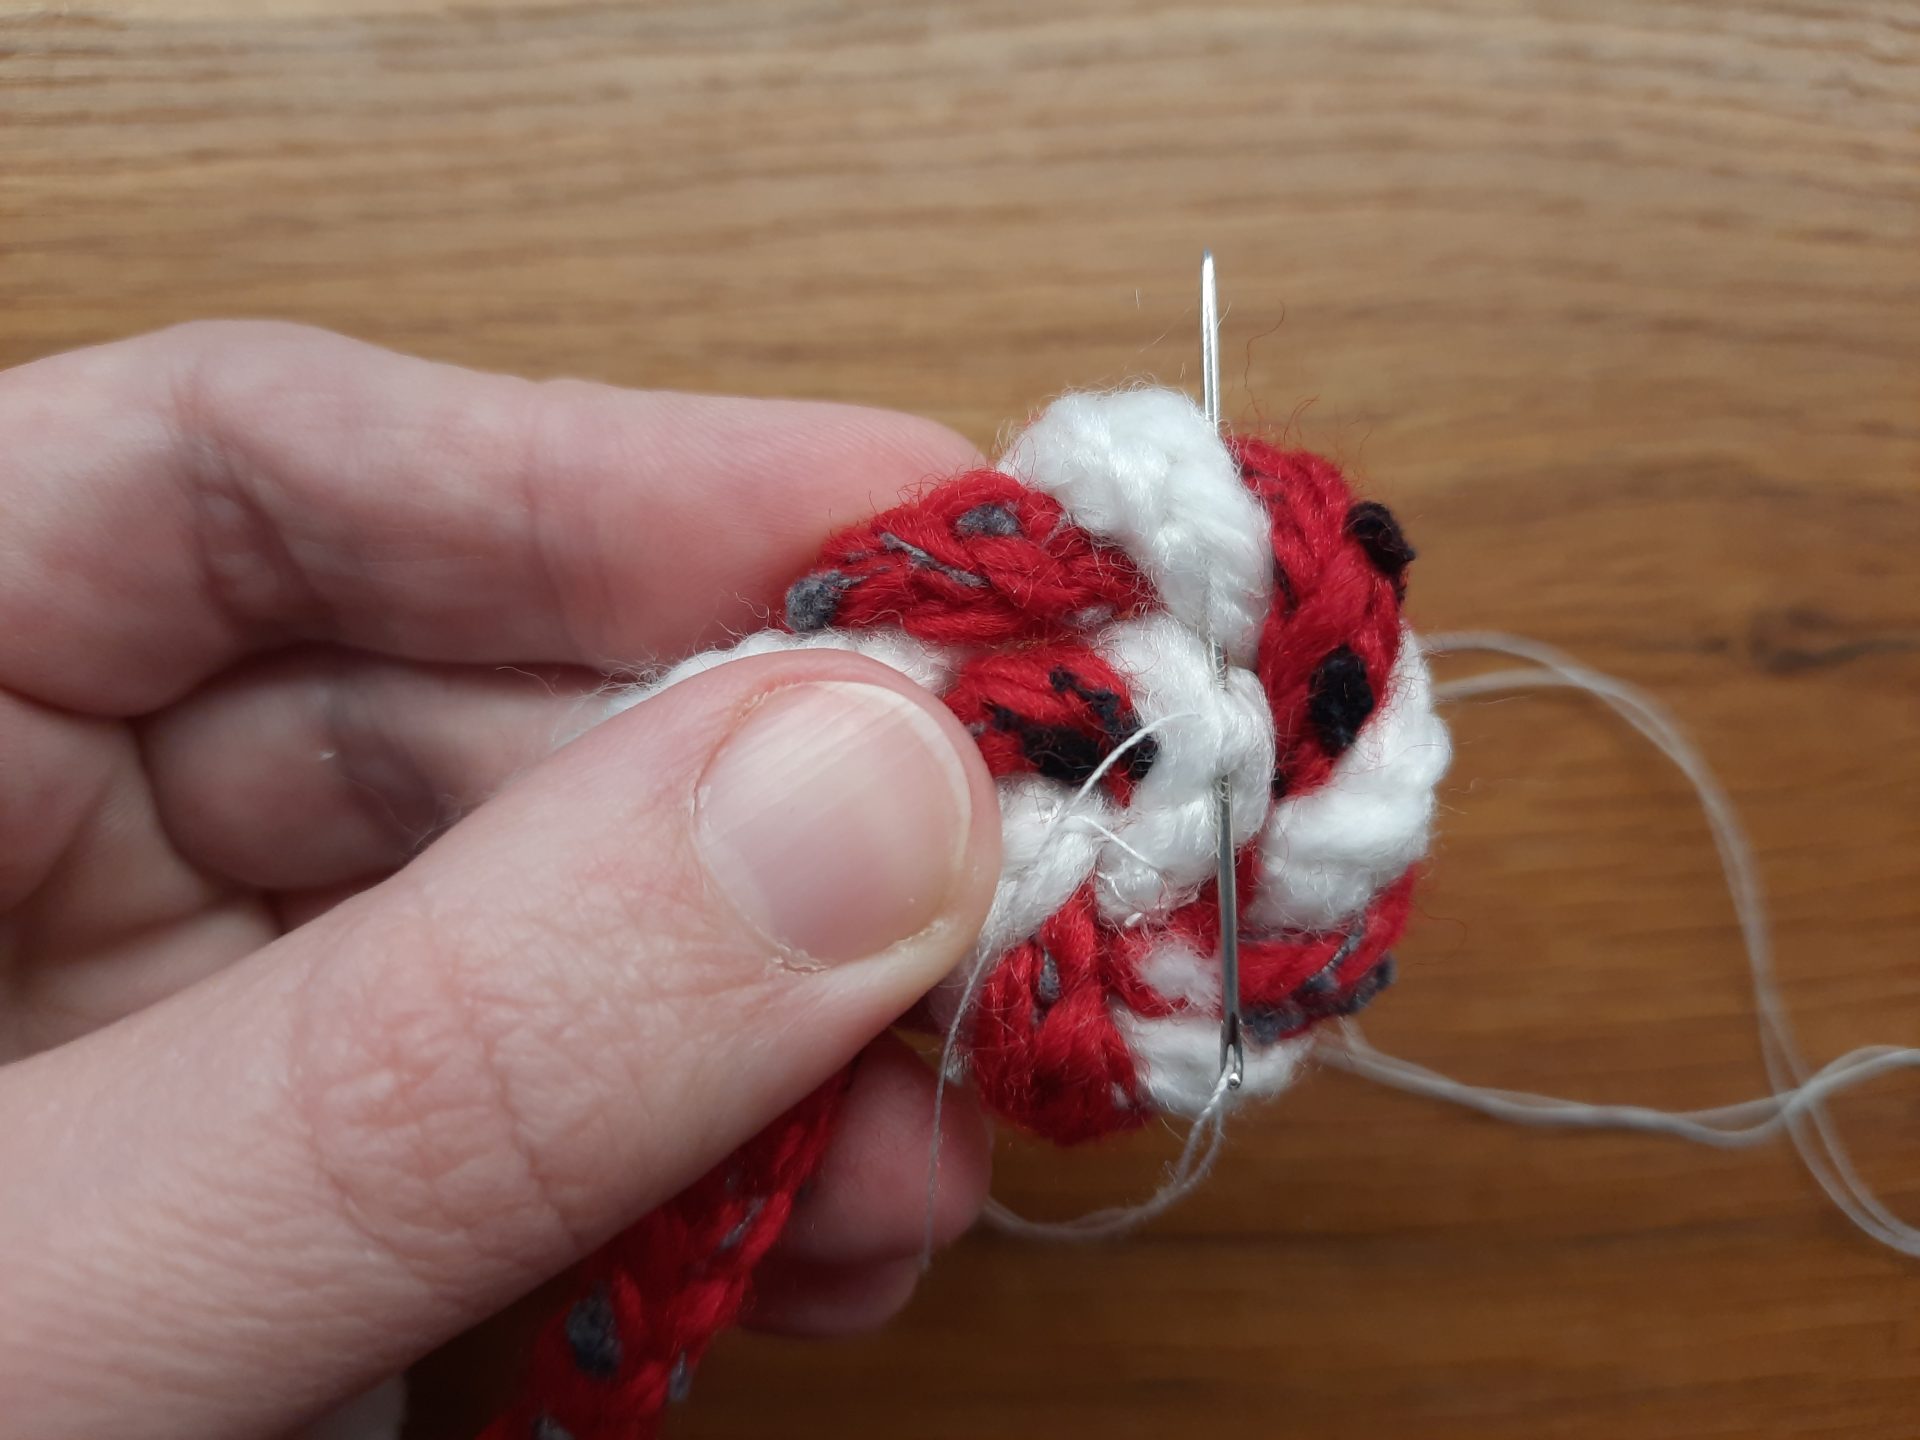
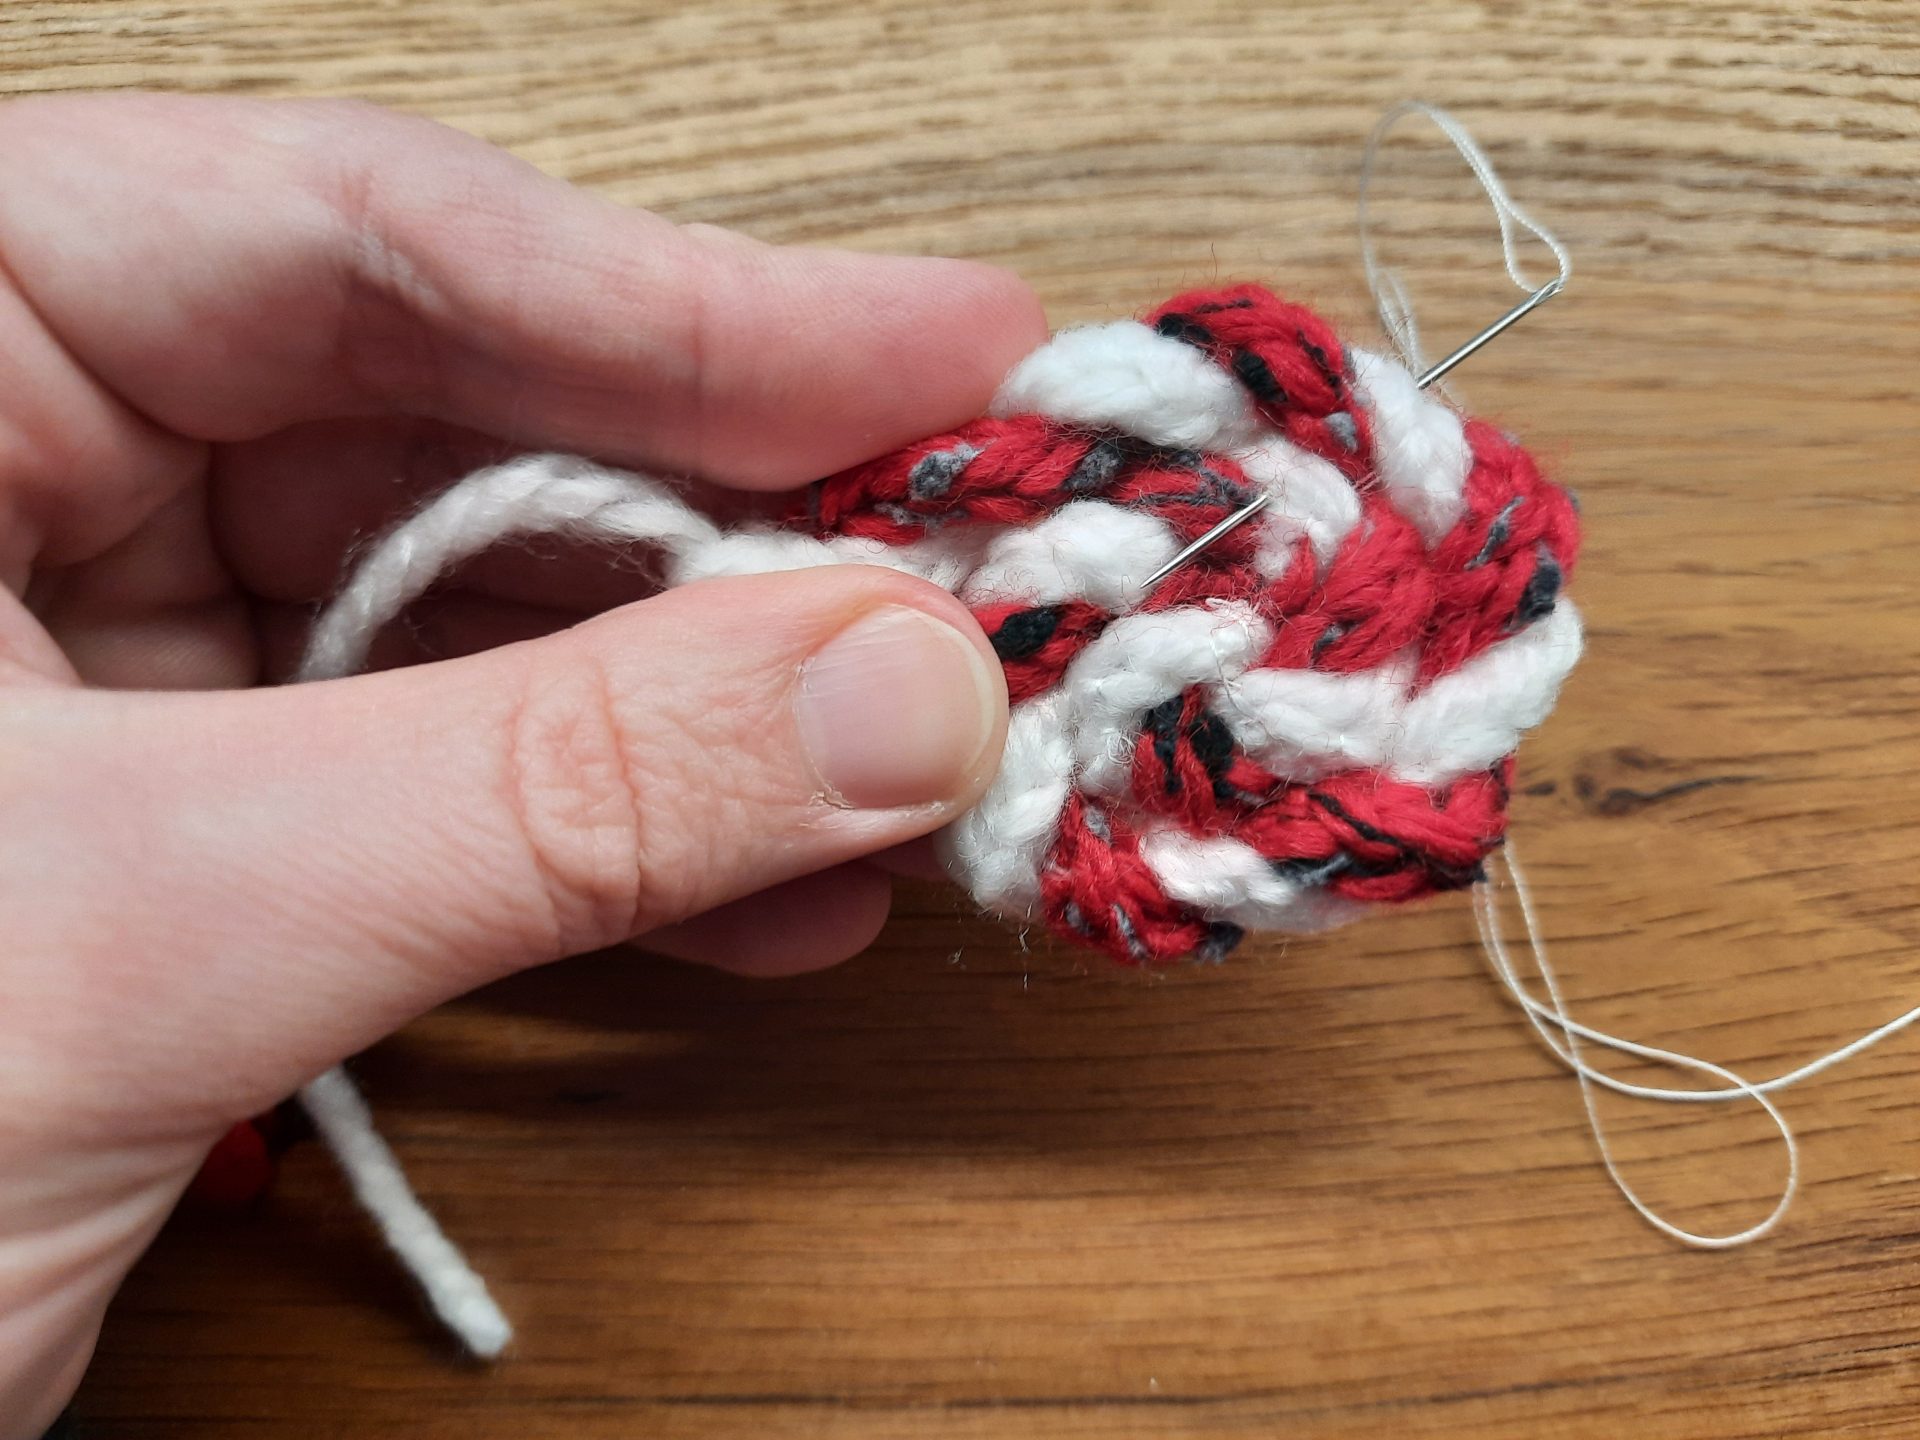
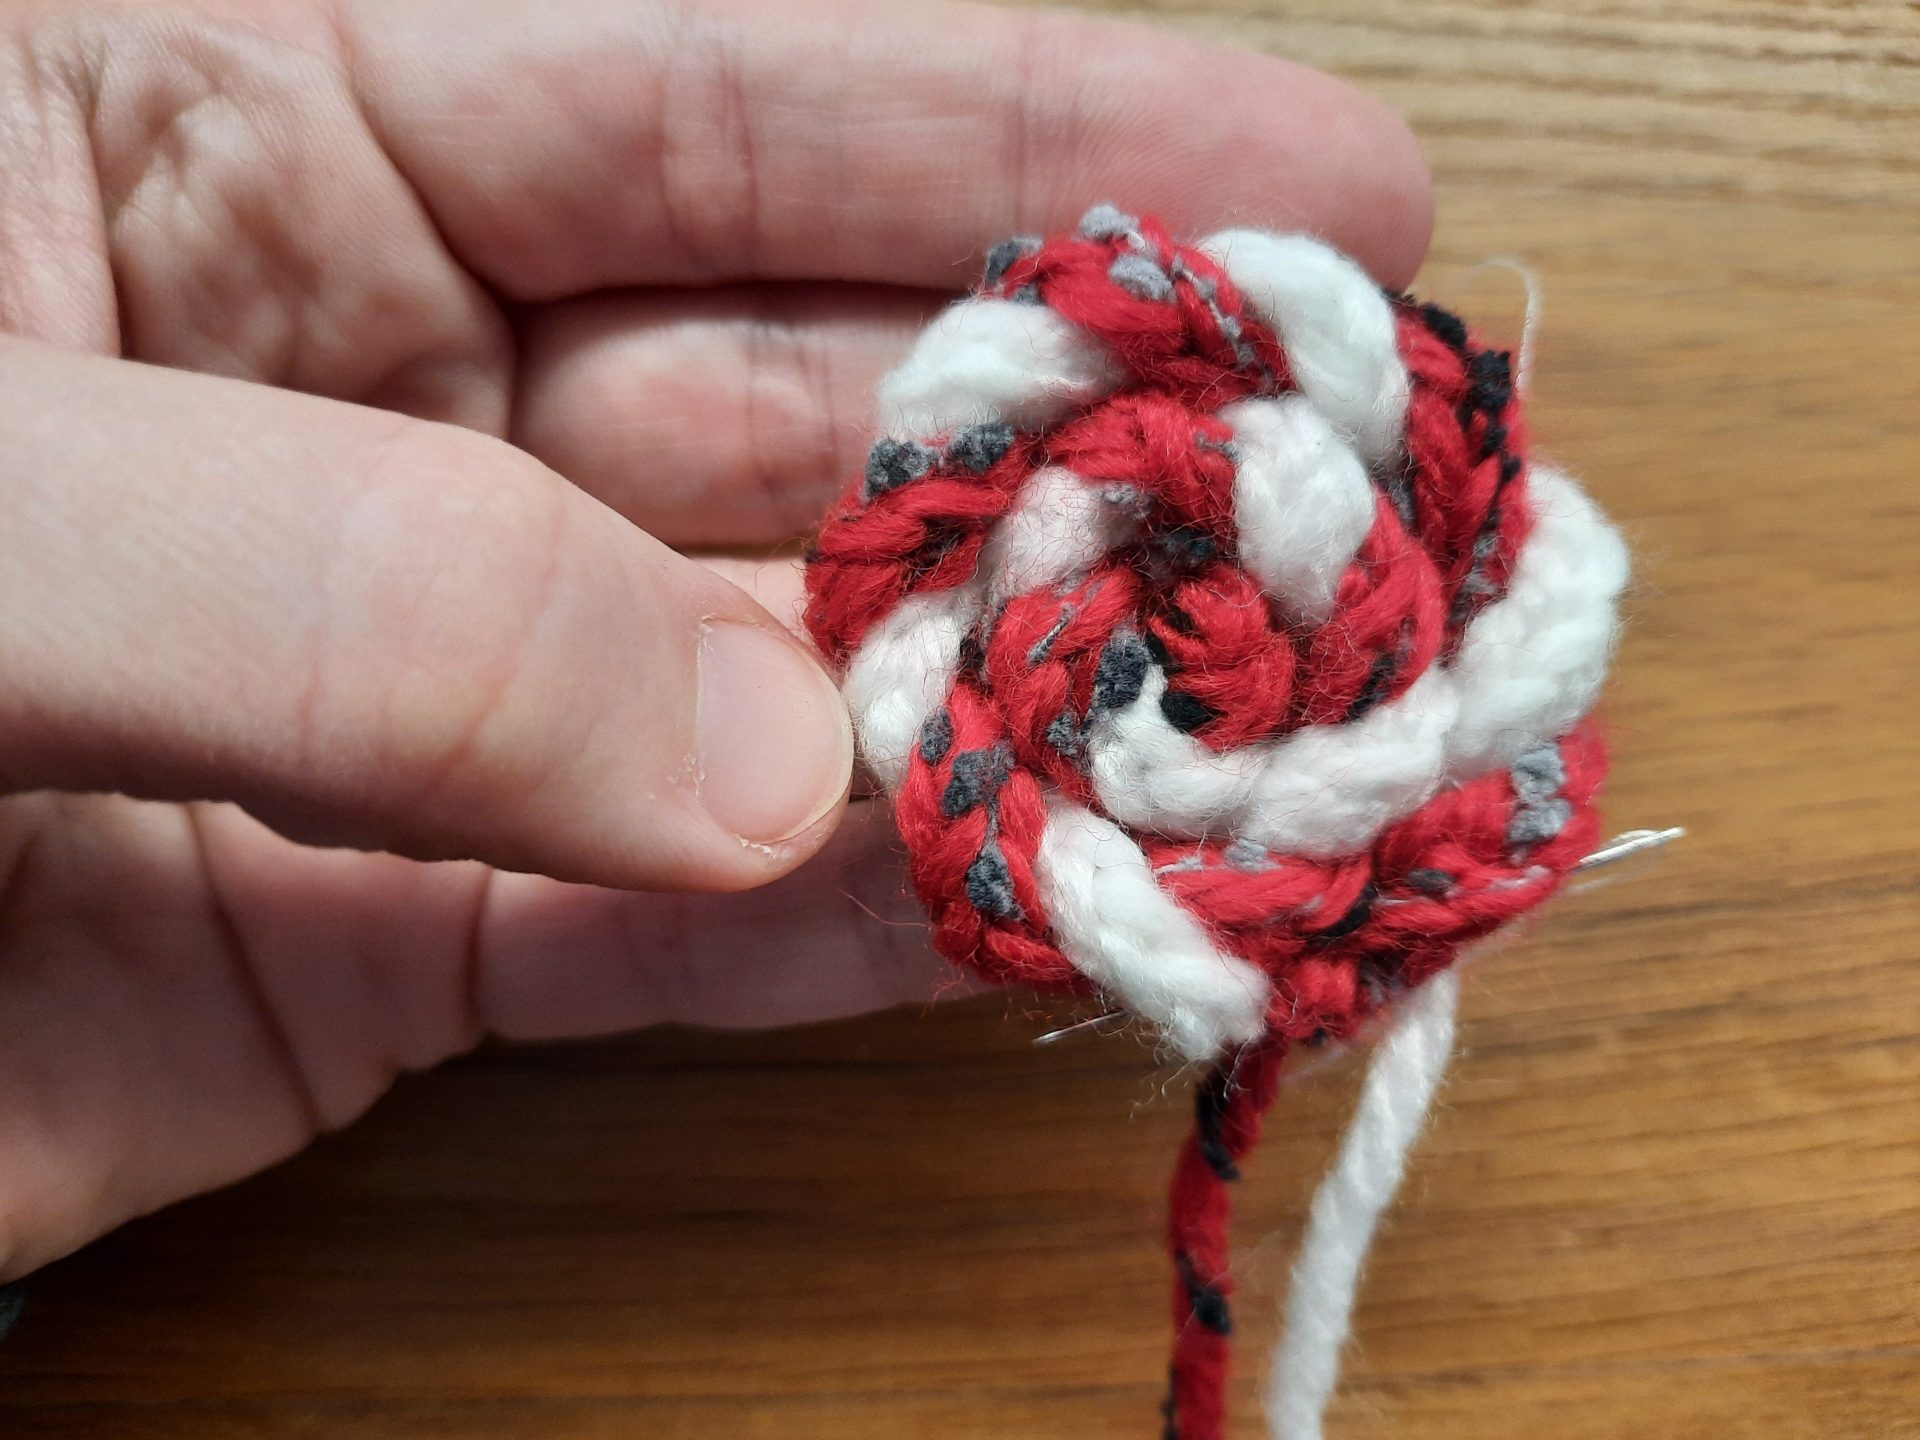
To make the spiral part of the lollipop, I chose to lucet two cords of the same length in contrasting colors, red and white. Spiraling with two cords creates an alternating color effect, which my daughter really loved. I secured two ends together with a knot, then started twisting them together in a spiral, as I do for making a candy cane. As I twisted them together, I started a spiral similar to the one to make a snail shell, always starting from the center. Sewing in place as I went, I continued the twisting of the cords together to achieve the double color effect.
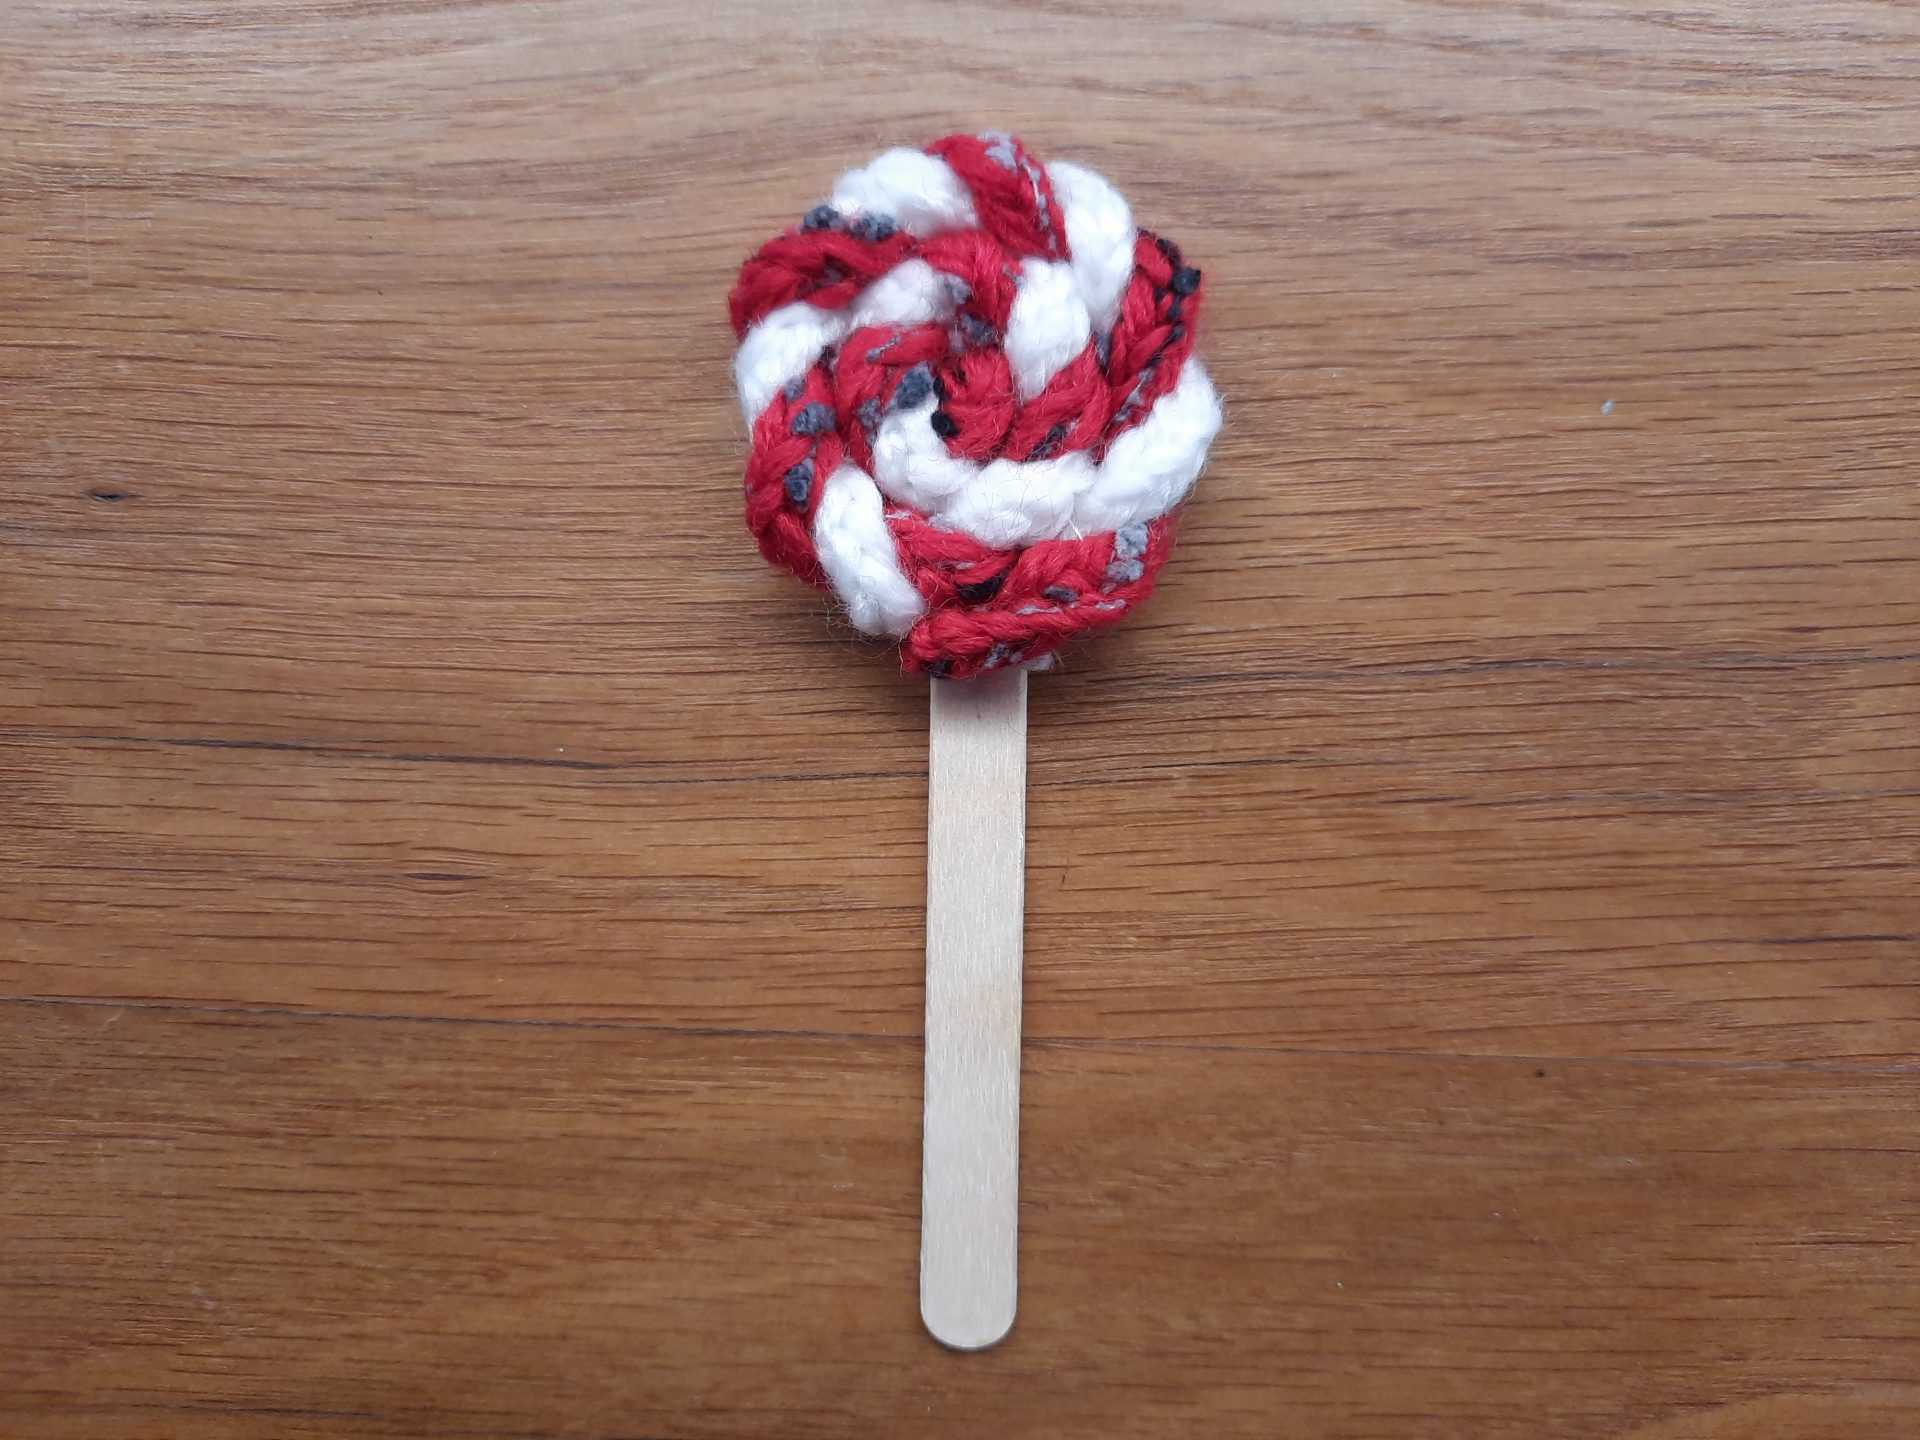
When the spiral is finished, hide the tails of your cords neatly. Choose which side will be the front of your lollipop (usually, the one with less visible stitching). Using hot glue, attach the popsicle stick to the back, making sure it covers at least half of the spiral to give good support.
Guest toy by... my daughter!

So, it happens I was making a cord for a bookmark, when my daughter stepped in asking me to make a thing for her dolls. Obviously, when I finished my cord I gladly accepted her request. While I was working on it, she found a new way to use my lucet! Now it’s impossible to unsee it… She just turned my lucet upside down and found her doll’s shoes were the perfect fit for my lucet’s prongs!
Children can be creative in unexpected ways, you know. They could play with random things and have loads of fun. I suppose we have to make a “doll lucet” for her, then. The lyre shape would also be glad to receive a skirt, and that would be a funny project to make with my kid, maybe using her own sewing machine.
Any other suggestions to turn a lucet into a tiny wee companion itself? Tell us your ideas in the comments below!
Wrapping up
I hope you enjoyed these little adventures with lucetted toys, where simple cords transformed into playful, pocket-sized companions. Come back from time to time: I might add new ones to the list, as I experiment with my kid.
Now I’d love to hear from you: have you tried making any lucetted toy or animal yourself? Do you have ideas for other creatures I could add to this growing collection? Or maybe tips and variations to share? Your suggestions and experiments could inspire the next addition to our little collection. Thank you for helping us share ideas with the crafting community!


