There could be loads of questions about a DIY technique.
How do you make it? Which tools do you find best? What are the materials needed? How do I start? Is it hard to master? And other more in-depth ones.
As regarding string art, – that is one of our favourite techniques, as well as the first one we practiced together – people have always been curious about the tool we use to weave the thread. I can’t count how many times I received a comment or a message asking about it! It’s time I’ll write a proper specific post about it (and all the alternatives).
Since this is not the only one we’ve come in contact with, I decided to collect all the most common questions we’ve been asked (mainly on social media). This wants to be a help to anyone who wants to begin with making string art projects or just wants to know more about it.
If you have a question that’s not covered yet here, please feel free to post it in the comments below! I’ll be glad to reply and to add it to the list!

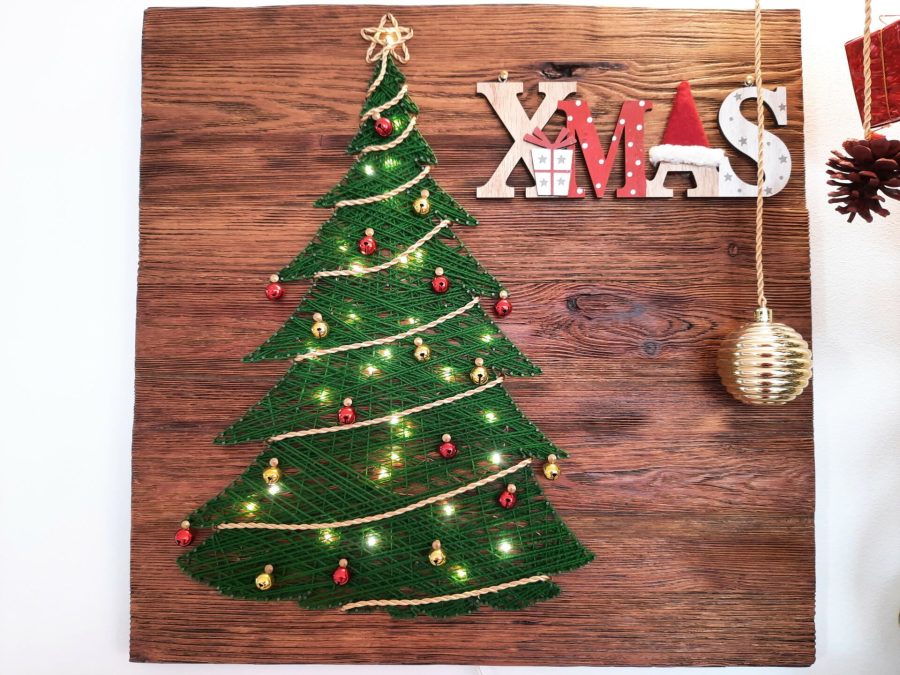


Table of contents
What is string art?
What is string art?
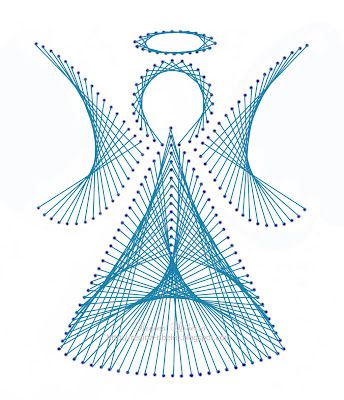
String art (sometimes called “nail and thread art” od “pin and thread art“) is a DIY technique where you hammer a series of nails on a basis to form the outline of a figure, which you then complete weaving thread, wire or string around the nails. This way you can create decorative crafts that could be super easy, but also complex and articulate.
You can form geometric patterns or figurative designs. The figures you trace with fiber around nails could be positive (leaving the board visible around the design) or negative (weaving fiber outside the figure).

What are the origins of string art? Brief history
String art, in its geometric form, was born from the “curve stitch” activities invented by Mary Everest Boole at the end of the 19th century as a mathematics teaching aid for children.
Her “curve stitching” is the practice of stitching colored thread through a pattern of holes pricked in cardboard to construct straight-line envelopes. When the holes are connected with thread, their envelope traces a segment of a parabola. In 1909 she published her teaching methods in the book “Philosophy & Fun of Algebra”: the curves she used are now known as the Bèzier curves.
String art then became popular as a decorative craft in the late 1960s with the publishing of kits and books. The American artist John Eichinger specialized in creating geometric designs which he referred to as “string mandalas”. A popular hobby kit distributor at the time, Open Door Enterprises, first marketed his string art kits in the late 1960s.
String art then gained another burst of popularity in the 2010s: in 2016 Petros Vrellis invented a computational form of string art, bringing computer programming into string art crafts.
Is string art easy?
Is string art easy for beginners?
Beginning with string art is easy indeed. You don’t require any special art skill. The basic technique is super simple and requires a few steps, giving you very satisfying finished projects.
You need a few tools you can find anywhere and they aren’t so expensive (nails, thread, hammer, a wooden board).
Have a quick glimpse of the basic technique in our one-minute video tutorial.

Is string art quick?
String art is a quick craft for small projects, the slower part being the nail hammering. If an adult hammers down the nails, also kids can find this craft quite satisfying.
As you practice, you’ll find more difficult patterns or techniques to follow, with different materials and complicated designs. But a simple outline can be a rewarding string art to make as a beginner.
How do you make your first string art project?
I talked about how we began string art in a dedicated post. To summarise:
- Basically, you need a wooden board, nails, hammer, thread
- Find a design you like, print it the right size and fix it on the board
- Hammer down your nails along the outline of the design
- Weave thread around the nails to cover all the space
That’s just the basic principle, for more how-to tips go to the “How to make” section. I suggest you also to the article about our beginning.
After completing your string art design, consider adding a personal touch by incorporating a custom pin as a decorative element. Custom pins can serve as a unique signature for your work, reflecting your personality and acting as a personal brand logo.
These pins can be thoughtfully placed in a subtle corner or highlighted in a prominent position on your piece. For example, you could attach the pin to a lower corner, where artists usually sign their artworks. This way, when someone admires your creation, they’ll instantly recognize your craftsmanship and connect it to your personal style. Custom pins not only enhance the charm and individuality of string art projects but also add a layer of value, serving as a memorable mark of your creative identity.

Tools and materials
Which string to use for String Art?
What you want to want to look for to choose your perfect yarn is:
- How easy it is to work with, mainly if you use a tool for weaving like we do.
- The yarn must be strong enough to resist brushing against the metal of nails.
- You have to like the appearance on your project, and this depends on what you want to achieve.
Our favourite yarn for string art is bamboo! We found a ball of bamboo at a local store as we were looking for materials for our very first project, and we loved it! It runs smoothly on our hole punch, it doesn’t have lints, it’s soft and durable.
It’s not the only material we used: we also tried acrylic, polyester, wool and cotton.
For small projects, also embroidery floss can work really well and be strong enough: consider the skeins are sometimes small, you might end up with jointed floss. Always check the length of your string: you don’t want to run out in the middle of the project!
We never made a project with them, but we saw jute or hemp used in several string arts: if you like the look, both could be a durable yarn to choose. Among my least favourite, wool and acrylic: mainly because of lints. For a couple of projects we chose acrylic despite the lints because they gave the piece the right appearance for that specific case. We never used wool, instead, for fear it was too delicate.
You can also use sewing thread for string art, but only if you want a very delicate looking outcome, since the thread is really thin.It’s the preferred option in the computational string art invented by Petros Vrellis.


Which wood to choose as a basis for String Art?
What you want to look for, while choosing your support, is:
- The most important thing is choosing a basis that is thick enough to hold the nails securely without having them come through the back of the panel. Always check thickness before beginning!
- It’s important to ensure that the nails do not become loose and fall out, the material must be able to support them without splitting.
- The nails chipping and lifting the wood could ruin the whole project: if possible, make small hammering tests before beginning the real string art.
My husband has a special care in choosing our boards for string art. You could choose different materials as your support, even a wall, but we love working with wood. Our main choice is solid wood, mainly unfinished. If you choose a soft kind of wood, it will be easier to hammer down the nails. Also, too hard wood could bend your nails, mainly if they are thin.
Your wood doesn’t need to be brand new. It can also be used and battered (even though it must be strong!), repurposed, giving your piece a vintage look.
You can choose between boards, canvases or wood slabs with or without their bark: this is up to you and it depends on the final result you want to achieve. Its the same when considering the shape and size: this impacts the planning of your project.
Both solid or plywood are all good options to use for string art, as they offer a hard surface that secures the nails in place. We never choose particleboard, instead, mainly for the final appearance on the project.
Can I use non-wood materials as a support for string arts?
Yes, you could also use supports other than wood to make a string art project. An original project could be done on the wall directly, without other supports.
If you want to use a material other than wood, you want to check a few things:
- Choose a durable, hard material.
- Choose a support that doesn’t crack while hammering nails, where nails can’t slip off easily or bend during weaving.
- Make a small test on a scrap of material to see if the string art stays in place.
- Be careful with materials that have a coating, as it could easily crack!
For example, avoid panels with a melamine coating! This type of finish cracks very easily when a nail is hammered in and leaves gagged edges around the hole. If you want the surface to be in a specific color, it’s better painting your board.

Pay attention to the material of your support: cracks could ruin your project.

We use black nails with smaller head when we want the thread or other items to stand out.

What are the best nails for string art?
Short answer: it depends.
Long answer. Well, it depends, but here’s more details.
Since there’s a whole world of nails around, you have to choose the best ones for your project considering a few things:
- Consider the size. Smaller projects require smaller nails and thinner floss. More intricate designs that require weaving the thread around the nail multiple times require longer nails with bigger heads to hold the thread in place. Also the size of the head depends on how you want the nail to stand out in your project.
- Choose sturdy hardware or crafting nails: you don’t want them to bend while hammering, or worse break. Stainless steel is usually the best choise to hammer into hard materials.
- Choose nails with a wide head, to prevent the yarn from slipping out. A flat head is usually comfortable if you aim to hammer several nails in a row.
- Color and head shape or size depend on the final look you want for your project. You could also decide to give your nail heads a colored coating, after hammering.
- Select nails with a smooth shank because that will allow the thread to be wrapped and adjusted more easily while you work.
- Ease of work: the bigger your nails, the more space you should allow between them.
- Prevent rust: choose steel over iron. If your board is made of hard wood, choose stainless steel nails, to avoid corrosion or breaking.
Patterns

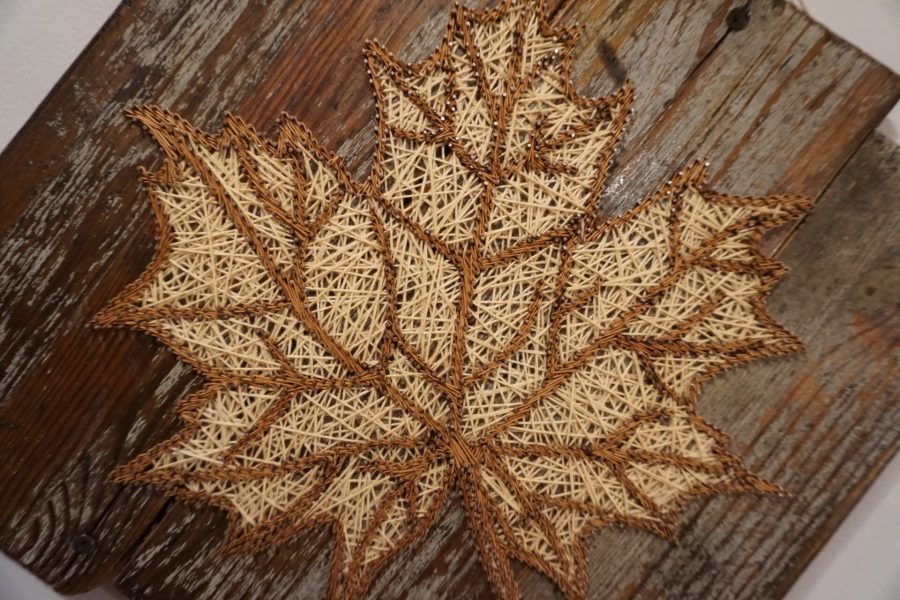
A pattern derived from a photo. Notice that a few architectural items have unnatural spaces: that’s to outline them better.
Where can I find string art patterns?
When I have an idea in mind and I look for the perfect image to start with, I search for:
- Outlines or easy monochromatic drawings. Do you remember the clip arts that used to be common in text editors back in the ’90s? They are the easiest to adapt: most of the time, you just have to print them and pin to your board!
- Photos or drawings where contour lines are clearly visible. I usually print them and retrace the outline on blank paper.
My favourite resource for string art (and crafts in general) is Pinterest. Its the best home page to find inspiration then browse to more in-depth posts about the craft you are looking for. You can find photos or images to adapt or even patterns specifically designed for string art, with nail positions and thread path, for the most intricate or geometric and complex ones.
I prefer designing my own patterns or adapting photos, but plenty of kits are available, complete with the materials needed. Perfect to start without worrying about supplies or running out of thread!
When retracing a pattern, I always have in mind the final size of my project and how far apart my nails should be: you don’t want a pattern you can’t recreate because the outlines are too close and you aren’t able to weave your thread. Adapting the spacing between your photos features is usually the hardest part.
Discover our free designs
We collected some of the patterns we used for our projects: you can download and use them for free to make your own. Whenever the pattern is our own original design or a free template from the web, you’ll find proper credit to the author.
How to adapt a design to a string art pattern?
You need to have in mind what you want to achieve. Will your project be a negative or positive string art? Do you want a particular part or feature of your board to stand out? Will it be small or big?
Choose a photo that has clearly visible outlines or boudaries. Retrace those boundaries (on paper or digitally, as you wish), checking that you have enough space between the lines: nails should never touch and you need room enough to weave around each of them.
Keep it as simple as possible: if it’s too intricate, string art isn’t maybe the best technique to choose from.

How to make
How do you prepare your board for string art?
That’s the part my husband likes most!
The first thing to do, if you work with solid wood, is sanding. A smooth surface is good to prevent splinters from breaking your yarn while weaving! My husband, also, likes surfaces that you can touch and find a 3D feeling. To obtain this, he uses a metal wire brush on his drill to work all the board: this is great to make the natural veins of the wood stand out.
You can stain the wood board in any colour you wish. Just make sure to leave enough time for the board to dry before you begin your string art project!
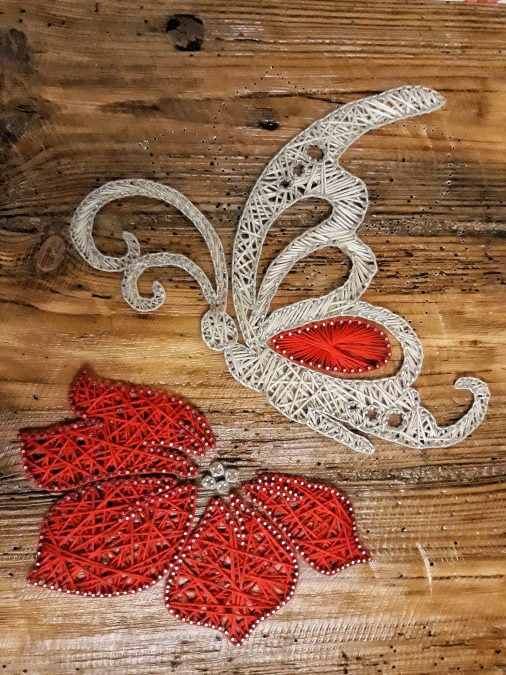
You can also cover your support with different materials. We especially love multimaterial string arts! In the 1970’s most string art projects you could see in the US were on a background of black velveteen felt. You could also find that burlap muslin is common. You could add a special touch with glow-in-the-dark paint or retro decoupage.
When to add a hanging kit?
If you want to hang your project to the wall, you need a hanging kit.
I saw other string artists adding it at the end of the project, when all the hammering and weaving are done. They say this way your board stands flat on the table, mainly during hammering.
Well, we prefer to add the hanging kit after our wooden board is ready, just before hammering: we don’t usually find it annoying to have the kit already on the back while hammering or weaving. We usually choose thin kits, or mill a small hollow to have the kit stand deep into the wooden board.
In both case, while hammering you could use a soft blanket or folded towel to cover the table: it has the advantage of reducing the sound of the hammer on nails, it protects the hanging kit from bending, keeps your board from sliding under you and protects the table from the wood scratching it.

If you choose to add the hanging kit at the beginning or at the end of your project, a folded towel under the board is useful while hammering or weaving.
Is there a technique for hammering nails on a string art project?
It’s important to keep your nails vertical: if they are inclined, the pull strength of the string could tear them out of the wooden board.
We use an awl to mark the place where each single nail will go. Even a hollow trace is really helpful! It speeds up the hammering and helps the nails stay straight. The hammering of nails is for sure the longest part of a string art project!
I suggest you to use pliers or also tweezers to hold the nail while hammering. Start by gently tapping the nail into the wood, so you have more control on its vertical position, and once it’s standing still into the board, hammer with more force to embed it.
The use of pliers could be useful also to embed nails at the same height. You can also think about glueing a height indicator onto your pliers, even a tiny cardboard could make the difference. Be careful not to hammer too deep, leave enough room on the shank for the thread. If your nails are too high, you can hammer more at the end, when everyone is in place, even though I don’t recommend it: you risk to hammer too much and achieve uneven heights.
If you’re not familiar with nail hammering, I suggest you to make a small test before making the real project, just to test the strenght you need to use. When you have a practiced technique, the nailing process will be easier and quicker.
How to start weaving a string art project?
Fix the thread to the first nail (the choice of the starting point depends on the design and weaving technique) with a knot. I suggest you add PVA glue to reinforce the stability of your knot. When it’s dry, cut the excess of thread.
I suggest you to tie the knot on the internal side of the project, so the weaving will hide it under the thread.

How do you weave thread around nails?
You can be very methodical and weave the thread in a precise geometric pattern, or you can weave around the nails randomly. Both techniques are highly effective: the choice depends on the final look you want to obtain.
On the random string art projects, the shapes are filled in with string to create a contrast between fiber, board and nails. The goal is to weave your thread around nails crossing the lines several times, until you have filled all the space and can’t see the board anymore.
Following a geometric pattern, your weaving connects two points with a straight line, grouping and overlapping multiple lines in a precise order. This technique is also known as symmography. It has a mathematical base in the Bézier curves.
Also, you can choose between positive or negative (reverse) string art: with the first, you weave your thread inside the outline of the pattern; with the second, you weave outsite the pattern outline, leaving a blank space in place of the design.
How to end a string art project?
You may want to change color, or you run out of thread, or you reached the end of the project. Whether you chose to do your outline at the beginning or at the end of the weaving process, at some point you need to secure the thread to finish your work.
You need to keep the tension of your thread to avoid your weaving slipping off. If you can, ask someone to help, it’s better to do it with another person, mainly if you don’t have enough practice.
Tying a knot could be hard. Choose as your finishing nail an external one, otherwise it could be too hard to reach with your fingers.If possible, though, choose a spot that would not be the most visible part of your project, just in case.
Cut a sufficient lenght of thread to work with ease. Thread a needle with the final part of your string (choose in advance the right sized eye to accommodate your string easily, and if you need it find a needle threader to help). Use the needle to guide your thread under the weaving around a nail. This could be tricky! Fix the thread with PVA glue, but avoid touching the weaving if you can. After tying a knot, cut the thread and use the needle to push the tail end under your weaving, to hide it behind the project.
Finishing your boards
Do I need to finish the edges or frame my board/canvas?
Well, it depends on the base you chose for your project, your design and personal preferences. We prefer “raw” wooden boards, but you could have the need for a finishing or framing, especially if you use a canvas instead.
Canvases are often used for computational string art (a technique popularized by Petros Vrellis in the 2010s for string art portraits).
Canvases are usually chosen for computational string art projects, a technique invented in the 2010s by Petros Vrellis and popular to make string art portraits. Here, round canvases are a popular choice. Some artists use just the canvas frame, since they are hammering down nails just around the border, leaving nothing behind the thread. Most projects, though, use the full framed canvas.
Round or stretched canvases can look unfinished along the sides, because of staples or raw fabric edges. A finishing can give them a more polished look.
As for wooden boards, they could also benefit from edge finishing: rough wood or saw marks can make even a beautiful piece look unfinished. The best results often come from preparing your board carefully before hammering nails.
For any support, you can get creative: LED strips around the edge, epoxy resin, even tape can work. Some designs allow you to hammer nails directly on a picture frame, eliminating the need for extra finishes.
Sometimes, however, a raw board or canvas is exactly what your design needs: leaving it “natural” can highlight your work beautifully.

How can I finish the edges of a canvas string art piece?
If you are working on a canvas, finishing the raw edges and hiding staples can make your piece look more professional. Options include:
- Standard photo/painting frames. An option only if your piece has a standard size and shape, and better for thin canvases or boards.. Many options, colors and materials are available. Just carefully check the thickness: maybe it’s better going to a hardware shop to see the options in person, and check if your project really fits.
- Floater frames. These frames leave space between the artwork and the frame, creating a “floating” effect. They could be an expensive option, depending on the size of your project, but they for sure provide a professional look and can protect the edges and border nails. For round portraits with nails around the border, this is a great option. You could even fill the frame with epoxy resin for a glossy finish.
- Embroidery hoops. You can fit a round canvas into the inner ring for a simple wooden border. You should look for a ring that’s thicker than your canvas. If one hoop feels too thin, you can stack two or more together. You could even stain them in different shades for a layered effect. Glue (such as vinyl glue) works well to fix the hoop around the canvas, no need for nails or screws.
- Fabric trims. Grosgrain ribbon, bias tape or decorative trim glued around the edge can create a smooth and elegant finish. The advantage: it works with any canvas shape.
- Painted edges. A simple yet effective option is to paint the canvas edge in a matching or contrasting color. Works best if staples aren’t too visible, or if you want them to become a design feature. And, as for fabric trims, it can go with any canvas shape.
- Custom frame. For your most important pieces, you could seek for the advice of a local framer. Checking with a specialized embroidery finisher could also be useful: specialized embroidery shops sometimes offer a finishing service, and they can provide tailored options and professional advice.
How can I finish the edges of a string art piece on a wooden board?
If you want to give your piece on a wooden board a more polished look, I’d first recommend you think about the finishing before hammering the nails, while you are preparing your board. Most finishing techniques can’t be applied later on, when nails and thread are already in place.
When you cut your board, refinish the edges right away with a clean cut and careful sanding. You can also use a router to create smooth, rounded or decorative edges.
My husband likes to add a 3D feeling to his boards by using a metal wire brush on his drill to work all the board, even the edges. This makes the natural veins of the wood stand out.
Apply stain or paint to the edges along with the surface, to keep everything consistent and make all your board look unified and polished. Choose rustic, bold, or modern finishes depending on your design.
As for canvas finishing, a simple trim or a floater frame can work well, but better keeping it subtle. A wooden board is in itself visually heavier than a white canvas, with knots and veins and its own color, so an overly ornate frame may distract from your artwork.
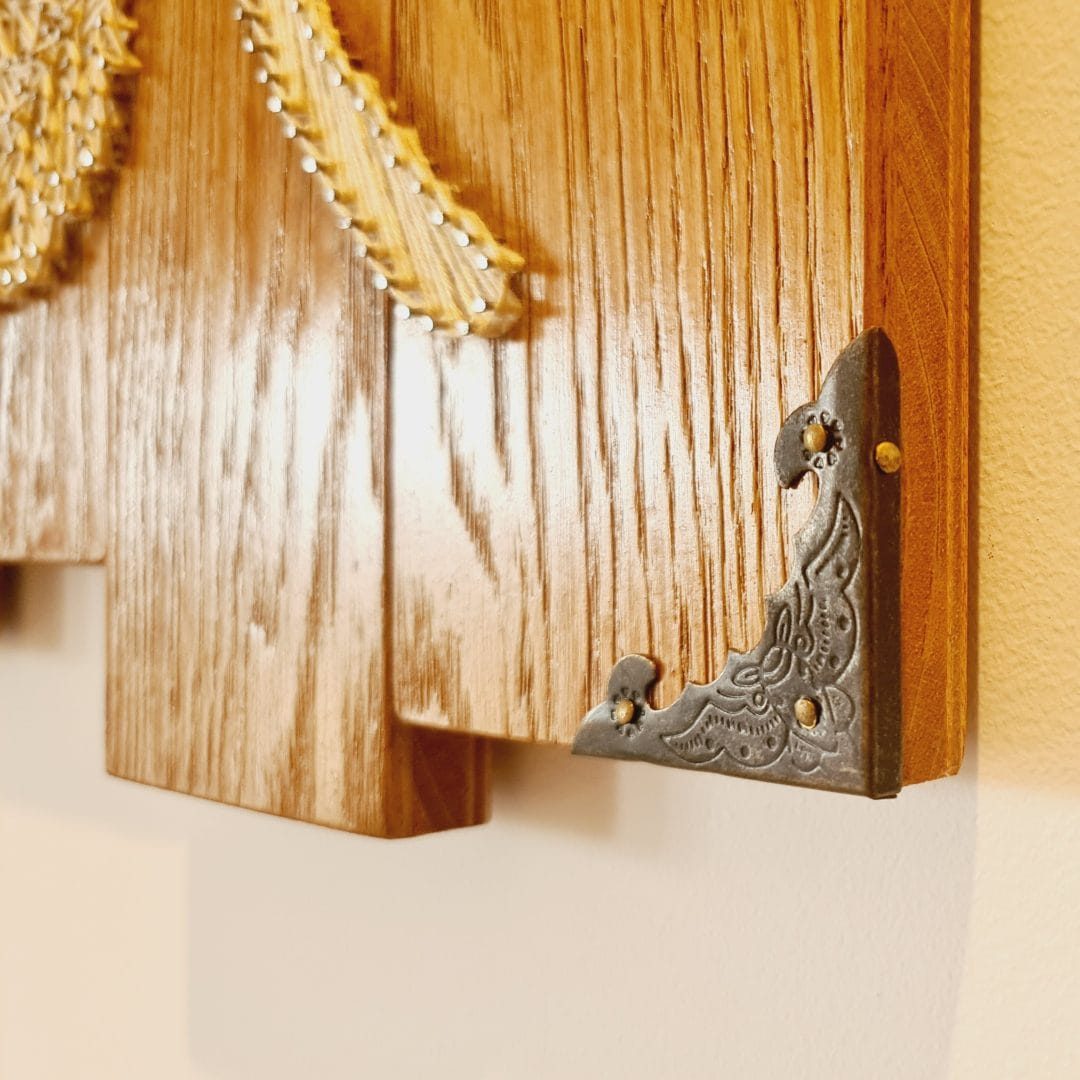
Adding little book cover corners can provide a lovely touch to refinish a string art project
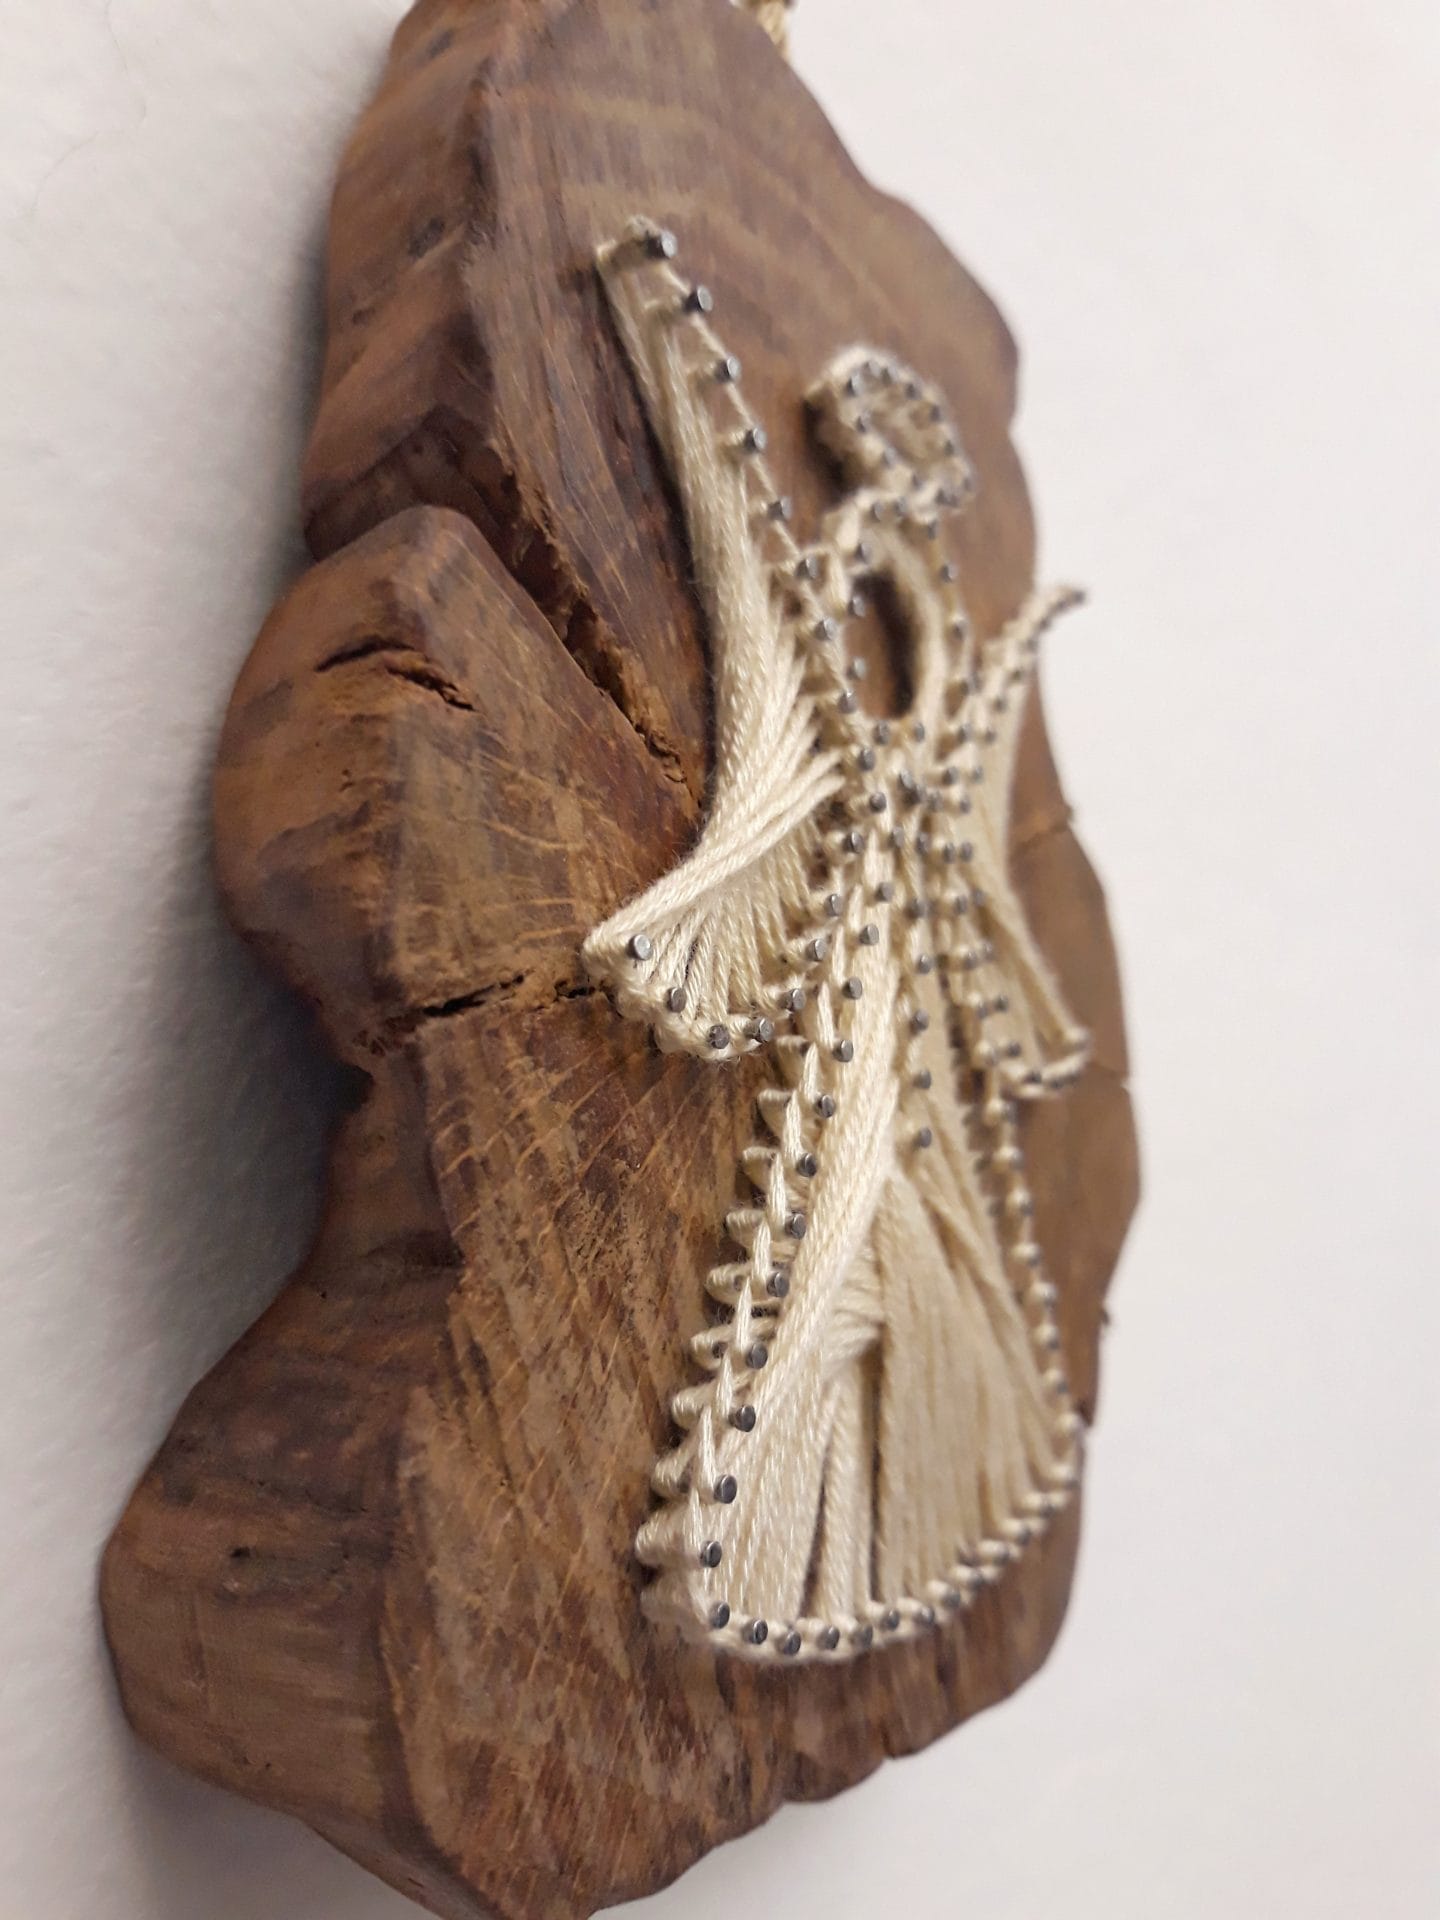
When choosing a wooden base with peculiar texture or uneven shape, leaving the raw edge can be the best finishing feature
Lettering and fonts in string art
Can I weave letters in my string art projects?
Yes, absolutely! You can incorporate words or letters into your string art projects. They can be the main focus of the design, like a motivational word or a name, or serve as an addition to a larger image, complementing a background scene.
When working with letters, choosing the best font is paramount. It’s important to consider their final size and ensure that they remain readable after the nails and string are applied. Larger, bold letters tend to work best because they allow for easier string weaving and maintain their clarity from a distance. If the letters are too small or detailed, their readability might decrease, as the string could overlap and blur the finer parts of the design.
We suggest you to test your lettering layout beforehand to ensure the final result is both aesthetically pleasing and easy to read.


What type of font works best for string art projects?
The best fonts for string art are typically simple and bold, easy to read. Here we must distinguish between serif and sans serif categories. As their names suggest, the main difference between these two categories is the presence or absence of “serifs” within the letters. Serifs are decorative lines or tapers (also commonly referred to as “tails” or “feet”) at the beginning and/or end of a letter’s stem.
For string art, I suggest choosing sans-serif fonts, such as Arial, Helvetica or Verdana, because of their simple, clean lines. These fonts have consistent line thickness and minimal intricate details, which makes it easier to place nails at even intervals and wrap the string without losing the shape of the letters. Sans-serif fonts are free from decorative flourishes which can complicate the design and reduce readability. They are to prefer especially when the letters are quite small.
Serif fonts with thin lines, sharp points or complex details may work well in certain designs, but require placing nails very close together. This could work in your design if the letters have a size that lets truly appreciate the decorations. Fonts like Bodoni or Garamond can look beautiful, but their fine details often result in an excessive number of nails being needed, which can make it harder to maintain straight lines and achieve a clean finish.
Handwriting or script fonts can be a wonderful addition to string art, especially for adding a personal touch to a design or for projects with a softer, flowing aesthetic. These fonts, which mimic the look of cursive handwriting or calligraphy, often have graceful curves and loops that lend elegance and fluidity to a design. Handwriting fonts like Pacifico or Dancing Script can give your string art a unique character, making them ideal for special projects like personalized names, wedding décor, or quotes.
However, hand-writing fonts come with their own challenges. The curves and varying stroke widths may require more precision in nail placement, especially at sharp turns or in delicate areas where the string needs to follow intricate paths. Additionally, because script fonts often have connecting letters and fine lines, you’ll need to ensure that the spacing between nails is close enough to capture the smoothness of the design, but not so close that the string bunches up and hides important details. If the letters are too small, these fonts can become unreadable, as the overlapping of the string might obscure the elegance of the script.
For best results, it’s often helpful to use a larger design size when working with script fonts to give the nails and string enough space to flow and prevent overcrowding. If your project calls for a personal, delicate touch, and you have experience working with string art, hand-writing fonts can be a beautiful option.

Tips and tricks
What's the tool you use for weaving?
That’s the question we’ve been asked the most! To weave the thread around nails, we use a leather working tool that belonged to my husband’s grandfather, a hole punch. The thread slides inside the hole punch and you can use it almost like a pen, passing around each nail easily.
One little tip: when hammering down your nails, check with your hole punch if the tool can easily pass through the space between nails. The weaving will be a lot easier!
What can I use for weaving if I don't have a hole punch?
A trick if you don’t have a hole punch or aren’t able to find one? Use an empty BIC ballpoint pen: not as efficient, but nonetheless useful.
Since our hole punch came from the family, we don’t have a specific brand to suggest, but if you search for “hole punch leather tool” on Amazon you’ll find instruments very similar to the one we use. And they are not expensive!


What's the right spacing between nails?
The right spacing depends on the size and complexity of your project. The main thing to consider is the ease of work: if you are not comfortable while working, you might not be able to complete your project.
If you use a tool like our hollow punch, be sure the tool can pass easily around each nail. If not, check with a small test project that you can weave easily with your hands.
A general rule: the bigger your nails (mainly considering the head diameters), the more space you should allow between them.
Tips to follow the chosen pattern
Fix your pattern onto your prepared board and have a copy at hand: having a guide will make the weaving easier, since you have to remove the pattern from the board before weaving.
To fix the pattern on the board, tape it with masking tape then hammer a few nails around the edges, at least one for each corner. You can also remove the tape now, or not use it at all if you feel confident enough. When you finish hammering, remove the paper from the board.
The main advice here is: plan in advance. When you have your pattern ready, think about the colors to use where, the technique you’ll choose to weave each section. I find a great help in coloring the pattern I use as a guide with the same thread colors I’ll use.
Outline: before or after?
As usual, id depends on your design and what you want to achieve.
We usually prefer weaving then doing a final outline after, right before fixing the thread: it helps the design stand out from the board.
Also, it underlines each design feature.


The use of any tool, like our hollow punch, could stress your thread: choose high quality materials if you want your project to last.

Take your time to work with epoxy, follow the instructions carefully, choose the right materials for the container and do what you can to avoid any leaks!
How long does a string art project last? Can I improve its durability?
In years, not a single thread of our projects has come loose, nor a single nail has come off.
Durability depends on the chosen materials, though. Go for high quality thread, since the passing around the nails or into any weaving tool you use (see above for the use of a hollow punch, and find a more detailed article about the instrument) could stress the floss and break it, during the making or after the piece is completed. Choose strong and quality nails, to avoid rusting or breaking under the thread tension. Check the section about tools and materials for more info.
One idea for improving the durability of your project could be epoxy resin.
Be careful if you never worked with epoxy before and follow the instructions on the bottle!
Place your project in a container the size and shape of the board, pay attention to avoid any leaks, and pour epoxy to cover all the board, nails and thread. Choose the container material carefully, so to be able to remove it when the resin is cured without any damage to the project. If in doubt, try pouring on a small sample. If you’re not sure yet, cover all the container with tape: it can help removing the cured epoxy.
It’s not cheap, depending on the size of your string art, and so on the epoxy quantity needed. It also makes the project heavy, so think about it beforehand if you have to hang it to the wall.
Just in case, try a little sample first. Pour epoxy on a little piece of board with a few nails and thread vowen around them, to see the final outcome and reaction of the materials to epoxy. A sample is always worth it: maybe you don’t like the final look, or the thread colors could change when wet with epoxy.
I hope you found what you looked for!
Otherwise, feel free to ask your question in the comments below: I’ll be glad to answer and add other helpful tips to this list!


18 Comments. Leave new
Can I use these designs and then sell my finished product?
No problem! We indicated when the patterns have other authors, so be sure to use our #LRCrafts patterns. I would be glad to get a link to this blog somewhere if you don’t mind, but our own designs are free to use 🙂
Very interesting read. First timer to string just playing around with some simple patterns and loving the feeling of being relaxed. I have one concern how do I knot the beginning and ends without it being noticed?
Thannks a million! To knot at the beginning in an unnoticeable way, you could just choose a central nail, so that would be later covered with the weaving. For the end, it’s more tricky. We usually choose an external nail, make a knot at the base of the nail, move the tail under the weaving and add superglue. Depending on how you’ll hang your project, you could choose a nail that is way up so you don’t see it when the project is on the wall. Or if you decide to put the string art on a shelf, you could choose a bottom nail.
Wooow! You have an amazing and instructive page😍. We have recently uploaded an app to generate string art portraits not only in circle shape but also any geometric shapes. The app is free and supports Android and iOS. Maybe you’d like to check that out? https://myzigzagart.com/
If you may also check our channel on YouTube(MyZigzagArt),you’ll find a video showing how to use it.
Thanks a million!
And thank you for pointing me to your app, I’ll go check it out.
Hi 😊 thanks for the tutorial! Have you ever experimented with hair spray or something like a spray varnish after finishing to help with sealing the design and durability? I’ve just finished a few for a friend’s birthday, but she’s moving soon and I’m worried about the nails bending or coming out. I’ve never used resin before and gone for a very rustic style using log slices and brass nails so don’t really want to do anything to change the aesthetic too much.
Thank you for any advice you may be able to give!
Hi and thank you for your appreciation! Never tried hair spray or similar. At the moment, none of my projects has broken, and they all have passed through at least one house move. If you just handle your string art with care like any fragile object, it’ll just be fine. When I store the Christmas themed one each year, I wrap them in bubble wrap for extra safety. My main concern would not be about the nails, if you choose a good sturdy base. Check that your thread has the right tension between the nails, so it doesn’t come off because too loose. I hope this can help you, for any other questions I am here!
It was quite useful….. throw more light on dealing with words and letter designs..and also a video of hiding the loose ends will be much appreciated
Thank you so much! Your suggestions are highly appreciated! I’ll come back with more content on that matter as soon as I can. Thank you again!
A thoughtful and informative post on string art, covering common questions and tool details! Your dedication to sharing Art and Craft insights is truly appreciated. Looking forward to learning more from your helpful guide and future posts!
Thanks a million! I am glad you appreciated my content on string art! I’ll do my best to keep it up-to-date and add more useful tips! Also, I have a couple of posts on string art scheduled for the next weeks. Have a nice day!
Hi! What kind of wooden canvas do you use that is not very heavy but will hold the nails?
Thank you!
Hello. the choice of wood can be tricky. A lot depends on the piece itself, how seasoned it is, if the place it will be stored has humidity and temperature that differ a lot from the previous place it lived in… Wood is alive. My advice would be – if you can – to test out a small piece first. As big as the palm of your hand would be enough. Hammer down nails as close as you can get them, and see if the wood cracks. If it cracks, the fibers are not suitable for a lot of nails. Generally speaking, a popular choice would be pine wood boards, the ones you can get for a good price at your local crafting stores. Pine wood is good to get stained or painted, it’s soft enough to be easy to hammer nails into, cheap and available. Also, see where knots are in your chosen board. Hammering nails into a knot will increase your chances of getting cracks. Moreover, plywood is a good option for string art, lightweight but strong enough. We never choose particleboard for our projects, mainly for the final appearance on the project. I hope I was able to clarify your doubts. If you have more questions, please ask! Happy crafting!
Is there something like a “round rim” of some sort that can go around the 16″ round canvas sides. Like a frame, but doesn’t stick out just covers the edge? To make the piece look more professional, I am giving it as a gift. I thought I saw something, but cannot locate what I saw…
Are you thinking about a sort of wooden frame or another material? Not sure about the “round rim” you talk about, but if you search for “floater frames” do you find something like it? I think you have multiple options, it all depends on your design and budget.
You could fit your canvas inside an embroidery hoop. 16” hoops do exist: you could use the inner ring. You just have to account for the thickness of board and hoop: you’d like the hoop to be thicker to provide some sort of framing. In alternative, you can use more than one, maybe stain them in different wooden colors if this matches your design. Just vynil glue would help you stick the hoops to your frame.
Checking embroidery finishing options could be another help. Framers sometimes use round float frames, more expensive than the regular hoop, but I don’t know your budget.
There are also metal or plastic edging strips (used in needlework finishing) that clip around circular pieces. No idea about the standard sizes here, though. You should ask a local finisher in a specialized embroidery shop.
In my area I do have an artisan who frames paintings, if it was for me I will for sure ask him for the available options and a quotation.
Always depending on your design and preferences, non-wood options could include fabric finishing: grosgrain ribbon, bias tape or fabric trim glued neatly around the circumference. This would give a smooth, clean band to finish your canvas.
Another option could be just painting the edge, if you don’t have too many visible staples.
Please if you do have more questions, contact us via the website contact form adding photos: I’d be glad to help you further!
Thank you for this detailed FAQ on string art! It’s a wonderfully clear and practical guide that makes this creative technique accessible for beginners and enthusiasts alike.
Thanks a million to your for your appreciation!