A few years ago, my husband and I relocated to a more spacious home, a significant upgrade from our small apartment where a bonsai served as our primary Christmas tree adorned with ribbons. The newfound space in our new home allowed us to explore larger Christmas tree ideas and create our own handmade ornaments, a passion you’re likely familiar with.
Among our various crafting endeavors, one standout project was our string art Christmas tree. It’s a venture we had contemplated for some time and that evolved into something I absolutely adore.
Together we had made several single-color and multi-color string art projects, but this marked our first 3D string art. It involved not only nails and thread, but also other materials, making it a more intricate undertaking than our previous creations.
Why the added complexity? Well, first of all for my strong desire to incorporate lights.
Click for the finished project detailed photos
Want a free pattern?
If you like our project and would like to make your own, you can use our template.
Download the silhouette with nail marks and indications about the holes to drill.

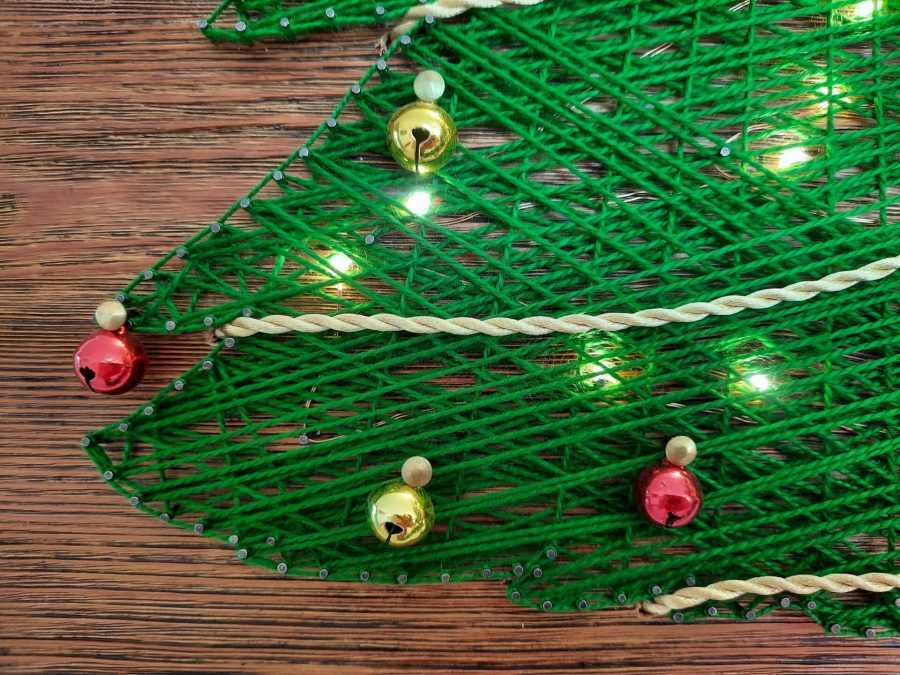
Not just lights, though: we wanted to add a golden rope as a garland, red and gold bells as hanging decorations, a wooden “Xmas” sign. We didn’t want to simply attach elements after completing the string art: everything had to seamlessly integrate, so we meticulously planned before beginning the making process.
Starting with a large square wooden board, already refinished and painted – sibling to the one used in a prior significant string art project -we hammered down all the needed nails, following a pattern I designed.
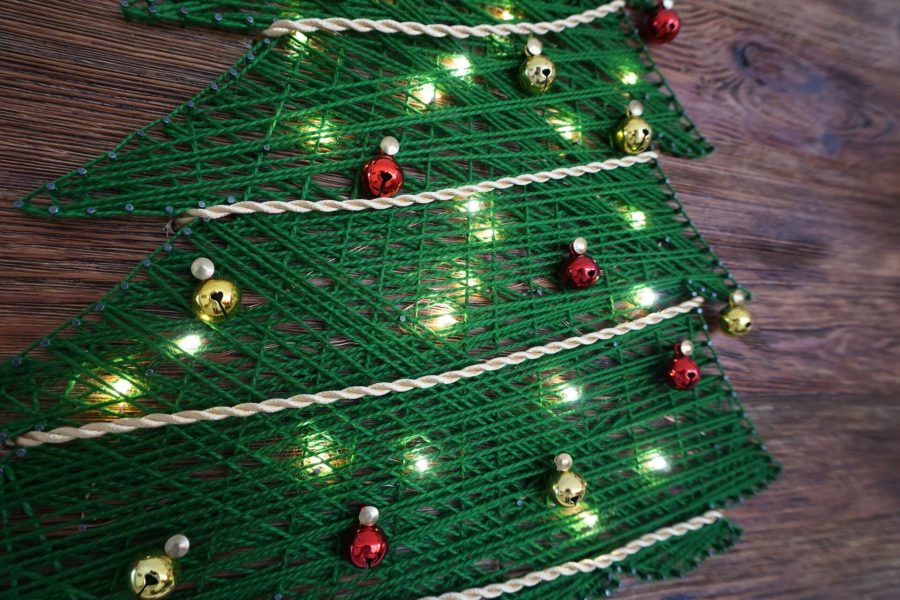
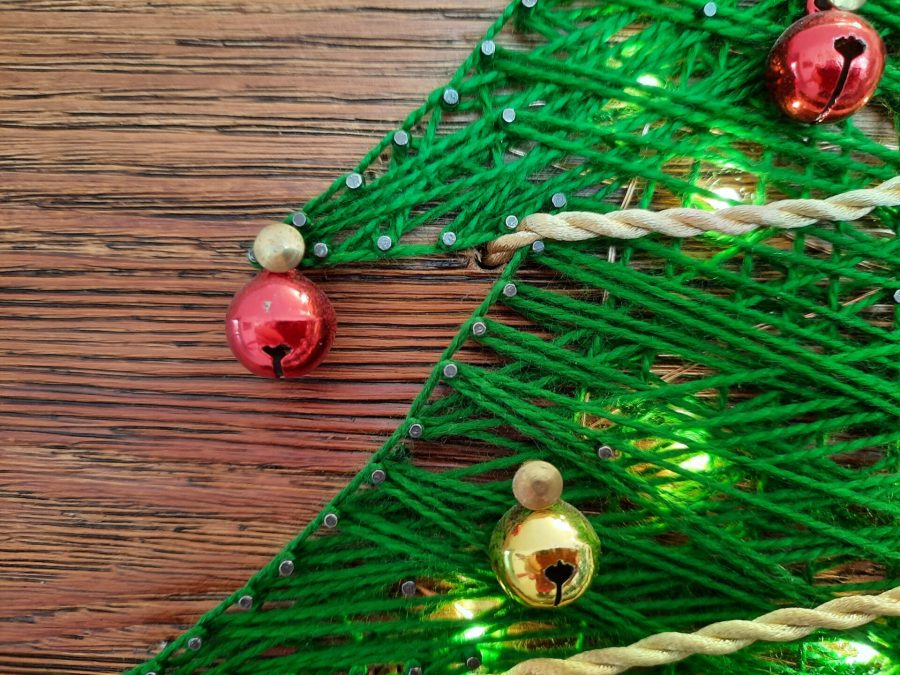
After hammering in the necessary nails for the weaving, my husband drilled holes. They were needed for electrical wires and a garland that would encircle the entire tree. We carefully marked the garland’s position on our pattern to ensure the holes were strategically placed. Also, another smaller hole was dedicated to the electrical wires, so it had to be hidden behind the weaving.
To enlighten our Christmas tree, we opted for LED wine bottle lights: we already had a couple of those with a switch and batteries in a cork.
While perfect for the project,we thought that battery life could become a problem. So my husband modified them to substitute the battery with a plug to be able to connect the lights to a wall socket, addressing potential battery life concerns. He even added a tiny switch at the bottom of the wooden board!
To affix the LED strip behind the string art weaving, we hammered smaller nails to weave the light wire and distribute the LEDs evenly behind the yarn. After pulling the wire through from the back, we carefully handwove it around the nails.
We did this gently by hand, without using weaving tools, to avoid damaging the LEDs. Also, we didn’t pull the wire too tight around the nails for the risk of breaking it. The yarn weaving on top was the main responsible for holding the lights in place.


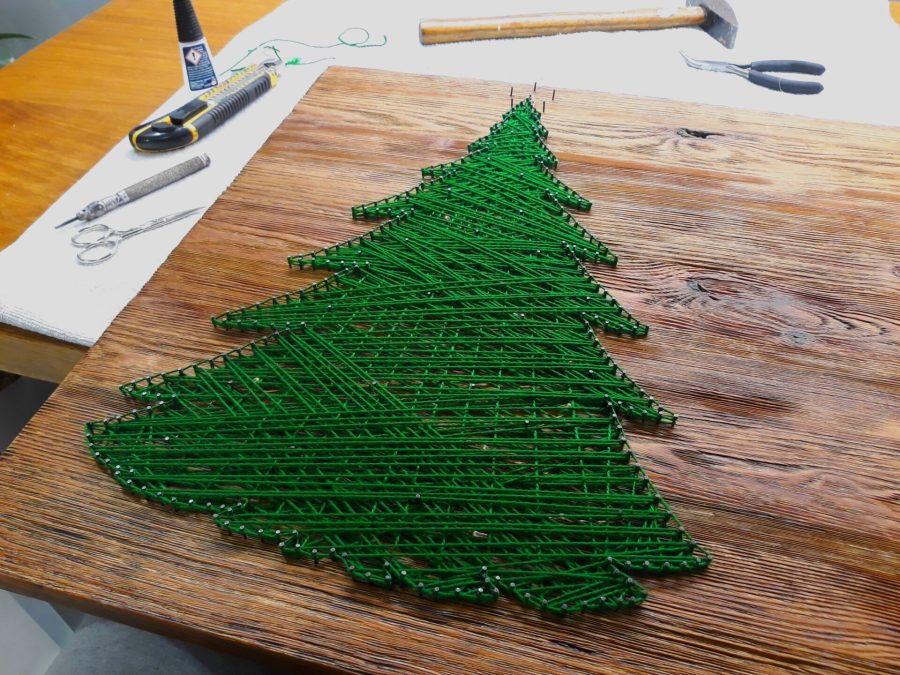


Then came the weaving itself.
Using our trusty leather hole punch, a shoemaker tool inherited from Locutus’s grandfather, we evenly wove a thick green yarn to form the tree, creating a dense weave to conceal the LED strip and the holes, but not too thick to block all the light. That was the quickest part of this craft, for sure.
The five nails atop the tree were left out from this weave. They were strategically placed for the star, which we planned to fashion from the golden rope garland.
Creating the garland involved twisting golden thread to form a thick rope. For this, we had loads of fun! We even employed a drill, a technique we had previously used for our wedding church booklet.
We cut a few lenghts of golden thread, each one double the length of the needed final rope. Those were folded in half, one end knotted to the drill while I holded the other one. To do this we needed a lot of space, and we had to become creative to manage it all by ourselves!
After pulling the garland through from the back using the topmost hole, we wove it around the the five top nails to make the star, then proceeded down along the tree.
We pushed the rope into the closest hole on the left of the tree, then pulled through the second one on its right and proceeded until the bottom, where we passed the garland into the final hope to fix it on the back with hot glue. Then it was time for the finishing touches.
Using nails with broad heads, we carefully scattered golden and red bells across the tree’s surface, ensuring not to interfere with the LEDs or electrical wires. In a designated blank space on the right, we affixed a multi-material writing that spelled “Xmas,” a lovely find from a Christmas shop.
In the proper blank space we saved on the right, we glued a multimaterial writing saying “Xmas“. This is not a craft of ours, we found it in a Christmas shop and liked it.
We deliberately refrained from adding more decorations, aiming to strike a balance and avoid clutter.

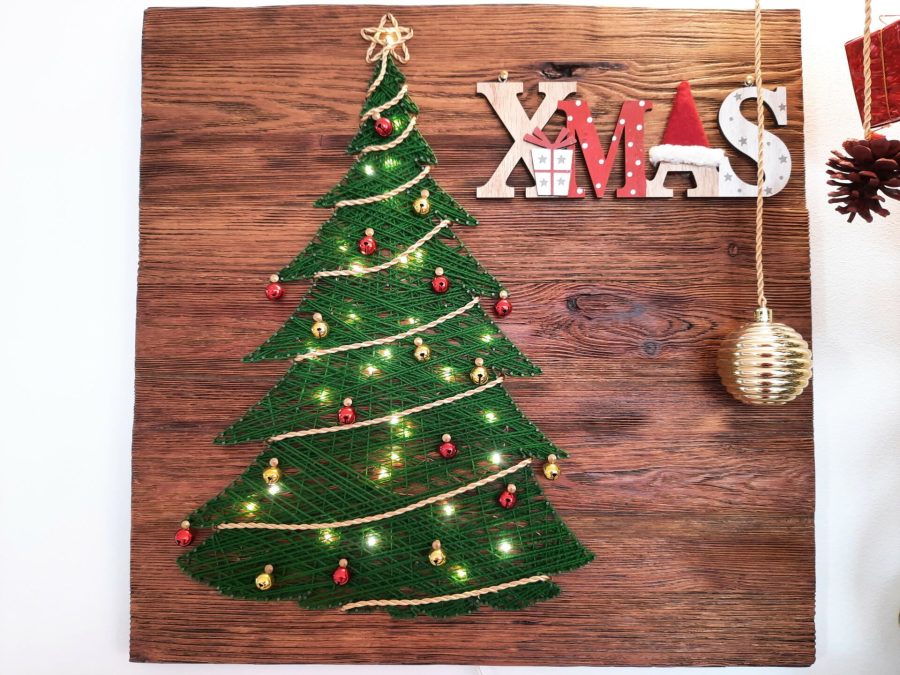


And so, our string art Christmas tree, adorned with lights and decorations, reached completion!
What are your thoughts on the final result? Does the concept of a string art Christmas tree with lights and carefully chosen decorations appeal to you? Share your opinions in the comments section: we’d love to hear from you!


)