In 2018, I discovered I love hand embroidery. The needle going in and out, up and down, is so relaxing, it can clear my mind.
I’ve been trying a lot of different techniques, making various experiments, until one day I stumbled into how to make 3D flowers. The discovery of stumpwork and 3D embroidery was mesmerising! Looking at my projects now, I suppose you can see how I fell in love with adding 3D touches in my stitching.
Experimenting for a while, I discovered a technique that’s perfect for making thistles, the main flowers my husband and I chose for our wedding in 2017.
So I made my first 3D thistles as a present for our grandparents: a handmade memory of our first wedding anniversary.
Well, I then decided I wanted to share my first tutorial about how to make 3D embroidered flowers: a quick step-by-step in nine easy moves.

Click for the finished project detailed photos
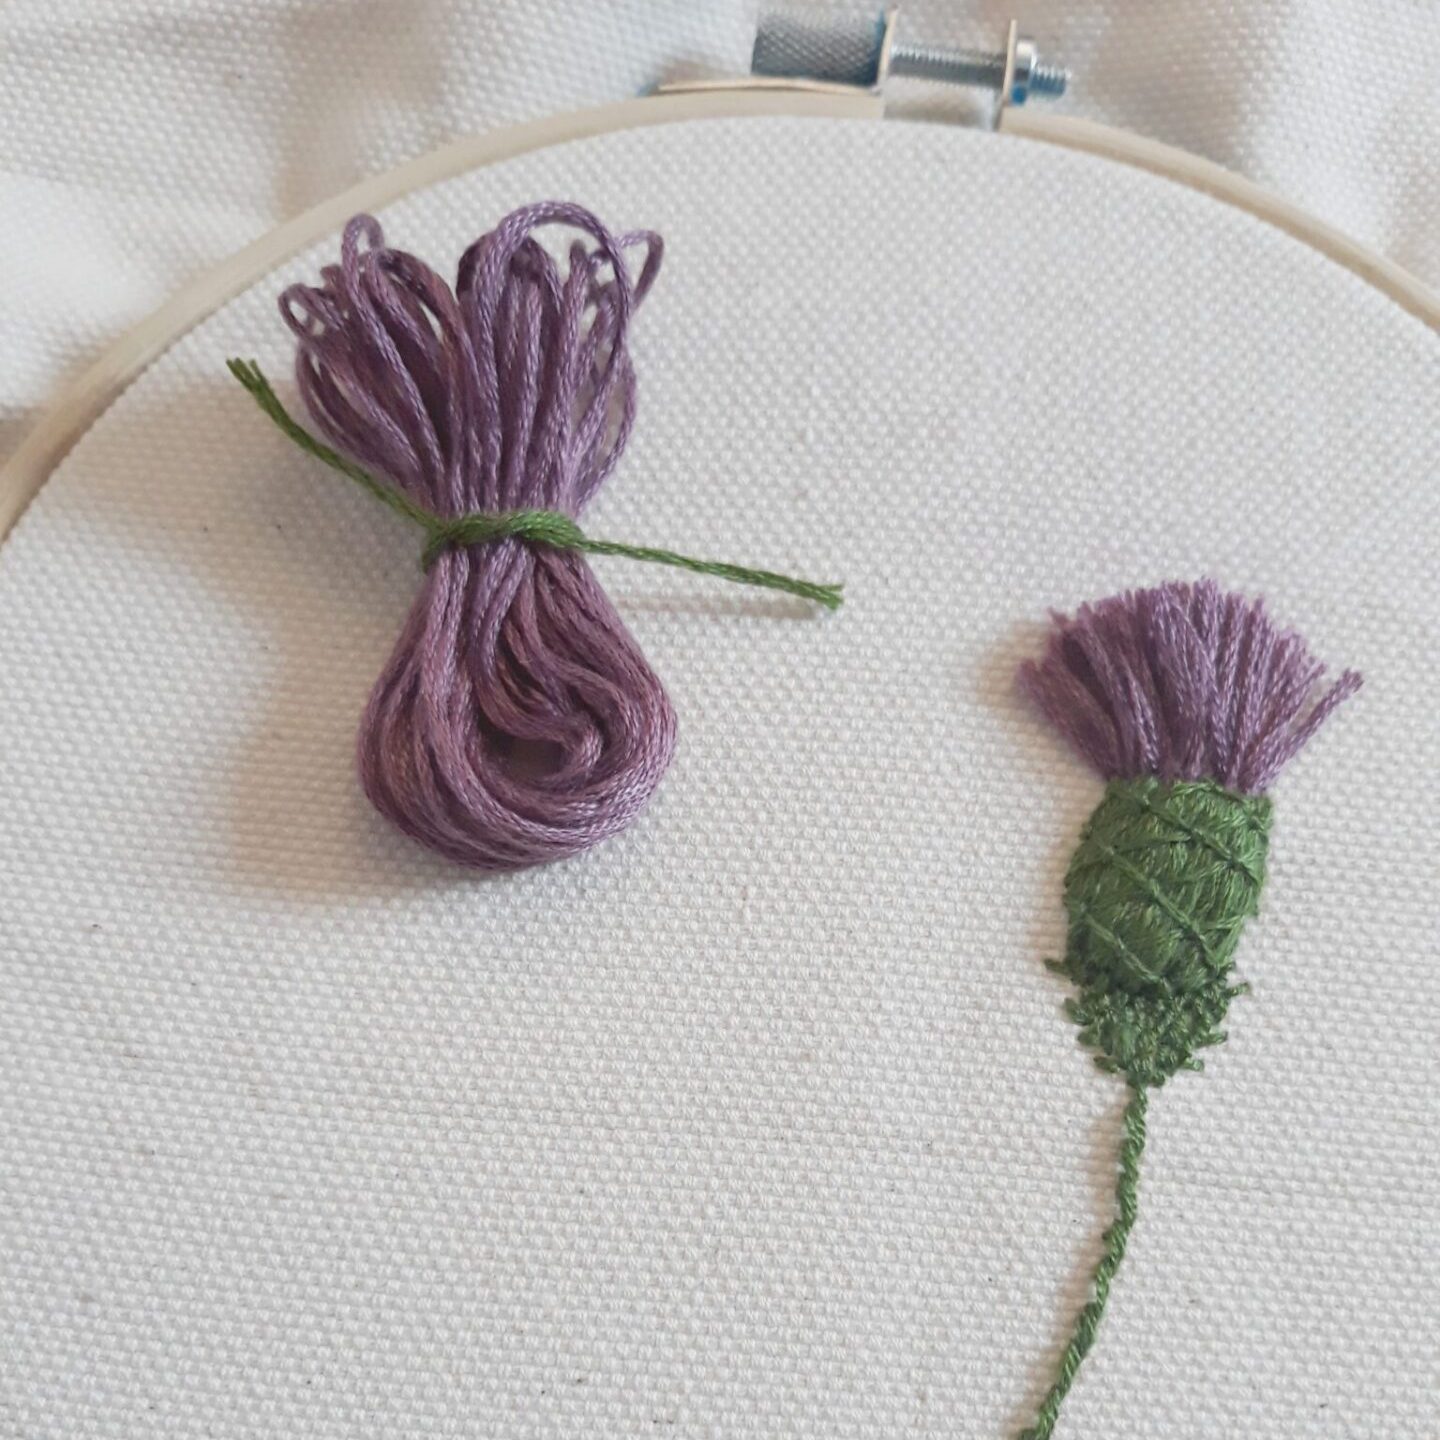
1
✔ Choose the color for your thistle: for my first flowers I chose a classic combination of lilac and violet, placing the lightest color in the inner part of the petals. Using two different shades makes the final result even more natural and tri-dimensional. Wind the floss around your fingers, each color separately, as to make a skein, then fold it in half. This is going to be the basis of your flower.
2
✔ Place the skein on your fabric (the lightest color inside the darker one), slightly compressing the half to make it thinner: the lower part should be a bunch that will become the green cup from which the petals emerge, so with the next step your are going to cover it with green thread.
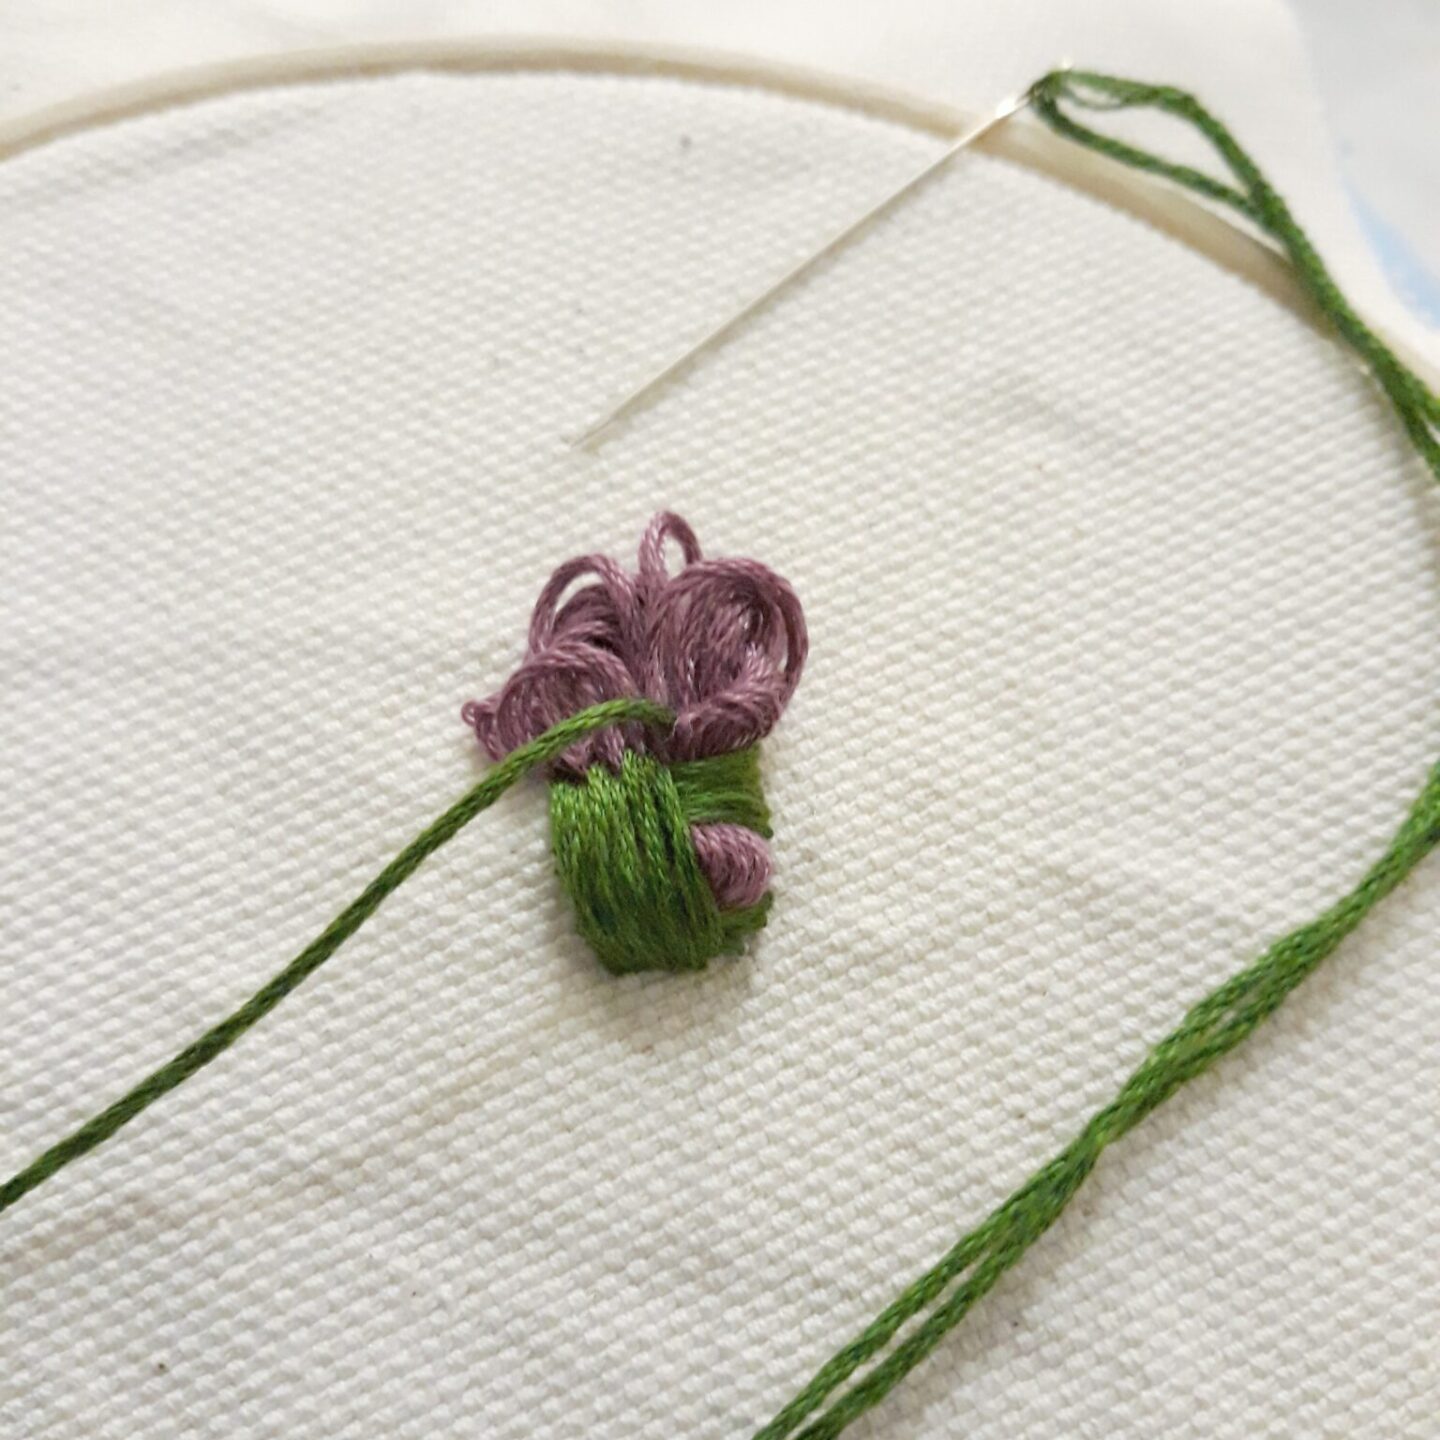
3
✔ With green floss, block the half of your flower on your fabric, to mark the begin of the petals. Stitch horizontally where the green cup ends and the petals begin, but it’s better if you stitch another couple of horizontal lines in the middle and at the basis of the green cup. Take care not to compress the central part: this must retain its original volume to make the final effect a real 3D.
4
✔ Stitch vertically with satin stitch to cover the lower part of the flower inside a bunch of green. Do not compress the underlying floss, try to keep the shape of the flower cup the more natural you can.
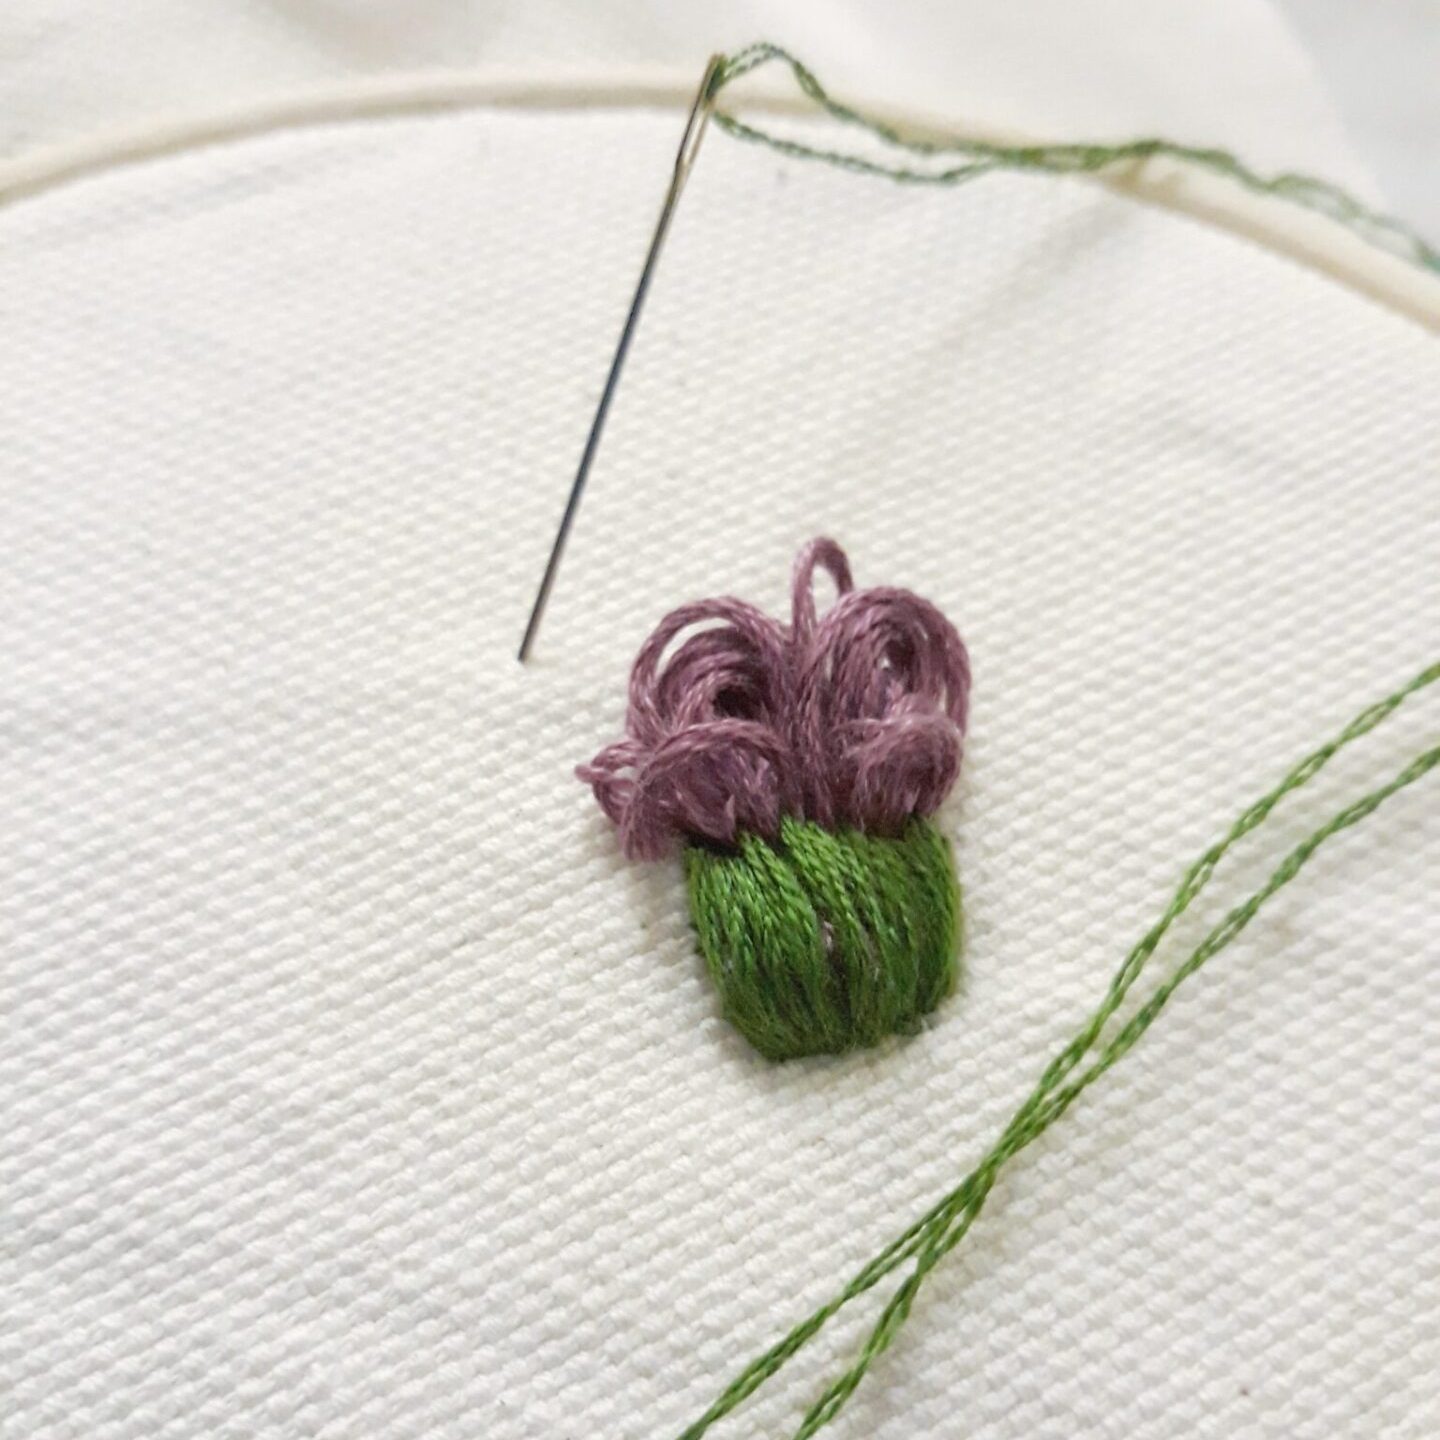
5
✔ To block the green thread, choose a thinner green thread (I use just one strand, the same shade or darker) then stitch diagonally, from left to right and from right to left, making a sort of grid. Block the intersection between the diagonals with a couching stitch. Just one small stitch for each intersection will be enough.
6
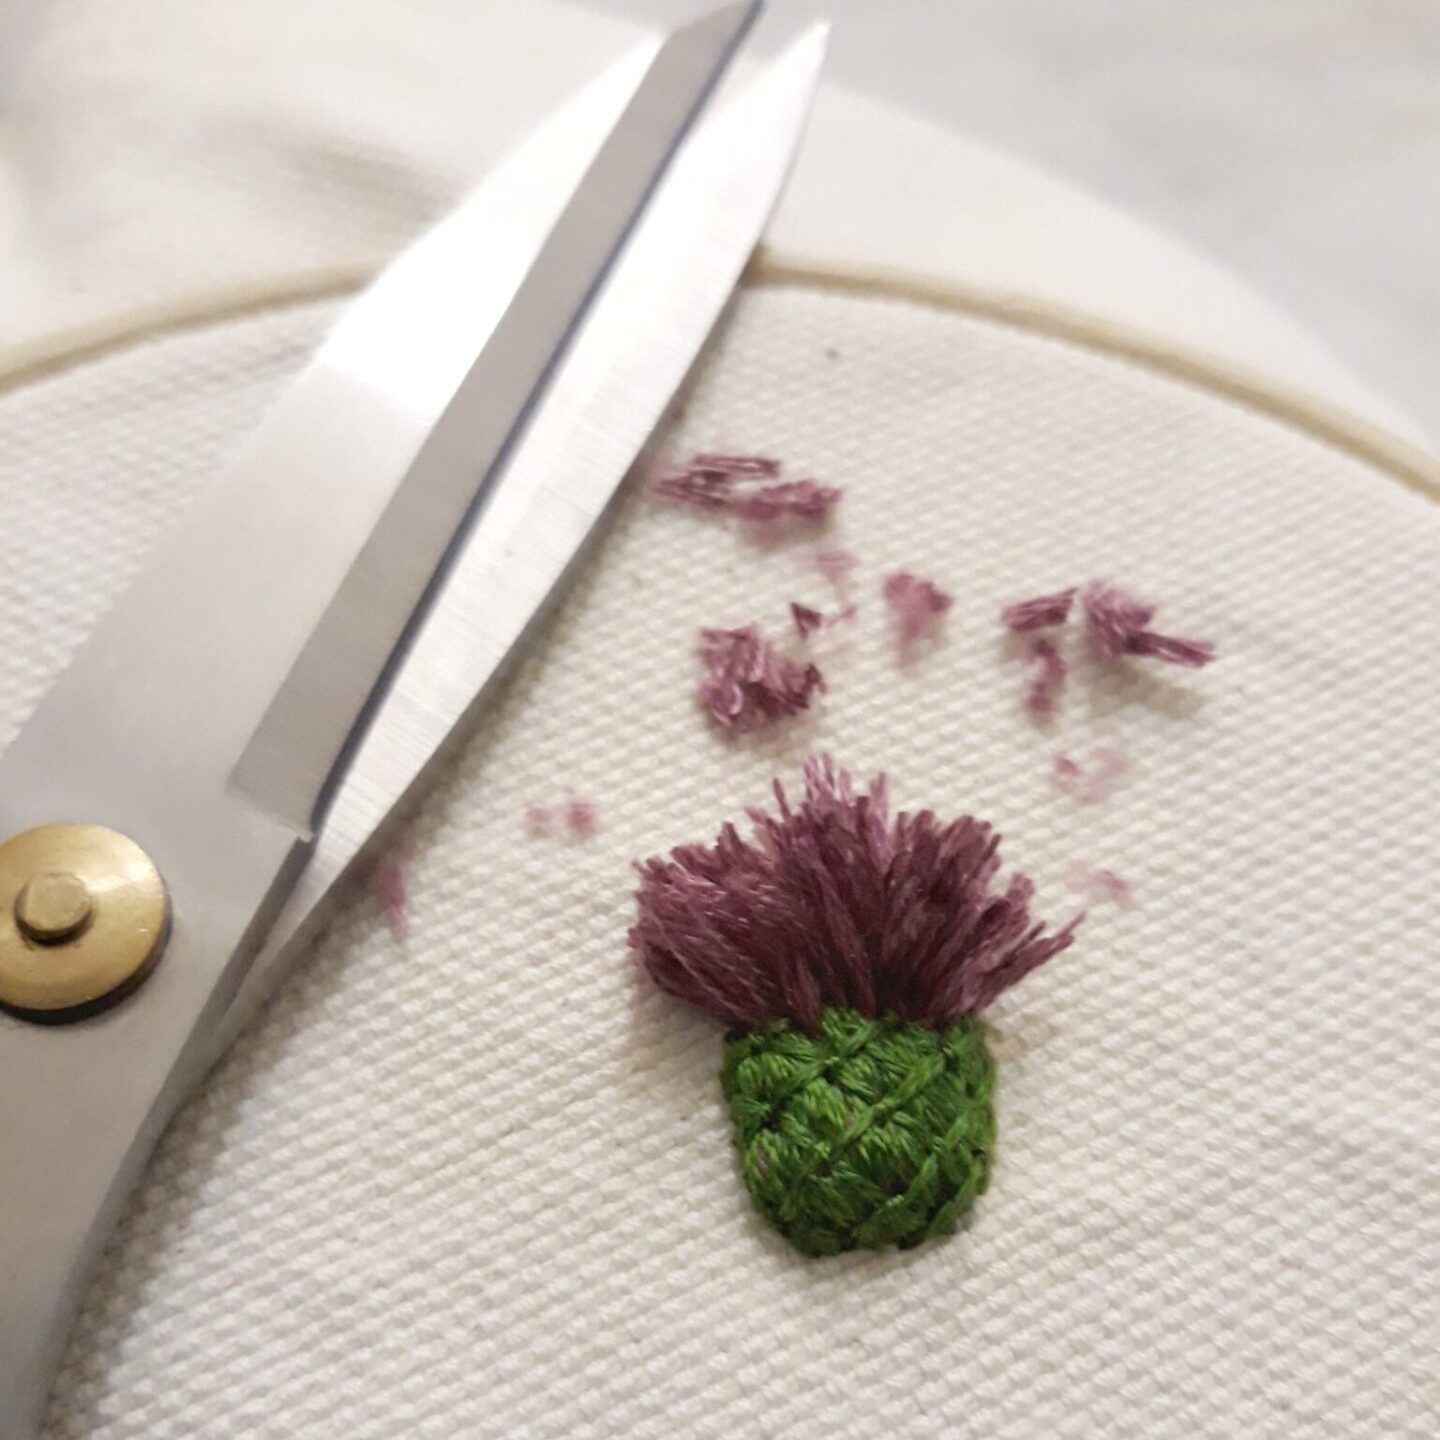
✔ Now take care of your petals. Cut the tips of the thread emerging from the green cup to have all your single threads separated from each other. With a sharp embroidery scissor, refinish the top following a semicircle shape. Don’t bother if the single threads are not all the very same lenght, the petals have to seem natural. A little tip for a better finish: before cutting the shape of the thistle, comb the floss to separate each strand from one another: the result will be more natural and making the final shape will be easier.
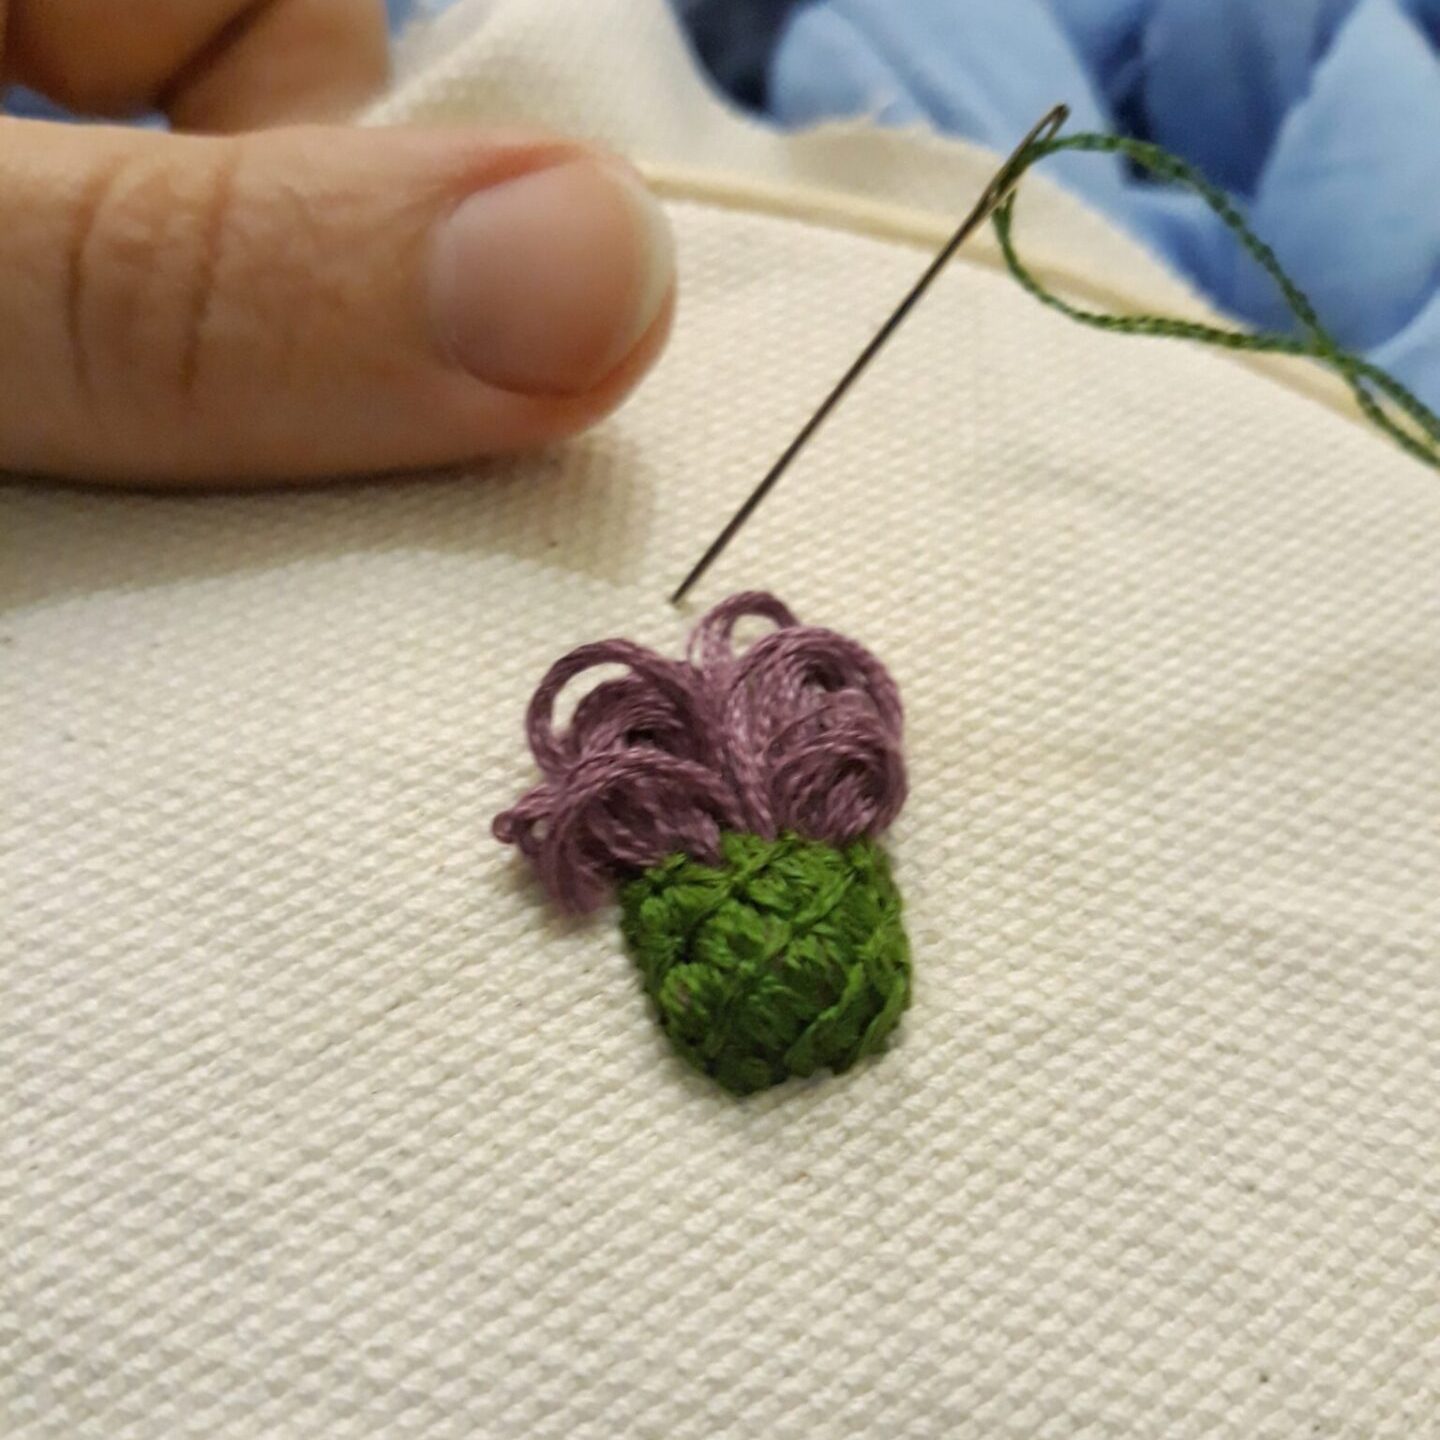
7
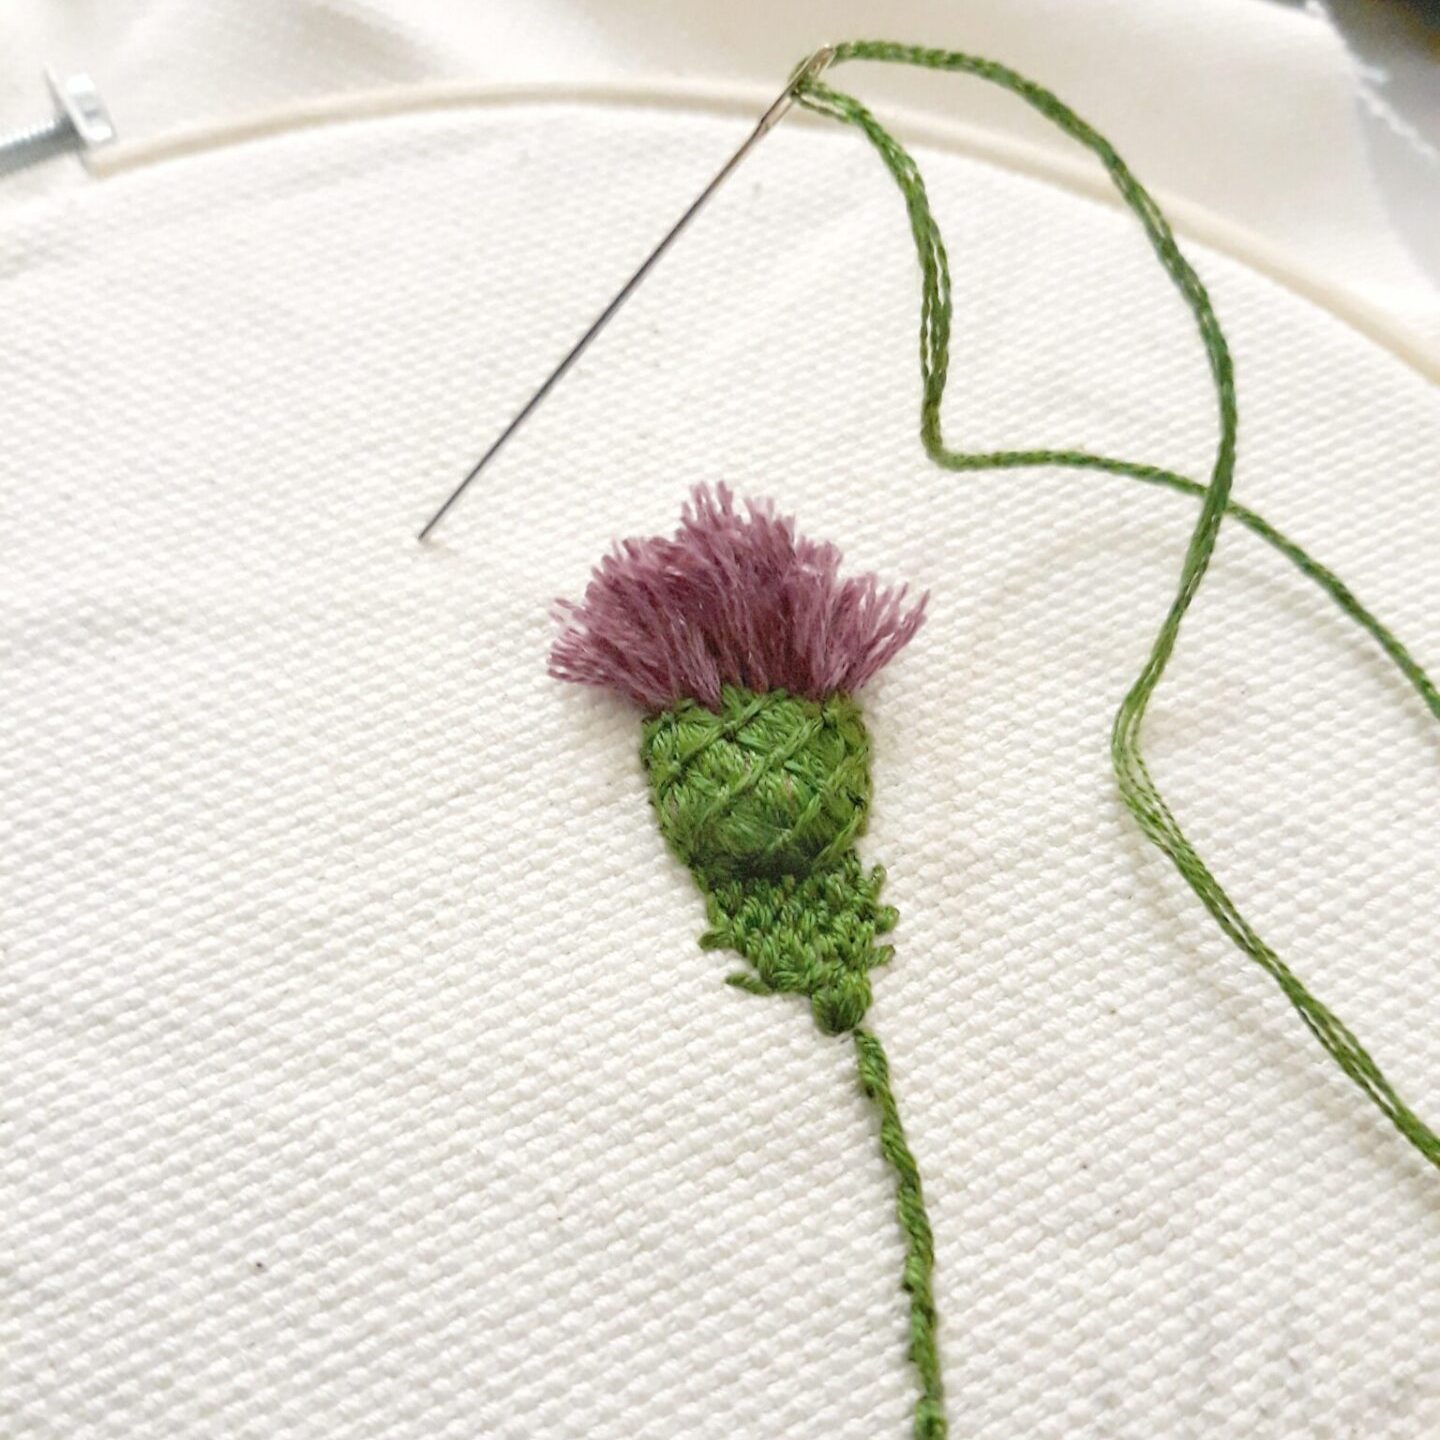
✔ Now add a triangular intersection below the cup, between flower and stem, complete with small side prickles. I chose to use the long and short stitch: I found it a natural help to give shape to this triangular part of the thistle, giving it also the impression of prickles all around the flower.
8
✔ The final part: stem and leaves. For the stem, I tried first with stem stitch, then I decided I prefered a simpler back stitch. Your own choosing. As you’ll see, this is the easiest part of the making.
9
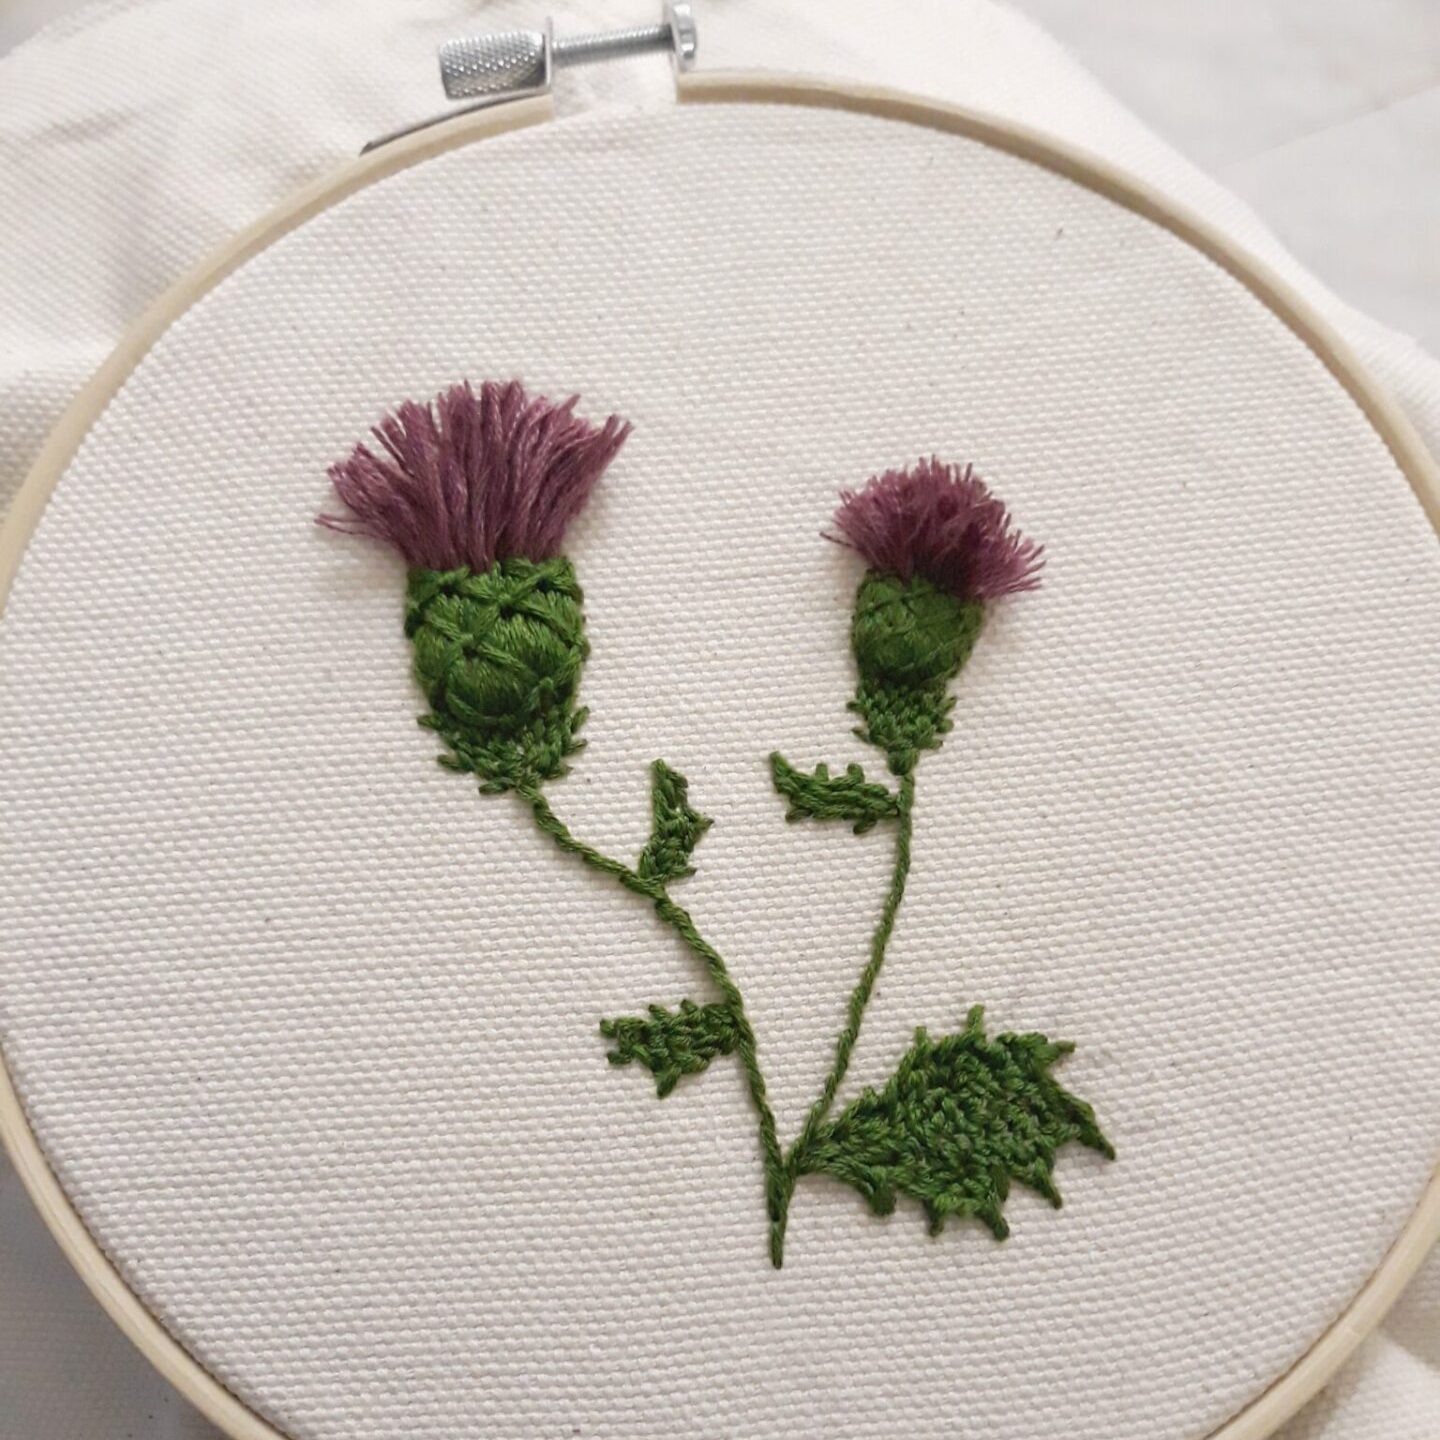
✔ The very last touch: leaves to add wherever you want along the stem, whichever size suits you. To make them, I outlined the shapes and middle line with a pencil, then I used satin stitch to cover each half separately.
There’s also another technique worth trying: fishbone stitch. Mark the central line with a single long stitch, then get out slightly on the left and stitch diagonally towards the middle, slightly crossing over the central line. Repeat symmetrically on the right, then go on descending down the middle line, one stitch on the left and one stitch on the right.
Both techniques are quick and easy, with a natural result.
And here it is: after following all the nine steps, your embroidered thistles are finished.
I hope you enjoyed this little tutorial. Please feel free to comment with any suggestion!


