Reuse. Reduce. Repurpose. Recycle. We hear those words often, nowadays.
Well, those four words were my first thought this Summer when, on vacation, I needed a support for my holiday embroidery project.
I was far from home and from supplies when I realised I had a too small embroidery hoop for the piece of fabric I had. So I asked my husband if we had something that could become a stretcher bar or slate frame or something that could support my work.
Have you ever had to improvise with materials on hand for a project? Well, that’s exactly what we had to do in this case. And, as always, my husband was able to save the day. While decluttering my father’s garage in my parents’ countryside home, he found the perfect materials to make me a frame in no time!


At first, he thought about using wooden photo frames, but we had just two that were of the wrong size. I suggested making something using scrap wood, but we just had the wrong materials and tools around.
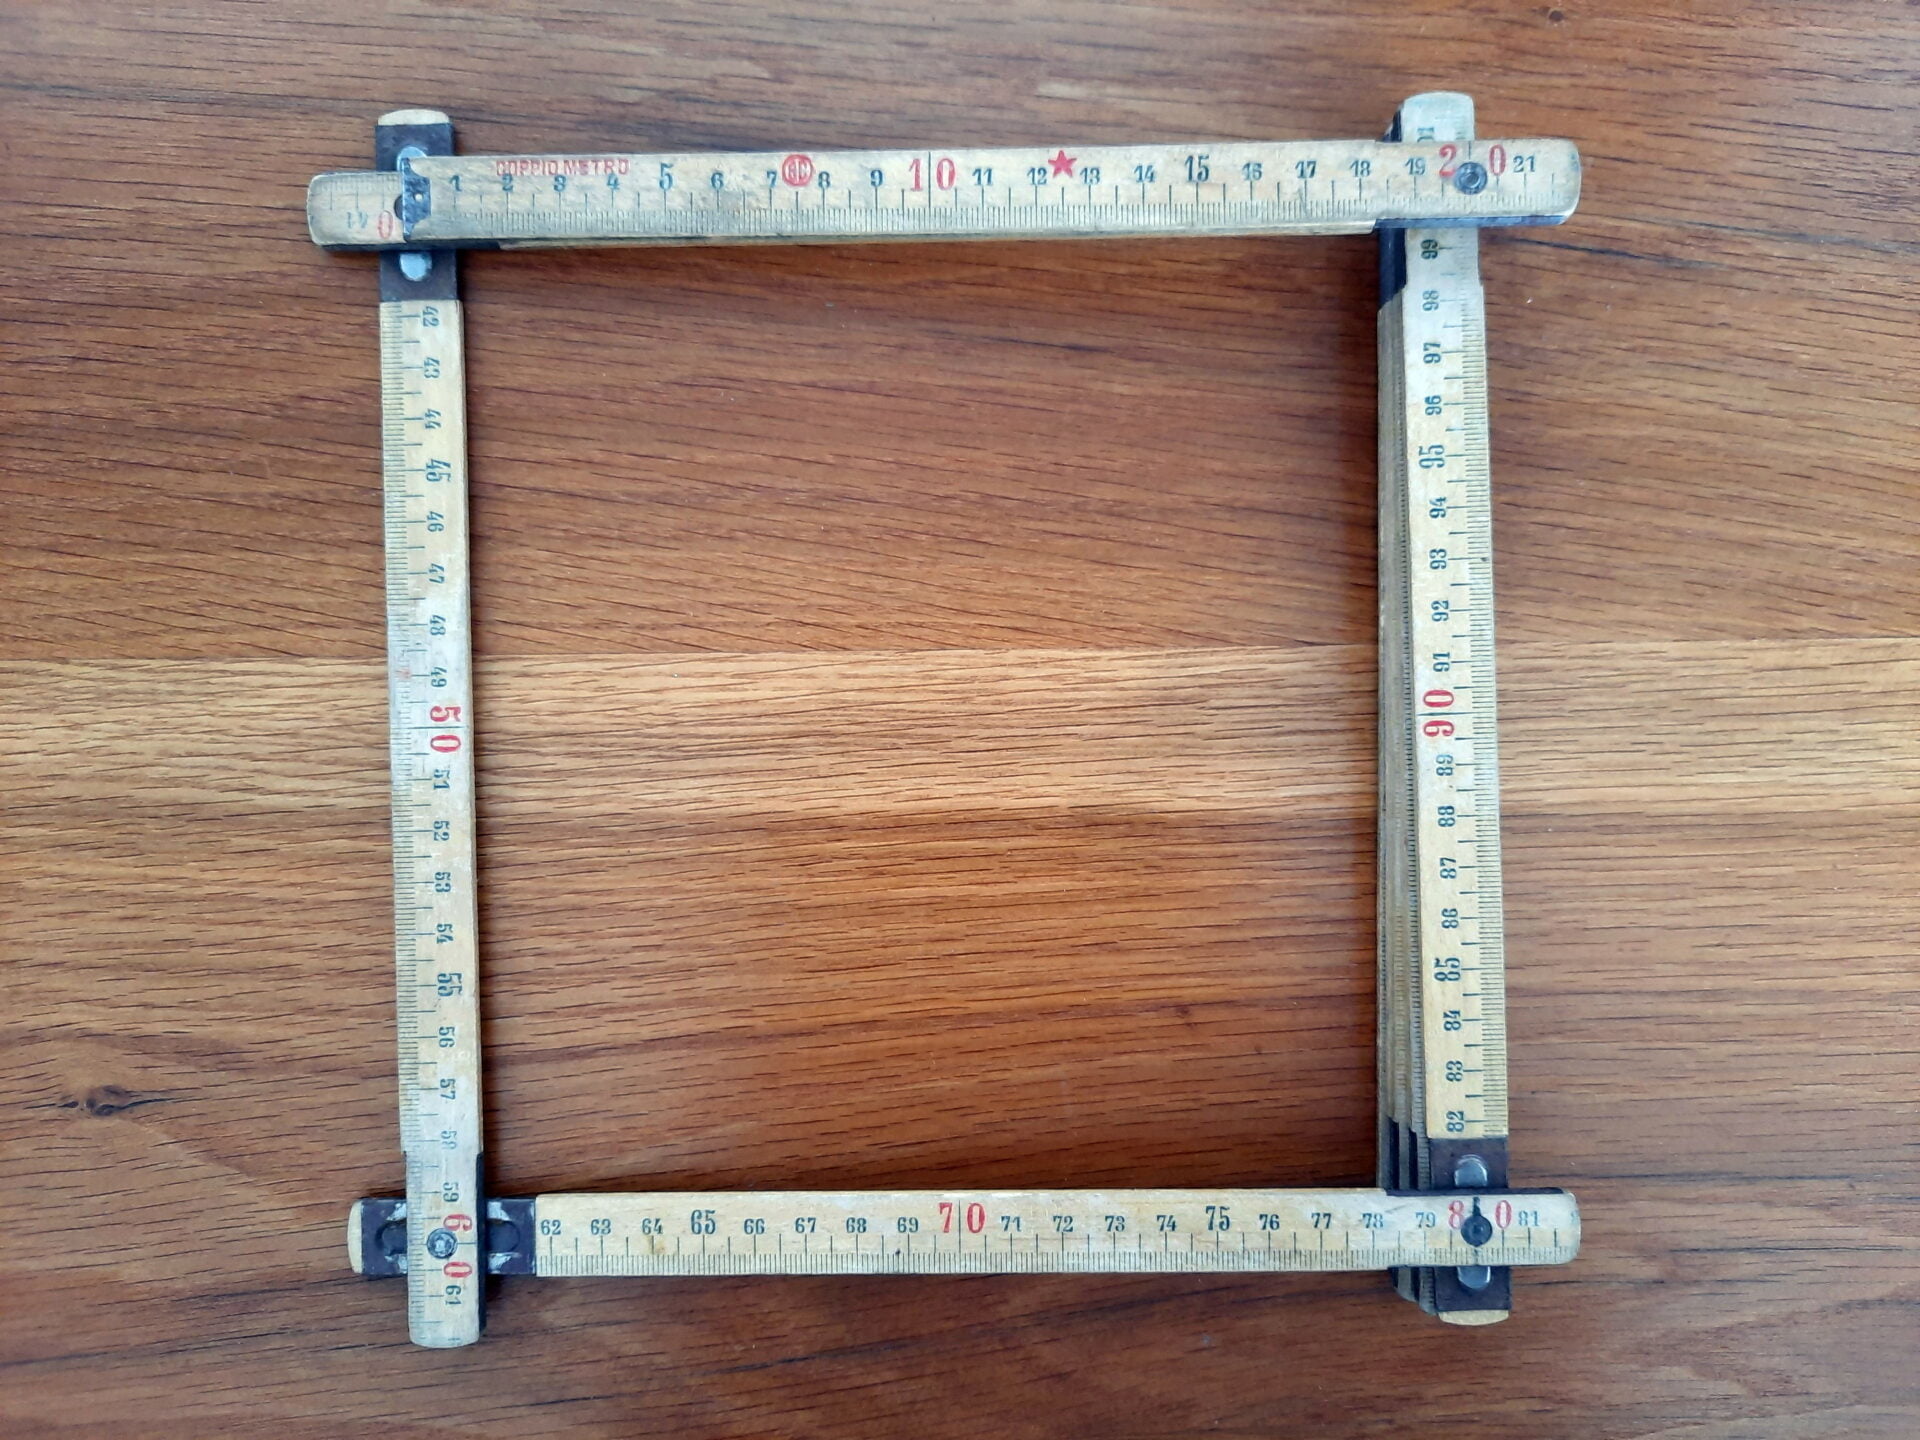
Suddenly, while putting garbage in a sack, he came up with the solution: a wooden folding ruler my father was throwing away.
The wood was still in good condition, it only had faded numbers and it was stiff to open. Well, that was just better for me, since I needed it to keep the fabric tension without moving! We folded it a square and it was really the best size I could have asked for!
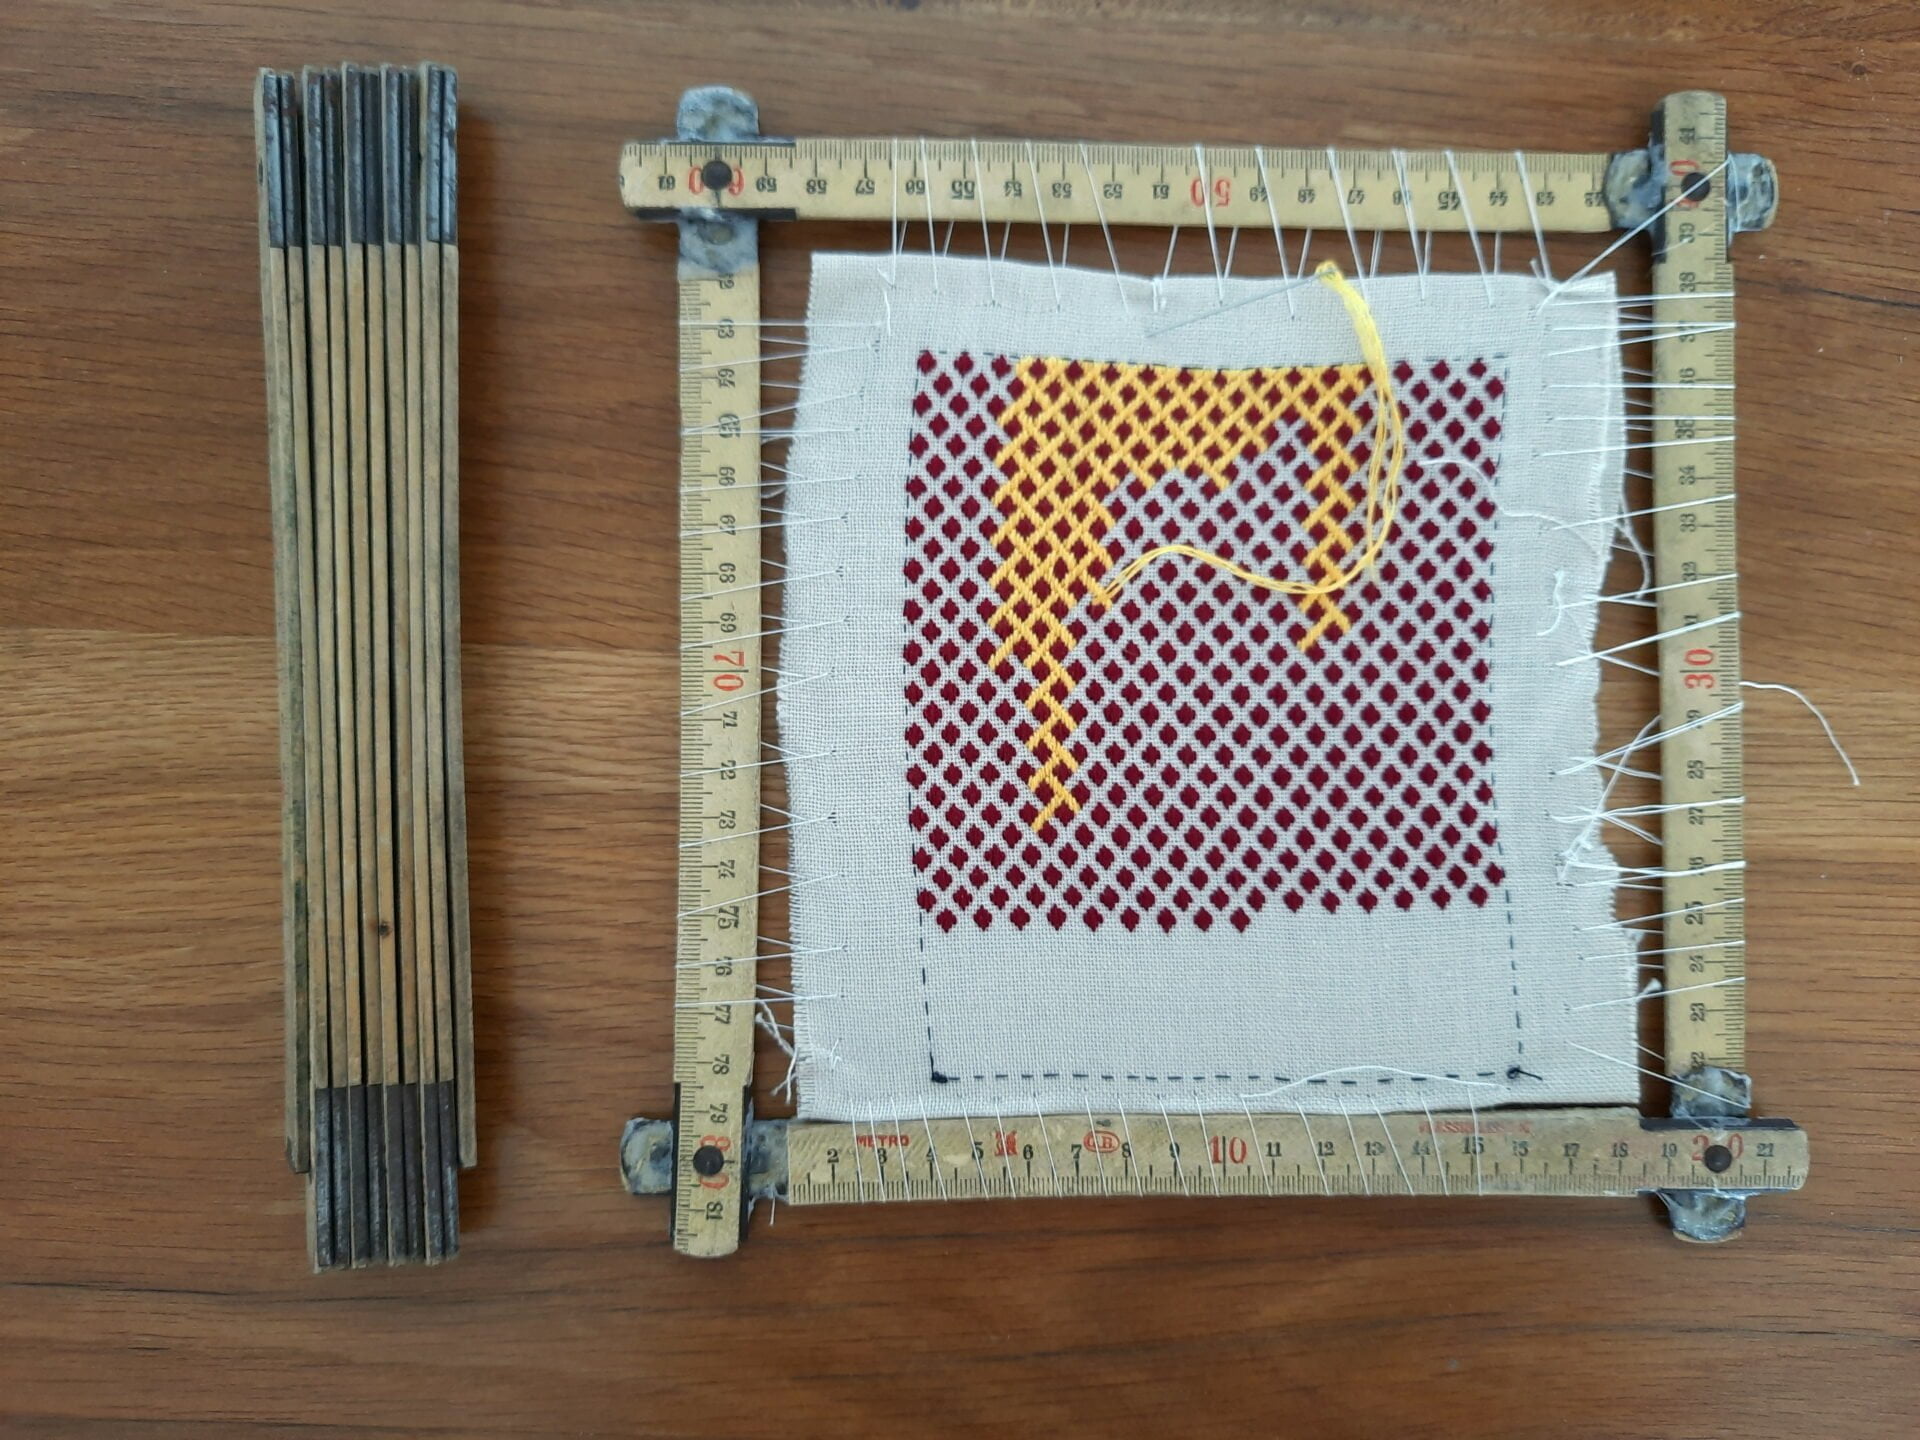
My husband, then, cut away the excess, keeping just four sticks, each one 10 cm long. I put the rest of the ruler away: it was long enough to make another bigger frame.
The joints were stiff, but the ruler could still move, so Locutus bend it to put the four sides in the desired position, making a square. Then he added glue to each corner, so the joints stayed in place.
When the glue was dry, my newly made frame was ready to use, and perfect for my embroidery! After completing my German brick stitch purse, I wanted to make another project with the same stitch, following a different pattern. I find that brick stitch embroideries are the perfect travel companions: a small number of colors, a specific pattern to follow, they are easy to carry around even during the commute to work and require so few supplies they can fit in a pouch less than the size of my hand.


Dressing the frame was pretty straightforward. My fabric was smaller than the frame, so I could not place it on top and fold the sides under to fix them to the frame. I decided, instead, to use a method as seen in Medieval reenactments.
I placed my project inside the frame, trying to align it at an equal distance from all four sides. I got a lenght of sewing thread, the longer I could manage, and started attacching the top side of the fabric to one of the frame’s sides. I fixed the thread to one corner of the fabric with a knot, then proceeded along the side with a whip stitch, one stitch in the fabric and one around the frame, moving towards the other corner.
Mantaining an even tension was the trickiest part, when I reached the other corner I had to adjust the thread before closing it with a knot on the fabric.
I made a mistake at the beginning cutting my thread too short to finish one side. Take a length of thread that’s preferably longer than you think you’ll need. If it’s long enough to stitch along one entire side, it’s easier to adjust the tension after working on the emrboidery for a while. I found out that the frame corners are super convenient if the thread keeping the project comes too loose: you can pull it tight and wrap it around the final part of of one corner.
So now you have a suggestion to make yourself a cost-effective embroidery frame with little supplies, no woodworking background and in no time! Even if you don’t have a folding ruler at hand, you can find one easily for a cheap price. It could become a custom-sized frame just the perfect size for your project.
It also happened that this was the only frame I had at hand during a reenactment, a month later. Well, if people didn’t come too close, from afar it could seem I was using a Medieval-looking frame… If it wasn’t for the centimeter marks and modern joints!
I have to say I find the centimeter marks convenient: if you need to check the size of something on your work or to cut thread at a specific lenght, you have at hand a visual guide.
So what do you think about this improvised embroidery frame? Did you happen to make a similar tool with other materials? Please share it in the comments below: I’d love to collect all similar repurposing ideas!


